| << . 1 . 2 . 3 . 4 . 5 . >> |
| Author |
Message |
Anonymous
|
# Posted: 6 Dec 2012 02:48
Reply
I noticed a leather couch in one of your pictures, and it made me think of mice... Since it is pretty remote, do you have a problem with mice/critters/etc? Since it is pretty remote, do you have a problem with mice/critters/etc?
|
|
aktundra
Member
|
# Posted: 12 Dec 2012 16:50
Reply
Yes, we have voles. They are a problem, but the cabin is "vole proof" for the time being (they always get in). We had a old fabric 70s couch that the voles dug into. Hoping the leather one stays nicer.
|
|
toofewweekends
|
# Posted: 14 Dec 2012 02:21
Reply
Tundra,
Nice photos and a beautiful cabin. Curious where you're located? Anchorage is home for us.
Also, what exterior dimensions are you looking at for the sauna? One of those is one my to-do list next summer.
|
|
aktundra
Member
|
# Posted: 1 Jan 2013 20:02 - Edited by: aktundra
Reply
Toofewweekends - we are in the Interior. The sauna is going to be 10x12 or 8x14. I am still debating on logs or 2x6 construction. I bought a new sawmill (Norwood ML26) and I think I can put up a pretty nice 2 sided log easier than a full scribe log sauna. I used a log sauna once in the bush and loved it! Of course a 2x6 built sauna would be the easiest.
Went up to the cabin over the Christmas Break. We installed the back door, new woodstove, and some wooden pegs for the bedroom.
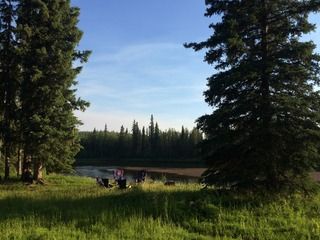
The time at the cabin cannot be beat! There isn't anything better than beautiful scenery, good food, and the company of family at the cabin. I'm sure everyone has their reasons for a cabin. We love ours to get away from it all - cell phones, traffic, demands of work. Wake up and explore, leisurely breakfast, gather more firewood, split firewood, tinker on cabin projects, run the dog on the river, all very simple tasks which seem so fun as we simplify the daily tasks and slow down to enjoy the great land we live!
The challenges of creating and fixing without the convenience of a local hardware store is fun too! This trip we installed the door and I forgot shims for the door frame. At the cabin, a trip to town for shims would take over 6 hours round trip and lots of gas money. Instead we took some of the scrap 1x6s and cut a bunch of shims. That's just one example, but even with tools you learn to make it work, do without.
AKTUNDRA
DSC_0522.jpg
| 
DSC_0542.jpg
| 
DSC_0565.jpg
| 
DSC_0490.jpg
|
|
|
aktundra
Member
|
# Posted: 1 Jan 2013 20:13
Reply
Finally took a picture of the cabinets with the counters installed.
Another great trip to end 2012 and welcome 2013!
Of course the Cabin Goals for 2013:
1. Build sauna
2. Install front door
3. Redo fireplace hearth
4. Build boot/coat closet for entry
5. Put together Norwood sawmill (ML26)
6. Install new flooring in bedroom (ripped out carpet so it has been plywood for a couple years now)
7. Build dog a new box for the back of the siglin sled (Red UHMW in the pictures)
8. Install small window in loft (I built it when I built the doors)
9. Mill siding for the shed
10. Enjoy the cabin as often as I can!!!
DSC_0507.jpg
| 
DSC_0531.jpg
| 
DSC_0172.jpg
| 
DSC_0513.jpg
|
|
|
BigDuke6
Member
|
# Posted: 8 Jan 2013 11:19 - Edited by: BigDuke6
Reply
A very nice place you have there! I love the fact that you are so handy and have had to find solutions since the nearest hardware store is a long ways away. I bet it is fun to be out there in winter, once you get it warmed up...
And, nothing goes with a cabin like a Lab! Love the pics of your dog.
|
|
jaransont3
Member
|
# Posted: 8 Jan 2013 23:02
Reply
Am I the only one that was hoping to see a cabin with a triangular floorplan?
Really nice cabin. I love the interior and the views are spectacular. Really nice job.
|
|
leonk
Member
|
# Posted: 11 Apr 2013 16:36
Reply
very cool place, love the log.
If you need any sauna advice - let me know. I only built one, but have been looking at it for 30 years
|
|
|
aktundra
Member
|
# Posted: 26 Mar 2015 23:35
Reply
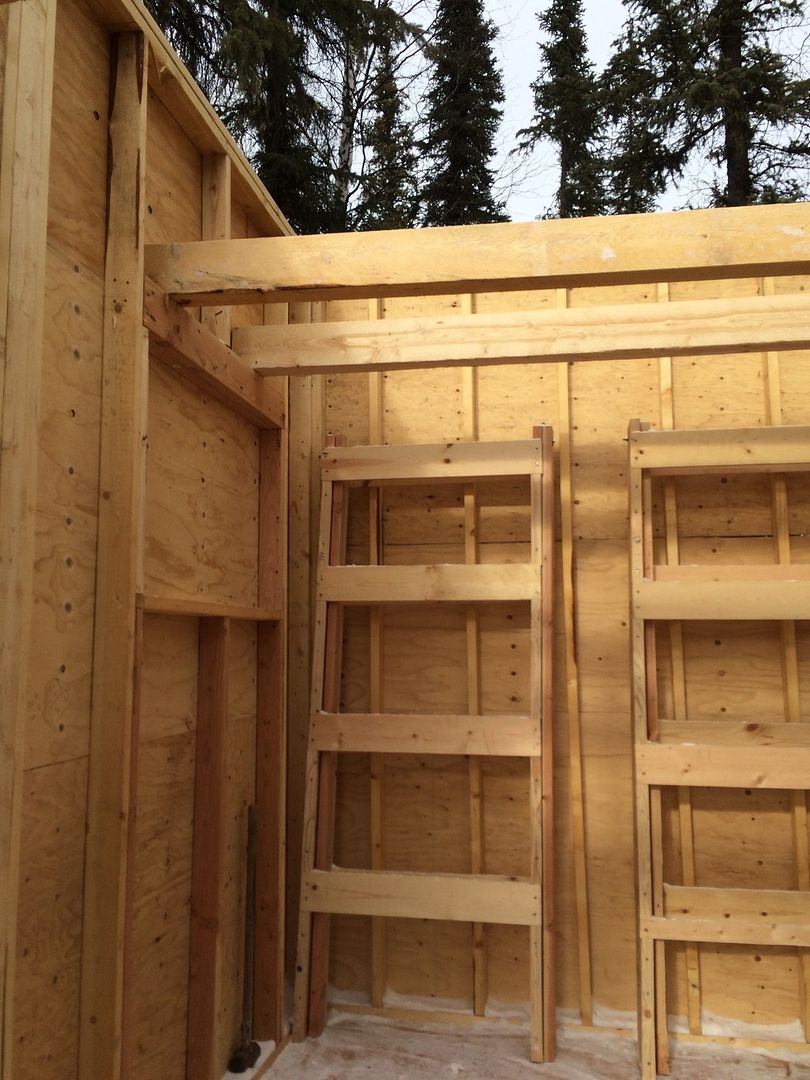
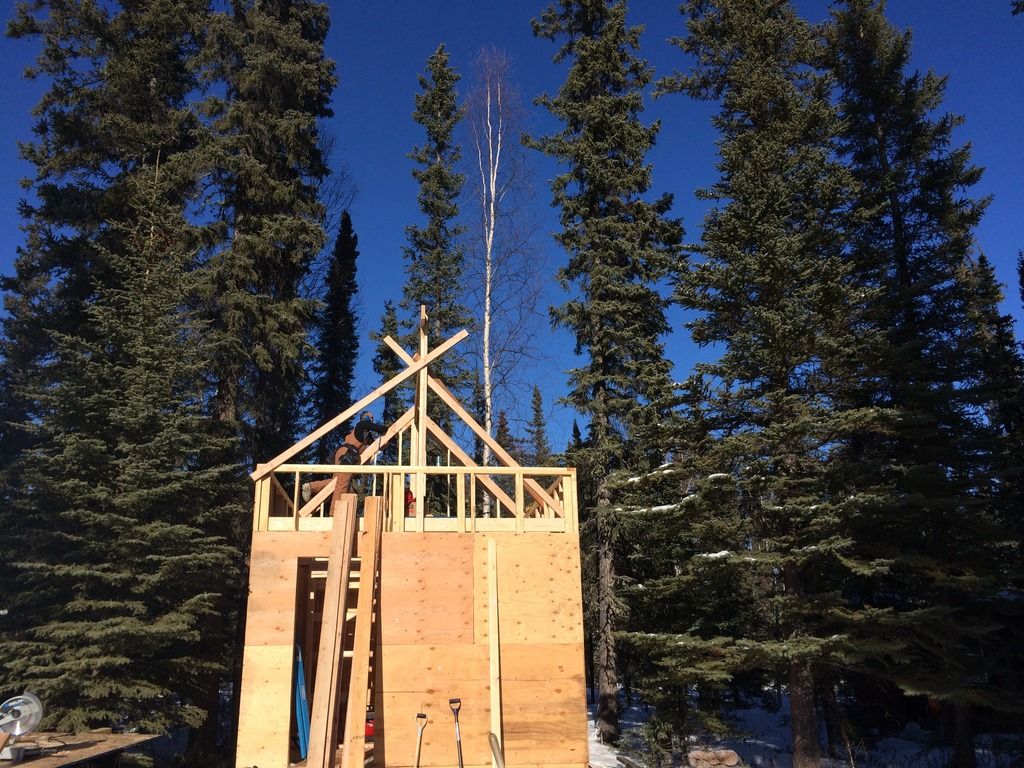
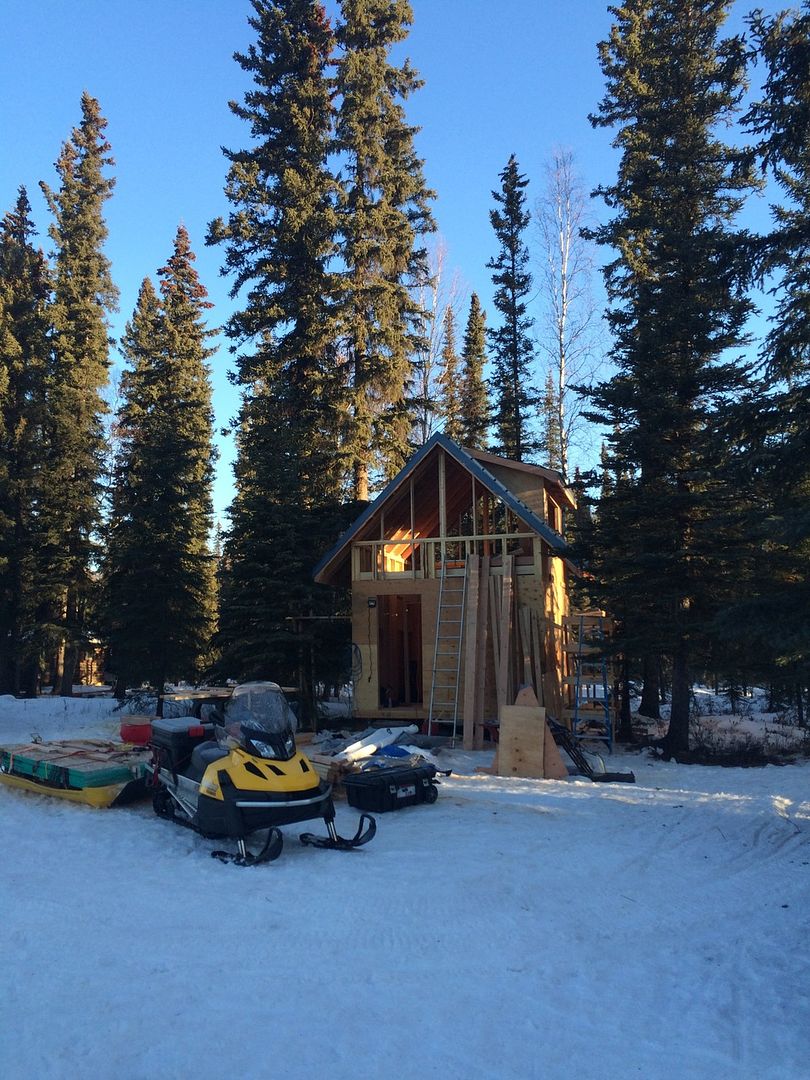
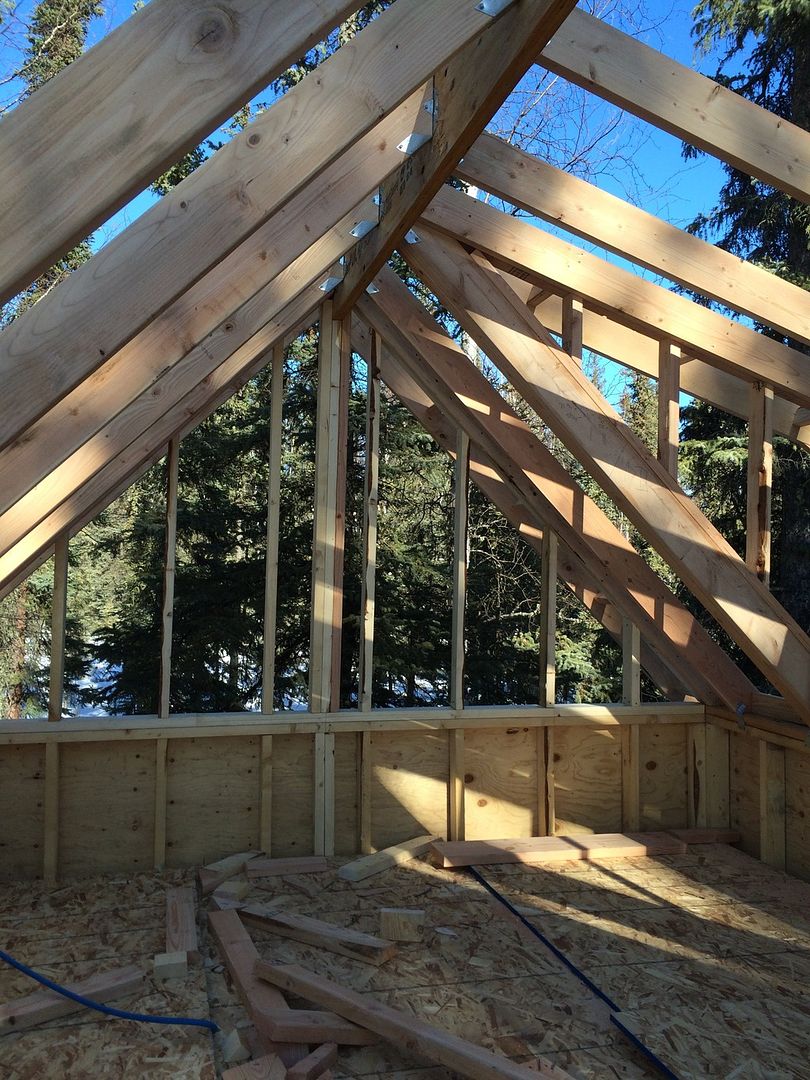
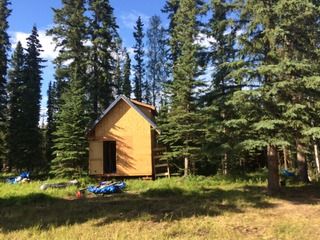
Here is my progress on the sauna sleeping loft cabin (the size got bigger). We hauled materials in July, put the foundation in prior to snowing in September, and framed the walls in December. Last week I was able to work on it and get the loft beams in, and roof on. We have spent 10 days building it with temperatures 30 above to 20 below.
|
|
turkeyhunter
Member
|
# Posted: 27 Mar 2015 04:54
Reply
looks GREAT!!! Good job for sure!!!!!
I don't now how you guys worked in 20 below temps....WOW!!! too cold for this southerner...lol too cold for this southerner...lol
|
|
leonk
Member
|
# Posted: 27 Mar 2015 09:15
Reply
Quoting: aktundra explore-build-do.blogspot.com
your blog is gone?
I am interested in fur garments - mitts and hats.
Could you please share?
I am going to make deer skin mitts with removable inner wool mitts and coyote fur for trim. Patterns courtesy of LOTN.
I have few coyotes I like to make into hats.
If you prefer you can e-mail to me at leonkaz youknow what goes here yahoo com
Thanks.
|
|
aktundra
Member
|
# Posted: 27 Mar 2015 13:15
Reply
LeonK,
The blog is still around, I don't know what happened but it should work now. Take some pictures of your mitts when you make them! I'm always looking for new ideas.
The river ice is melting and lots of overflow. Might be the last trip until June for me...
|
|
Rebel300r
Member
|
# Posted: 29 Mar 2015 09:45
Reply
AKtundra, like the layout of your sauna. I understood most of it, the stove in the middle, shower left, seats right and down. What is the mini room upper left with the bench seat? How about the light blue rectangle to the right of the mini room?
Scott
|
|
leonk
Member
|
# Posted: 29 Mar 2015 10:17
Reply
now that I looked at the sauna I don't get it.
The big one is the sauna? with the outside door?!
or is it the little one? you want to have at least 7' to lie down for one person. Make top benches wide enough to lie down w/o arms falling off. Most saunas in NA have too narrow benches.
make the top bench 42" from the ceiling in the sauna.
No nails/screws in the top of the benches - avoid burns.
Lower the ceiling or raise the bench, depending on the rest of the building. It works for most people, if anyone in your group is very tall, check the height while sitting.
|
|
SteveN
Member
|
# Posted: 30 Mar 2015 08:35
Reply
Great cabin! I've added your blog to my favorites list - lots of good information there! Thanks for sharing!
|
|
aktundra
Member
|
# Posted: 31 Mar 2015 13:04 - Edited by: aktundra
Reply
The original drawing has changed for the sauna --- gotten much bigger.
Rebel300r - the mini room in the upper left is the changing room.
The cabin is a family cabin, and we realize space is sometimes limited when 6-10 people stay in the main cabin. So I decided to build part bunkhouse (summer) and part sauna (winter). In the summer, we just utilize the propane water heater for showers (for the most part).
The project got larger than anticipated at 12x14. Putting up 10' walls got it even bigger. The loft beams start at 8' or so making the loft more spacious.
While watching the most spectacular display of northern lights, we made a late night change to the sauna adding the shed dormer. We decided the shed dormer will provide northern lights / star viewing from the loft since it's so high, and added daylight in the summer. Dormers are also great because they add so much more space without really costing any more money. We used probably 4 more rafters, 4 2x4s, and 1 2x8 (header) to build the dormer. The dormer has transformed the loft space. Roofing materials were the same, except for some extra trim pieces.
Also, notice that the sauna drawing is flipped. This was to provide the river view from the West wall with a big window, which the stove in the corner wouldn't allow.
|
|
leonk
Member
|
# Posted: 31 Mar 2015 14:53
Reply
I'd install the stove inset into the wall, so the main body is in the sauna, but you can feed it from the room where you have firewood. I will stop pestering you with my advice now
|
|
aktundra
Member
|
# Posted: 31 Mar 2015 15:59 - Edited by: aktundra
Reply
leonk ,
Keep feeding advice. I'm learning as I go here!
I've been in banyas like that, fed the stove from the changing room. That was really handy.
How do you protect the wall with the stove in it?
|
|
skootamattaschmidty
Member
|
# Posted: 31 Mar 2015 16:03
Reply
I love your idea. I am doing the same thing. I am in the process of building a log cabin sauna for the winter and use it as a bunkie in the summer. Mine is eight by tan on the inside with no loft. I think it's a great use of space and makes things more comfortable for guests. Glad to see like minded individuals! Keep the pictures coming.
|
|
leonk
Member
|
# Posted: 31 Mar 2015 17:19
Reply
Quoting: aktundra How do you protect the wall with the stove in it?
I guess there are many ways.
I'd keep the flammable (wood) material away (bigger opening) as per the stove manufacturer and fill the void with something. The options are endless - cement board should work or brick or stone.
That part I am not the expert.
|
|
aktundra
Member
|
# Posted: 25 Sep 2015 16:33
Reply
It's amazing how much you appreciate water when it's not readily available or drinkable. Having a clean water source is important for remote cabins. We usually haul 5 gallon jugs of water for drinking and dishes. We would pump river water for showers. Drilling a well has been on the list of things to do for several years to simplify our cabin experience and allow us to stay out longer. We are next to a river, so water is shallow, however we drove the well below the low water mark of the river.
Tools
(2) Quality pipe wrenches
Extra length of pipe for breaker bar or 48" pipe wrench
Jack hammer with 2" attachment
Water pump
Air compressor and hose
Supplies
5' sections of 2" well pipe
2' well pipe for height of pitcher pump
2" couplings
2" Gravel point
Thread lubricant for wells
Pitcher pump
2" to 1 1/4" adapter (pipe to pump)
Cost $465
2" galvanized pipe $35 x 3
2" couplings $20
Well point $75
Thread lubricant $5
Pitcher pump $75
Adapter $5
Jack hammer rental $180 (weekly rate, lower daily but cabin is remote)
A friend helped provide "well prospecting" expertise. We used 3/4" pipe shown below, with an adapter to a water pump. We pumped water from the river to push the pipe down and kept adding sections of pipe. Using hydraulics helps easily find the best spot for drilling without having to drive the 2" well pipe.
The basic idea of using the 3/4" pipe is to find water. Water goes down into the ground and flows back up. When you hit gravel or something that holds water the water won't flow back up. If it can take water then it can (usually) give water. We went about 18 feet (3 5' pieces then the well point) which is below the low water of the river. We hit gravel at 12'.
Once we found the location, we readied the well pipe. We cleaned the threads and applied thread lubricant and attached the drive couplings. Many of the rental companies have the jack hammer with the attachment for driving 2" pipe. We used a sacrificial piece to drive the pipe.
Once the pipe was driven, we used the same T setup we used with the water pump. This time we changed the fittings to attached to an air hose and compressor. Every 15 minutes or so, air pressure is applied to help create the aquifer and get rid of some of the large sediment.
After the aquifer was created, the pitcher pump was attached. The pitcher pump is an older pump, so I soaked the leathers overnight.
The time to drive the well was under 2 hours. I may use a 1/2hp pump in the summer for water. A 1/2hp electric pump can be driven off a 2000w Honda or Yamaha generator. The pitcher pump is the best for the winter because it can be used even when it's -40F. I like the pitcher pump because of this, and the simplicity.
|
|
aktundra
Member
|
# Posted: 25 Sep 2015 16:36
Reply
I'll upload more photos later. It really was easy to drive a shallow well.
|
|
neb
Member
|
# Posted: 25 Sep 2015 16:39
Reply
Very nice! Great setting for a cabin and great work.
|
|
Donkeydave
Member
|
# Posted: 6 Dec 2015 13:50
Reply
"Thanks! It really isn't a perfect cabin, and would never appear in a magazine. We didn't build it but we love it even with its "character" flaws. "
Wow! If I were a publisher that place would certainly be in my magazine. I wish our land had some timber so I could make my own lumber. I have a band saw mill but all I'll be able to mill is the flooring and the door. Logs are a little hard to come by around our primary home here in the desert.
|
|
littlesalmon4
Member
|
# Posted: 8 Dec 2015 18:42
Reply
I see you have the RSF princess installed. We just replaced an old RSF 65 with a princess. Have you noticed the way the princess heats that the loft is not as crazy hot as it used to be? I think ours seems way more efficient and seems to distribute the heat way better. What do you think?
|
|
aktundra
Member
|
# Posted: 11 Dec 2015 15:13 - Edited by: aktundra
Reply
I love the way the princess heats and the temperature is easier to regulate. It also is very efficient.
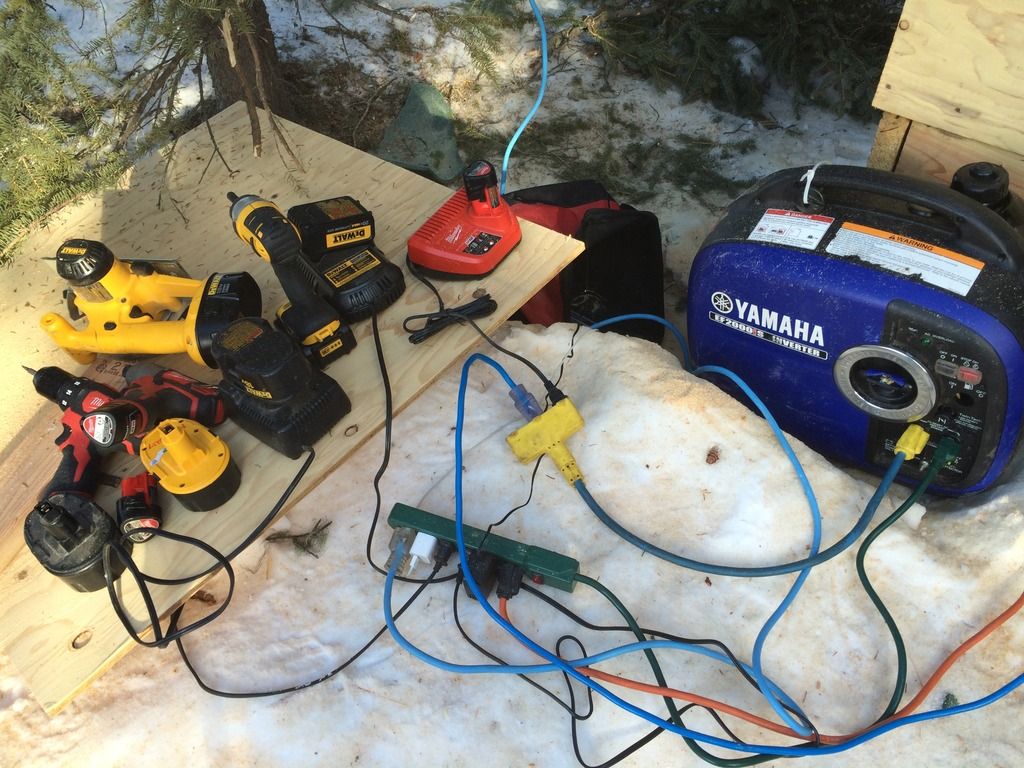
I spent a lot of time at the cabin this summer and really had fun. I worked and played a lot. I'll add some more details later but here are some of the pictures
 [/url] [/url]
I finished the roof trim one trip this summer. I kept putting it off but finally it was a nice day.
Even with battery tools, you still need a generator
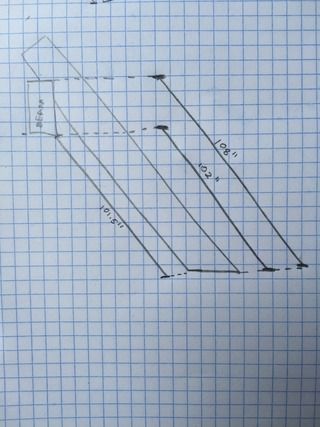
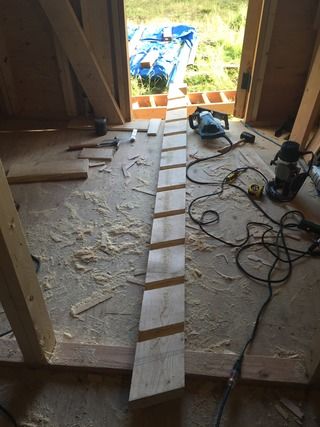
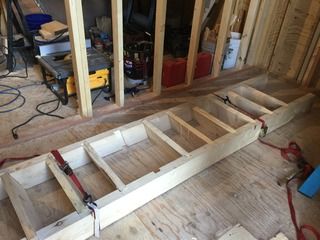
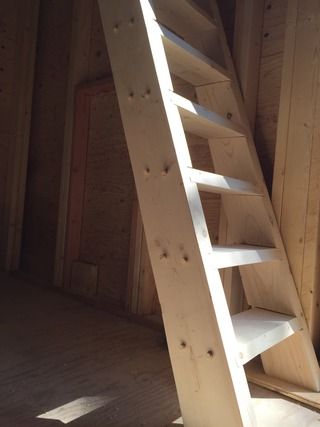
I milled boards for the loft ladder. The ladder took me three days to cut the grooves for the treads and fit everything together. Definitely longer than I planned but that's how all my projects end up.
|
|
aktundra
Member
|
# Posted: 11 Dec 2015 15:34 - Edited by: aktundra
Reply
Really appreciate the comments. It reminds me to update the progress.
Alaska had a nice summer. I finally added flooring to the main cabin bedroom.
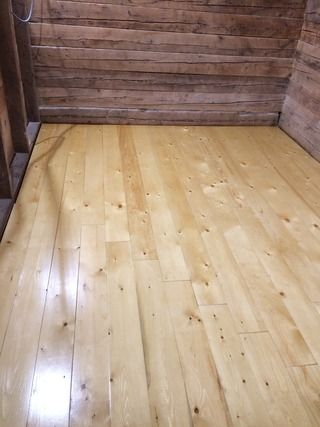
One downside to using the tongue and groove for flooring is the lumber stamp is on the flooring side.
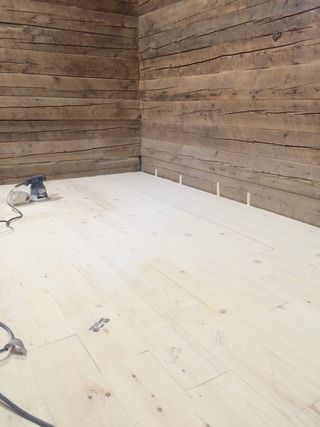
We used tongue and groove spruce with the groove side down. We bought a nice flooring nailer which wasn't necessary but I have a ton more projects I'll use it for. We did a lot of sanding. I forget which finish we went with, but we sanded with 320 grit in between coats.
With the extra tongue and groove, I covered the stud walls that frame the interior room. I really like putting up t&g. It's quick and changes a space.

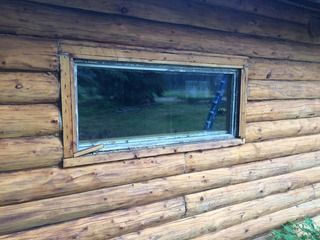
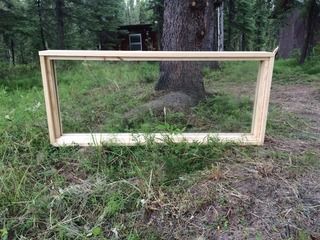
We tend to have so many projects that sometimes we get sidetracked. The kitchen window needed redone. It's a double pane window framed in basically. So I pulled it out and built a new frame. I also adding trim to the remaining windows.

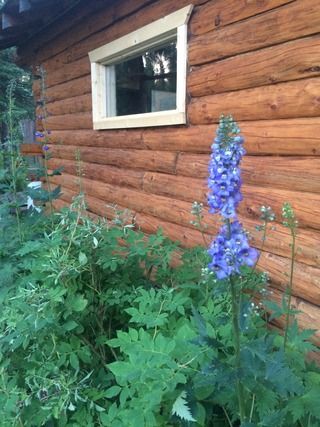
The long days and daylight are great for work and play.
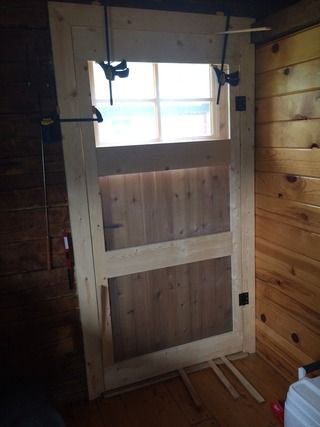
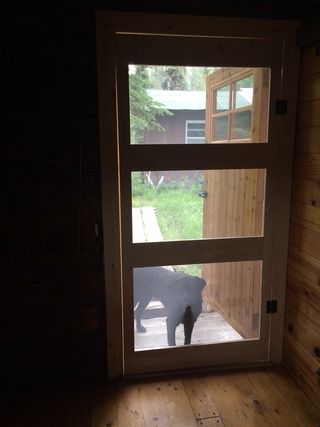
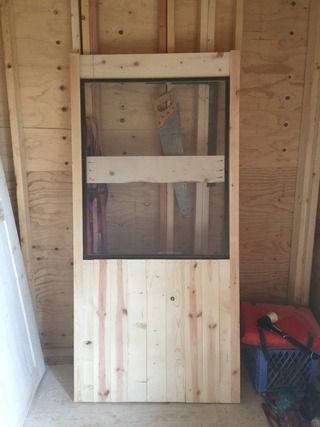
It was so hot we had to build a screen door. Since the dog likes to open the door, I did wood on the bottom so I'm not constantly fixing the mesh. I tried doing a frame without and ending up modifying the door.
|
|
aktundra
Member
|
# Posted: 11 Dec 2015 15:50 - Edited by: aktundra
Reply
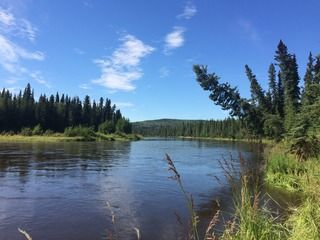
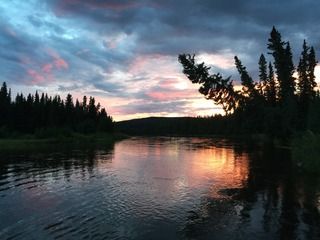
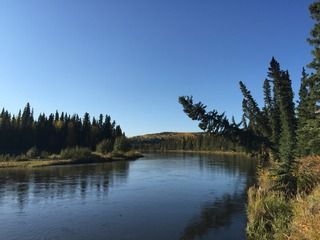
If only I could live here

|
|
neb
Member
|
# Posted: 11 Dec 2015 18:01
Reply
Very nice!
|
|
abby
Member
|
# Posted: 13 Dec 2015 16:26
Reply
WOW. lovely. just so lovely!!
|
|
| << . 1 . 2 . 3 . 4 . 5 . >> |
