| << . 1 . 2 . 3 . >> |
| Author |
Message |
BlaineHill
Member
|
# Posted: 26 Oct 2013 17:53
Reply
Thanks for posting all the details about your project. It's a real quality build and a beautiful spot too. I know that was an ambitious roof design and it turned out looking great. As I sit and type this note in front of the woodstove at my own cabin, I can tell you it will all be worth it in the end.
|
|
knock
Member
|
# Posted: 26 Oct 2013 22:07
Reply
Thanks Blaine. The roof did take longer to frame than anticipated and would have taken a lot longer to shingle if I didn't sub that out.
I will get a few more hours in on the roof when doing the soffit and siding on the shed dormers.
|
|
knock
Member
|
# Posted: 29 Oct 2013 11:55
Reply
I was able to get the rest of the second story windows in and framed up the front porch. Since I was working solo I set the windows from the inside then went outside to nail them in.
I am going to get started on the soffit and siding next weekend. Then electric and insulation.
Hopefully it will be ready for us to stay overnight soon.
|
|
knock
Member
|
# Posted: 10 Nov 2013 23:24
Reply
Well windows are done. Siding has begun. Wife picked the color. I know I am probably going to get hassled about using vinyl siding, but it is a lot easier to do solo than lifting sheets of smart siding.
Once it got dark I figured I spend some time working inside.
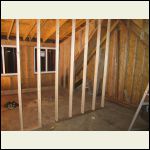
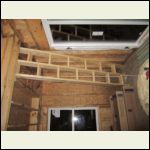
I framed the upstairs into two smaller rooms and temporarily placed the "ladder" (alternating tread device) I build.
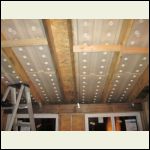
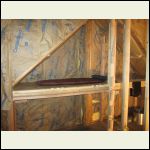
I have also installed some insulation baffles to separate the underside of the roof sheathing and the top of the insulation.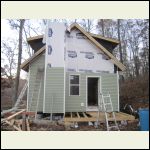
siding
| 
upstairs
| 
"ladder"
| 
baffles
|
|
|
knock
Member
|
# Posted: 21 Jan 2014 21:51
Reply
Well it has been a slow couple of months. I have still been working on the siding (when weather permits) and on the rough wiring and insulation when it doesn't.
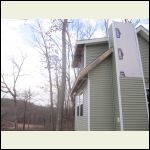
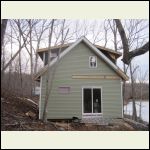
I have realized that if you are working by yourself siding goes up much faster when you are working on the ground and not on a ladder or the roof.
I hope to have all the siding done by the end of Feb and the inside habitable by Memorial day.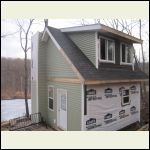
working
| 
siding
| 
ladder
| 
insulation
|
|
|
PatrickH
Member
|
# Posted: 22 Jan 2014 07:38
Reply
place looks great I like the design and I agree nothing beats working on the ground!
|
|
gersus
Member
|
# Posted: 22 Jan 2014 08:56
Reply
Lookin' good! Your place is going to be a lot of fun when it's ready. Won't be long till it warms up, the trees turn green, and you can walk over and throw a line in!
|
|
knock
Member
|
# Posted: 22 Feb 2014 22:34
Reply
Well, it is still February and I have finally completed the siding, soffit and fascia. I hoped I would have been this far a couple weeks ago, but I am happy that I met the deadline I set.
I am very glad to be done with the heights and cutting metal. Hopefully the cuts I have on my hands will have some time to heal.
|
|
|
turkeyhunter
Member
|
# Posted: 23 Feb 2014 06:43
Reply
looks great!!!! good job!! and I like the color of the siding...
and a awesome view as well.
|
|
ErinsMom
Member
|
# Posted: 25 Feb 2014 17:41
Reply

|
|
knock
Member
|
# Posted: 13 Apr 2014 21:49 - Edited by: knock
Reply
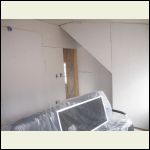
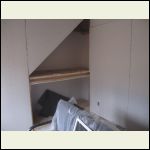
I have started installing the interior wall coverings. After debating several different options I ended up going with....... drywall. I know it doesn't give off a cabin feel, but it is cheap and my wife can make it any color she wants.
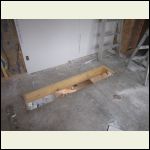
Just like installing the siding, it is taking much longer than I anticipated. Since the access to the second floor is just a ladder, I had to create a trap door to move material (including drywall) upstairs.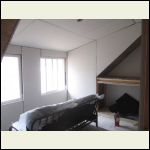
drywall
| 
dywall 2
| 
bunks
| 
trap door
|
|
|
knock
Member
|
# Posted: 13 Apr 2014 22:00
Reply
More photos of downstairs.
|
|
ErinsMom
Member
|
# Posted: 17 Apr 2014 07:10
Reply
it looks much bigger than a 16 x 20
|
|
dfosson
Member
|
# Posted: 23 Apr 2014 20:21
Reply
Sure looks great! I'm always interested in other's 16x20 projects. I get the same remarks that our cabin looks so much larger. It really is all about utilization of space. Best Wishes! Dave
|
|
knock
Member
|
# Posted: 24 Apr 2014 21:38
Reply
Thanks Dave. Yeah the pics make the space look larger when I hold the camera above my head with my back in the corner. Having a 1/2 story on top also helps.
|
|
knock
Member
|
# Posted: 19 May 2014 22:42
Reply
Well I got back down to start finishing the drywall. I got all the returns to the windows and the corner bead in, so it is time to mud and tape.
I am by no means a pro at taping, so more coats and more sanding.
I also got the AC unit installed so I wont have to work in the summer heat.
I can't wait to get the inside finished.
|
|
knock
Member
|
# Posted: 1 Jun 2014 14:15
Reply
This past weekend I added some interior doors and wired up the lights and fan in the bathroom.
I also worked a little on the outside putting together a picnic table from menards and freshened up the gravel. I really like the look of fresh gravel.
|
|
paulz
Member
|
# Posted: 14 Jun 2014 20:20
Reply
What a great cabin you've built Knock. I have a contractor friend that is going to help me with mine (I'm a mechanic by trade) but if I could ask a couple of dumb questions: The dormer walls are flush with the first floor walls, right? What is the roof pitch of your dormers? Are all your rafters attached above the ridge beam or just the dormer's and why? What did you do for the short rafters that run under the dormers? I can't see it in your framing photos.
My friend asked me if I have plans. I was originally going to use the online 12x24 Tiny house plans but after seeing yours I want to incorporate the shed dormers which pretty much changes everything. Should I have plans made or should a licensed contractor pretty much be able to figure out what to do?
|
|
stickbowcrafter
Member
|
# Posted: 15 Jun 2014 08:47
Reply
Looks great knock. What a great design. I won't get on you too bad for the plastic siding & drywall. Cabins are supposed to be enjoyed and you saved yourself a ton of future maintenance by going plastic.
-Brian
My property tour
|
|
knock
Member
|
# Posted: 15 Jun 2014 21:43
Reply
Stickbow - thanks for the complements.
Paulz - thanks for the positive comments. The dormer walls are flush with the first floor walls. I used a 3/12 pitch for the shed dormer walls. I attached my rafters (for both the shed dormers and the 10/12 pitch at the ridge, I had to hold the shed dormer rafters up a couple inches to maintain a uniform ridge.
So on the 1st floor under the shed dormers I framed up some small triangles to match the pitch of the roof as if they were not there. The triangles were 2x4's with some O.S.B. holding it together (i used the framed overhang to make a template of the size they needed to be). I then attached them to the exterior wall (pic may show some detail).
With regards to the plans, it depends on the capabilities of the contractor and if they are primarily a builder or re-modeler. If they are a framing contractor who builds multiple houses a year, yeah they should be able to handle it. But if it was your contractor friend asking if you have plans, he may not be up to building them without plans.
|
|
paulz
Member
|
# Posted: 17 Jun 2014 20:14
Reply
Knock, thanks for the info. I'll be doing a 12x24. Something similar to this. With such large dormers I wonder why not just push all four walls out flush with the bottom ones and just use the high pitch for the eves. Not the most attractive I suppose.

|
|
knock
Member
|
# Posted: 18 Aug 2014 20:56 - Edited by: knock
Reply
Well it has been a slow two months since my last update. More painstaking drywall work (which I dislike and maybe I should have hired out).
Well I am done with the sanding, priming and painting. I still have to put trim on the two upstairs room, but they are ready enough to use now (Red and Blue). I used carpet squares on the floor.
The colors are pretty bold but will hopefully get toned down when curtains and decorations are added.
|
|
knock
Member
|
# Posted: 24 Aug 2014 23:58
Reply
I got down the cabin for another 24 hours. Flooring really makes the space feel livable (even if everything isn't finished).
So today was my first attempt at installing laminate flooring. There was a little learning curve (I had to redo the first three rows 3 times). It took 3 hours to do the first 3 row, in the next 3 hours I did 19. Overall I was pretty happy how it turned out except that the dark flooring really shows the dust.
|
|
knock
Member
|
# Posted: 5 Jul 2015 20:57
Reply
I have gotten several weekends down at the cabin getting some work done. However with a newborn, those weekends don't come around as often as they used too.
I have worked on the trim, installed a portion of the kitchen and have worked on the fire pit area.
I still have to install a facade on the fire pit and top cap. Not to mention put up a guard so the little ones don't fall off the wall. The first project I started 2.5 years ago was the fire pit area and I am finally able to use it.
|
|
knock
Member
|
# Posted: 5 Jul 2015 20:59 - Edited by: knock
Reply
Photos were too big, here are some more. (Fire pit)
|
|
knock
Member
|
# Posted: 5 Jul 2015 21:04
Reply
And one more with the lake.
|
|
littlehouseontheprarie
Member
|
# Posted: 5 Jul 2015 23:09
Reply
You did a wonderful job! !!!
Where did you get the plans
|
|
knock
Member
|
# Posted: 28 Feb 2016 22:19
Reply
I actually designed it myself. I drew out about 20 till I settled on this one.
|
|
knock
Member
|
# Posted: 28 Feb 2016 22:24
Reply
Wow 8 months since my last photo upload. Winter was coming and the little on started walking so time to do more baby proofing.I made these for all the baseboard heaters. Also a gate to keep the kiddos away from the fire.
|
|
abby
Member
|
# Posted: 2 Mar 2016 10:37
Reply
can't say it enough, just fabulous! 
|
|
| << . 1 . 2 . 3 . >> |

