MtnDon
Member
|
# Posted: 14 Sep 2016 14:42
Reply
We've spent a good amount of time remodeling our sons home in Los Alamos. New oak stair treads (33 of them), floor tile (all laid on the diagonal), wall & ceiling paint, etc. This thread has nothing to do with all that. ;D
There are forums for every interest. A year or so ago I discovered there are forums for flashlight crazies. And I became one.
My favorite is the BLF, budget light forum.
For the past three years they have had a flashlight building contest. A machine made category that permits use of lathe and end mills, and a hand made category that does allow the use of power saws and drills, including a drill press. But no lathes or mills.
I missed finding that forum until last years contest was well underway. But I've spent time daydreaming up a few possible plans. Over the last month or so I have completed my handmade entry. I shall unfold the build in short form here. The longer form, complete with a couple of mis-starts and reversals is found here at the BLF.
Lots of images but they are all between 20 & 30 KB so should load very quickly.
I should mention a few things at the start. The contest does NOT permit the use of parts from flashlights such as the head, body tube or tailcaps. Reflectors, lenses, LED's, electronic driver boards, switches can be taken from flashlights for inclusion.
Most flashlights that interest this group are powered by some variation of a lithium ion battery. Or more correctly by Li-ion cells. A cell is a single voltage unit. A AA, C, etc "battery" is really a cell. Two or more cells make a battery; 6 cells for your 12 volt car battery for example. I am using 4 cells of the 18650 designation. 18 mm diameter x 65 mm length. The final zero means it is cylindrical. My light has 4 cells in parallel for longer running time. They have a nominal voltage of 3.7 and the mAh capacity of mine is 3000 mAh per cell.
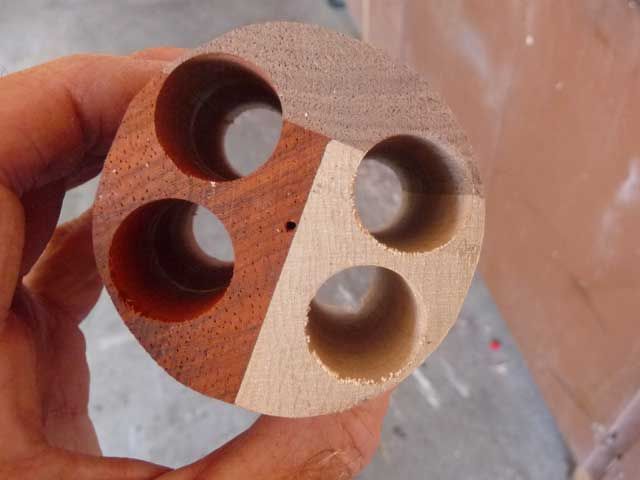
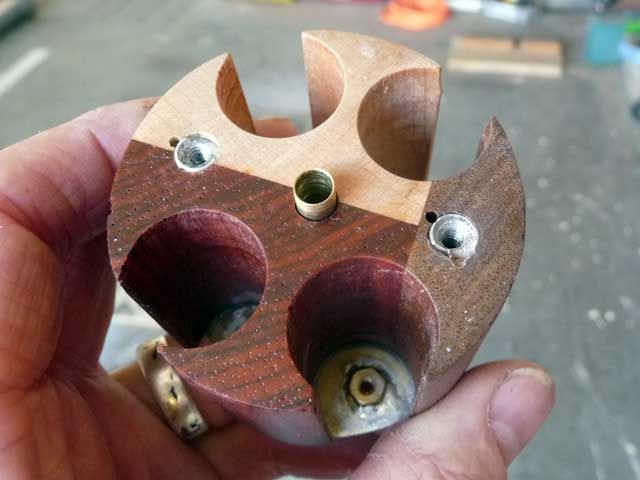
So here I was almost a month ago. I glued up a new wood block to build a new and better mousetrap, battery holder. I used a piece of padauk, the orange / red colored wood, some walnut and some maple. The first task was to layout where the ¾ inch holes to hold the 18650 cells were to be located. After drilling I rough cut with the miter saw.
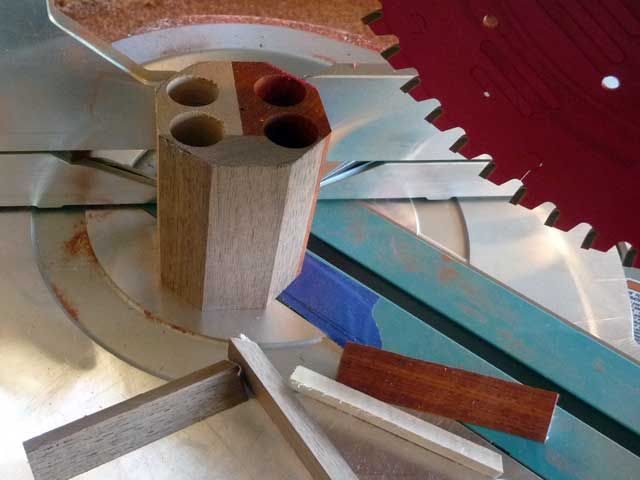
This is a recently new Makita sliding miter saw that I absolutely love.
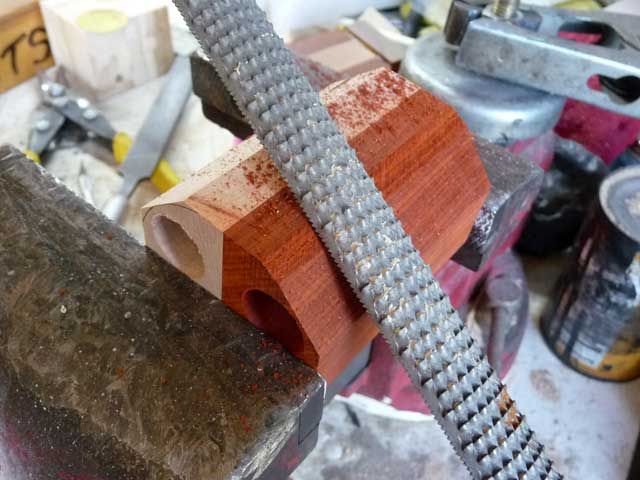
Keeping to the spirit of hand made after all that power saw use I began shaping the octagonal shape to a cylindrical shape. Rough rasp, then finer files and lastly sandpaper.
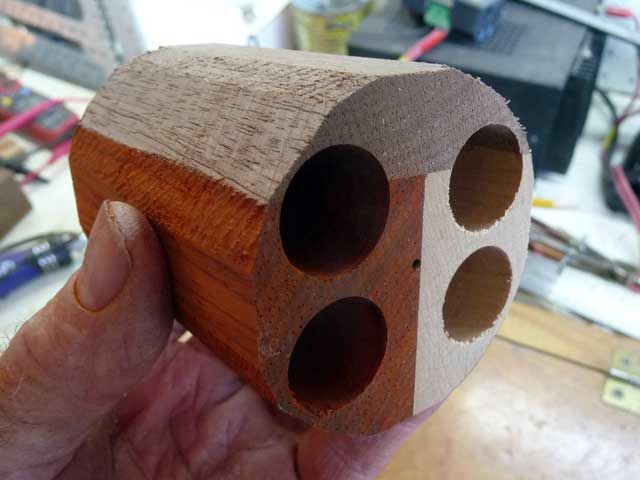
Here the cell block is nearing completion...
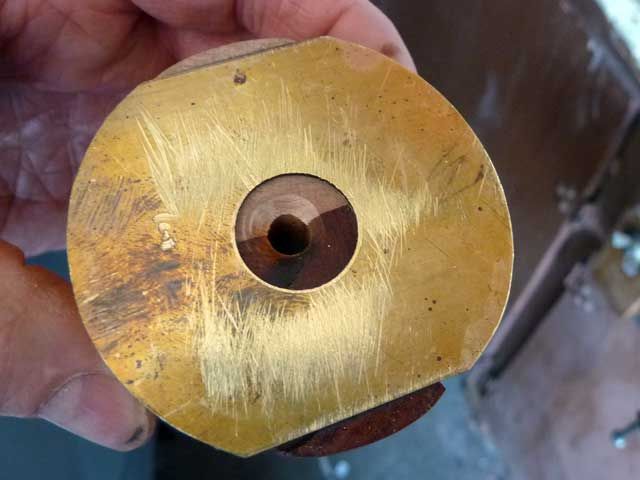
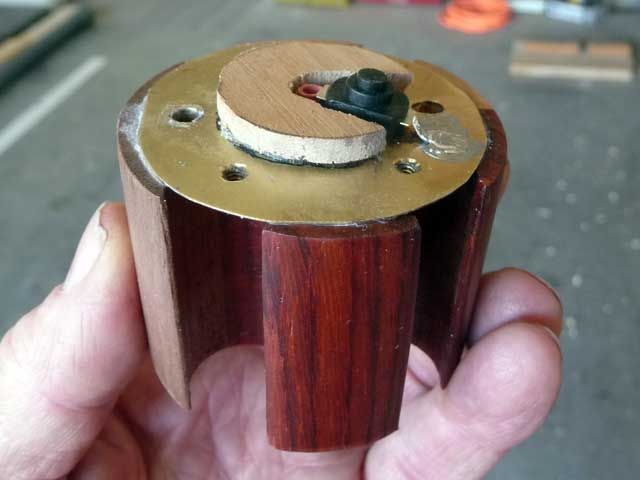
A piece of 0.020 brass was used for a cell connection plate at the + end...
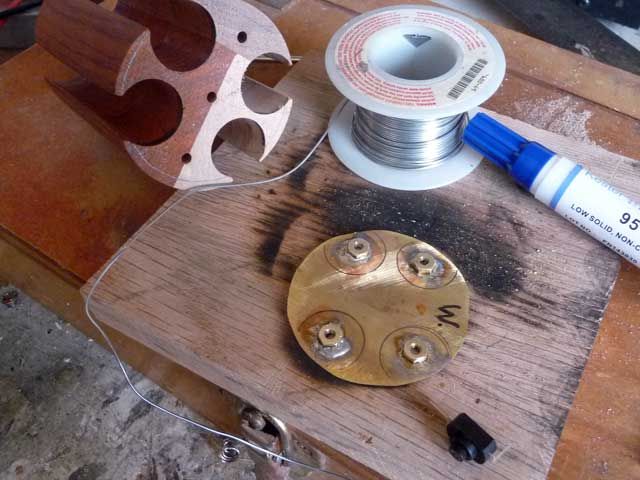
A piece of 0.030 brass for the connection plate at the other end was made...
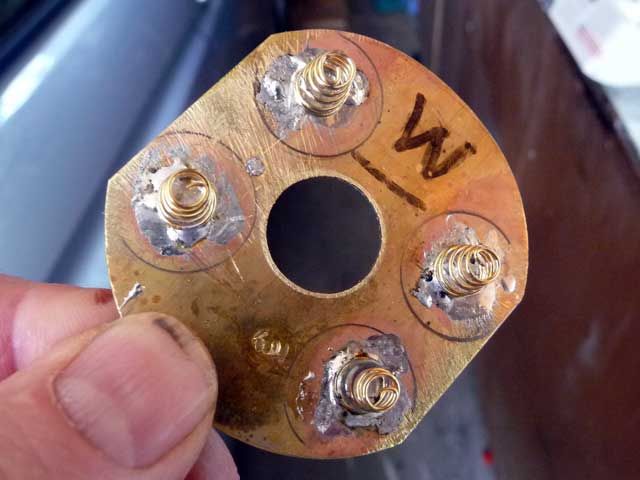
Little gold plated springs soldered to the plate...
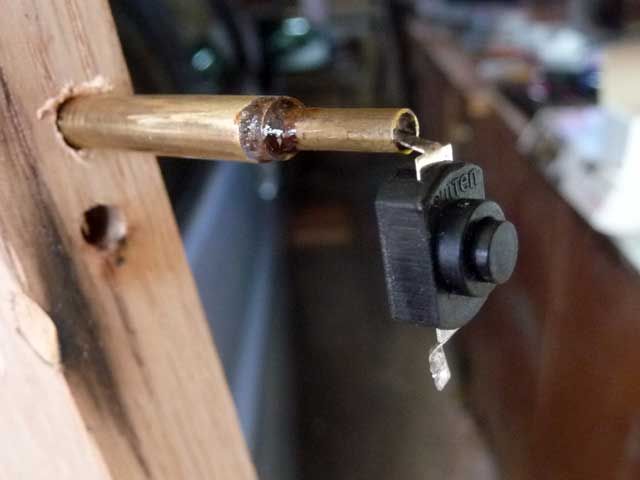
Every light needs a switch and this one is no exception. The switch is an actual flashlight switch. One side gets soldered to a brass tube, actually several nested tubes at that one end...
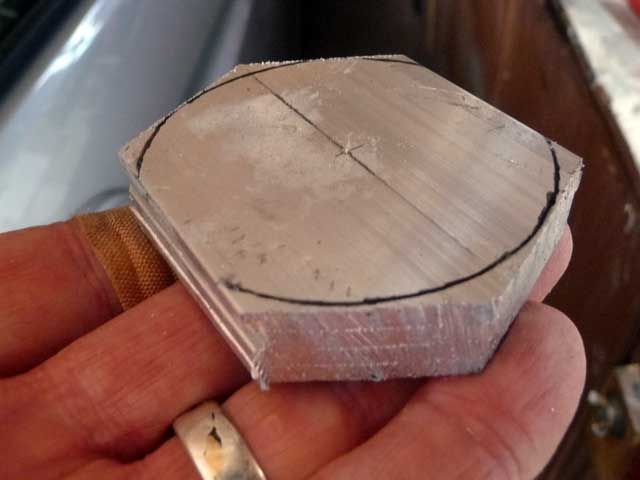
I needed a block of aluminum. Nothing thick enough was at hand so I glued up some 1/8" strap with a thermally conduction epoxy and hand cut and filed....
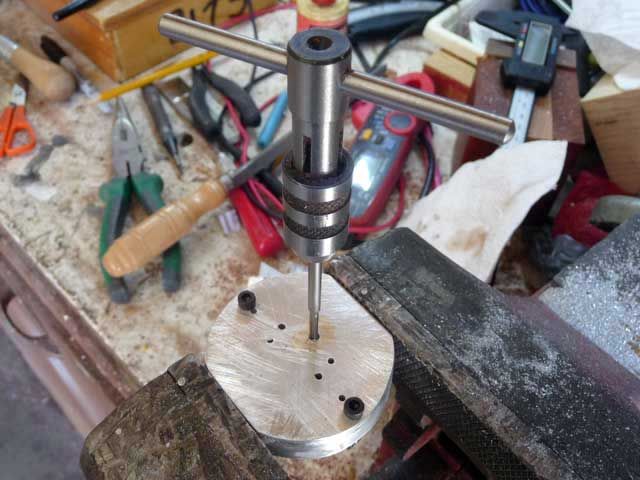
I drilled and then hand tapped some holes....
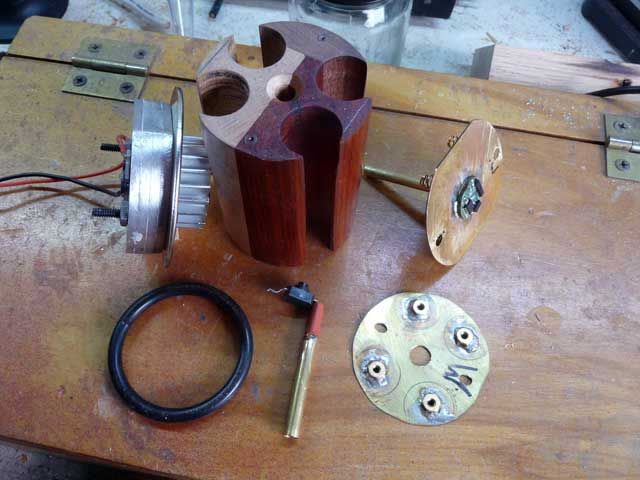
The LED driver is the gizmo in the center of the brass plate.

another view of some of the completed parts. The rubber o-ring was not used in the finished light.
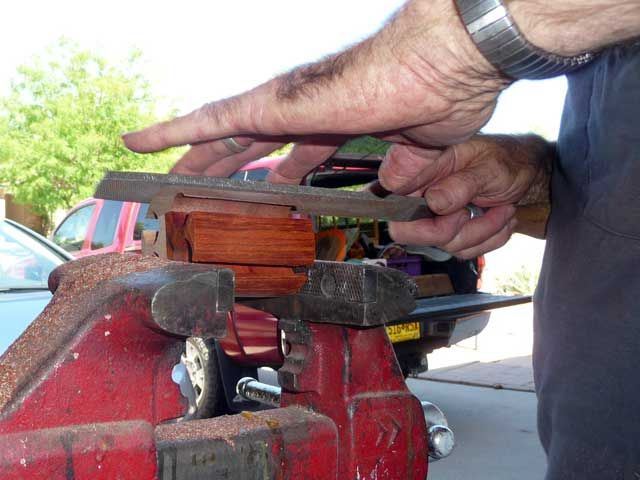
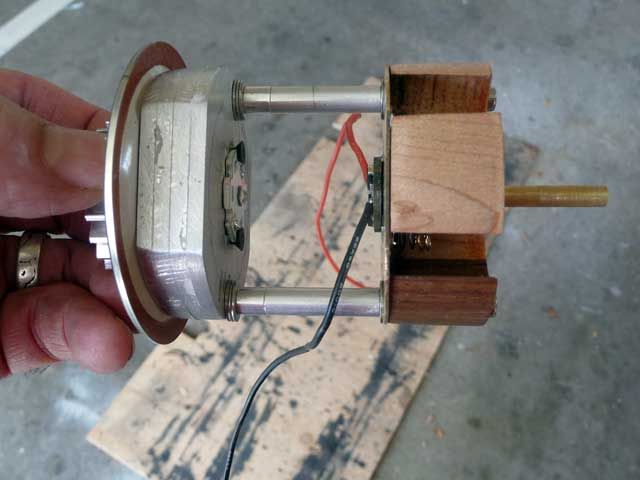
The cell block gets cut into two halves, an upper and a lower. The lower end has the lower + plate and the switch....
Viewing the other end of the lower block. Inserts are for machine screws to hold the halves together with cells in place...
The LED mounted...
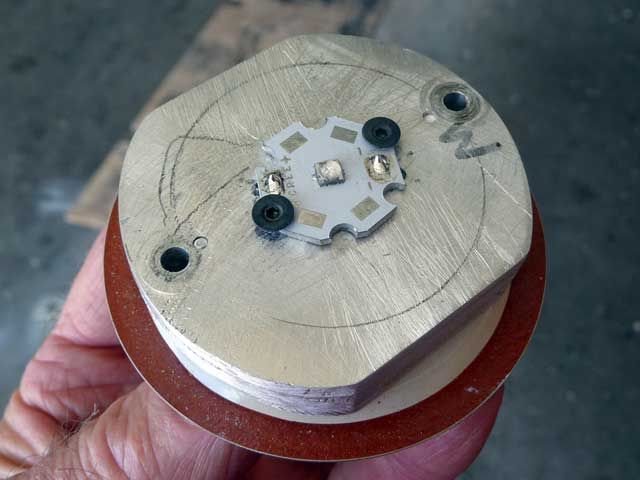
The LED heat sink....
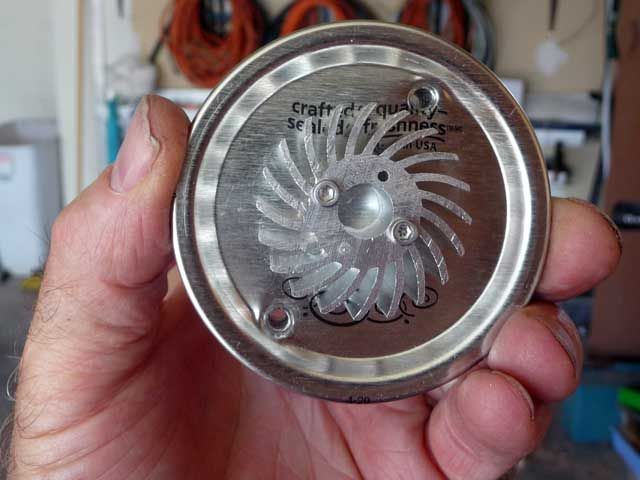
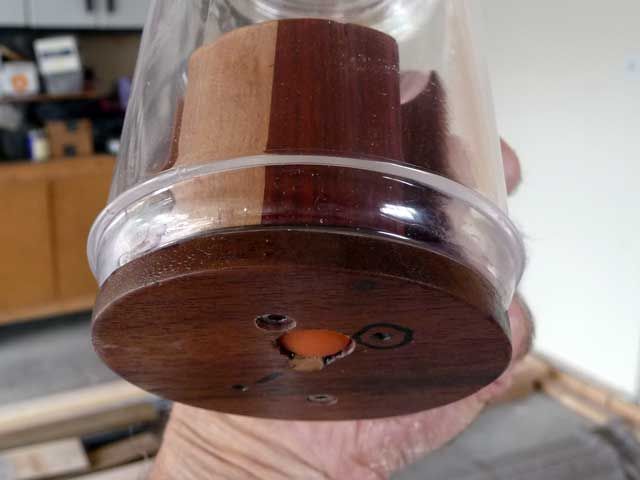
Surprise! It is a MugLite! The mug is 16 oz. and accepts std mason jar lids and bands.
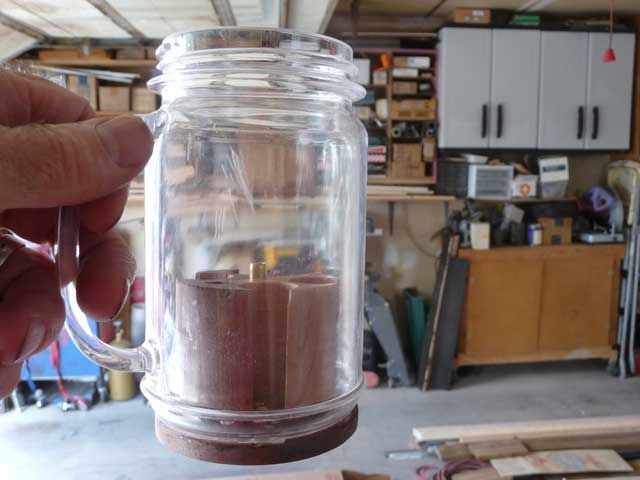
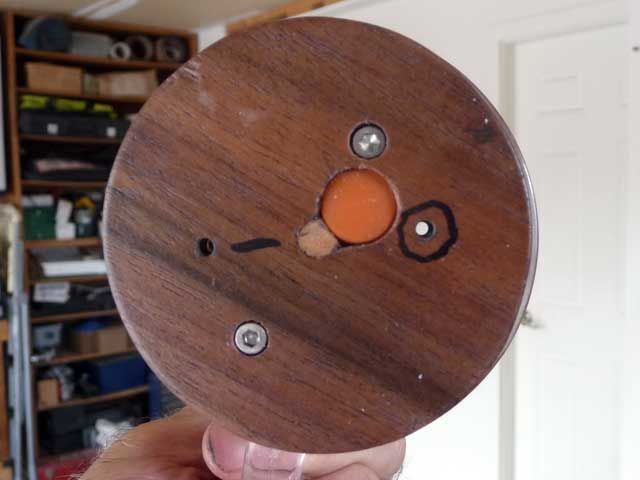
The switch is mounted in a walnut disc that is glued to the bottom. The orange thing is a rubber boot to protect the switch.
The inner cell block bottom half is secured with 4-40 machine screws through the bottom...
The upper end almost fully assembled. The brass tube connects the + terminals from the lower end to the upper module. Two tubes, one sliding inside the other.
The upper end with the phosphor dome that will produce white light from the bare royal blue LED emitter. The spacers and washers are to adjust the length for best battery contact.
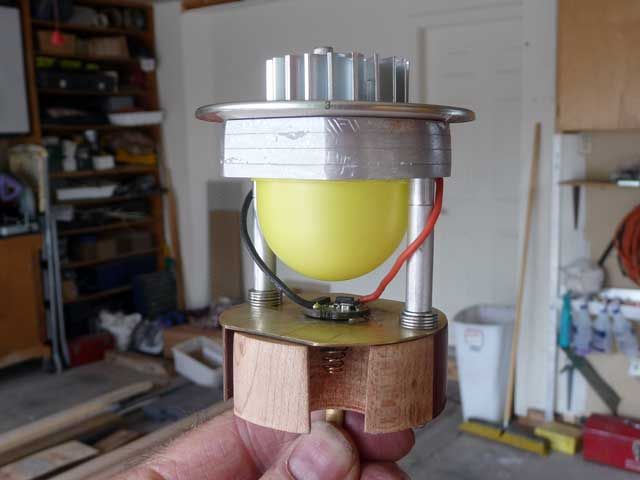
The upper end is inserted into the mug, the springs are contacting the cell ends and there is about a ¼" to be compressed...
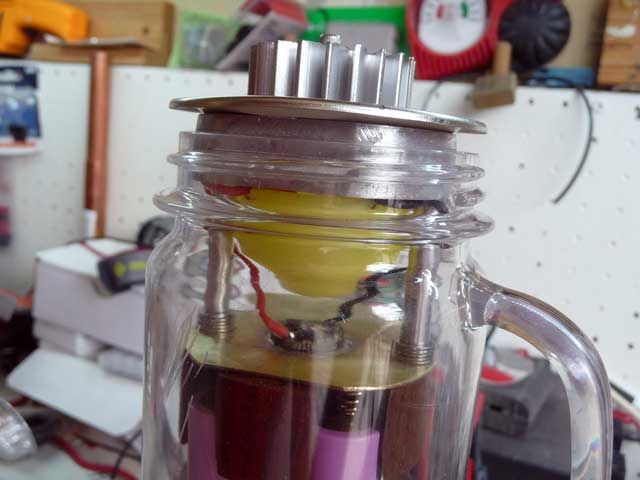
The lid band screwed on and it is ready to go...
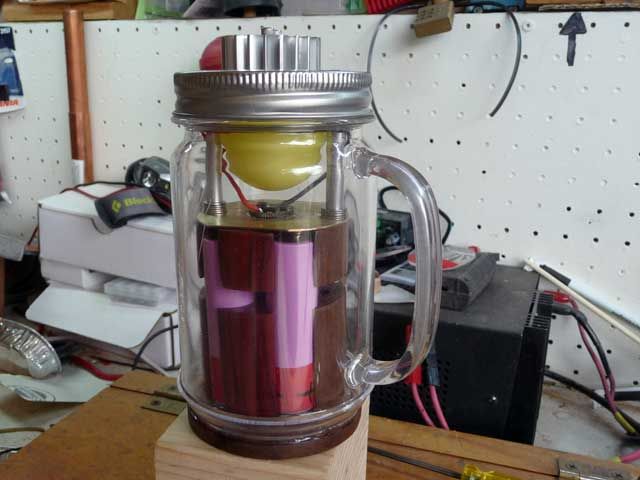
And it works!
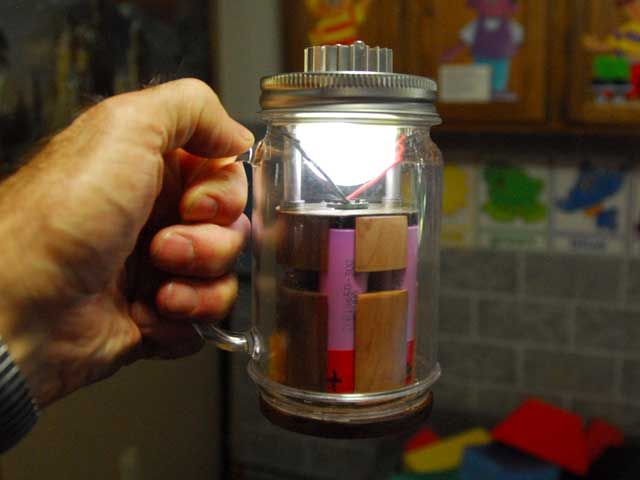
The light has six levels from the low shown above to high. I find that when used in a dark room level 2 or 3 provides a nice amount of light. Good enough to read by adjacent to the light. Outside at a picnic table level 4 was better; no light reflecting back off walls and ceiling I suppose. Level 5 was quite bright outside. A run time test got 24 hours out of the 4 x 3000 mAh cells on level 5. I recently swapped in a newly purchased set of 3400 mAh cells for even more time.
Anyhow there it is. The contest ending date is not until 10/31 so I have a while to wait to see if I finish well, or not.
The idea behind using upper and lower cell block halves to to make it easy
|
