|
| Author |
Message |
toyota_mdt_tech
Member
|
# Posted: 27 Dec 2015 13:17 - Edited by: toyota_mdt_tech
Reply
...OK, the woodstove I have it cast iron trash burner style. It has multiple parts, so potential for air leaks. It has a top, bottom panels, front, back and 2 side panels. All seams.
It has a plug in the back for either flue exit in the rear or the top (I'm using the top) and it has the removable round lid in the top in addition to the front door, all the more seams to leak air. The fire would burn out by about 2AM, would get so hot inside the well insulated cabin. If I could get a tighter stove that can shut down more, I'd be good to go. Trouble is, I could not find a steel one that was smaller than what I had.
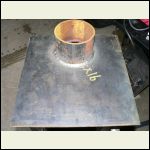
So I started purchasing 1/4" plate steel, had it all shear cut, ie the sides, bottom, top, had a chunk of 5" well casing cut for flue, a smaller chunk for the door. I used all 1/4" steel on everything except the angle iron inside used to hold in the fire brick. Its 3/16". Lets are 1 1/2" 1/4 wall square tube.
I welded the 4 sides together, got the angle iron inside welded. Took it to a buddy's shop who has a plasma cutter. This is a big one that goes through 1/2" (cut up to 1") steel like a hot knife does to butter. If you have never used a plasma cutter, you will throw rocks at your oxy acetylene set up.
I have an oxy set up, but the plasma cutter is so much more precise and it doesn't inject so much heat into the steel. Anyway, with the unit on, I clamped down a straight edge. Pointed the ip on the steel, pulled back the safety and with a pull of the trigger, it instantly cuts like a razor knife and as fast as I could move the nozzle. No slag left behind, cut parts falls freely. The plasma cutter plugged into a 50A 220V outlet (its a big spendy unit, caution on the smaller cheaper units) and the price of a plasma cutter is around $1800-$2500.
He had an auto darkening helmet. (I must be a caveman with my gear) and its a green filter, but you can see well, and as soon as I start welding, it darken right up. And when I stop, it lightens up, Its as if someone turned the lights on as soon as I stopped welding.
The door is built, installed, with latch, I will install the legs on the bottom, weld it to the 4 sides, then last, weld on the top. I should have it completed today. I need to scrape off all the BB's left behind from the MIG welding before painting.
I have a few from last week, I will post the finish product next. Its turned out nice.
I was unable to find a stove to meet my needs and in the dimensions I wanted. So I built my own.
It will be lined with firebrick on the sides, back and bottom.
I will follow up with more post later on today, I expect to have it finished today.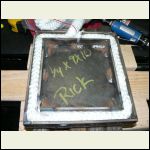
door_back_seal.jpg
| 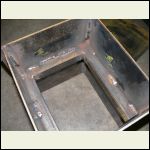
inside_view.jpg
| 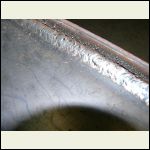
weld.jpg
| 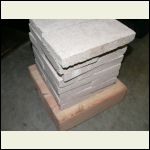
fire_brick.jpg
|
|
|
neb
Member
|
# Posted: 27 Dec 2015 15:17
Reply
That looks great! I was thinking about doing something like that also. I have a small tent/camp wood stove and does a great job but it isn't tight and someday I want tot replace it with a custom built stove. I have a stand up built wood stove I might drag out and take a look at it.
Keep us posted on your progress and how it works.
|
|
Just
Member
|
# Posted: 27 Dec 2015 16:03
Reply
Not to be confused with your precise work Toyota I have made a few of these over the years .They work well in a 4 x 8 ice fishing hut . Made with 10 IN. well casing .
|
|
cspot
Member
|
# Posted: 27 Dec 2015 17:30
Reply
Can't wait to see the final pics.
|
|
toyota_mdt_tech
Member
|
# Posted: 27 Dec 2015 17:31 - Edited by: toyota_mdt_tech
Reply
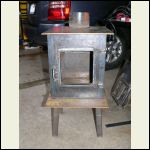
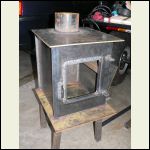
OK, worked on it all day Saturday and a good 6 hours today. I was just "woodstoved out" (worked on it enough, burned out) and put the tools away and closed up shop. I just have to finish draft controls on front door, and weld the mid section to the bottom plate (its tacked on now) and then a few welds inside, then glue the top on. The top is just settign in place, but all the sub assembly's are done. Just final assembly now.
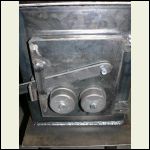
Spent a good chunk of today just cleaning all the weld BB's off, grinding with hand grinder and bench grinder cleaning up all parts. I will put a fin on each side of the ash guard up front, maybe, will see how it looks. I need to finish the baffle behind the door where the air vent controls are. I am using (2) of the 2" pipe caps. I have galvanized, but going to round up some black pipe for it. Welding to galvanized is tough. Unscrewing them will open up the air and there will be 2 on the bottom of the door. I have yet to cut the fire brick. I will do that before I glue on the top. Make sizing the pieces so much easier with no top in place.
Just, I have seen nice kits (door kits) to make woodstoves out of 55 gallon drums and they even have a double burner kits where you can stack them. I did look for one of those door kits, was hoping they made them for the smaller 15 gallon drums, but no such luck. Would of made life so much easier. The door and seal was the toughest paert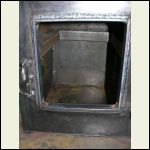
inside.jpg
| 
top_flue.jpg
| 
front_no_door.jpg
| 
left_side_view.jpg
|
|
|
cspot
Member
|
# Posted: 27 Dec 2015 17:56
Reply
Looking very nice!!!!
|
|
turkeyhunter
Member
|
# Posted: 27 Dec 2015 23:18
Reply
looking good....looks like you been stacking dimes ....welds look great!!! ....welds look great!!!
I have a fisher stove in my southern camp...very similar design...
|
|
pizzadude
Member
|
# Posted: 28 Dec 2015 00:58
Reply
Oh......
That's nice.
Wish I could weld like that.
Take pride. Looks swell so far..
I'm anxious to see how the door turns out🍕
|
|
|
Julie2Oregon
Member
|
# Posted: 28 Dec 2015 02:04
Reply
Wow, that's awesome! Very professional-looking job! Well done!
|
|
toyota_mdt_tech
Member
|
# Posted: 2 Jan 2016 20:16
Reply
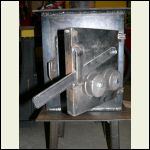
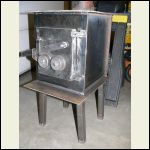
OK, fire brick is all cut for the inside, the stove is basically done with the exception of sanding rough edges, making it all smooth before painting. I need to shorted bolts for draft vents and then put a baffle on behind vents to keep embers from falling out of vent. Here is where it stands now. Then a coat of high temp flat black paint and I am done.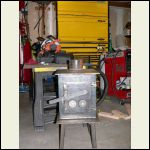
woodstove10.jpg
| 
woodstove12.jpg
| 
woodstove11.jpg
| 
woodstove15.jpg
|
|
|
neb
Member
|
# Posted: 2 Jan 2016 20:41
Reply
That is a dandy! Now you can build me one. Lol Someday I will need to improve or replace the one I have and will look in to building one also.
Very nice job!
|
|
turkeyhunter
Member
|
# Posted: 2 Jan 2016 21:10
Reply
looks great!!!
|
|
toyota_mdt_tech
Member
|
# Posted: 2 Jan 2016 21:33 - Edited by: toyota_mdt_tech
Reply
Quoting: neb That is a dandy! Now you can build me one
Neb, if you lived close, I'd love too. But if I had to shipped this thing, it would break me.  It ended up being real heavy. All 1/4" thick steel in everything, even the legs. It ended up being real heavy. All 1/4" thick steel in everything, even the legs.
I am going to add in a bend on the door handle latch to move it slightly outward then put either a spring handle on it or a wooden handle. I have a new spring handle on hand.
I have about $350 in steel. There was including about $130 of that was shear cutting the steel (shop labor). My next investment is going to be a plasma cutter after using my buddies. A must have IMHO. It makes clean cuts through this thick steel with very little clean up needed.
I will post a few more after its all sanded, painted black, fire brick installed, baffle on back of door and door seal in place and post those final pix.
The whole reason I made my own is I wanted a steel unit, air tight and small in size. No one made a steel one the size I needed. They made much smaller units for boats etc or too big. So I had no option but to build my own.
I will convert my old one to yard art over there. Pull the round lid off the top, fill it with dirt and plant flowers on the openings and stove pipe outlet too. 
|
|
turkeyhunter
Member
|
# Posted: 2 Jan 2016 21:58
Reply
Quoting: toyota_mdt_tech The whole reason I made my own is I wanted a steel unit, air tight and small in size. No one made a steel one the size I needed
I have the Fisher Papa Bear
the Fisher Baby Bear reminds me of your stove
https://www.youtube.com/watch?v=jRf9O2CoBr4
|
|
cspot
Member
|
# Posted: 2 Jan 2016 22:03
Reply
Toyota, you should be proud of yourself as that is some fine work!
|
|
Pawag
Member
|
# Posted: 3 Jan 2016 20:45
Reply
Great job. That is very impressive. Should work very nice for you.
|
|
toyota_mdt_tech
Member
|
# Posted: 3 Jan 2016 21:35
Reply
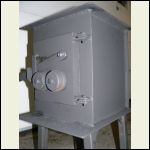
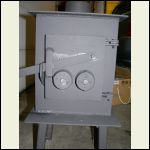
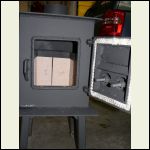
OK, last and final post, I think. Brick installed, door seal in place, all painted up. I will adjust the latch/handle a bit (maybe) and cut the bolts shorter at the 2 air vent controls. Otherwise, its done and here is the final pictures. Its next stop will be a run to the cabin. It will stink at first as the paint cures. Its fire paint, but will still stink.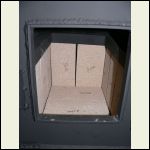
woodstove16.jpg
| 
woodstove19.jpg
| 
woodstove18.jpg
| 
woodstove17.jpg
|
|
|
toyota_mdt_tech
Member
|
# Posted: 3 Jan 2016 21:37 - Edited by: toyota_mdt_tech
Reply
few more pics. I know I need plenty more coats of paint. I will hit it as each coat dries up.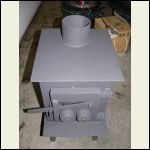
woodstove20.jpg
| 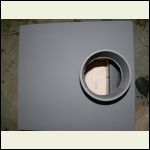
woodstove21.jpg
| 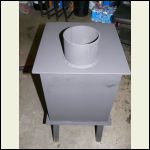
woodstove22.jpg
|  |
|
|
AK Seabee
Member
|
# Posted: 3 Jan 2016 22:30
Reply
Great job Toyota!
|
|
|

