|
| Author |
Message |
Murphy
Member
|
# Posted: 22 Apr 2017 11:36
Reply
Hi
Im a new cabin owner from MN....I posted this in my new guy post...first post...but I thought I would add it here also...under a specific topic.
Issue:
Its a fireplace insert...placed in the middle of the room on its own...with a stack out the roof.
I have a traditional wood stove I want to put in...but the stack sizes are very different. The current pipe is a 12" double wall....and I have a new 6" stove ready to put in.
How can I go from 6" to 12" pipe...near the ceiling? Is there a reducer this size?...and does it have to be double walled also...since its near the ceiling?
Thanks Guys!
|
|
bldginsp
Member
|
# Posted: 22 Apr 2017 12:01
Reply
On standard installations, the pipe from the stove to the ceiling is called stove pipe, and the pipe that passes through ceiling, attic, roof etc. is callled chimney. Looks like someone used 12" chimney for your entire installation, for whatever reason.
Going from 6" to 12" would probably create drafting problems. If the flu gasses cool too much they don't draft upward as well, or not at all. The chimney needs to stay hot so it drafts well.
I think you need to start from scratch, get 6" stove pipe and 6" chimney. The instal you have there is funky at best- I wonder what the required clearances to combustibles are for the back of an insert.
Stovepipe comes in single wall and double wall, and chimney comes in double or triple wall. Single wall stove pipe is least expensive, I think triple wall galvanized chimney is the least expensive, not sure. One way or the other it's expensive but safety is priceless.
|
|
Murphy
Member
|
# Posted: 22 Apr 2017 13:16
Reply
Hi
Thanks for the reply.
Its a funky setup for sure....was hoping it would be an easy fix.
I havent tried this fireplace out yet...didnt really want to...just wanted to replace it right away.
Do they even make reducers that go from 12" to 6"?
I want to try to make this chimney setup work...its already there and has been used for years....drafting is one thing...safety trumps that though.
Somebody I know mentioned maybe running 6" up the inside of the 12".....sounds odd...but possible?
Just looking for solutions.....that are reasonable...I know safety first....I dont think I would even use a single walled pipe....makes me nervous.
Thanks again.
|
|
Tonerboy
Member
|
# Posted: 22 Apr 2017 15:39
Reply
The insert has a triple wall pipe, which allows for cooling of the pipe so the outside surface of that pipe is not capable of starting a fire. Lookup "fireplace insert" on the web and you can get info as to how it works now.
As for your new install I would say that it might be possible to use that portion of the current pipe/chimney to slip the new pipe into. Depending on how it was capped. You might be able to check with a fireplace shop in the area of the cabin.
The thing that is currently installed is designed to be built in, such as an apartment, where a standard brick/block/stone chimney can be used. In theory, it's a fireplace however, the pipe gives off almost no heat and the box is designed to be closed in by drywall, so it doesn't produce much, except the opening, which really needs some form of an insert to collect heat and blow it into the room.
|
|
Murphy
Member
|
# Posted: 22 Apr 2017 17:01
Reply
Im starting to see what they were saying about using the current chimney .....by inserting the smaller diameter inside to the top.
I will have to look at this option further....any more input on this appreciated....doesnt seem too difficult..but theres always little details.
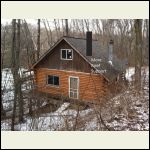
Heres the exit...roof
|
|
DaveBell
Moderator
|
# Posted: 22 Apr 2017 19:32
Reply
I don't think that is an insert.
It appears to be a zero clearance fireplace.
|
|
bldginsp
Member
|
# Posted: 22 Apr 2017 21:58
Reply
Yes Murphy I think putting a 6" chimney inside the existing one will work, provided the dimensions work out.
Yes they make reducers, but probably not 6 to 12. But you could get a 6 to 8, connect to an 8 to 10, then a 10 to 12. But I still think you shouldn't for the drafting issue. Chimney diameter needs to be matched to woodstove.
If the existing chimney is a galvanized triple wall with a 12" internal diameter, you could fit a new 6" chimney inside it. My 6" double wall chimney is 8 inches in diameter outside. Doing this, the old chimney just becomes a thimble for the new one to pass thru. You would thus get double protection from two chimneys. And you don't have to mess with the roof flashing which is a major job to do right. Looks from the photo like the installer knew what he was doing, and you can check for any evidence of past leaking.
You could, I suppose, just use 6" single wall pipe inside the 12", on the notion that the 12" already gives you the protection required. But I doubt an inspector would accept it, and again, it might have drafting problems because the single wall pipe would get very cold.
You would need to figure out how to terminate the 6" chimney inside the 12". Maybe all it needs is to go up to within a foot or two of the existing cap. The new stove manual will tell you minimum height of the chimney for proper drafting. That's all you need.
And you need to figure out how to deal with the 12" pipe inside. Right now it's whole weight is resting on the stove, I guess, and you need to cut it, or disconnect a section, and leave it hanging while the 6" is installed. I suppose you could rest the weight of the 12" onto the new stove, but I don't know how you would assemble that without disassembling the whole thing first.
On standard installations the chimney weight is loaded onto the ceiling with a special drop box that connects to the rafters. Doesn't look like you have that here. So I'm not sure how you would support the weight of the existing chimney. But if you have a new 6" double or triple wall inside it, clearance to combustibles becomes irrelevant to the 12", so you could literally support it by screwing 2x4s to it.
|
|
Murphy
Member
|
# Posted: 22 Apr 2017 23:06
Reply
Excellent.....you covered most of the questions rolling around in my head....Thanks!
The one I didnt consider....the weight!
These are heavy...there is a spare piece laying outside the cabin.....and it weighs more than I expected...possible triple wall?
For some reason I thought it was held up by the ceiling and I could just disconnect it.
I can see it go through ceiling upstairs...its not finished yet..and check to see if it has any bracing around it.
Ill also double check that extra piece laying outside for the I.D. and hope its not triple wall....or it may be too small.
So if it does turn out to be triple wall....the reducer idea may work then?....cant picture how a reducer would fit onto that....on the I.D.?
Ill check it out tomorrow......take a few pics also.
Appreciate all the help!
|
|
|
DaveBell
Moderator
|
# Posted: 22 Apr 2017 23:15
Reply
I'm fairly sure that is a zero clearance fireplace. Maybe has a circulating fan under the firebox. A very poor idea for heating a cabin.
The chimney is supposed to be above the roof ridge. I'd tear it all out, patch the roof and do a wood stove right. Chimney exit near the ridge, against an outside wall for external air connection.
Can u post 360 pics?
|
|
DaveBell
Moderator
|
# Posted: 22 Apr 2017 23:18
Reply
Quoting: Murphy For some reason I thought it was held up by the ceiling and I could just disconnect it.
Mine in a house years ago was placed, then each tube section snapped together as it went up a chase. So once it was pulled out the whole chimney collapsed.
|
|
Murphy
Member
|
# Posted: 23 Apr 2017 07:51
Reply
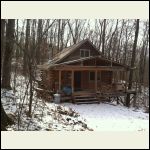
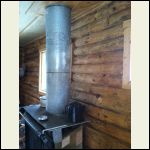
Couple pics....Ill get a few more when Im out there today.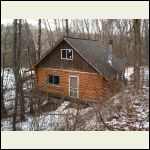
IMG_0790.JPG
| 
IMG_0794.JPG
| 
IMG_0805.JPG
|  |
|
|
Greenland South
Member
|
# Posted: 23 Apr 2017 08:58
Reply
If you look under the stove (looks like a factory built fireplace to me) you might find a label attached to a short piece of wire or chain. On that label will be listed the manufacturer, clearances to combustibles, and quite possibly the type and manufacture of the chimney that the stove was tested and certified with. This is the only chimney that should be used if it's listed.
If it is a factory built fireplace, it is unlikely it is rated to carry the weight of that chimney. Looking at the pic of the outside, I'm not able to tell if the chimney is tall enough. Chimneys must extend a minimum of 36" where they exit the foot deck and be a minimum of 24" higher than any roof deck or structure within a 10' radius. Not nessacery to be higher than the peak in all cases.
Finding adaptors of any kind for that chimney may be very difficult or impossible. Only components approved for that chimney should be used.
I'm obviously not standing in front of it doing an inspection, however from what I see in the pics and from your description, I would not be using it.
Poorly installed wood stoves and chimney components quite often work until they don't.
|
|
DaveBell
Moderator
|
# Posted: 23 Apr 2017 11:37
Reply
Looking at pic 805, that is a zero clearance fireplace. Looking at pic 790, you could put a wood stove to the right of that door if you wanted to use an outside air connection. If you centered it on that wall, or close as possible to the door, your chimney would have more roof structural support. I would start over and get something in there that would work better.
|
|
bldginsp
Member
|
# Posted: 23 Apr 2017 11:37
Reply
Ditto Greenland. Even if you find reducers for that brand of chimney, whatever it is, the remainder of your components would have to be the same brand so they all connect together correctly. Each chimney brand has their own connection type and you can't mix and match.
But if the chimney was used only as a thimble for a different chimney you would not have that problem, except at the top. You couldn't just end the new chimney inside the old below the old cap as I previously described, because embers could fall between the two chimneys into your house. Also looks like you don't have the 2 feet-10 feet clearance, so the new one needs to be higher, meaning you would have to make a connection water tight seal where the new one comes out of the old.
And you have to support the weight of the remaining old by the ceiling joists and rafters, possible but not easy.
Since the installation is a simple one, straight up, you're probably better off starting over.
One way or the other, run supports from the top of the chimney to the roof so it wont blow over in the next hurricane.
|
|
DaveBell
Moderator
|
# Posted: 23 Apr 2017 18:26 - Edited by: DaveBell
Reply
Murphy, can you post some pics of the other wood stove. Make, Model etc.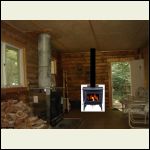
Murphy_Stove_Int.jpg
| 
Murphy_Stove_Ext.jpg
|  |  |
|
|
Murphy
Member
|
# Posted: 23 Apr 2017 19:43
Reply
Hey Dave.....thanks for installing the stove!
Heres a link to the stove I purchased.
http://www.northerntool.com/shop/tools/product_200665055_200665055
Hope links work here.
|
|
DaveBell
Moderator
|
# Posted: 23 Apr 2017 20:19
Reply
No Problem.. Thanks for the six-pack.
That stove will work nice. No external air kit but being near the door should draw air from one spot versus all the rest. That little flat area down the back stairs would work as wood storage.
|
|
bldginsp
Member
|
# Posted: 23 Apr 2017 20:42 - Edited by: bldginsp
Reply
Made by US Stove Company in.... China! You really have to dig through their literature before you find it. I wonder how long they will last....
A few choice quotations from their literature:
"You've purchased a heater from North America's oldest manufacturer of wood burning products."
"US Stove Company
US Stove — Tradition, Quality & Value Since 1869.
United States Stove Company produces a full line of easy-to-install appliances that meet all of your heating needs. Over 100 years of experience in the industry has enabled US Stove to manufacture the very best in multi-fuel stoves, wood-stoves, direct-vent propane heaters, and stove accessories."
Well let's see... nowhere does it explicitly state that they are made in the US, but if they are "north america's oldest manufacturer" you might assume they are a North American manufacturer...
So, no wonder in the Q+A section a person asked,
"Can you tell me where the stove is made? I would assume the United States Stove Company would be made in the US but is worth asking."
To which they plainly replied, "Made in China."
No where else did I find any reference to origin of manufacture in the literature, but I didn't read the whole website.
Maybe the stoves are fine, maybe not, but this kind of deliberate deception is not OK. I recently bought a bunch of Milwaukee battery tools, all made at least in part in China. Milwaukee makes no bones about it and we all know why they are making them there. But they make them to high specifications and they seem to be excellent tools. Did US Stove have their Chinese components manufactured to high specifications? Why are they trying to hide the country of origin? How do you make and sell a woodstove for 20" logs for only $450?
|
|
Murphy
Member
|
# Posted: 23 Apr 2017 20:43
Reply
Im going to have to use the service of a local fireplace guy to get this done. I was thinking I could do it....but there seems to be more to it....as usual.
Some info I found today.
The current pipe is 9" I.D.
Also there is no support near the ceiling.....its all sitting on the fireplace.
The previous owner came out today to pick up some stuff he left......he was bummed I was replacing the fireplace...he said he paid a bit of money on it....guess it worked great for about 9 years.
I think re-doing everything would be a big bite in the budget....supposed to be for generator...cabinets...outhouse...on and on.
Ill find out what I can get away with....and still be safe and functional....and try not to spend two grand....Im not getting on any roof!
|
|
Murphy
Member
|
# Posted: 24 Apr 2017 06:16
Reply
bldinginsp
I usually research the crap out of something ...then sit on it waiting....not an impulse buyer to say the least.
Most info and reviews from various sites were mostly good....seems to be very popular.
The install seems to be a point of debate and issue. I found the 6" pipe would slip up into the 9" I.D.....
As you mentioned....it would have to be secured to the joists in the ceiling.
As I mentioned Im not going to spend a few grand to re-do everything....but the insert is going for sure.
|
|
bldginsp
Member
|
# Posted: 24 Apr 2017 08:47 - Edited by: bldginsp
Reply
If you remove the insert, you will be looking at significant cost to replace. If it's a good, safe install, maybe it's best left for later. Since it's an insert, you can build an enclosure around it perhaps, if the manufacturer's specs allow. That's cheap and easy and you can spend your time and cash on other pressing issues. Just a thought. Always a million things to do at the cabin, why make more work for yourself. IMHO
As someone above said, it doesn't look like an insert that is meant to be inserted into an existing masonry fireplace. It looks like a built-in, meant to be installed inside wood framing with proper clearances (or no clearances). If so building a wood frame around it is easy and you can cover it with tile or armadillo hides. That ugly chimney will look snappy after 2 cans of heat resistant spray paint. Let the wife choose the tile and paint color. Beware- they make pink.
Chimney sizes are measured by internal diameter, not external. Going from 6 inch to 9 inch is a lot different than going from 6 inch to 12". See if the manufacturer of the new stove limits size of chimney pipe. If they allow 9", and you can support the thing otherwise, all you have to do is that support, remove some chimney in the cabin, use that chimney manufacturer's fittings to connect to the stove with stovepipe, which is cheap. But if you have to put new chimney inside the old one, the cost goes up a lot. Stove pipe is far cheaper than chimney. thinking out loud.
|
|
1tentman
Member
|
# Posted: 24 Apr 2017 14:19
Reply
Murphy
I have a couple of questions about your pipe. Is the inside 9" pipe stainless steel or is it regular black stove pipe and are the two pipes fastened together or is the inner pipe just held centered with wire triangle brackets. I have seen them made both ways. If the inner pipe is stainless steel you should try to make this set up work because there is no reason to take the stainless out. You will have to make a drop box like bldginsp said to support the 12" pipe. Then you could run single wall stainless up to the box from the stove and adapt it to your 9" pipe if it is stainless. If the inner pipe is not stainless then I would scrap the whole chimney and start over. I have seen a couple of these with regular steel pipe on the inside that after some years of use will burn out and cause fires.It looks like your outside pipe is tall enough but if you wanted to extend it you said that you had a extra piece of pipe just take the cap off and extend it one more section.You do need to put some support brackets on the chimney. Buy some 10 ft. pieces of galvanized conduit, flatten both end with a hammer and bent angle on ends. Screw one end to your roof and fasten the other end to your pipe with a big hose clamp, run 2 pieces off the chimney and that should support it against wind and even help with snow sliding.
|
|
Murphy
Member
|
# Posted: 24 Apr 2017 18:58
Reply
Hey 1tentman
Yes the I.D. pipe is stainless......and it is connected...like most double walled...solid.
How would you adapt it?..(type of adapter)..and dont you need double walled next to the ceiling....where it would connect?..inches from the ceiling.
I looked at the height yesterday....and the cap just clears the top of the peak.....barely.
This sounds logical...and more affordable...plus I could do this myself......as long as I can stabilize that large heavy pipe before moving the fireplace.
|
|
bldginsp
Member
|
# Posted: 24 Apr 2017 23:13
Reply
Chimney should be higher than the ridge if within 10 feet. I'd suggest disassembling the whole chimney in sections, get a ceiling support box and transition fittings from the same manufacturer, then reassemble as many of the sections as needed to get the right height. Then instal stovepipe up to the ceiling transition fitting.
If you can't identify the manufacturer, or they are out of business, you will have to mix and match from other manufacturers which is basically hit or miss, possibly dangerous, and would probably not be accepted by local inspectors.
|
|
1tentman
Member
|
# Posted: 26 Apr 2017 17:52 - Edited by: 1tentman
Reply
Murphy
I think you are out of luck trying to find fittings for 9" double wall insulated pipe. I have been looking at a number of sites and nobody makes that size anymore, but you can still salvage the existing pipe.
This is what I would do if it was mine. Remove the plywood that is around the pipe at the ceiling and expose your ceiling joist.
Make a steel band roughly 4" wide by 1/8 to 3/16 thick that will wrap around your 12" pipe ,bend the ends where they meet and drill holes in the ends and install a bolt so you can tighten band around pipe, also drill about 5or 6 small holes in band and run some screws thru band into pipe , this will hold band to pipe better. Cut 2 pieces of angle iron and bolt these to studs that you weld to the side of band, or weld angles directly to the band.Angles need to be long enough to span across ceiling joists. Install and secure and this should hold your pipe from the ceiling up.
Your pic shows 2 pieces of pipe the one connected to insert looks to be roughly 2' the one next to the ceiling is longer, remove both pieces and install the shorter one at joint at ceiling. This should give you enough clearance from ceiling.
Install stove and put a 6x8 adapter on stove. I would run 8" single wall stainless up and insert it in your 9" pipe. Then purchase a trim ring to go around the 8" pipe and
slide it up against your 9" pipe.Now to seal the gap between the 8" and 9" pipe drill 4 holes evenly in trim ring and fill the void with stove cement. This can be purchased in squeeze tubes and fill gap between the two pipes and let set up.
The reason I would go with 8" pipe from stove to your 12" is it would give it a better appearance.
You could also install some strap to the piece at the ceiling and run these up to your joist for more support. Paint the thing flat black with heat paint and install new plywood trim around pipe and you are ready to watch the fire.
With your stove set under this existing pipe you will not have enough clearance to the wall you will have to build a heat shield against the wall.This should be easy to do.
This plan might not meet ever-bodies approval but I think it will work. Just my 2 cents worth good luck with your project.
|
|
Murphy
Member
|
# Posted: 28 Apr 2017 06:01
Reply
Thanks Tentman
That was an excellent description-post.
Thanks everyone else who jumped in....I will take pics as I go also.
I will work on a way to support the current chimney....then I will probably go with double wall to the ceiling.
Thanks!
|
|
|

