|
| Author |
Message |
Sojoe
Member
|
# Posted: 16 Nov 2018 21:07
Reply
Disclaimer: I know little to nothing about restoring cabins but I am determined to learn.
The log cabin in the attached pictures was moved/restored in 1948 but I have no idea how old the original logs are. When it was moved, it was boxed in with 1x planks and covered with a thin siding.
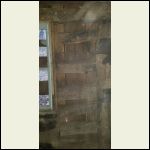
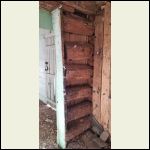
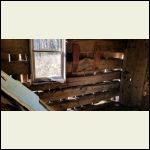
I just began removing the wood from the inside and the logs seem to be mostly ok, with a few exceptions under windows and doors.
My biggest concern is the large gap between the logs. The pictures of chinking between logs that I've seen on the internet seem to be much smaller.
Initially, does this seem like a feasible project?
Thanks in advance!
Joe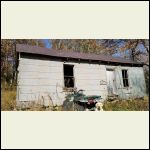
46458037_26345436103.jpg
| 
46292856_76775885024.jpg
| 
46339811_56470145063.jpg
| 
46328519_10520861749.jpg
|
|
|
ICC
Member
|
# Posted: 16 Nov 2018 21:33 - Edited by: ICC
Reply
Wide spaced logs like that are common in Appalachia. And the squared off log faces are also common. The squared faces were used so that later on, after the builder had more money, they could install those 1x boards over the logs so it would not look so much like a log cabin. Log cabins were for poor folks and the 1x boards raised you a level or so in society. Same thing goes for the siding that was applied to the exterior; that showed you had moved up the economic ladder.
As for restoring the rotted wood under windows and doors. That alone can be a big job/ Idsit really worth doing? Another route is to totally dismantle the cabin and save all the good logs. Maybe buy another one to dismantle for the logs. A friend in WV has done that and built a great old looking cabin with modern windows, doors, concrete foundation, partial basement, etc.
|
|
rockies
Member
|
# Posted: 16 Nov 2018 21:58
Reply
You should watch a few episodes of "Barnwood Builders" on TV to see what they do.
https://www.diynetwork.com/shows/barnwood-builders
|
|
Sojoe
Member
|
# Posted: 17 Nov 2018 20:00
Reply
Thanks for both replies. I guess my main concern was the huge gaps in the logs and if they would be able to be chinked like that. Where there's a will, there is a way.
Also, I watched a few episodes of the Barnwood Builders and those guys are great!
I will post more pictures as I get more siding off from the inside to reveal any other issues.
Thanks again,
Joe
|
|
Malamute
Member
|
# Posted: 18 Nov 2018 21:09 - Edited by: Malamute
Reply
What are you planning to chink with?
Plain mortar is garbage for chinking. it cracks, crumbles, fall out, doesnt bond well. The new high tech idea in the 70s or so was the mixture of 1 part portland cement, 2 parts gypsum plaster and 3 parts coarse saw dust, such as from a mill or chain saw work. Its far more stable than plain mortar, and very difficult to remove in comparison. This and mortar were usually used with nails set in top and bottom logs of the joint to help hold it in place. In small log joints it was also common to tear fiberglass insulation into strips and pack the joint to reduce airflow, which will happen to a degree because of log shrinkage and expansion over time. In your case, that wouldnt work. Id be temped to cut thin plywood strips for center backers for the 3 part chink mix.
The current tech is the Log Jam type thats a rubbery product that looks like mortar, but adheres to the logs very very well. Its usually used oved a backer rod, round or triangular, that fills the gap somewhat and makes a bond breaker section so the chinking doesnt pull off the logs as they expand and contract with variations in temp and humidity. Ive seen large gaps chinked with modern chinking, its usually done over a foam board filler (plain white foam board or one of the upgraded colors with more R factor, either works), cut to fit the shape of the logs and chinked over. I believe they spec a piece of tape across the face of the foam board as a bond breaker, but consulting the site of the manufacturer would be advised.
Chinking is pretty simple with either the portland/plaster/sawdust mixture or the modern stuff. You may be able to rent a power chinking gun, Ive just used the manual gun and plate that drops in a 5 gal bucket of chink and allows the filling of the gun easily. For the volume youll be doing, having a helper than can load the gun while you tool out what youve just applied helps quite a bit.
This for the gun, they also have the plate listed on their site.
https://albioneng.com/accessories/chinking-tools/30oz-core-special-deluxe-manual-bulk -gun
Ebay had some search results also.
https://www.ebay.com/p/Special-Deluxe-Dl-59-t13-BULK-Caulk-Gun-30-Oz-Albion-Engineeri ng-Quality/1510174282
|
|
Sojoe
Member
|
# Posted: 26 Nov 2018 00:21
Reply
I definitely want something that will last and will work for the large gaps that I have. The mix that includes the sawdust sounds like the best idea so far from a price/practical standpoint.
The attached picture shows the rest of what I have to work with now that I have the complete wall exposed.
|
|
KinAlberta
Member
|
# Posted: 26 Nov 2018 20:57 - Edited by: KinAlberta
Reply
Could some sort of aged or kiln dried wood be inserted between the logs to reduce the gaps and provide more solid support for the weight of the wall above them, especially where the logs end as at the window frame?
|
|
Sojoe
Member
|
# Posted: 27 Nov 2018 00:43
Reply
I think that is the best way to support the large gaps and I feel pretty confident by the replies that the distance between the logs (while large) won't keep me from saving the cabin.
I am in the middle of taking 1x planks off the walls and ceiling and then plan to remove the chimney, then the roof.
Thanks for all the replies and I will post updates and questions as I slowly move forward.
|
|
|
Sojoe
Member
|
# Posted: 2 Dec 2018 22:29
Reply
Progress today!
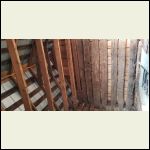
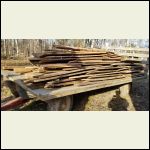
Finished removing all the ammunition boxes, tar paper and 1x sheathing from the inside of the cabin. Tomorrow I will start removing the 1x sheathing from the outside.
One step closer to taking the logs apart and storing them until I prepare the location where I am moving it to.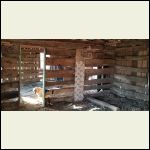
20181202_145823.jpg
| 
20181202_152720.jpg
| 
20181202_154538.jpg
|  |
|
|
|

