| << . 1 . 2 . 3 . 4 . >> |
| Author |
Message |
BRADISH
Member
|
# Posted: 13 Sep 2021 14:18
Reply
Looks good! I think as usual, you'll have the most critical eye for it. I don't immediately see any repetitions in the pattern. A good choice of paint color may help mask it in the end anyways.
I hear you about the rain. Rained on us one day solid this past week and it was a slog through the muck. Fortunately we got lucky with mostly dry weather otherwise.
|
|
jsahara24
Member
|
# Posted: 13 Sep 2021 16:24
Reply
Quoting: BRADISH I think as usual, you'll have the most critical eye for it.
This is definitely the case for me as well......
Looking good, keep up the good work...
|
|
Grizzlyman
Member
|
# Posted: 14 Sep 2021 18:18
Reply
Quoting: BRADISH I hear you about the rain. Rained on us one day solid this past week and it was a slog through the muck
It’s amazing how muddy a site can get when all the vegetation is beat down from walking back and forth!! Especially under the roof edge where it drips!!
|
|
BRADISH
Member
|
# Posted: 15 Sep 2021 13:11
Reply
Quoting: Grizzlyman Especially under the roof edge where it drips!!
While it may be considered a bit of a luxury for a cabin, this is exactly why I will be installing rain gutters when the time comes.
|
|
Grizzlyman
Member
|
# Posted: 19 Sep 2021 20:42
Reply
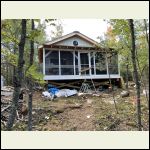
Up again this weekend. Finished my siding.. we’ll almost I ran out and need just about 20-30 more sections to finish the porch. But everything exposed is now sided. The top of the rake wall killed me up and down the ladder over and over… etc…
Next I need to finish inside the porch, and the single shakes under the windows and in the eaves …then caulk around the trim and then well paint it.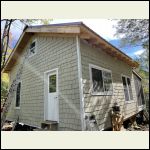
FEAAADB6A7204C6D8.jpeg
| 
54ED05CAB91A4C338.jpeg
|  |  |
|
|
BRADISH
Member
|
# Posted: 20 Sep 2021 13:20
Reply
It's always just one more thing, ain't it?
Looking good. Probably feels good to be closing things up before winter!
|
|
Grizzlyman
Member
|
# Posted: 13 Oct 2021 07:51 - Edited by: Grizzlyman
Reply
Can you say Done?!?
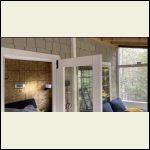
I’m DONE with construction. I went up again this weekend and finished all the construction. I have some interior things to do yet but all the major stuff is done. Feels good to put down the tool belt for hopefully the last time ;)
I had to buy 100 more pieces of siding. They’re 10’lbs a piece so difficult to get the across the lake and up my hill/ but did it.
I also needed 2x4s for my railing system in the loft. Bought about 16 and hauled them as well. I also had to move some durock for the stove floor, corrugated tin for the surround, and welded wire panels for loft.
I finished siding the front of the cabin and was able to finish all the little individual shakes under windows and eaves as well.
Then I cut a hole in the roof and put the chimney in. This roof experience was not enjoyable 
Then I put down cement board for the stove and went on a rock scavenger hunt. Looking for 1/4 thin or less rocks to tile it. I found about 2/3 of what I need … need to find more though. Also put corrugated tin around the stove.
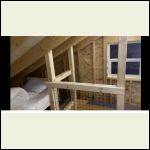
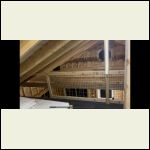
I installed the railing for my loft using the wire panels and 2x4 surround. I’m very happy with it. I was a few 2x4s short-
Lastly I put a floor in the loft. Menards puzzle piece 24†foam tiles. They’re not the best floor… but I gotta say I really like it for a loft floor!
Going up this weekend for possibly last time as a family until January- we’ll see. My wife is going to paint the siding and fascia/ exterior rafters I will actually be sort of relaxing and playing with our boys- only little work in finishing the loft railing and finish the stove tiling. Then I’ll hook up the stove. Just a few pipes left to do there!
If I do get ANOTHER weekend yet in addition… then I’ll insulate it and cover with poly.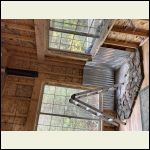
7A69FD81C4C14700B.jpeg
| 
16C879809B264A7F9.jpeg
| 
D3110C3685EB44F59.jpeg
| 
2D63BDDDD6B54B24A.png
|
|
|
Alaskajohn
Member
|
# Posted: 13 Oct 2021 09:42
Reply
That is an impressive build, and given your logistical challenges, even more so! I know you will enjoy what you have created! Congrats and respect!
|
|
|
Aklogcabin
Member
|
# Posted: 13 Oct 2021 09:45
Reply
Hey you did great man ! And putting the wood stove in after all the work prior is sooooo rewarding. Finally heat. Did you fire it up ? Kinda like a milestone minute.
I suspect that you're beautiful wife n family are like mine. Kinda skeptical of heading out at first but after hitting the trail they became all in.
And being able to just stop. To not have to have to do. And I also suspect you're family enjoys seeing you stop to relax.
Life can happen fast, It's nice to see another family built their dreams together.
Lots of memories to come
|
|
gcrank1
Member
|
# Posted: 13 Oct 2021 13:57
Reply
Wha-Hoo! Some Kick-Back time!
But 'done'? Nooo Never, there is Always Something 
|
|
Grizzlyman
Member
|
# Posted: 13 Oct 2021 16:03
Reply
Quoting: gcrank1 ha-Hoo! Some Kick-Back time! But 'done'? Nooo Never, there is Always Something
Truer words…
|
|
WILL1E
Moderator
|
# Posted: 14 Oct 2021 14:24
Reply
Grizzlyman can you share details on the siding? I like the look and want to check the costs locally.
|
|
Grizzlyman
Member
|
# Posted: 14 Oct 2021 17:08 - Edited by: Grizzlyman
Reply
Quoting: WILL1E Grizzlyman can you share details on the siding? I like the look and want to check the costs locally.
It’s allura by menards. Fiber cement staggered shakes.
Roughly $9 a piece and 10lbs per piece.
Be careful ordering- I was short because they list the size per sheet- but not the coverage. It’s 48x16 pieces and they lap only about 6â€â€¦8†at the max… so pretty much 2ish sq ft actual coverage per piece. I went through about 400 pieces on my 22x20 cabin. I expected that amount to do the cabin, shed, and outhouse.
Honestly given the weight and the cost I would not do it again. I would just use real shakes…. It would have been faster, cheaper, easier, and lighter. It’s going to cost me almost 2x what I thought for siding due to the lap. Also saw blade is good for only about 100 cuts. It’s $30 per blade as well… not worth it IMO… and you have to hit studs on install… shakes you can just pop into OSB.
|
|
Grizzlyman
Member
|
# Posted: 17 Oct 2021 20:51 - Edited by: Grizzlyman
Reply
Well maybe I jumped ahead too far when I said “doneâ€. Lol. But I think I am done now.  … at least for now. … at least for now.
Went up for a long weekend. Wife painted all the exposed rafters and soffits. Turned out fantastic.
My plan was to relax with the kids… but it got down to 34* on Friday and that was quite chilly… especially since it gets dark so early now… and the nights are LONG!
Saturday went on a scavenger hunt to find enough stone to finish the hearth. Mortared that and finished it up.
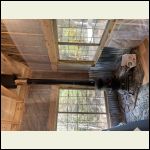
Then hooked up and sealed up the stove.
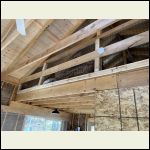
Then I ran into town and bought insulation. I insulated the cabin.
Then I finished up the last bits of railing in the loft.
Fired the stove up Saturday night and was perfect. Nice and toasty by the stove… and at least took the chill out in other parts of the cabin…. Didn’t run it too hard as it was the first time. Will get one of those fans…
Then this morning i put the snow splitter on the roof.
Then we shut down the cabin for the winter! Cleaned up the site, put everything away and prepped for the deep snooze of winter.
I may be back in a few weeks if we’re ice free still and not too terribly cold…but other than that or a trip here or there it’ll be until probably late April/may until we’re really in it again!
Crazy that that 6 months from now!
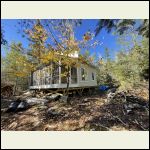
All in all I am incredibly amazed at the progress made and the work put in!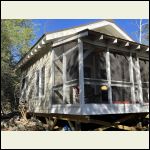
03420BF350524B79B.jpeg
| 
3ABD6544BDE143F8B.jpeg
| 
55D5E6F8C0C14A50B.jpeg
| 
5CC47ED6303F44CCB.jpeg
|
|
|
gcrank1
Member
|
# Posted: 17 Oct 2021 21:52 - Edited by: gcrank1
Reply
Fwiw, we have found that we can generally do well if we draw the line at about 30*F. At that, arriving to a dead cold cabin about noonish we can get the 'fire going', pack the gear in from the pull in at the road 340ish feet out, then maybe go for a walk on the trails around 'da-9' and once back things have warmed decently. If staying over we can be good, we keep the heat on until it is shirtsleeve warm, but a few times we left at sunset after a good long afternoon.
Below 30ish it is just too bitter and takes much longer to bring the interior and appointments up to temp (everything inside is either a cold-sink or a heat-sink) and having to just huddle about the stove isnt all that great.
|
|
Land4077
Member
|
# Posted: 1 Jan 2022 03:59
Reply
Is there a way to round over the outside board? So it will look more natural.
|
|
Grizzlyman
Member
|
# Posted: 5 Jan 2022 11:43
Reply
Quoting: Land4077 Is there a way to round over the outside board? So it will look more natural.
Hi land. I’m not sure I catch your meaning. Can you elaborate?
|
|
neb
Member
|
# Posted: 23 Feb 2022 22:10
Reply
Beautiful!
|
|
Grizzlyman
Member
|
# Posted: 1 Jun 2022 13:23 - Edited by: Grizzlyman
Reply
Well back at it!!
Ice melted only 3 weeks ago in N Minn…. Been up for 3 weekends working So I was back at the island a few days later after ice-out . Water was crazy high. My dock was under water an inch. It has come down about 1 1/2 ft since.
To start with- I had about 6k dollars worth of boards delivered to the landing and hauled them across in several trips in my boat. Unloaded and carried up the bluff.
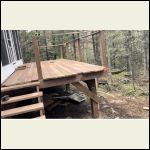
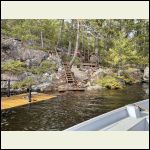
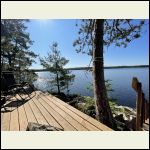
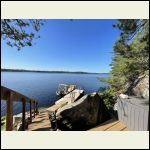
First construction project was a deck into the middle of the bluff. It ended up being larger than I thought. It is approximately 20x8. It’s beautiful and provides a great place to sit by the lake. The edges are cut tightly around the rock. The east side is tucked behind a huge boulder, the middle is behind a tree, there’s a boulder sticking up through the decking in the middle as well, and the west side is supported freestanding. The stringers on the lake side are attached to a rim joist 2x10 and on the bluff side they are cut around and supported by rocks. It was tricky to build but not that bad.
From this deck I hung a 15’ stairs down to the dock. 6†rise. This is cut around rocks as well on the bottom side. I chose to make traditional stringers here as I only had about 20†to work with between the rocks on the bluff. Therefore if treads were inside rather than on top of stringers it would be an 17†wide staircase… instead I put the treads on top and I overlapped tread by 2†each side to build a comfortable 24†wide stairs up to the deck.
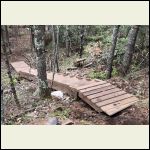
I then built another 20’ stairs UP from the dock. This was challenging as there was a lot of rock In the way. Sledgehammer was the best tool for this and I busted a lot of rock to make room… several hours o of bustin rock…I could not build traditional cut stringers as when I cut around rock on the bottom there would be little wood left for support after making the 90* cuts. I chose to build treads inside instead for this reason. It’s cut around rock so it doesn’t move anyways, but I also fastened to the deck with spax and with joist hangers turned horizontal to keep it from sliding. The treads are screwed from the side with 5†spax- 4 on each tread.
On the top of the stairs I built a boardwalk that is through-bolted to the stairs at the top. The other end of the boardwalk is fastened by 24†rebar pounded through a 1/2†hole in the boardwalk and down into crevices between the rocks.
From there the trail goes to another bluff area. There I built another 20’ stairs up to my cabin site. This is really more horizontal than a typical stairs as the incline is only about 10’ and the stairs are 20’ boards.
Same procedure for this one- though I only had to cut around one rock. Treads spax’d through the side. I fasted this at the bottom to keep from sliding by fastening a plate to the bottom of the stairs which is again secured by 3’ of rebar again pounded down into crevices. I bent over the top of the rebar to keep it pinned down.
I then built a board walk on the bottom of the stairs to make an easy approach and again at the top of the stairs- again both through bolted.
I then wen back to the dock and built a boardwalk from by dock to the bottom of the 1st set of stairs.
Back up at the cabin I dug and poured 6 footings for a deck. 6x6 posts w post bases bolted to the cement footings. Then built a deck on the front of the cabin off of the screened porch. This is a cantilevered deck over a double 2x10 beam on the posts. 8’x20’. Frankly wish now it was 10 x 20 but… whatever …it’s good. This is freestanding and not attached to cabin itself.
Then I built a 6x6 deck on back of the cabin. Not freestanding and is attached to structure. posts here are 4x4 and I used pre made cement post bases that i dug down and placed on granite bedrock about 12†down.
Last weekend I built stairs for decks. Back deck has two stairs- one on each side. One going to outhouse and one going to shed.
Front deck has two sets as well. One on each side.
I put railing posts in and cut, fit, and tacked down all the deck boards. I have to screw them all down yet. I also have yet to do the railing itself l. Railing will be an “ X†pattern every 6’ between posts.
We also Built up the fire pit as well with more rocks around the fire ring on a different bluff overlooking lake and cut stumps for seating. We had a couple bonfires for the first time. I’ve saved and tarped all my cardboard from construction instead of packing out… so we have a huge mound of good burning cardboard for a while! Also have the main scrap pile from construction to burn along with all the trees from
Clearing still.
Wife started painting exterior Falu Red which is the traditional Scandinavian cabin color.
I may yet build another boardwalk or two around trick spots on trail but that yet to be determined.
Also chipped a LOT of branches strategically around cabin to lay down a base ground layer as it had gotten extremely muddy and sloppy from all the walking around in the same places.
I am ALMOST done!! Once deck is complete then construction is all interior. Wall sheathing and window trim is all that’s left.
Interior will be Baltic birch plywood with Battions every 2’ for a “cape cod†type look. That will be painted white.
Then I am done for now at least 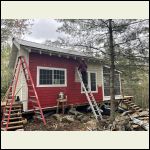
B16A2B511565485E9.jpeg
| 
36A6394006664E36A.jpeg
| 
19B7D67A6BB4422EB.jpeg
| 
68F56C34E03F4AE5A.jpeg
|
|
|
gcrank1
Member
|
# Posted: 1 Jun 2022 20:58
Reply
Wow, after all that its time to take a breath!
|
|
Grizzlyman
Member
|
# Posted: 28 Aug 2022 23:28
Reply
Well 3 months passed since my last true update. I had sort of updated in the construction forum…
Since June we have been up a fair amount but mostly for fun. I’ve only had one true work weekend since then… the rest has been for enjoyment.
I realized the kids were starting to get bored as I’d work during the day…and I don’t want them to associate the cabin with boredom so despite “myself†and my nature to always be working… I’ve tamed the work to just an hour or two per day while there.
This has slowed progress by that’s okay!! nice to actually enjoy the place… been doing lots of fishing w the boys! They are “sunny slayersâ€! nice to actually enjoy the place… been doing lots of fishing w the boys! They are “sunny slayersâ€!
Anyways. Since last update I installed the “x†railings. These were easier than thought. I could simply just hold them in place, trace the outline of the cut and cut them. The 2x4s were angle cut on the short side… so the saw left 1/2â€. This was easy enough to finish with a handsaw.
Then it was interior work. I used 1/4 Baltic birch plywood. Plan was to use as nice of a plywood possible within reason for the best interior look possible. This was nailed to studs. Sheets run vertical. I started with a trim nailer but soon realized a coil nailer was the only way…. Using siding nails. 1/4 is a little flimsy…but it’s fine. It doesn’t look wavy at all…but it doesn’t feel super “solid†either. I settled on. 1/4†since I didn’t want to do 1/2†and 3/8 was not an option in fine plywood. I’m happy w/1/4†as is but it’s not 100% ideal.
I sheeted the entire interior. 1/4†was VERY easy to carry up the ladder and maneuver in general. Cuts were also easy and again 1/4 made things like plunge cutting outlets easy with a circular saw.
That took a couple of days to sheet the interior.
Then covered the seams with battens. Battens we’re 3/8†x2 mull casing. This looks very good. It was expensive however.. and I needed way more than I had hoped. I ended up buying out several menards many times in order to procure enough. I would buy 20-50 at a time and haul up with the family each time I needed somewhere around 175.
I thought about manufacturing my own by ripping and it would have saved a few hundred… but the time involved would have been insane.
Trim went up very easy w the finish nailer. It took time but the process was simple enough. Battens every 2’. Easy enough. Since the roof was 6/12 it was easy to mark and cut all the angles as everything is 6/12 as well.
I trimmed out the windows as well. This took a LONG time. I used select 1x4’s for the widow trim. Looks great but time intensive. I cut sills that protrude past the edge… so lots of notching. Also since I’m not an *ahem* expert window installer (quite terrible actually!) the depth of each window was slightly different which meant ripping the inside trim as well each time. I cut the sills, and 3 inside trim pieces on each window. The cased the window w/ the batten mull casing. Then I cut small square trim to finish the inside and we’re very happy with the look.
The interior is almost finished except for some trim in the loft yet I am in NO hurry to trim the loft on my back/side in the corners and working around furniture.. so that may have to wait 
We’ve also got the inside almost entirely furnished as well- which has take some time too!
We’ve continued to build trails on our 14 acres as well and even “disposed†of the plywood and OSB pile by piling up to make a causeway over some swamp area on the trails.
I’ve cut back lots of trees too. I decided the cabin needed more space … trying to clear 30’ or so around the cabin- save for a few small trees… and it does look better with more space. Lots of limbing and chipping and time involved in this process. All the chipping has given us a chance to build up nice walking paths around the site.
We thought about changing the paint from the interior from white to whitewash. We considered the change to let more natural through since the natural birch looks amazing as is… but we experimented with a few whitewashes and nothing looked really “finished†enough for our liking.
The last step for the interior to be finished is paint. We need to get that done yet this fall. More to come on that…
No pics right now unfortunately since I’m here now and reception is sketchy at best.
Crazy that it’s almost Labor Day and will be shutting down again in a few months!
|
|
Grizzlyman
Member
|
# Posted: 12 Nov 2022 09:58 - Edited by: Grizzlyman
Reply
Well our summer was cut short by a late ice-out in MN (2nd latest on record)… so I Ended up losing about 4 weekend less than average… which means I had more work weekends than anticipated to finish.
This summer I:
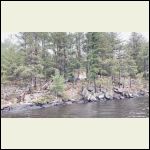
-built a sun deck in the middle of my bluff above dock
- built stairs from the dock up to sundeck
-built stairs from sundeck up the bluff face to the top
- built stairs up 2nd bluff
- built a bunch boardwalks
- built deck in front of cabin
- built deck on back of cabin
- sheeted interior of cabin
-trimmed interior
- painted exterior siding
-cleared lots of trees around site
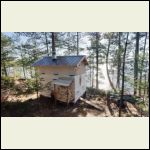
- built a Sauna by lake
-cleared hiking trails
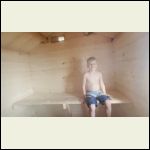
We are 90% done. All I have left next year is a small deck off of sauna, painting interior, and painting/ siding exterior of accessory buildings (outhouse,sauna, shed).
I may also install a pump/ water system of some sort next year.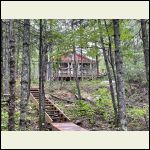
D21D3AE81E66443EB.jpeg
| 
B7B27BF6B43440F6A.jpeg
| 
1CB4B5E8C34F4AAFA.jpeg
| 
EFB3CE226F2E4FFCA.jpeg
|
|
|
Grizzlyman
Member
|
# Posted: 21 Jun 2023 21:34
Reply
Summer 2023 update.
Well we had another late May Ice-out in N Minn.
The late ice-outs really limit my ability to get stuff done. BUT…
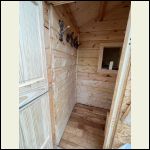
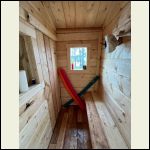
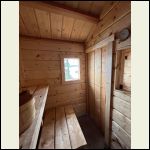
In just a few weeks thus far I was still able to build the deck on my sauna. Was also able to trim out the inside. Built a permanent woodshed for sauna as well.
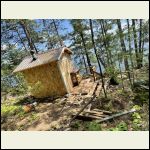
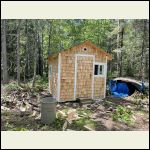
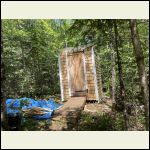
Got all the siding done on my outbuildings. My shed/bunkie and my outhouse had been sitting in tyvek for 2 years. I used cedar shakes instead of hardiboard shake siding… way easier, way faster, and waaayyy lighter to carry. I would have done the entire cabin this way if I could go back and do it again. I did all three outbuildings in about a day and a half only.
We also got the interior ground floor fully painted. Still need to do the big gable wall at the top and the loft… but progressing.
2 major projects left. One “easy†and one not hard but still fair amount of construction… after which we will be fully finished. I need to install a water system with a pump from the lake (easy) and we’re going to install nail up copper ceiling tiles in the bedroom and kitchen to cover the open joists.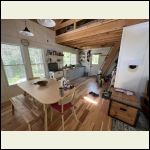
DBDA95B8B15843579.jpeg
| 
22EE6B9A82D84366A.jpeg
| 
1B1105055EC94B808.jpeg
| 
FEC044E16FF742B4B.jpeg
|
|
|
Grizzlyman
Member
|
# Posted: 21 Jun 2023 21:44
Reply
Few more pics…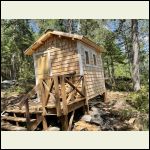
9B7BE7D2EB45438BB.jpeg
| 
7DEE64BCD1DB4AB5B.jpeg
| 
D618027315154208B.jpeg
| 
C698729FB5264D578.jpeg
|
|
|
Grizzlyman
Member
|
# Posted: 21 Jun 2023 23:00
Reply
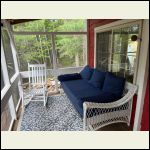
And few more…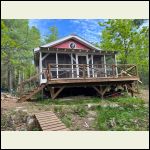
E41F2831F950472BA.jpeg
| 
1CB56BDB91BB472DB.jpeg
| 
7EDDDCC6F195400AA.jpeg
| 
7EE8385716F747579.jpeg
|
|
|
Grizzlyman
Member
|
# Posted: 30 Jul 2023 22:59 - Edited by: Grizzlyman
Reply
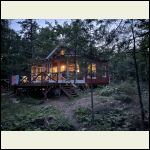
Water system installed. Detailed on another thread here. Basically pumping water up to cabin. Then pushing though a reverse osmosis filter for drinking water. Been using this for a few weekend now and seems to be a good fit.
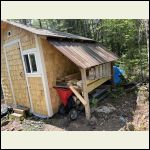
This weekend I built a lean-to on the side of my shed/bunkie. This is meant to primarily be a final resting place for my excess lumber. The “lumberyard†is finished. Last year I spent a day collecting and transporting all the extra lumber from
Various piles and places. I had nailed a few boards between trees to set all the wood on. Covered with tarps until now. I also have the wood chipper underneath.
Speaking of which, we spent a lot of time on site cleanup today. We chipped for hours and really cleaned up a lot of the site still have lots to do.
I also started moving my big construction pile. I had it piled next tot he cabin this entire time. I found a spot in a depression about 100 Yards back and away from the cabin. I’ve been moving the pile there- made about 35 trips so far carrying boards or buckets full of cut pieces.
I suspect another work weekend and I’ll be able to clean up the site more or less to its final appearance. I do still have mounds of cardboard under tarps to do something with…. So not quite there but Getting close!!
I may still put a copper ceiling up, and I want to build a smaller, simpler lean/to by the sauna for all our water toys and gear.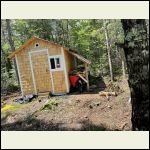
1A5A001A92244669B.jpeg
| 
A8BE0BBB7353466B9.jpeg
| 
DFB9F119051846B49.jpeg
|  |
|
|
Nobadays
Member
|
# Posted: 31 Jul 2023 08:54
Reply
Very nice!
|
|
Grizzlyman
Member
|
# Posted: 11 Sep 2023 14:20 - Edited by: Grizzlyman
Reply
Well spending a lot more time fishing than building these days;). That is a good thing!
Reverse osmosis filter still working great- it’s maybe the best tasting water I’ve ever had… but it is slow. Totally fine by myself or for a few of us but with a family of 5 it could be better. We’ll see if it stands the test of time.
I have still been busy though- Albeit just a few couple hour per day.
Since last update I have :
Hooked up a pressure tank to “make water†when not pumping.
Built a lean-to on our sauna to keep the tube, water toys, etc.
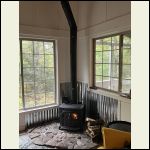
Swapped out the cheap stove for a used Vermont castings stove. Hauling that thing up the hill was something else. Even without the doors/grates/ etc… it was probably 200 lbs+ still. Thankfully I’m strong enough to do it-one step at a time- but my god that was tough!!! I even got bruises on my arms from the stove just from holding it!!Took me an hour or more…. And I thought the old one was heavy lol!
Hooked it up just this weekend and man the difference is staggering. We got about 4-5 hrs of even 3-400 degree heating from just a handful of logs. It’s really nice to have a top notch stove and will make the stove much more enjoyable.
I had to rearrange the pipe stack for that stove as well. Due to lesser clearance requirement , I was able to better arrange it in the corner where it should be- the other stuck out too far. This took a little while messing with stovepipe but not too difficult- just time consuming.
I also cleared the garbage pile (yeah!) I have reclaimed the site now from “constructionâ€. We ended up taking about 60 or so trips moving the garbage away from the cabin.
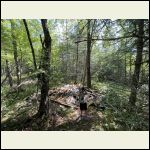
I also have now cleared a solid 30 ft or so around the cabin. I cut trees, started filling the woodshed, and the big thing was just simply moving the “wrist sized†logs/ or branches that aren’t good for firewood and are too big to chip out of the area. It’s amazing how many dead old logs/sticks I cleared. …hours of just throwing sticks/log chunks into the woods…. I tried to disperse the branches evenly in the forest and hide them behind thickets so it doesn’t look like we’re penned in. I cleaned out all the small poplar growth as well as stamping down all the rotted logs and everything else from inside the perimeter.
Did a lot of chipping as well. Mostly have cabin site itself entirely cleaned up for now. Sauna site still needs work.
I also finished my stairs and handrails on the deck.
Tin ceiling is going to wait till next year- we like it as is so not sure if we’ll do that or not.
…Have to start thinking about clearing out the water system. Got maybe a week or two before we start to see frost/freeze here in mn.
Edit: two of the photos are messed up. No idea why. Tried to fix but just moving on. Reposting below did work.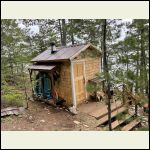
E0D6BEBBFCD6462DB.jpeg
| 
AA8E521FB23547279.jpeg
|  |  |
|
|
gcrank1
Member
|
# Posted: 11 Sep 2023 14:42
Reply
You've come far!
|
|
Grizzlyman
Member
|
# Posted: 11 Sep 2023 14:53 - Edited by: Grizzlyman
Reply
Trying separate post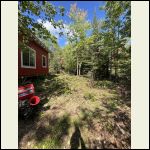
9DEE049B68A8467AB.jpeg
| 
896553CA9267403E9.jpeg
|  |  |
|
|
| << . 1 . 2 . 3 . 4 . >> |

