| . 1 . 2 . 3 . 4 . 5 . 6 . >> |
| Author |
Message |
SonnyB
Member
|
# Posted: 8 May 2012 10:58
Reply
Started my 20x32 1 1/2 story a few weeks ago. Had road cut in, tree cut down and gravel put in.
|
|
SonnyB
Member
|
# Posted: 8 May 2012 11:27
Reply
Have some road work done and losts of wood to start cutting up and splitting for next winter!
|
|
SonnyB
Member
|
# Posted: 8 May 2012 12:08
Reply
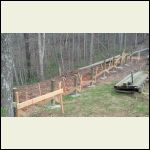
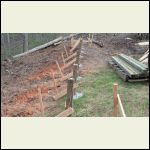
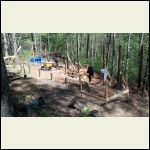
More photos!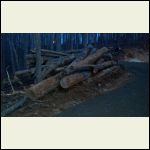
2012Wood_Pile.jpg
| 
201203First_row_of.jpg
| 
201203Post.jpg
| 
201204Most_of_the_.jpg
|
|
|
SonnyB
Member
|
# Posted: 8 May 2012 12:11
Reply
Yes all post holes were dug by hand and we mixed 50 lb bags of concrete by hand. Holes are 24-36 inches deep! It took about 3 weekends to get this done.
|
|
MJW
Member
|
# Posted: 8 May 2012 12:21 - Edited by: MJW
Reply
I will be following this one closely. This is the exact size and type we are wanting to build and same foundation.
Where are you located?
Congrats, SonnyB!
|
|
SonnyB
Member
|
# Posted: 8 May 2012 15:07
Reply
Thanks!
I have been watching this site for about a year. I bought 4.21 acres in Blairsville which is north GA. I will have 12' walls with a loft on both ends.
|
|
MJW
Member
|
# Posted: 8 May 2012 15:12
Reply
I know exactly where you are. I used to have a house in Ellijay.
Your place is sounding more and more like my plans with the exception of the loft. Only one end on ours and open on the other.
Can you tell me more about your foundation? How many piers set how far apart? What are you using for beams? How much concrete are you adding in each hole?
Thanks for any info.
|
|
SonnyB
Member
|
# Posted: 8 May 2012 20:39
Reply
I have 3 rows of post. 1st and 2nd row are 4x4 post and are 4 ft apart. 3rd row is 6x6 post and I have one at each end one at 16' and then divided the other post between the 16' span. So I have 7 post on the back row. I went with 6x6 post because I am about 7 1/2' to 8' high at the back row.
Each 4x4 post hole took 4-5 bags of 50 lb fast set concrete. The 6x6 post took 7-9 bags per hole.
|
|
|
MJW
Member
|
# Posted: 8 May 2012 20:58
Reply
Holy cow! That is alot of Quikrete!
Anxious to watch your progress. Thanks!
|
|
jgiffi
Member
|
# Posted: 9 May 2012 00:40
Reply
Sonny great job! Any reason you are filling the holes completely with concrete? just curious... keep up the good work and keep the pics coming
|
|
SonnyB
Member
|
# Posted: 9 May 2012 07:49
Reply
Im on such a hill I just think it will keep any run off water that does get under the cabin from settling around the post or washing out around them.
|
|
SonnyB
Member
|
# Posted: 9 May 2012 07:53
Reply
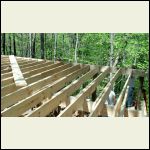
Starting to frame up rim joist and floor joist. I used 2x10 for the floor joist 16"oc and double rim joist around the outside. In the middle of the 20' span I put a double 2x10 beam that the joist rest on top off. I also used 12' 2x10 for the joist so I would have a 4' over lap in the middle of the floor for extra support. I know its overkill!
|
|
SonnyB
Member
|
# Posted: 9 May 2012 07:55
Reply
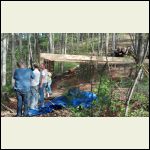
Here are some pictures I forgot to add!!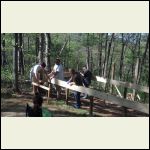
20120412_171327_.jpg
| 
201204Floor_joist..jpg
| 
201204Floor_joist_.jpg
| 
201204Jacob.jpg
|
|
|
turkeyhunter
Member
|
# Posted: 9 May 2012 08:15
Reply
very nice job----i built my cabin 20' x 30' ( 1 1/2 story) --wish i had built it 20 x 32 the extra 2 ft. would have been nice in the kitchen area. What are you using for the outside siding???
|
|
Swamphunter
Member
|
# Posted: 9 May 2012 10:14
Reply
YES!!! I love watching a new build! Especially with detailed pics!!! Thank you SOOOOO much!
|
|
curious
Member
|
# Posted: 9 May 2012 10:56
Reply
How are those rims fastened to the posts?
|
|
SonnyB
Member
|
# Posted: 9 May 2012 11:58
Reply
Thanks for all the compliments!
turkeyhunter I will be using 12" pine siding.
curious I used 3" deck screws through the first rim joist and then used joist hangers on the inside also. Then I went back and installed the second(outside) rim joist. Then I used 3" deck screw and screwed to the post inside and out. Also using a "T" metal strap to the outside of the post. Hope I explained it so you can understand.
|
|
SonnyB
Member
|
# Posted: 9 May 2012 12:03
Reply
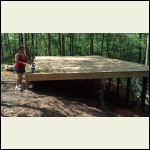
Subfloor done! Used Advantec plywood. A little costly but I knew it would be in the rain and it comes with a 300 day rain warr. and 50 yes also. Screwed it down with 2 1/2" deck screws and subfloor adheisive.
2012_Putting_in_Flo.jpg
| 
Floor_Framing.jpg
| 
201204Sub_Floor_in.jpg
|  |
|
|
MtnDon
Member
|
# Posted: 9 May 2012 13:06 - Edited by: MtnDon
Reply
Good to see Advantec being used. It is great stuff!!
The deck screws could be a future problem. They are hardened to make the drive sockets resist tear out when being driven. That however, makes them brittle. When under a lateral, sideways, load they snap rather than bend. Sudden failure, no warning. Deck screws are called deck screws because they are meant to be used to hold down deck planks. Screws like the GRK RSS are rated for structural use. There are also other brands; you can usually find "Headlok" and "Ledgerlok" at the big box stores. They are also good. The RSS, Ledgerlok and Headlok are good too as the built in washer head helps prevent overdriving. Connections where screws have their heads buried in the wood have less strength. Amazon sells GRK screws online that are well priced especially if you have Prime membership for free shipping.
Another good idea would be to install HD angle supports under those rims. Those would be best through bolted to the posts, although structural screws can be used as well. They would offer a sturdy shelf to support the rims. That is better than relying on the 2x rims not developing cracks/splits at the point the screws penetrate. There will be a lot of weight bearing on those rim to post connections by the time the cabin is completed; especially if there is much snow. You could make you own from 3/16 steel angle stock; wide enough to support both rims. Simpson also sells some brackets and they have their own screws approved for structural use. Look for their HL series angles.
|
|
Borrego
Member
|
# Posted: 9 May 2012 17:45
Reply
What Don said +1
Nice looking build Sonny and welcome to the forum, it's a great place!
|
|
turkeyhunter
Member
|
# Posted: 9 May 2012 19:45 - Edited by: turkeyhunter
Reply
Quoting: SonnyB turkeyhunter I will be using 12" pine siding.
i know where you can get Hemlock ( old growth trees from NC) 1" x 10"' siding up your way ( North GA) --custom cut-- for board and batten---way cheap and a super nice guy to deal with. He also saws pine as well. He delivers all over north GA.
|
|
SonnyB
Member
|
# Posted: 10 May 2012 15:52
Reply
Turkeyhunter can you give me his number or a way I can get in touch with this guy? I am going up this weekend and would like to talk to him an get some prices. It mountain building supply in Blairsville sells 1x12 TG white pine for .99 lft.
Im going to start on some walls this weekend!
|
|
MtnDon
Member
|
# Posted: 10 May 2012 17:16
Reply

|
|
turkeyhunter
Member
|
# Posted: 10 May 2012 18:39
Reply
SonnyB
got a email i can send his phone number too??? hate to put his cell #'s on the world wide web--thanks
when you start putting up the walls it will look like a cabin---looking forward to more pic's!!!!
|
|
SonnyB
Member
|
# Posted: 11 May 2012 09:40
Reply
my email is braswells@butts.k12.ga.us
|
|
turkeyhunter
Member
|
# Posted: 11 May 2012 13:52
Reply
SonnyB
just sent you a email with the sawmillers info===
|
|
SonnyB
Member
|
# Posted: 14 May 2012 08:50
Reply
Thanks turkeyhunter for the info!
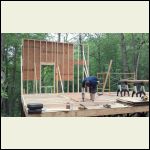
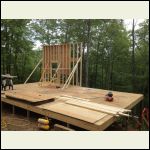
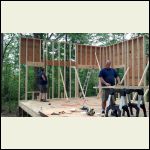
Another productive day! Had my wife and son in law help me out this Sat. Did a little burning of limbs and brush. We nailed up one section of back wall that is 16' wide and 12' tall using 2x6 for the walls. Then nailed up the sections of side wall that totals 20' long! That back wall wall was HEAVY! It took all three of us to lift it up. Now three sections up and level!! Not bad for about 5 hours worth of work! We would have gotten the rest of the back wall built and up but the rain came in and we headed home.
20120504Burning_li.jpg
| 
20120512First_Wall.jpg
| 
First_wall_section.J.jpg
| 
20120512_Side_wall.jpg
|
|
|
turkeyhunter
Member
|
# Posted: 14 May 2012 09:45
Reply
SonnyB--you now have a cabin....
glad you got the walls started. looks GREAT!!!!
boy we got the rain this weekend---but we needed it.
|
|
SonnyB
Member
|
# Posted: 14 May 2012 15:07
Reply
Mtndon just to let you know I am going back with the nail gun and nail everything where I used decking screws.
|
|
MtnDon
Member
|
# Posted: 14 May 2012 20:24 - Edited by: MtnDon
Reply
Quoting: SonnyB ...back with the nail gun and nail everything where I used decking screws.
That's better, but still leaves some questions....
Many nail gun nails are the equivalent of box nails. A 16D box nail (3.5 x 0.135") nailed through a 2x into a post 3,5 inches thick or thicker, has a shear strength of 113 pounds (using Southern Pine, other species may vary a little, not much though). Multiply that by the number of nails used and that is the total weight the nails can theoretically support. If real "common" 16D nails (3.5 x 0.162") are used the shear is 154 pounds.
How much does the floor weigh? 20 x 32 = 640 sq ft. If we use the rule of thumb of floors having a Dead Load (DL) of 10 PSF we have 6400 lbs. One quarter of that rests on each outside side (32') wall, one half on the center row. A quarter = 1600 lbs. 7 posts (back row), 7 nails per post = 49 nails. 1600 / 49 = 33 lbs per nail. But no walls, no roof load has been included. Nor has any Live Load (LL = people, furniture, etc) been included.
That's ignoring the screws I know. They might break so not counting is fair. Maybe, maybe not. Maybe they won't shear because the nails will prevent that, keep the loads low enough. We don't know?
The rule of thumb for living spaces is 40 PSF. Sometimes with cabins we can get away with 30 PSF. (smaller fridges, smaller TV, no bookcases....) So if we add 30# of LL to the DL that will multiply the floor load to 6400 on an outside row of posts. 6400/49 = 130 pounds per nail. Oops, that could surpass the safe load.
Adding more nails raises the problem of too many nails in too little space. When the nails get too close together you can run into a situation where the wood fibers can begin to separate, fail, prematurely. In that case the nails total shear strength increases but the ability of the wood to carry load decreases. Point of diminishing or no returns.
What I'm getting at is it is too bad you never published the plan before you nailed pieces together. Those side rim 2x10's will be supporting a quarter of the floor load, if we assume an equal spread out loading. They may very well be overloaded. Have 5 250 pound folks gather in one corner and that assumption shifts. As well as 1/4 the floor load there is the total weight of the 12 foot side wall above the rim; maybe 120 pounds per linear foot. Then the roof. Total roof weight, just the DL, could come to 9600 using a DL of 15 PSF. The norm is 10 PSF but with a steep pitch roof the rafters are longer, there is more sheathing, more shingles or metal, so 15 PSF is the safe factor to use. That could be an additional 4800 pounds on the side rims, or about another 150 pounds per linear foot of wall length.
We haven't factored in the gable end walls or the loft. Nor has the "weather" load on the roof been added; rain, wind and if there ever is snow.
This is why the main side and center supports (usually beams not 2x10's) for a structure are usually placed on top of the posts. The load carrying capacity of lumber in compression is much higher than the shear strength of nails, plus you don't have to worry about the wood fibers separating under load.
Then....
Quoting: SonnyB I used 3" deck screws through the first rim joist and then used joist hangers on the inside also. Then I went back and installed the second(outside) rim joist.
It's not totally clear to me how the rim joists are being used and what task they are fulfilling. I see one 2x10 is fastened to the inside face of the posts, the 2x10 running down the 32 foot length. Floor joists are hung from that 2x10 rim on the inside face. Where is the second 2x10 rim? Was it fastened to the posts on the outside face of the posts?
If it is on the outside face of the posts is is not supporting any floor load. It may help support wall load if the wall bottom plate reaches out over that outer 2x10 rim. A single 2x10 on the inside face of the posts is not really up to supporting the floor loads.
I know this sounds harsh, but it is what I see and how the numbers crunch. Perhaps I'm grossly wrong on how this was put together. I apologize for any errors I have made by assumption or my interpretation of what I believe I see.
It probably won't come crashing down if you add those nails. But it also is not as strong as it should be. Adding steel angle irons as supports would help but this is inherently a less than ideal platform on which to build a 20 x 32 structure with a loft or second floor.
|
|
| . 1 . 2 . 3 . 4 . 5 . 6 . >> |

