| << . 1 . 2 . 3 . 4 . 5 . 6 . >> |
| Author |
Message |
MJW
Member
|
# Posted: 20 Feb 2013 18:21 - Edited by: MJW
Reply
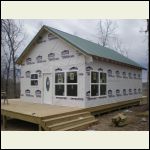
Even though it was colder than heck today (25 degrees most all of the day) we still got our goal completed of getting the house completely dried in.
Yes! We are dry!
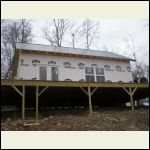
Today we completed the front gable end on the house, got house wrap installed and all windows and doors in.
The forecast for tonight and early tomorrow is 1 inch of ice/freezing rain and 1 - 3 inches of snow so I think tomorrow will be an off day.
Hopefully we will get back out on Friday to build one more set of deck steps and the stairs inside the house.
Right now there is a hot cup of Earl Grey with my name on it. 
Hopefully that will thaw me out.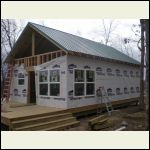
House Wrap Going On
| 
Wrap Completed on the Back Side
| 
PawPaw Teaching Matt How to Secure the Door
| 
Gables Complete - Wrap In - Windows & Doors In - House Dry!
|
|
|
Thunder9
Member
|
# Posted: 20 Feb 2013 19:57
Reply
you're making great progress. Keep sending pics.
|
|
MJW
Member
|
# Posted: 21 Feb 2013 09:48
Reply
I had someone ask about a floorplan and with the ice storm today I am stuck inside so I found a floor plan website and put these images together.
The house is 20 x 32 with a 12 x 20 loft area that will be our son's room and a little additional storage. The first floor will have our bedroom (12 x 14) and a bath (6 x 12) that will leave a 20 x 20 with cathedral ceiling for the kitchen, living room, dining room, office area.
The deck runs 10 ft out from the house on 3 sides totaling 920 sq ft, making it larger than the house sq footage. It caused me to go way over budget but the feeling you get when out on it is incredible and I wouldn't change it for anything.
Due to the small sq footage of the house, we figured leaving the ceiling area open would allow us to add a second loft later if we decided we needed the room. After getting the house dried in, however, I can't imagine closing that high ceiling up. It looks great.
I hope this answered the questions on floorplan but if not, let me know.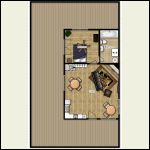
1st Floor and Deck Area
| 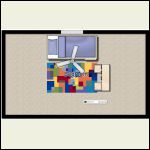
Loft Area
|  |  |
|
|
turkeyhunter
Member
|
# Posted: 21 Feb 2013 13:46
Reply
AWESOME job!!!! fast work dryin it it!!!! Congrats!!!!....same size as my cabin, and the layout is close, just kitchen sink in other corner of 1st floor....same loft area as mine!!!!green roof too!!!! nice size cabin!!!!
|
|
MJW
Member
|
# Posted: 24 Feb 2013 14:35 - Edited by: MJW
Reply
Thanks, TH. I have admired your project in the past. The 20 x 32 seemed to be just right to us, too.
Spent Fri & Sat finishing up a few things. Got the loft stairs built, trimmed the deck boards off (quite a chore on 92 running feet of deck) installed the locks on the house and built another set of steps off of the back of the deck.
We were also supposed to get the fireplace installed on Sat but discovered we were short one piece of insulated pipe and not one fireplace store had what we needed in stock so we had to order it. Hopefully we will be able to get it in this coming week.
We unloaded the rental truck (kitchen cabinets, stove, fridge, flooring for the loft, deck rails & posts, bathroom vanity, assorted lights, etc.) and took it back. Even at $50 a day it was well worth having it as it was a real time saver with regard to trips to the home improvement store and a place to secure materials and tools until the house got dried in.
It looks like we got the roof on just in time. On Wed night/Thursday we got an inch of ice and 3 inches of snow. I can't imagine what a mess things would be if the top hadn't been on for that.
Today we drove in and picked up the flooring for the bathroom, hardware for the kitchen cabinets and the insulation for the entire house. Installing the insulation will be the project for the next couple of days.
No pictures from this weekend but with working around all of the snow/ice etc. no one took any. Hopefully I will be able to update them tomorrow.
The weather calls for rain coming in tomorrow night turning to snow for Tuesday & Wed. *sigh* 
At least we can work in the house now.
|
|
MJW
Member
|
# Posted: 25 Feb 2013 18:43 - Edited by: MJW
Reply
Went out today to get started on the ceiling insulation and the guy that was supposed to deliver the scaffolding didn't show. 
We spent a couple of hours sweeping up inside and organizing, laying out the kitchen cabinets to get a "feel" for how it will all come together and burning some scrap wood and other debris.
We then drove to a local building supply place to order the flooring for the main room & our bedroom as well as the wood siding we will be installing on all walls in the house.
While I was there ordering the siding and flooring, I "accidentally" bought a Porter Cable 18v cordless 4 piece tool set. 
It is raining cats and dogs right now with the weatherman saying it will be changing to snow tonight and more snow for possibly the next 2 days. I am afraid there will be little to no progress during this time.  
1/2 of the Insulation
| 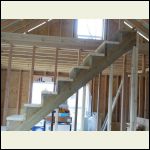
Stairs to the Loft
| 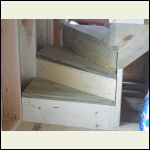
Stair Landing
| 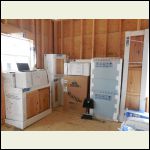
Kitchen Ready to Install
|
|
|
MJW
Member
|
# Posted: 28 Feb 2013 12:14 - Edited by: MJW
Reply
We are actually having a very productive week despite the weather.
On Tuesday we met with the guy that will be installing our solar. He has actually been an offgridder himself for almost 20 years in our area and was a wealth of information and advice. He gave us a very good price on a system that will meet all of our needs and is easily expandable if we ever need to do so.
Went out yesterday and started on the cabin insulation & bird blocking.
By the end of the day we had all of the ceiling & gable insulation up as well as about 1/4 of the walls done. The wife had gotten a large area of debris, limbs and wood scraps burned as well.
We also met with the owner of the local lumber yard that will be milling the rough cut lumber we have decided to use as exterior siding on our home. I was pleased to find out that we will be able to completely side the house for under 1k.
We are taking the day off today to celebrate my wife's birthday. We will actually be shopping for something that's not cabin related and going out to dinner at her favorite Mexican restaurant.
The schedule for tomorrow has us starting the electrical wiring and getting the fireplace framed up and insulated pipe installed so we can start burning some wood INSIDE the cabin and stay warm while we work.
These damp 30 to 35 degree days are killing me.  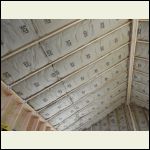
Ceiling Insulation
| 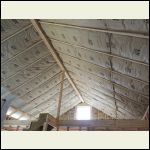
Ceiling & Gable in Lot Insulated
|  |  |
|
|
MJW
Member
|
# Posted: 2 Mar 2013 12:13
Reply
Even though we had light snow all day yesterday and the high was only 30 degrees, we got most of our goals for the day completed.
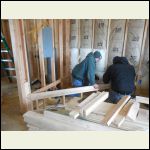
The breaker box was installed, wall boxes put into place for all outlets and switches and 90% of the wiring run for the entire house.
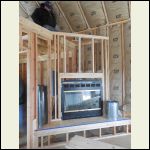
We also got the fireplace framed up and the first piece of pipe put into place before we ran out of daylight.
Taking the weekend off and back at it on Monday to complete the wiring and pick up the wood flooring and siding that came in.
Have a great weekend everyone!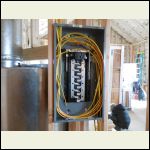
Panel Box Installed
| 
Building the Hearth for the Fireplace
| 
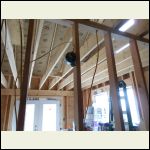
Finishing Up the Framing
| 
Running the Wire
|
|
|
|
MJW
Member
|
# Posted: 4 Mar 2013 21:39
Reply
Today was a beautiful day! Sunny with a high of 57.
Of course all the work we did today was on the inside. 
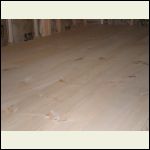
We completed the house insulation, electrical wiring and got almost all of the loft floor installed. The wife also cleaned up a large area that got burned.
Tomorrow the forecast is a high of 40 with 35 mph winds. Glad to be inside for that.
Tomorrow's plan is to complete the loft floor and start on getting the interior siding up.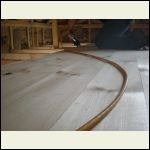
Putting in the Loft Floor
| 
Loft Floor
| 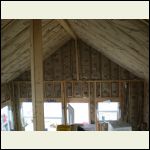
View from the Loft Into the Great Room
| 
View from the Loft Window
|
|
|
Paul
Member
|
# Posted: 5 Mar 2013 01:13
Reply
you are really moving along fast, nice work too. I looks like it will be a great place when done.
Quoting: MJW I was pleased to find out that we will be able to completely side the house for under 1k.
is that buying and milling it?
|
|
MJW
Member
|
# Posted: 5 Mar 2013 18:48
Reply
Thanks, Paul. We were trying to get it completed and move in by the middle of the month but getting the well drilled has been a challenge so now our target is "by the end of the month." If the well is drilled by the latest date given to us, that is doable.
The 1k price of enough rough cut to side the exterior is the cost for boards already cut and bundled for sale at the sawmill. This mill is only 10 miles down the road from us.
|
|
MJW
Member
|
# Posted: 9 Mar 2013 07:44
Reply
The going this week has been much slower as we are starting on the more detailed work.
This week has been focused on starting the interior siding and getting the 2 beams up in the living area.
Figuring odd cuts and angles, working up on ladders and scaffolding and trying to minimize waste on the materials has taken much longer and been more tedious than I figured but we are moving along.
We did take a break yesterday from the interior work and do a little cleanup outside in the "front yard" area and build a firewood rack and fill it up with some of the firewood we have collected.
The plan for today is to finish framing in the fireplace and move along with the siding on the ceiling.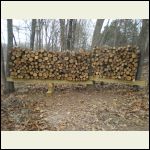
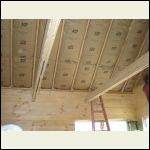
Firewood Rack
| 
Beams and Siding
| 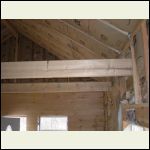
Beams and Siding
|  |
|
|
MJW
Member
|
# Posted: 10 Mar 2013 11:40
Reply
Well, if anyone is still out there and interested, here is the update for yesterday.
We got quite a bit of the siding up, completing one gable end and half of the ceiling. We also finished the framing up of the fireplace and hauled quite a few rocks to an area that we are going to use for our outdoor firepit area.
There will be rain all day today so we are relaxing and regrouping, taking stock of where we are with materials, etc. and what we need to wrap things up. It looks like we are going to have to purchase more siding next week. 
For the more visual of you out there I am attaching a few pictures from the day.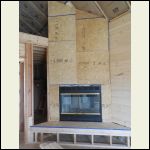
Fireplace Framed Up
| 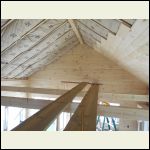
Gable Sided & Ceiling Started
| 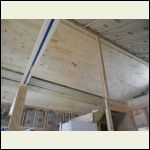
Ceiling One Half Completed
| 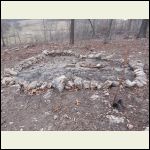
Fire Ring Started
|
|
|
Paul
Member
|
# Posted: 10 Mar 2013 13:08
Reply
that is some beautiful t and g work. What are your plans to finish the top of the ceiling? I have almost the same set up but with drywall. The only thing I can come up with is to box it off with cedar 1x6 to look like a beam.
|
|
MJW
Member
|
# Posted: 10 Mar 2013 14:29
Reply
Thanks, Paul. It is really taking alot more time to do this than I had thought it would, though. What with trying to square the joints, avoid joints in the same place and staying on level, there is alot more to it than it appears. 
The plan for now is to wrap the main ceiling beam and the 2 living room beams with the same siding we are doing the walls and ceiling with. We were planning on just ripping them and wrapping all 3.
I originally wanted to find beams from a barn tear down to use but couldn't find any that I liked the looks of by the time we needed them so we fabricated them with the plan on just finishing them out with something else later.
Your cedar plan sounds like it would look nice. There seems to be alot of cedar available here for a good price so that is definitely something to consider here. Something different would break things up nicely.
|
|
beachman
Member
|
# Posted: 10 Mar 2013 19:43
Reply
Gotta get back to MO. I was born there but was moved (not my say) to the east coast and haven't been back. It looks beautiful! It always takes longer than you figure to put these things together. Nice that you can spend basically full-time on the project and you had good luck with the weather. I'll keep a watch on this one. Looks great!
|
|
MJW
Member
|
# Posted: 14 Mar 2013 20:33
Reply
Thanks, beachman. Yes, we are lucky to be able to spend so much time on the project. Working from home helps.
This week has been spent largely on detail work with installing the interior siding taking breaks from time to time to do outside tasks such as raking and building a shed where we will store our propane tanks.
We completed the ceiling today and started wrapping the main beam with siding.
We had a visitor yesterday in the form of a turtle that must have thought due to the recent warm weather that hibernation was over. Once outside he decided a few more weeks of sleep were in order and quickly dug another hole a few feet deep and covered himself back up. 
The goal for tomorrow is to finish the last wall in the house with siding and get the remaining 2 beams wrapped then complete a little electrical work.
Grandma Helping Out
| 
Our Visitor
| 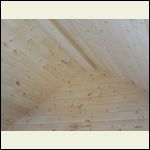
Completed Ceiling and Beam Wrapped
|  |
|
|
MJW
Member
|
# Posted: 28 Mar 2013 22:39 - Edited by: MJW
Reply
Updates are slow now but between the weather and the incredible amount of time the details take, progress seems really slow, too.
Seven inches of snow last week didn't help our timeline but we still managed to get some work done. Our 5 year old got to build his first snowman, too. 
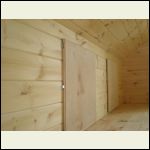
We have completed the interior siding, installed one of the 2 knee walls in the loft for storage, installed kitchen cabinets & countertops, installed the bedroom & bathroom doors, got all the bathroom fixtures in and completed all of the electrical and plumbing.
The big deal over the last couple of weeks, at least to the wife, was the completion of the "under the stairs storage area."
My wife is an extreme couponer. A VERY good extreme couponer. In fact, the money she saves by couponing had alot to do with us being able to build this place and pay cash for all of it. She always needs space for her latest haul of "50 cans of free tomatoes" or "20 boxes of free cereal" so the under the stairs storage idea was born.
Every storage space I have ever seen under stairs had tons of wasted space so why not treat it like a giant cabinet? That's what we did. Eight cabinet doors and three sheets of OSB cut into shelves later we have enough storage under the stairs to make her smile. I like it when she smiles. 
Today we got started on applying the poly to the cathedral ceiling area and will probably spend most of next week completing the interior poly.
A couple of light fixtures to install, applying stone to the fireplace and the flooring to be done over the next couple of weeks and we will be wrapping things up.
Matt's First Snowman
| 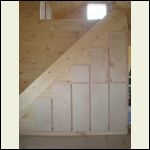
Under the Stairs Storage
| 
Three Feet of Extra Storage in the Loft
| 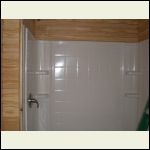
Shower Unit Installed
|
|
|
Goatman
Member
|
# Posted: 30 Mar 2013 12:52
Reply
I like this idea, I think I might adopt it and change it some.
|
|
Goatman
Member
|
# Posted: 30 Mar 2013 12:53
Reply
very beautiful!
|
|
hattie
Member
|
# Posted: 30 Mar 2013 12:59
Reply
Beautiful place. I love the under the stair storage idea! Genius!!!
|
|
MJW
Member
|
# Posted: 30 Mar 2013 15:23
Reply
Thanks, guys.
Yeah, the under the stairs storage was one of my better ideas.
I am known for occasional milliseconds of brilliance. haha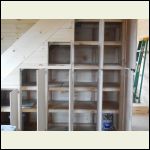
Under the Stairs Storage Shelves
|  |  |  |
|
|
trollbridge
Member
|
# Posted: 30 Mar 2013 16:33
Reply
The smile on your sons face is priceless!
Terrific use of space under those stairs. It all looks great 
|
|
MJW
Member
|
# Posted: 31 Mar 2013 10:26
Reply
Thanks, TB.
Yes, he is a pretty happy kid. Coloring eggs and such today.
I appreciate your comments. We have worked hard and there is still alot to do.
Happy Easter!
|
|
trollbridge
Member
|
# Posted: 31 Mar 2013 12:06
Reply
Happy Easter to you too.
The last Easter basket was finally found (sneaky bunny) and we just finished making fried donuts-not healthy, I know, but they were delicious!!!
Would be fun to make at the cabin some time
Enjoy coloring eggs!
|
|
MJW
Member
|
# Posted: 1 Apr 2013 10:34 - Edited by: MJW
Reply
Donuts sound awesome...healthy or not. 
I can afford to eat a couple these days. My father in law told me he would have me looking like Arnold Schwarzenegger by the end of our cabin construction. He didn't exactly deliver on that but I have lost about 15 pounds. haha
|
|
MJW
Member
|
# Posted: 5 Apr 2013 21:35
Reply
Another week of slow progress toward completion...
This week we got the gas complete, water heater installed, all gas lines pressure checked and tested, automatic switchover regulator installed, 2 - 100 lb tanks filled and installed.
The well was drilled and capped. 30 gallons a minute at 349 feet. Hoping to have the pump and pressure tank installed next week.
All light fixtures, ceiling fans and last minute electrical details installed and completed.
2 greatroom ceiling beams wrapped and finished out.
Roof put on propane / generator shed and some exterior siding installed.
With excellent email & phone coaching from toyota_mdt_tech, was able to get my Honda EU2000i wired up through the panel box to run the house via a breaker. Was VERY pleased to find just one of the pair was needed to run the entire house. Fridge, lights and ceiling fans all on eco mode! This is great news as our solar installation has been delayed. Sure is nice to know electric will not be a problem regardless. Thanks, tmt!
Started construction on the loft handrails today. We are building them with the same siding we used inside the cabin. Lots of ripping! Hope to wrap them up in one more session.
All in all, a productive week. T-minus 2 weeks to move in!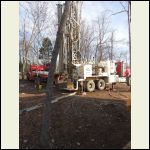
Drilling the Well
| 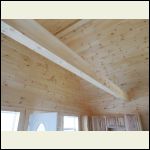
Beams Wrapped
| 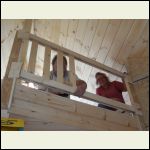
Handrails Going Up
| 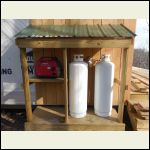
Generator & Propane Shed
|
|
|
Bzzzzzt
Member
|
# Posted: 5 Apr 2013 21:56
Reply
You guys have made some good progress. Is looking very nice!
|
|
MJW
Member
|
# Posted: 8 Apr 2013 22:36
Reply
Thanks, Bzzzzzt. We really like it.
We finished up almost all of the poly today and are going in search of hearthstone tomorrow so we can install it and stone the fireplace this week then on to the floors this weekend.
|
|
MJW
Member
|
# Posted: 11 Apr 2013 20:03
Reply
Taking it a little easier this week so not as much done.
We spent one day in search of something to use for a hearthstone and found some sandstone we liked at Home Depot. Used some of them solid and busted up a few to put together a hearth that looks pretty good.
We found a guy that had a bunch of 3 inch thick black walnut slabs and got one to use as a mantel. Cut it to length and cut a couple of pieces of the scraps for corbels and got that installed.
Starting on the stacked stone tomorrow to complete it.
Spent more time than I anticipated on the loft rails but they are really looking good, I think so anyway.  Hopefully only a couple more hours on them and they will be completed. Hopefully only a couple more hours on them and they will be completed.
We had hoped to have a well pump in place by now and working water but finding someone to trench the ditch the 20 feet from the well to the house has been a challenge. Maybe I am the only one that thinks $300 to $500 is a bit excessive for a 20 foot ditch but I do. Found a guy that says he will do it for $100. Guess we'll see if he shows up tomorrow. 
Otherwise got the cabinet hardware installed, doorknobs put on and washer / dryer put in.
In other news, after a rain a couple of days ago, we walked around the house to see what tracks we could spot. In the well drillings right behind the house we saw deer, racoon and cat tracks that were over 3 inches across. The picture is not very good but that was one big cat. 
Got to get that game cam soon.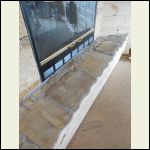
Hearth Installed
| 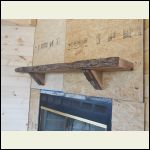
Black Walnut Mantel
| 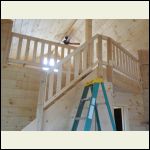
Loft Rails
| 
Cat Tracks
|
|
|
| << . 1 . 2 . 3 . 4 . 5 . 6 . >> |

