|
| Author |
Message |
chico
Member
|
# Posted: 11 Jul 2013 16:37
Reply
I've decided to enlist the assistance of the active members on this forum for assistance with designing a strong small cabin. Its one open room, one level and I could use some help on how to leverage the foundation that is already in place.
There are (6) 5'-tall precast cement piers in the ground, each has a 2' belled out foot. They only have 6"-8" exposed at the top and they are all sitting on rock. The rock was mostly shale and for some we had to pick away at hard rock to make room. The last 2' is pure crushed stone for extra strength. -I want to think that they are solid.
They are in 2 rows of 3 each. The long row is 20' and the short row is 8'
The distance is based on the center of the 2' footer because the top of the pier has a threaded 5/8" insert.
For better or for worse, these are in the ground and this is what I have to work with. because its on a ridge, there is no more room, so I'm hoping to get creative with the build and this is where your input will help to determine where we go from here.
I want the build to be part fire tower, part cabin and part influenced by a tree house. I will post up more sketches and thoughts on the initial build as soon as I can. For now I just wanted to toss in a post and let you know that I'm here!
|
|
Truecabin
Member
|
# Posted: 11 Jul 2013 17:45
Reply
Quoting: chico There are (6) 5'-tall precast cement piers in the ground, each has a 2' belled out foot. They only have 6"-8" exposed at the top and they are all sitting on rock. The rock was mostly shale and for some we had ....The last 2' is pure crushed stone
you dug holes 6 1/2 feet deep, put in 2 feet of crushed stone then set them on the stone 4 1/2 feet down leaving 1/2 foot exposed
sorry this doesnt sound so great it seems like they could tip
its just backfill holding them vertical?
make sure they are all tied together with those 5/8 bolts
if you are going to make a tall building you better be careful with this I don't think it sounds too strong. if you dug those deep holes then backfilled with concrete i think that would have been better to have undisturbed soil holding the piers up man those are deep holes did you pack your backfill as you filled?
but i like the sound of what you are doing nobody builds anything interesting anymore
|
|
chico
Member
|
# Posted: 11 Jul 2013 18:04
Reply
ah, typo... the last 2" (inches) on top is pure crushed stone...
Maybe my grammar is not up to speed, let me try again.
- we dug ~4.5 feet in to shale rock and other hard rock.
- using a digital level and small pick we leveled out a pad in the rock for the foot to rest on.
- then backfilled the holes with the mixture of mostly sandy, rock chunks and heavy fill. It was also stamped down as we filled every foot.
They are fairly solid as I did bump in to one with the skid steer and it felt like I hit a wall.
this picture was from when the crushed rock was being spread on top, but it should give a better idea.
|
|
creeky
Member
|
# Posted: 12 Jul 2013 10:00
Reply
wow. what a view you're going to have. are you going to cantilever off of the posts?
|
|
chico
Member
|
# Posted: 12 Jul 2013 12:17
Reply
def a little cantilever.
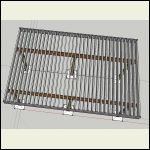
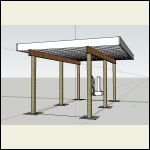
here is version 1, with a floor.
Still need to add some bracing to the legs and clean up some edges, just putting it up to stir some conversation and input.
2' off the back ~3.8' in the front
Girder is (3) 2 X 12 x 24
Joists 2 x 12 x 14 and 8" OnCenter
Screen_Shot_201307.png
| 
Screen_Shot_201307.png
|  |  |
|
|
Scott_T
Member
|
# Posted: 12 Jul 2013 13:19
Reply
You may be over doing it with 2x12 joists spaced every 8". Every 16 with that size of a joist should be fine even with the cantilever you propose.
|
|
chico
Member
|
# Posted: 12 Jul 2013 14:06
Reply
Scott_T;
what do you think about stretching the joist out to 16'
with cantilever ~2.5' in the back and ~5' in the front?
|
|
Ozarker
Member
|
# Posted: 12 Jul 2013 16:30
Reply
Hi, first post, I think, if it works 
The old golden rule to cantilever any beam is that the overhang is not to exceed one third of the length, then the beam must be sized for the load.
I'd agree with Scott that it seems your plan is too heavy using 2x12s as rafters. I would think a 60 mph wind would really play on those posts of an unknown size.
The top of the pier being 6-8" limits the size of post that can be used safely as well. I like to see no more than (again) 2/3rds of the top of the pier being taken up by the post end, so a 4x4 post would need a 6" flat base area on the top of the pier to set on.
Sounds to me like you have precast piers to use 4x4 or maybe a 4x6 post in wood. So that limits the rest of the structure in its overall height and the higher you go the lighter the static load needs to be.
I don't know what your solar requirements are up there as to the sun's angle and the spacing and height of shading rafters, if that's what you are doing, but you might consider 1x8, 1x10s and then use purlins above that laying the other direction to keep the 1x materials from warping. I'd also block between the rafters about every 4' as common practice.
If you want heavy lumber up there I'd then suggest you use steel posts on a flange base, you could box the steel in for the wood look.
I also wouldn't go up more than 10'.
The pitch of that roof will also be affected by wind loads, the flatter the better. A pitched shed roof design pointing toward that valley will act like an airplane wing in high winds without a front wall on the higher side. Even with open rafters, significant winds slightly off from the head on direction of the rafter ends will cause a convection of air as it blows up through the rafters causing lift. Hard to explain, but build it light and strong, IMO.
Might also consider snow and ice loads up there, I'd bet a heavy snow would still pack up, freeze over and accumulate even with open rafters, snow and ice storms do strange things.
In fact, blocked 2x4s can make a nice trellis as a sun shade.
Another option I suggest is digging around those piers and adding more concrete around them, as if they become the core of a much large poured reinforced pier and encapsulate them forming a new top of the pier higher than these. The depth is probably fine. That would allow larger posts, beams and rafters to carry the loads. The surface area is an important part of the pier design, not just the depth, as it all works together.
This is from the schooling I received from the University of Hard Knocks Engineering. Been there and done that and had to redo them in the past due to the issues mentioned.
Maybe some experts will chime in with load tables, solar angles and accepted practice in your area. Best of luck in your project 
|
|
|
chico
Member
|
# Posted: 12 Jul 2013 17:03
Reply
the piers have a nice square head of 7.5" x 7.5"
The posts in those sketches are 6x6 PT
I have thought about going 8x8 PT and that would use the whole pier surface.
First hurdle is that the piers are precast with one 5/8 threaded opening that is perfect for a StrongTie bracket to hold up the 6x6
The 8x8 bracket requires two bolts and I was not interested in drilling...
but at this stage of the game I'm not going to rule it out either.
I'm definitely not bringing concrete up there .
for better of for worse that is the foundation I am working with and it will dictate what I do going forward.
|
|
johng
Member
|
# Posted: 12 Jul 2013 17:25
Reply
I would have just planned to have my beams sitting on the piers. Is there a reason you want posts between the piers and your floor?
|
|
chico
Member
|
# Posted: 12 Jul 2013 17:28
Reply
well, the only real motivation for the posts is to just to gain some height.
If that becomes too much of a challenge then the plans can certainly change and the floor can come down to the piers or even shorter posts.
|
|
johng
Member
|
# Posted: 12 Jul 2013 17:46
Reply
The attachment points just add flex which could be overcome with adequate bracing.
The mention of fire tower look would help by using posts long enough to extend from pier to roof, setting your floor level or levels wherever you want.
|
|
ICC
Member
|
# Posted: 12 Jul 2013 20:21
Reply
Time for an engineer if you want to be safe.
|
|
johng
Member
|
# Posted: 12 Jul 2013 21:19
Reply
Quoting: ICC Time for an engineer if you want to be safe.
Agreed!
Although I glean a plethora of opinions on the internet I still rely on paid professionals for real results.
|
|
chico
Member
|
# Posted: 4 Sep 2013 18:11
Reply
well, -still going strong over here.
The height of the posts was reduced to only 3 feet, still need to add some more bracing but so far its coming along.
gotta be sure to take a moment and give thanks to all those that take the time to contribute on this site. The library of information here is priceless to a n00b like myself.
hoping to have a roof and some sheathing (or smart panels) up this weekend.
|
|
chico
Member
|
# Posted: 18 Feb 2014 14:56
Reply
still going strong!
funny, I was planning to be done in September and well under budget...
At this rate, I'm just hoping that I finish the interior in time for the beginning of the next one in Spring.
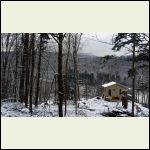
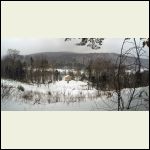
I'm a strong lurker on these forums, so once again -thank you to all those that share their info here.
photo_copy.JPG
| 
GOPR0066.JPG
|  |  |
|
|
Just
Member
|
# Posted: 18 Feb 2014 16:55
Reply
great view Chico NICE CABIN
|
|
Mike 870
Member
|
# Posted: 20 Feb 2014 21:07
Reply
Beautiful site. I'd love to see some more pictures of your cabin and land.
|
|
ErinsMom
Member
|
# Posted: 21 Feb 2014 18:44
Reply

|
|
|

