|
| Author |
Message |
Jeremy
Member
|
# Posted: 10 Jun 2014 21:03 - Edited by: Jeremy
Reply
We are excited to start our cabin this year after reading, and enjoying several of your building journals this last year. We decided on a 16x20 cabin with a 8x20 screened in porch. At this time we are planning on roughing in the cabin before winter so we can work on the interior during the winter months. We will be constructing slowly as weekends allow. The cabin will sit on 3 acres with a creek running in the front of the cabin on the south and state land to the west, along with family owned land around this parcel. We will be building with labor assistance from family and friends.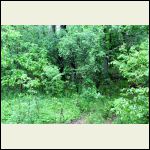
north side of cabin
| 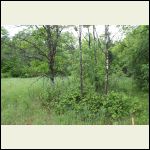
State land to the west
| 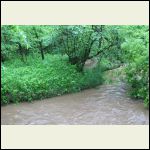
Its been very wet the creek is not normally this high or dirty
| 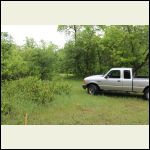
This is part of the driveway now since it has been cleared
|
|
|
OwenChristensen
Member
|
# Posted: 10 Jun 2014 21:37
Reply
Welcome to the neighborhood. Start taking pictures we love to watch your build.
Owen
|
|
Jeremy
Member
|
# Posted: 10 Jun 2014 21:43
Reply
I have pictures of the past 2 weekends but I cant figure out how to upload them, but I am working on it...
|
|
PatrickH
Member
|
# Posted: 10 Jun 2014 22:36
Reply
Where abouts ? We are in Oakland/south range. have you Been enjoying the mosquitos?
|
|
Jeremy
Member
|
# Posted: 10 Jun 2014 22:50
Reply
We are in Sterling township between St. Croix Falls and Cushing. 1 hour from St. Paul.
|
|
Jeremy
Member
|
# Posted: 10 Jun 2014 22:56 - Edited by: Jeremy
Reply
The first weekend I went up to the property and mowed the grass and hauled brush away from where we were going to start building. No permits are required as the sq. ft. of the cabin is 400sq. ft. or under. There are however land use permits required due to the water frontage. So we had to build 100 feet back from the high water mark. Seems a little excessive to me...
Before we could drive down into the property my father-in-law and I had to fix the driveway due to it washing out from when they installed a new bridge 15 + years ago. A friend, and a township worker hauled in some gravel and we were able to get the driveway fixed. That same day I hauled about 15 ton of class 5 gravel for the base of the cabin. Then I leveled that and went over it with a compactor.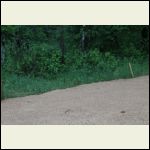
Base
| 
class 5
| 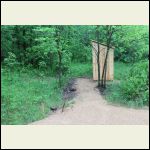
Outhouse installed
| 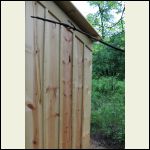
Pine board and batton siding
|
|
|
Jeremy
Member
|
# Posted: 10 Jun 2014 23:07
Reply
Last weekend I rented a post hole auger and drilled out 12 post holes 4 feet deep with a 12" diameter. I ran into rock so it took longer than expected. So, I am taking Friday off this week to finish the 4 other holes for the porch with a 8" diameter then hopefully I will have time to set the sonotubes, and pouring concrete on Saturday! I will post pictures when I am done.
|
|
trollbridge
Member
|
# Posted: 11 Jun 2014 15:35
Reply
yay! And congratulations! It's going to be an exciting summer 
Best of luck to you. I hope the weather cooperates and the mosquitoes fill up on someone else 
|
|
|
Jeremy
Member
|
# Posted: 19 Jun 2014 15:19
Reply
Well I had to take a week off and go to the doctor to treat a case of poison ivy. I have a wedding this weekend and will be back up there next weekend and over the 4th.
|
|
stickbowcrafter
Member
|
# Posted: 19 Jun 2014 23:11
Reply
Congrats, looks like a great place! Good luck and get yourself some Ivarest foam from WalMart. I rub that stuff on anytime I plan on being around poison ivy and I never get a rash any more.
-Brian
|
|
Jeremy
Member
|
# Posted: 7 Jul 2014 19:40
Reply
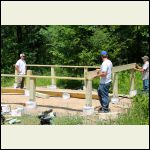
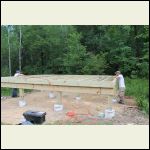
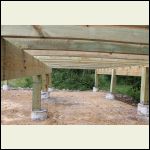
Progress from the long fourth of July weekend. Thanks to my Brother-in-Law Van and his Dad Brent. Brent came with a "transit" to ensure we were level and square with the posts and beams!
I don't know if anyone is interested but Brent has recently published a book on his family hunting stories. http://www.amazon.com/Sticks-Slivers-The-Mathson-Gang/dp/1625637160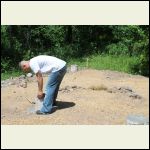
12" footings
| 
Beams installed
| 
Joists in place
| 
Joists in and secured
|
|
|
Jeremy
Member
|
# Posted: 7 Jul 2014 19:53
Reply
Sorry the second picture is when we were checking square
|
|
Shadyacres
Member
|
# Posted: 7 Jul 2014 21:43
Reply
Looks like you got a good start and a very sound base for a cabin. Look forward to seeing pics as you progress. I've been working on mine since Oct 2013 and I still get excited to go do more work.
|
|
Jeremy
Member
|
# Posted: 8 Jul 2014 10:48
Reply
This weekend I will insulate and get the subfloor on and then I want to put osb on the bottom of the joists to make sure the insulation stays in place...
|
|
slgerber
Member
|
# Posted: 8 Jul 2014 11:47
Reply
How did you decide on the height for the floor of your cabin? It seems higher than necessary. Are you concerned about potential flooding from the creek?
|
|
Jeremy
Member
|
# Posted: 9 Jul 2014 13:45
Reply
The creek hasn't flooded since early 1900's so not to concerned about it, but it is in a flood plane so to have insurance on it I needed to build it up out of that. Now I'm covered, and I want to be able to add plumbing eventually so I think I will need the room to work on it for that. Its 30" from ground to the beam.
|
|
Jeremy
Member
|
# Posted: 5 Aug 2014 20:17
Reply
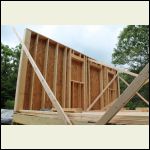
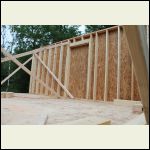
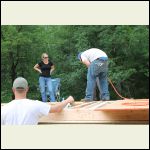
Its been a crazy summer but we are seeing slow progress on our land. We have built our 20 foot walls and now have them raised so we can build the two 16 foot walls. Should be able to frame and sheath those this weekend. Then start the porch next week and pour a slab for the fireplace to rest on. Hopefully the pictures will upload.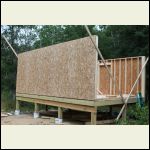
20 foot walls raised
| 
20 foot walls raised
| 
secured walls
| 
Fraiming 1st wall
|
|
|
knock
Member
|
# Posted: 5 Aug 2014 23:20
Reply
The cabin is looking good. How did you attach the beams to the posts?
|
|
Jeremy
Member
|
# Posted: 6 Aug 2014 08:16 - Edited by: Jeremy
Reply
I first notched the treated 6x6 then put on my beams by nailing them together, then put in a few 4" spax on each post and every few feet on the beam.
|
|
Sustainusfarm
Member
|
# Posted: 8 Aug 2014 22:57
Reply
Central WI here! Your place is lookin good!
|
|
Maxwake
Member
|
# Posted: 19 Aug 2014 19:09
Reply
Place looks great! Keep posting
|
|
Jeremy
Member
|
# Posted: 27 Aug 2014 16:39
Reply
Sorry for the delay in updating... There has been a lot of rain in the past 2 weeks, and had to get a few projects done around the house... I will be heading to the cabin early tomorrow to get a few tarps off the floor and hopefully dry it out before the weekend so I can get a good start on the second floor loft and maybe the rafters. I still hope to get the place dried in before winter. Last sunday I was up there and put in some additional cross bracing on the posts for the foundation. It eventually will be skirted with treated plywood and a stone veneer.
Hope everyone has a great holiday weekend!
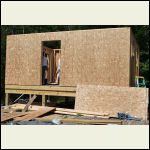
Daughter Caroline came to visit!
| 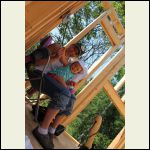
Caroline and Aunt Jessica relaxing at the cabin
| 
Doorway opened
| 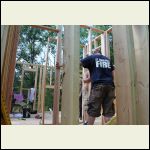
Interior walls complete.
|
|
|
Jeremy
Member
|
# Posted: 25 Sep 2014 12:47 - Edited by: Jeremy
Reply
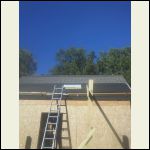
I am trying to update this on my lunch break, but last week I took off work Thursday and Friday to work on the cabin. With all the rain this summer it is nice to get a roof on it. I used a 2x12 ridge beam and 20x10 rafters. hope this works. I will close up the gable ends Saturday and hopefully get the windows in.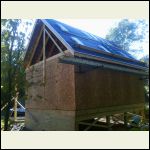
0921141626c.jpg
| 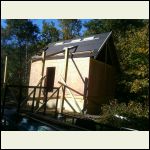
0921141626a.jpg
| 
rotate_0922141600.jp.jpg
|  |
|
|
Jeremy
Member
|
# Posted: 25 Sep 2014 12:50 - Edited by: Jeremy
Reply
shingled sunday
|
|
OwenChristensen
Member
|
# Posted: 25 Sep 2014 22:05
Reply
Nice to have it water proofed , isn't it?
Good job!
|
|
Jeremy
Member
|
# Posted: 26 Sep 2014 14:25
Reply
lot less worries... tired of stapeling tarps.
|
|
Jeremy
Member
|
# Posted: 3 Oct 2014 20:53
Reply
I am hoping to install windows and doors this weekend, and need some advice or a quick and dirty how to lesson. I was planning on tar paper about 9 inches wide, starting with the bottom then the sides then the top of each rough opening. Then putting in a foam and adhesive sealer (not sure the techinical term) and then nailing the flanges to the osb and studs.
Can anyone tell me if I am on the right track by morning? any other tips or advice? I have not done this before...
|
|
Gregjman
Member
|
# Posted: 3 Oct 2014 22:42
Reply
You may want to use tyvec or a similar house wrap. Go all the way around the building. When done cut and X from the center of each opening and pull the wrap in the window and door openings.
After installing the windows and doors ( I put silicon behind the nail flanges) use the house wrap tape over the nail flanges.
You can also by 4"x75' rolls of the 'water and ice' material to go from the wrap over your nail flange. This is a good idea.
These suggestions are if you plan on siding the exterior.
|
|
Jeremy
Member
|
# Posted: 9 Oct 2014 11:20
Reply
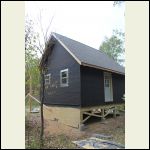
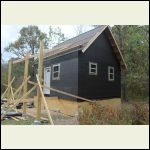
I got the shack tar papered and windows and doors installed thanks to all your help.
I do have a question. After thinking about this for a while and since I need to get the deck done soon so I can get the porch roof on, I need to bring in some rock to put under the deck. I would like to bring the grade up to the top of the posts and cover the treated ply wood up to the top of the cement where I snapped a line if you can tell from the pictures. If I did this all around the cabin do I need to bring up the grade on the inner side of the ply wood to avoid a big pool of water? Or will it stay dry?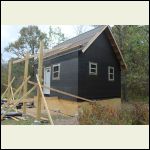
windows in
| 
windows in
| 
windows in
| 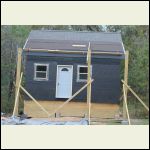
windows in
|
|
|
Maxwake
Member
|
# Posted: 9 Oct 2014 13:51 - Edited by: Maxwake
Reply
As long as there is not a huge run off in that direction, I would think you would be fine, but I am not an expert.
|
|
|

