| . 1 . 2 . 3 . >> |
| Author |
Message |
p0rtia
Member
|
# Posted: 12 Oct 2010 17:51
Reply
I've found a wealth of information on cabin choices and off-grid living here over the past few years, though I've only posted a few times. I've been living in a 60 year old trailer and a bunch of tents on my site in the woods in upstate NY for the past four summers, but this year was cabin year.
I did my own design. Started out thinking 8 x 12, and then 10 x 20, but ended up with 12 x 20. So glad I did. After lengthy negotiations with my builder (got a good price in the end), I was able to spring for my dream cabin--the one with lots of windows and a loft. Board and batten, on skids. Off grid except for a landline I put in this summer when Tracfone screwed up my phone upgrade. I've been slowly adding to a solar system I first put in three years ago. I now have 2 100-watt panels charging 6 6-volt golf-cart batteries, and then a 50 watt panel to keep the battery for my propane fridge happy.
Pretty good, I think, for a single lady in her late fifties (yikes!). The building itself was beyond me, but I wired the batteries and laid the conduit that brings the power to my site, and I thinned out the trees (sorry, necessary), built the tiki toilet privy (complete with separating toilet), and have started in on the insulating and drywalling. :-)
I'll post a few in progress pix and then the finished product in the following posts.
|
|
p0rtia
Member
|
# Posted: 12 Oct 2010 17:56
Reply
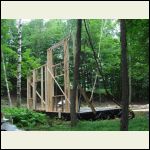
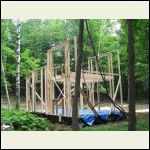
Here are a few early construction photos. The deck is laid on 6 x 6 skids, 2 x 10s, insulated, with sheet metal on the bottom to keep the critters out. It took about three weeks from first to last, with my builder working between 20 and 30 hours a week.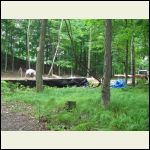
1__8_AM_July_20.jpg
| 
2__11_AM_July_20.jp.jpg
| 
3__3_PM_July_20.jpg
|  |
|
|
p0rtia
Member
|
# Posted: 12 Oct 2010 18:04 - Edited by: p0rtia
Reply
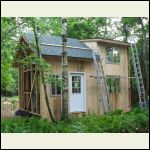
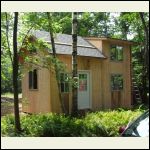
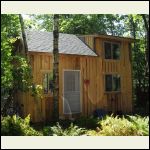
The flared roof over the loft was the last change to the plan--made the day I ordered the windows. A suggestion of my builder's. Originally, I thought I wanted a dormer on one side. In the end, the cabin is a foot higher than I wanted (just trying to keep a low profile to be as unobtrusive as possible), but it is nice to be able anywhere to stand up in the loft. Working with my builder (a real craftsman) was terrific, btw. Height ended up at 16'.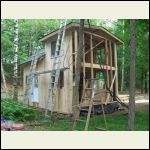
CIMG0120.JPG
| 
CIMG0121.JPG
| 
CIMG0123.JPG
|  |
|
|
p0rtia
Member
|
# Posted: 12 Oct 2010 18:13
Reply
I started moving in about five minutes after the fourth wall was complete. Just the basics, ma'am.
|
|
p0rtia
Member
|
# Posted: 12 Oct 2010 18:19
Reply
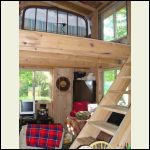
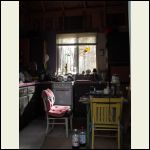
I'd been collecting furnishings at various thrift stores and yard sales for the past year.). The big prize was the kitchen cabinets. The propane fridge lived in a screen house for two months while I waited for cabin construction to start. Got a wonderful camp-sized propane stove (forty bucks--even the pilot lights work) at a local place a lot like Habitat for Humanity.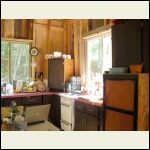
CIMG0158.JPG
| 
CIMG0136.JPG
| 
Ellens_Place.jpg
|  |
|
|
p0rtia
Member
|
# Posted: 12 Oct 2010 18:25
Reply
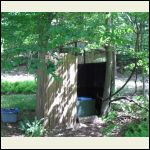
Next year, a little wood stove. I've already bought it (saw it a year ago at a yard sale and went back this year to snap it up), but the cost of insulated chimney slowed me down. Good heavens.... Who knew it was $30 a foot. Plus the T and the cap. Okay, I'm over it. I bought a small propane heater to get me through till early December (it's a three-season cabin), and the cook stove gives off a lot of BTU's. :-) I've been nesting for the past two months, and the place looks pretty comfy, now. Oh, and here's the tiki toilet.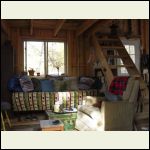
Parlour_from_door.jp.jpg
| 
Kitchen_from_door.jp.jpg
| 
CIMG0043.JPG
|  |
|
|
p0rtia
Member
|
# Posted: 12 Oct 2010 18:37
Reply
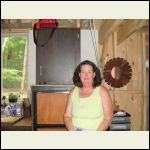
It never ends. The wood for the deck will be delivered Friday. Just a simple 6 x 16 job, resting on the abundant local rocks. Half a day's work, even for me. LOL Then I may do some more insulating. The cold weather inspires me. Planning on ship lap pine with some cedar for all the walls that aren't kitchen. Should keep me busy for a few years. Then there's the ram pump and the dream of running (or at least creeping) water. Next year...next year.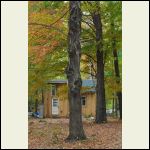
sept_cabin.jpg
| 
CIMG0153.JPG
| 
autumn.jpg
|  |
|
|
KC cabin
Member
|
# Posted: 12 Oct 2010 19:12
Reply
Fantastic cabin, love your architectural design. It's wonderfully satisfying, isn't it, to make a place that's truly and uniquely your own. Far better than "pretty good, I think, for a single lady in her late fifties."
Quick question about the treads on your loft ladder: How are they supported? I didn't see any cleating in the photos. Dadoed?
|
|
|
hilltop
Member
|
# Posted: 12 Oct 2010 19:40
Reply
Looks cozy, very nice .
|
|
hattie
Member
|
# Posted: 12 Oct 2010 19:48
Reply
Absolutely adorable...You have done a great job!!
|
|
islandguy
Member
|
# Posted: 12 Oct 2010 21:38
Reply
I bought some approved chimney sections and Tee, ulc listed, for about $200 for about 8 feet. thats what, $25 a foot, at a new and used building supply co. You only need chimney outside the cabin, use single or double wall stovepipe inside, and run the longest run inside. Try to run as close to the peak as you can, so you will draw better, and use far less expensive chimney sections to clear your roof. You may also leace the chimney unsupported if it does not extend to far above your roof. Nice cabin, good luck. BTW we have yet to install our woodstove/fireplace, and have been using a kerosene heater as auxillary heat.
|
|
dk1393
Member
|
# Posted: 13 Oct 2010 08:44
Reply
Love the cabin design. Where upstate are you? I love upstate NY. Its my favorite time of the year right now
|
|
p0rtia
Member
|
# Posted: 13 Oct 2010 17:26
Reply
Thanks all, glad you approve!
To KC: Yes, it is highly satisfying. I'm still at the "I can't believe it" stage, because I've been thinking about this for so long, and now it's here. About the stairs: unfortunately, the treads are just screwed into the stringers--by this time my builder was seriously regretting his quote (!) and every extra second he had to spend working on the cabin. I am already contemplating various replacements--although the immediate goal is a rail on the open side. I wonder if I could add cleats after the fact.
To istlandguy: I've been up and down the very issues you bring up a hundred times. The main problem is that I want the stove under the loft, and my builder insists that it would be unsafe to bring the chimney up through the loft, and that it must therefore go outside at about five feet. And in fact, I don't want to lose the space in the loft that stovepipe would take up. But yes, I am already hunting for deals on insulated stovepipe. Thought I had a source, but no.... It'll happen.
To dk1393: I'm in Washington County, right on the Vermont border. Strange fall this year, actually. An early frost followed by weeks of warm weather has left the foliage either on the ground or green. Some nice color this week, but Friday's cold and rain will probably do us in. But I agree, this is the best time of year. The light is incredible. Have I said that? One of the reasons I chose this spot.
|
|
KC cabin
Member
|
# Posted: 13 Oct 2010 19:17
Reply
Sorry to be a busybody, but for safety's sake, I hope you will glue and screw some sort of cleating under those treads. 1x2' furring strips would do the trick easily and economically.
Btw, is that one of those "instant" screen doors (that attach with velcro tabs) at your entry? If so, are you happy with it? It looks quite nice in the Ellens_Place pic.
|
|
Gary O
Member
|
# Posted: 13 Oct 2010 19:54
Reply
Very very nicely done.
Love it.
I'm sure you do too, after camping for four years.
Now that the roof is on, you can take your time and make it like you want.
As KC cabin's concern, you will need to shore up those stairs. There's lots of ways to go, but aesthics play a part.
Happy cabining.
Gary O'
|
|
p0rtia
Member
|
# Posted: 14 Oct 2010 13:26
Reply
Thanks, KC and Gary O. The cleats idea sounds much simpler and quicker than the more drastic measures I had been considering. And something I can do myself, which is always the deciding factor! I will add the cleats ASAP.
As for the screen door--good eyes! Yes, it is a foldable, velcro attachable screen door. It's great for a temporary fix (which is what it is), but when I get back in the spring I'll be adding a real door. Curiously, it's one of the many gifts I received while scouring the county for used furnishings. I was at a yard sale at a lovely cabin in the woods, and got to talking with the owners. The woman eventually gave me a bunch of stuff for free, including the screen door, saying "you'll need this." Boy was she right! There is a bond between those of us who build houses in the woods.
|
|
fasenuff
Member
|
# Posted: 15 Oct 2010 09:22
Reply
Looks great! You should be proud. Hope mine turns out half as nice.
|
|
KC cabin
Member
|
# Posted: 15 Oct 2010 10:05 - Edited by: KC cabin
Reply
Quick correction. That should read 1"x2" (or 1"x3") on the furring strips, not 1x2'. D'oh!
|
|
Anonymous
|
# Posted: 16 Oct 2010 11:00
Reply
Nice place you have there, congrats on your place.....
|
|
LakeSuperior5
Member
|
# Posted: 20 Oct 2010 16:55
Reply
Love the photo's, it looks very nice. Can't wait until we have a roof on ours and can actually sleep in it.
|
|
p0rtia
Member
|
# Posted: 23 Oct 2010 11:04
Reply
KC -- I got what you meant. LOL You'd have the 2/3" side vertical under the step, yes?
|
|
Anonymous
|
# Posted: 23 Oct 2010 11:32
Reply
my hubby and I just love it! you must be so pleased!!
|
|
Pyro
Member
|
# Posted: 26 Oct 2010 10:21
Reply
I concure w/ KC. The steps must have better support. Since they are not Dado'd, Solid Risers would help a lot if sandwiched between each step. (But you loose the openess of the ladder.) Cleats at the very least. As they are now, one day a stair tread "will" split & the injury will likely be painful.
Quoting: KC cabin Sorry to be a busybody, but for safety's sake, I hope you will glue and screw some sort of cleating under those treads.
|
|
KC cabin
Member
|
# Posted: 26 Oct 2010 23:04
Reply
Hope this helps, p0rtia. Your cleats would look something like this:
|
|
p0rtia
Member
|
# Posted: 14 Nov 2010 13:02
Reply
Wow, thanks for the illustration, KC. I will do it first thing in the spring when I return. Much appreciated. I've been absent from the boards for a bit, as a windy spell inspired me to do some insulatings (!). I am now cozy and warm, and the wind may blow to its heart's content. I also constructed a small (6 x 16 deck--can you call it a deck when it's only three inches above the ground!?). Anyway, it's a wonderful addition, and I already have my eye on roofing it over and screening it in. Ah, the plans go on forever, but honestly, I got much more accomplished this year than I thought I would--and I think I've got it organized to have my builder slap up the interior walls while I'm gone this winter. I'm enjoying my last few weeks here at the cabin. Off to family for Thanksgiving, then back up here till it gets too cold (even with insulation!)--sometime in early December, I imagine. Thanks again, all.
|
|
p0rtia
Member
|
# Posted: 16 Nov 2010 07:51 - Edited by: p0rtia
Reply
KC -- What kind of glue would you recommend for those cleats? Just regular PVA wood glue? And are the screws necessary? I'm worried about putting that many more holes in the stringers. Thanks!
|
|
KC cabin
Member
|
# Posted: 16 Nov 2010 08:35
Reply
Carpenter's wood glue (yellow) is very strong but the screws are important for added strength and security as they help to clamp the wood surfaces together. A wood screw every 3-4" through the flat face of the cleat into the stringers should do the trick and is quite unobtrusive. If you have a Home Depot or Lowes in your town they can cut your cleats to length for you and further advise you on the appropriate wood screw lengths.
|
|
p0rtia
Member
|
# Posted: 18 Nov 2010 07:27 - Edited by: p0rtia
Reply
Thanks, KC, much appreciated. There's a skill saw in the barn, so there's no problem cutting the cleats. LIkewise I can gauge the screw length okay (so it doesn't go all the way through, I imagine--1.5 or 1.75 inches or some such). Are there different screw diameters I should look for? My instinct would be to get the smallest diameter available, if there are choices. I'm guessing there's a standard diameter for each length though. :-)
AGain, thanks a million for your responses. This sort of detailed help is invaluable to me, as I am constantly doing things I've never done before. Yes, I have the ability to do them, but experience is just priceless. You are very generous to lend yours.
|
|
KC cabin
Member
|
# Posted: 18 Nov 2010 14:28
Reply
Building and maintaining a cabin can certainly be a challenge to most of us at any skill level.
#8 stainless steel flat head wood screws should do nicely. : )
|
|
MtnDon
Member
|
# Posted: 18 Nov 2010 15:11 - Edited by: MtnDon
Reply
A note on screws: Some screws, like deck screws, are hardened. The hardening makes it possible to drive them faster with a drill/driver. The hardening process also makes the screws more brittle, more susceptible to breaking off under a shear load.
A shear load is what you have when you screw cleats to the stringer and place the stair treads on the cleats.
Screws that are not hardened act more like nails when it comes to shear loads. They will bend before they break. They give a warning rather than simply break suddenly. That is one reason screws are never permitted for structural uses by any building codes. However because they are not hardened the heads will deform easily, resulting in worn and torn drive slots.
A non hardened screw is the only type of screw I would use for a stair cleat.
One way to tell if a screw is hardened is to screw it half way into a solid piece of wood. Then hit it sideways with a hammer. A hardened screw will most often break but a non hardened screw will bend like a nail.
Screws come in many lengths for each size diameter. To help prevent splitting drill a pilot hole in the cleat that is large enough to just clear the shank and drill the appropriate size (smaller) pilot hole in the stringer.
If you have an Ace or a True Value hardware store near you they are probably a better source of screws and information than a Lowe's or HD. They normally let you buy the precise number of screws you want.
You don't need stainless steel screws, regular plated screws will suffice.
|
|
| . 1 . 2 . 3 . >> |

