| . 1 . 2 . 3 . 4 . 5 . >> |
| Author |
Message |
TomChum
Member
|
# Posted: 12 Jan 2011 01:58 - Edited by: TomChum
Reply
Hello!
Here is my cabin. I am absolutely thrilled to have this at my time in life (with my kids). I bet a lot of folks on this forum feel the same about their cabins!
Its up high, in snow country, and sorry I'm not too comfortable telling the location. Incidentally the tax assessor found it during construction and assessed tax on it - I'm OK with that. I fear the day when the building dept. comes by to tell me to take it down. It's way out there, behind a locked gate, with no vehicle access for 6 months of the year, so it's somewhat safe as long as the taxman doesn't talk too much (or me).
I paid a local to build the structure then trimmed it out with help of friends & family. I used rough-cut lumber from a local sawyer. The shingles are hand-split cedar, and the gable ends are board and batten, with long, hand-split cedar planks. The roof is 1 1/2" thick wood (plus shingles), but the floor has R19 insulation. The foundation is 9 granite rocks. I constructed it under the goal that it should look 100 years old, so there is no visible modern materials (very little). But for now the wood all looks bright and new.
A water pipe from the creek runs outside onto the ground constantl. It flows 800 feet by gravityy, with 17 feet of head, at the rate of 1 gallon per minute. I had the water tested, and my "stream sample was safe to drink". The stream originates from a spring on a steep hillside about 2000 feet away (origin is in a cedar grove but off my property). I drank it all of Sept/Oct/Nov, and no problems, but since it's on the surface there's no assurance that it will always be safe. I'll build an outdoor sink at some point. The kitchen counter is made of rough cut doug fir, Grandpa-built, and the range is an RV unit by Atwood. No refer yet.
I bought the windows at a used building materials store. I have an 85W solar panel about 30 feet up a tree, charging 250Ah of batteries.
T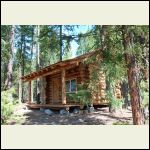
Porch view
| 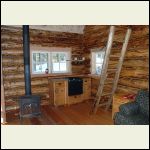
Kitchen
| 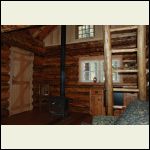
Woodstove and dutch door
| 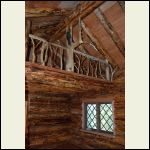
Loft
|
|
|
TomChum
Member
|
# Posted: 12 Jan 2011 02:23 - Edited by: TomChum
Reply
Here's the outhouse and a couple other views. The porch is 7x16 feet. It's empty because we have just cleaned it out to leave. When the family is there you don't even see the floor for all the gloves, boots and coats, firewood, groceries. It's a lot smaller than it looks in the pictures.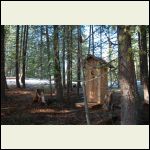
Cedar Outhouse
| 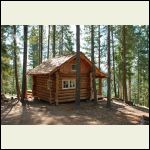
cabin1_Aug15.jpg
| 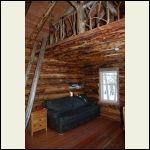
Hideabed and ladder
| 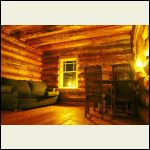
Night_lamplight_sofa.jpg
|
|
|
SmlTxCabin
Member
|
# Posted: 12 Jan 2011 04:49
Reply
WOW. That is absolutely beautiful. Nice cabin and pretty property. Sounds like you have a great retreat!
|
|
Timberjack
Member
|
# Posted: 12 Jan 2011 07:15
Reply
Looks like a picture postcard, truly a work of art!
|
|
larry
Member
|
# Posted: 12 Jan 2011 07:35
Reply
WOW ! that's great. sorry to hear about the tax man. on a brighter note now that it's up they can't make you take it down. Can we ask what state or provence you're in?
|
|
TomChum
Member
|
# Posted: 12 Jan 2011 12:23 - Edited by: TomChum
Reply
Thanks for the nice comments. .....It's in the continental USA, in the northwest corner state. ;-) Started end of June 2010, finished in November
It was kind of hard on my family, (while building it, I was obsessed, stayed out there for 2 weeks sometimes). Also difficult for them because there was no outhouse (just a grunt-bucket!). My girls are pretty hardy though, they just pick up a shovel and march off into the woods. We built the outhouse in mid-November and everyone is happier.
It was a profoundly satisfying project for me. I love being out in nature, and having a place to watch wildlife, look for tracks with my kids, cut firewood, ride dirtbikes, snowmobile in the winter, and sit with my wife on the porch.
|
|
darz5150
|
# Posted: 12 Jan 2011 15:45
Reply
Just took a look at your cabin.....totally awesome. I think thats what I had in mind when I was building my cabin but financially I couldn't make it happen. How much did it cost ( If you don't mind my asking )?
|
|
TomChum
Member
|
# Posted: 12 Jan 2011 16:04 - Edited by: TomChum
Reply
I don't know the cost, didn't keep good track of it. Some things I didn't pay for, the Grampa-built stuff like the door, all the windowtrims, the kitchen counter, which would have been costly. The rough-cut lumber bill ended up costing 4 to 5 times (per BF cost) of buying regular lumber at the store! But it doesn't have any barcodes or grading inked on it.
The roof, for example was only 5 squares but the shakes were all hand-split, and they don't just lay down waiting for a nail. Plus there is a transition to a 3/12p over the porch which took a lot of thought. It took 4 days to put the shingles on which cost lot more money than I anticipated. In the beginning, everyone said, "Oh the roof will be on in one day".
I suspect it cost about 35k total. It was ~18k for the walls and roof structure. It cost a lot to get an excavator all the way out there to lift the logs. And with the excavator we did other valuable tasks like road repair, fire suppression, set bridge abutments, etc, it's really difficult to break it all out to cabin cost. I cringe a little at that number for under 200SF,,,, but it is really exactly what I wanted.
|
|
|
fpw
Member
|
# Posted: 12 Jan 2011 16:56
Reply
Nice...cabin. If you do the work yourself and have the trees on the property you can build this type of project for about 10K. However, you better have some time cause it ain't quick.
|
|
nathanprincipe
Member
|
# Posted: 12 Jan 2011 19:54
Reply
you deff acheived the "been there a 100yrs look"!
|
|
hattie
Member
|
# Posted: 12 Jan 2011 23:25
Reply
Absolutely gorgeous. You should be real proud of this :-)
|
|
TomChum
Member
|
# Posted: 13 Jan 2011 00:41
Reply
Quoting: fpw If you do the work yourself and have the trees on the property you can build this type of project for about 10K. However, you better have some time cause it ain't quick.
That was my original dream. You need a minimum one year to dry the logs. I was very impatient because my kids are the right age and not getting any younger. ;-) (me too)
Quoting: hattie IAbsolutely gorgeous. You should be real proud of this
Thank you.
|
|
TomChum
Member
|
# Posted: 14 Jan 2011 16:02 - Edited by: TomChum
Reply
Winter photo, about 15 inches snow on the ground. No insulation in the roof just boards .......
|
|
elkdiebymybow
Member
|
# Posted: 17 Jan 2011 01:57
Reply
Great Job! Any advice on chinking and staining or log preservation? I still need to do that, bought 'perma-chink' by Sashco last year but didn't get a chance to finish that up. I also bought a product to treat the wood for insects and such. I love how you did the loft rail and your door. Fantastic Job!
|
|
TomChum
Member
|
# Posted: 18 Jan 2011 01:55
Reply
We used permachink on the logs. Used a wet gloved finger to smooth the chink. Have not put any stain or finish on the outside yet. Was advised to let the logs breathe for a few months before staining. Maybe sometime this spring 2011. I did spray the entire outside with "Borate" to make it unhealthy beetlefood.
I did not use any stain on the inside, just one coat of varnish. I was advised to use only one coat, for longer life. You can see in the photos where I 'missed', the flash tells all on the railing and ceiling.
The floor has 3 coats of Daly's floorfin, an oilbase finish. The floor is rough cut doug fir boards of varying widths, nailed down onto 3/4" OSB. I sanded it very lightly to take the fuzz off then put on one coat. Then hand-sanded lightly to cut all the sharps off. Then 2nd and 3rd coat no more sanding. So the floor is kind of rough, but it can be swept or mopped.
|
|
Anonymous
|
# Posted: 18 Jan 2011 16:02
Reply
I luv your sustainable log cabin....Im a single guy that loves the wilderness, and traveling....etc....Im planning a similar build....looking 2 spend 15,000....no need 4 a morgage here.....glad it worked out 4 ya....enjoy......Peace Puff
|
|
TomChum
Member
|
# Posted: 10 Mar 2011 23:51 - Edited by: TomChum
Reply
Thought some folks might like to see how I did my gable ends. Gables are covered with long, hand-split cedar shingles, in board-and-batten style. These are pretty small gable ends (cuz the cabin is only 12x16). The windows came from a used building materials store.
Under the cedar (not visible) is OSB on 2x6 framing with insulation.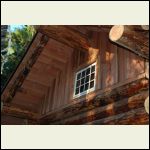
Board and batten cedar shingles
|  |  |  |
|
|
turkeyhunter
Member
|
# Posted: 11 Mar 2011 07:09 - Edited by: turkeyhunter
Reply
the board and batten, gables look GREAT!!!!!! good job for sure, your camp is so nice. It looks so rugged but beautiful.
|
|
Erins#1Mom
|
# Posted: 11 Mar 2011 18:16
Reply
It looks amazing. Very warm and happy as a cabin should.
|
|
dvgchef
Member
|
# Posted: 12 Mar 2011 18:50
Reply
Good for you - a real beauty. thanks for sharing.
|
|
teakboat
Member
|
# Posted: 27 Mar 2011 20:39
Reply
I like the proportions of it. I don't have the conifer logs so I couldn't exactly replicate it, but I sure like it.
What is the roof pitch?
|
|
TomChum
Member
|
# Posted: 27 Mar 2011 21:35
Reply
Roof pitch is 8/12 and 3/12 on the porch
|
|
Montanan
|
# Posted: 6 Apr 2011 16:08
Reply
Thanks for all the info- and the photos. It looks great. We're doing something similar, but paying the builder to actually put in pier blocks and set the log shell (should take place in 3 weeks, if the snow melts enough.) We'll be doing everything else (got the windows for free from a friend doing a remodel.) I have couple of questions:
1) Are the floor boards tongue and groove?
2) Are you using this cabin actively in the winter? If so, does the stove provide enough heat, especially without insulation in the roof?
Thanks.
|
|
TomChum
Member
|
# Posted: 6 Apr 2011 17:14
Reply
Quoting: Montanan 1) Are the floor boards tongue and groove?
No they are flat 3/4 boards nailed onto 3/4" OSB. 2x6 floor joists support the floor, with R19 insulation. Buy your floor boards ASAP and put them at the site where they can acclimate in the dry, for as long as possible before they nail down.
Quoting: Montanan 2) Are you using this cabin actively in the winter? If so, does the stove provide enough heat, especially without insulation in the roof?
|
|
rayyy
Member
|
# Posted: 7 Apr 2011 06:03
Reply
Another awesome sucess story.We envey you Tom.
|
|
Montanan
|
# Posted: 8 Apr 2011 01:57
Reply
Thanks for the replies. We're aiming to use the cabin in -0 temps (we're less than 10 miles from skiing) so we want to make sure we get the right sized stove. We're planning to insulate the roof, though. For the floor, did you insulate underneath the cabin itself- i.e. crawl underneath and put up insulation under your piers?
Thanks!
|
|
TomChum
Member
|
# Posted: 8 Apr 2011 11:05 - Edited by: TomChum
Reply
We insulated the floor from above, before sheeting it. Each of the floor joists has a 1x3 on the bottom so there is a "ledge" at the bottom of the joists. We dropped 8foot x 14" wide strips of OSB in between the joists so there is only wood below, to protect the insulation from critters. These strips are just held down by gravity.
Regarding stoves, I started another thread in January called "controlling heat from a woodstove". It has a pic of the "too-small potbelly stove", and good replies from other members.
I'm certain that a HUGE amount of my heat is lost thru the roof. Also due to air leaks because it is "just boards" with shake felt above. The roof boards were not adequately dried before nailing them on. Sitting under that nice dry heated roof, they've shrunk, opening a 1/4" gap between each board. So at each gable end I have 26 little 'vents' (one between each board, that add up to 4.5 inches each gable). Plus there is leakage across the whole roof under the felt. Don't judge your stove by my roof. My roof is designed to be 'classic' not to save firewood.
If you can use a modern stove and an insulated (and a tighter roof) it should be no problem heating your place at 0deg. I'd place the stove at least 30" away from the wall so people can stand all around it. Also you can build a hotter fire. And theres room to hang clothes on the wall to warm, (or dry) behind the stove.
|
|
neb
Member
|
# Posted: 8 Apr 2011 22:37
Reply
Awesome.
|
|
samoni
Member
|
# Posted: 20 Apr 2011 10:33
Reply
so so cool! This is almost the same layout/look as the one we started building. I love the railing in the loft. Beautiful!!
|
|
RnR
Member
|
# Posted: 20 Apr 2011 12:39
Reply
You could sell photos of your cabin as postcards. I hear you about being obsessed. Thanks for sharing your great story!
|
|
| . 1 . 2 . 3 . 4 . 5 . >> |

