|
| Author |
Message |
MI drew
Member
|
# Posted: 21 Jun 2013 11:42am
Reply
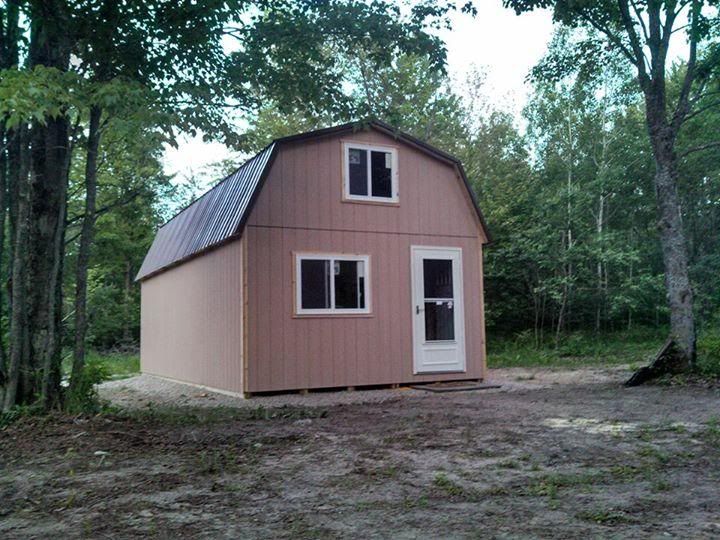
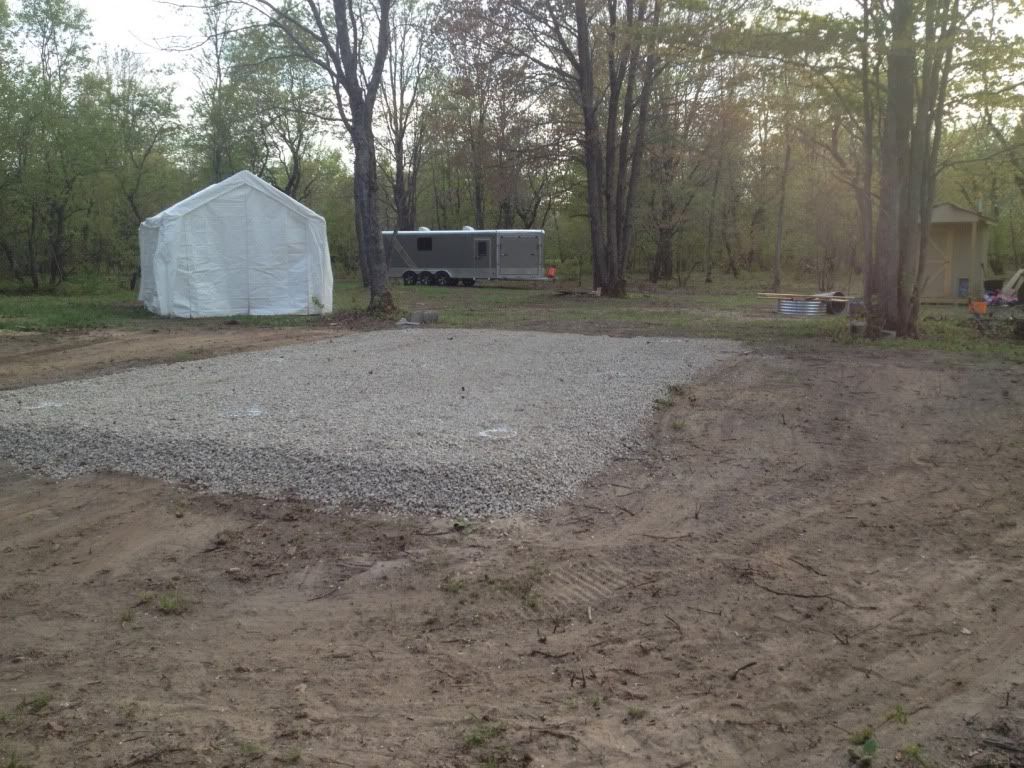
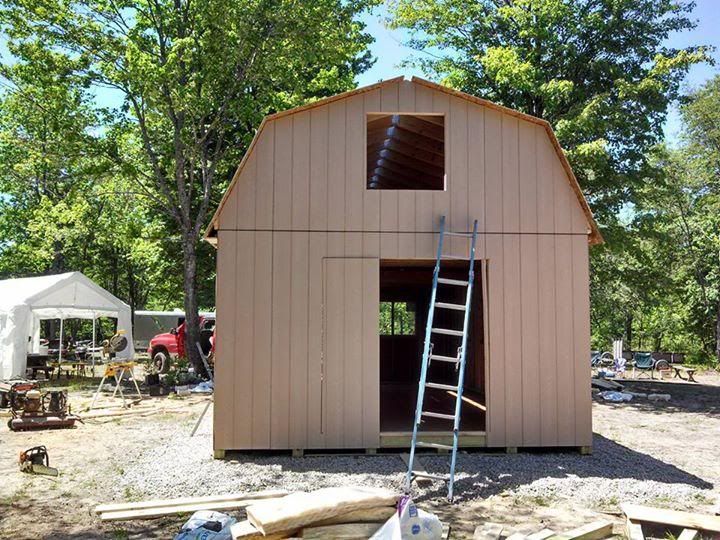
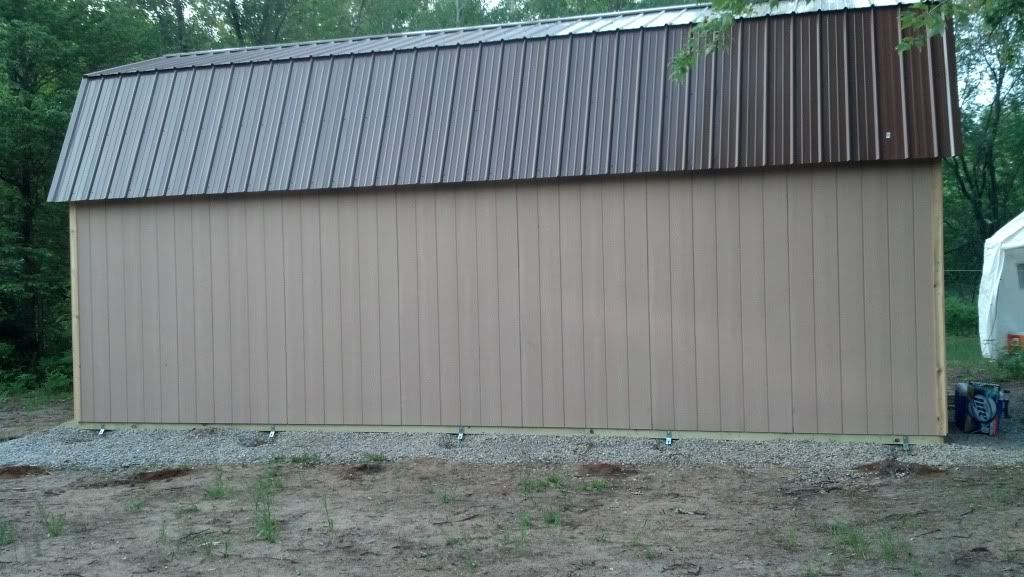
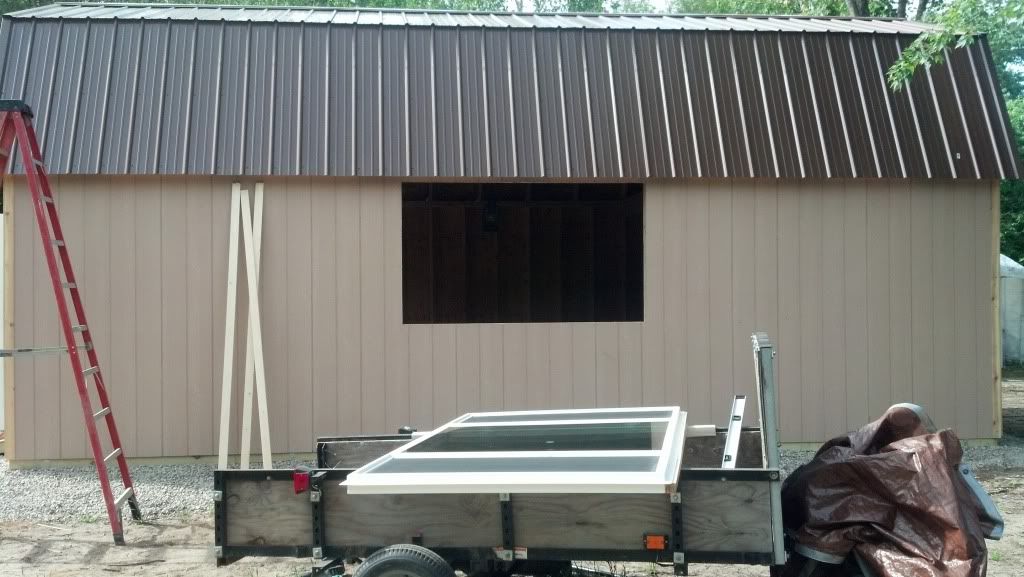
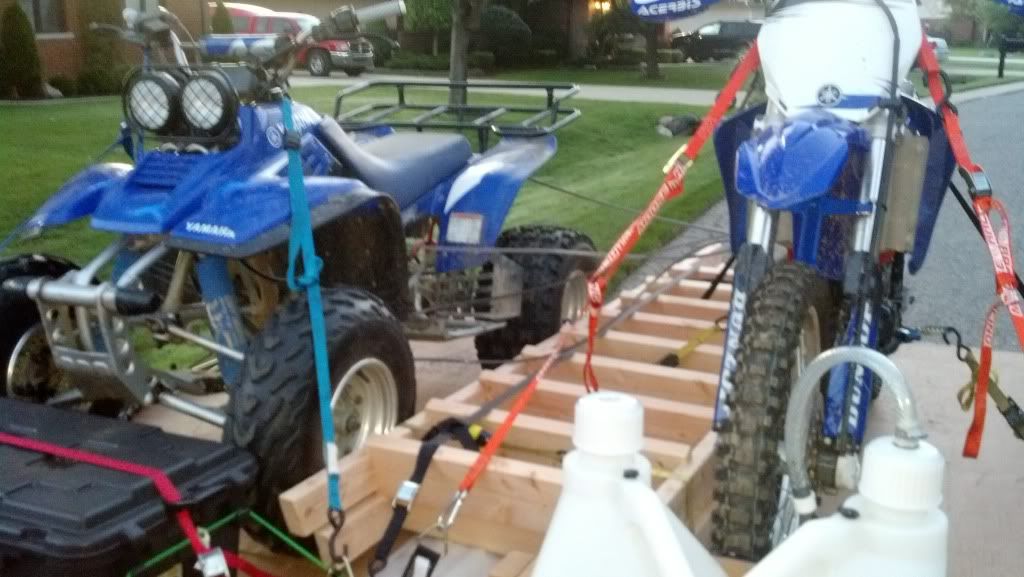
Well... we finally did it. We had our small cabin built last weekend. We hired an Amish builder to do the shell. 3 guys took from 8am till 5pm and were done. Just amazing. It would have takken me 4-ever. They also drove (not them of course) 1hr45min each way for the job. It is 14x28 with two 8x14 lofts. I made an outhouse last year that we are currently using and at some point we will be adding a 8x12 bathroom off the side. The floor is insulated. I have 7' under the lofts on the main floor and 5'6" in the middle of each loft and 42" at the corners. Should be perfect for sleeping up there. The roof is framed with 2x8's for the snow load we get in that area  . Once we are inspected next week I'll be putting a wall up on the storage door side and 4x7 window in the area already framed for it (covered with peg-board now). In a couple years we'll be building a smaller 10x20 shed and I will take the double doors off the cabin to use for it and we're either putting in a sliding patio door or window in the spot. That 8x14 area will then be mine and the wife's bedroom. We had 2 kids (4 and 2.5) and at that point we'll they will each get their own loft. . Once we are inspected next week I'll be putting a wall up on the storage door side and 4x7 window in the area already framed for it (covered with peg-board now). In a couple years we'll be building a smaller 10x20 shed and I will take the double doors off the cabin to use for it and we're either putting in a sliding patio door or window in the spot. That 8x14 area will then be mine and the wife's bedroom. We had 2 kids (4 and 2.5) and at that point we'll they will each get their own loft.
Originally we looked at going the no permit 12x16 route but decided that for the cost differance and size of the family we wanted to go bigger. We are allowed up to 500sqft to be zoned as a "hunting/fishing cabin" for seasonal use (120 days or less) in our area and that's why we went with the size we built. Once I add the bathroom we will be at 488 sqft.
Thanks for all the ideas and pictures from this site. It really helped me to plan out what we ended up doing. Hope you all enjoy the pix and I will update with our progress as we go.
|
|
MI drew
Member
|
# Posted: 21 Jun 2013 11:48am - Edited by: MI drew
Reply
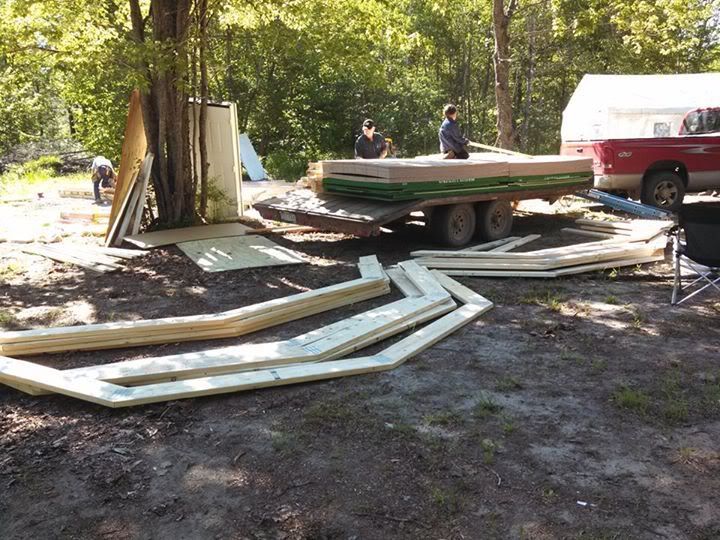
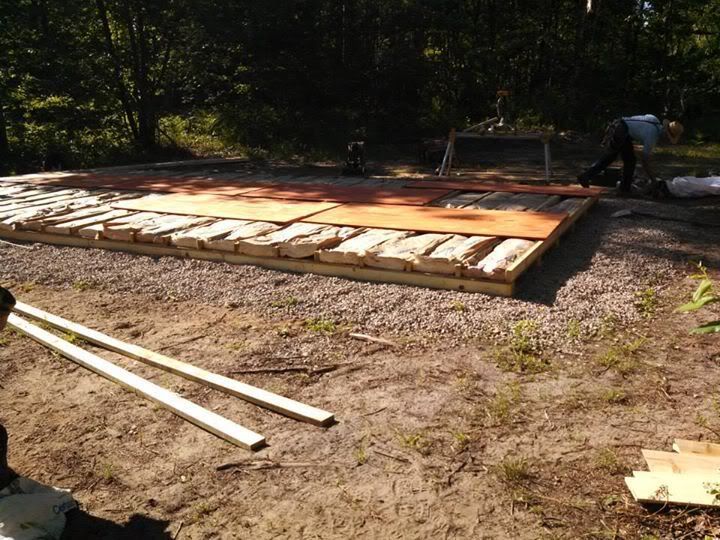
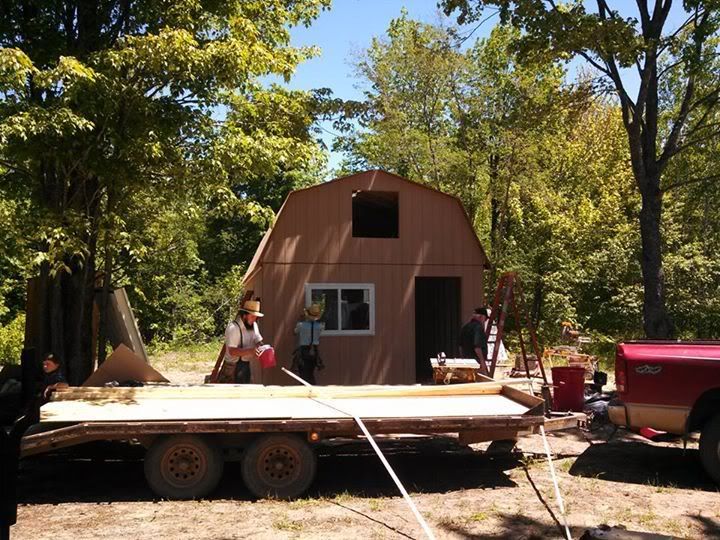
Build pix
|
|
MI drew
Member
|
# Posted: 21 Jun 2013 12:12pm
Reply
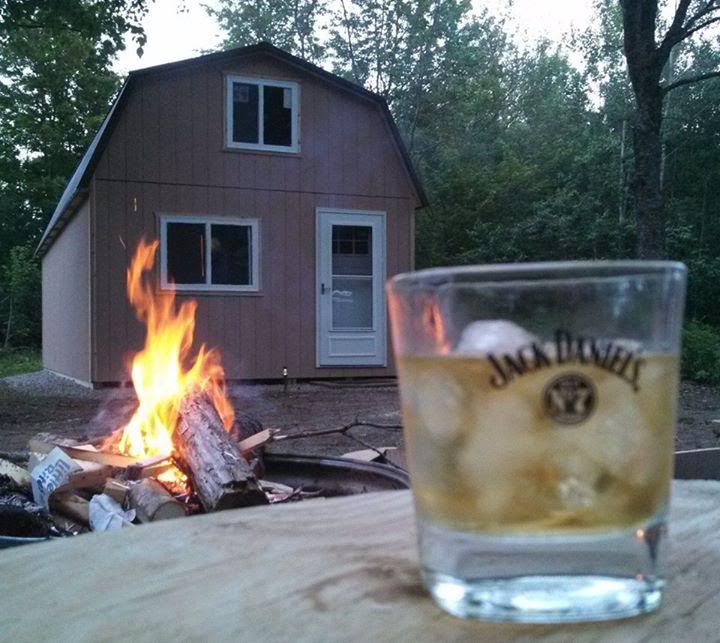
Dad's day night after the kids went to bed.
|
|
hattie
Member
|
# Posted: 21 Jun 2013 12:20pm
Reply
It sounds like you have really thought this out well! That is amazing how quickly it went up. I can't wait to see the pictures from the inside as you begin finishing it off. Congratulations! I hope you have years and years of fun there!!!!!
|
|
naturelover66
Member
|
# Posted: 21 Jun 2013 12:42pm
Reply
I love it!!! My cabin is near Petoskey....its so beautiful up there....
|
|
MI drew
Member
|
# Posted: 22 Jun 2013 09:00am
Reply
Thanks! I do love it up there. Potoskey is a very nice area. Been riding and golfing up that way. We're between Mancelona and Gaylord. Going up in a couple hours and can't wait to be able to go to "my place".
|
|
MI drew
Member
|
# Posted: 26 Jun 2013 06:46am
Reply
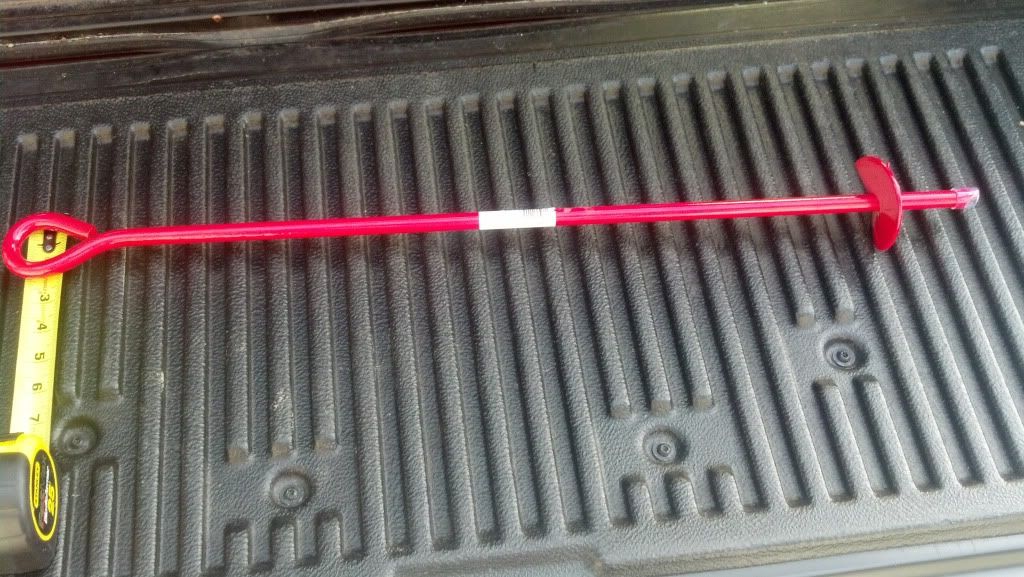
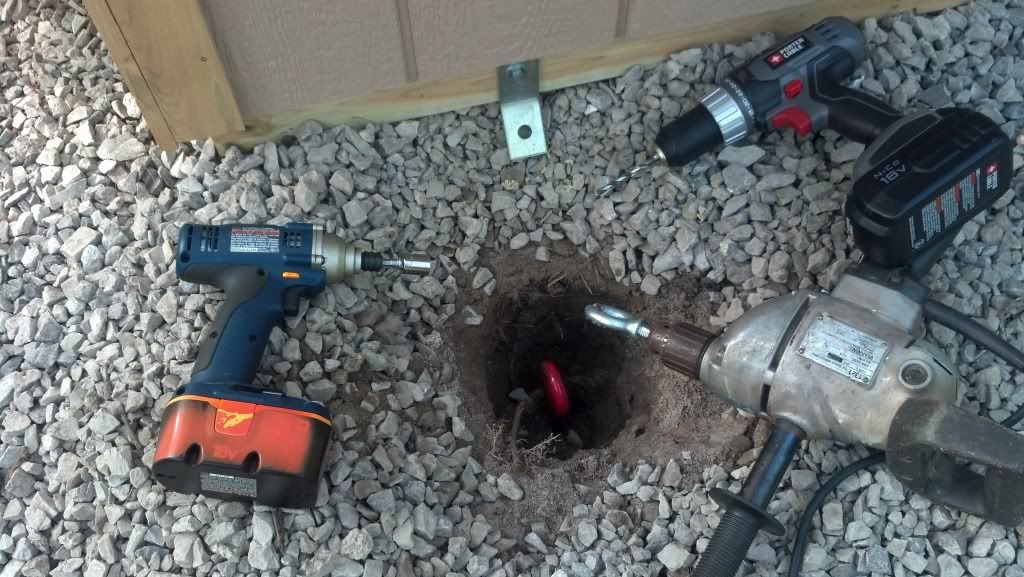
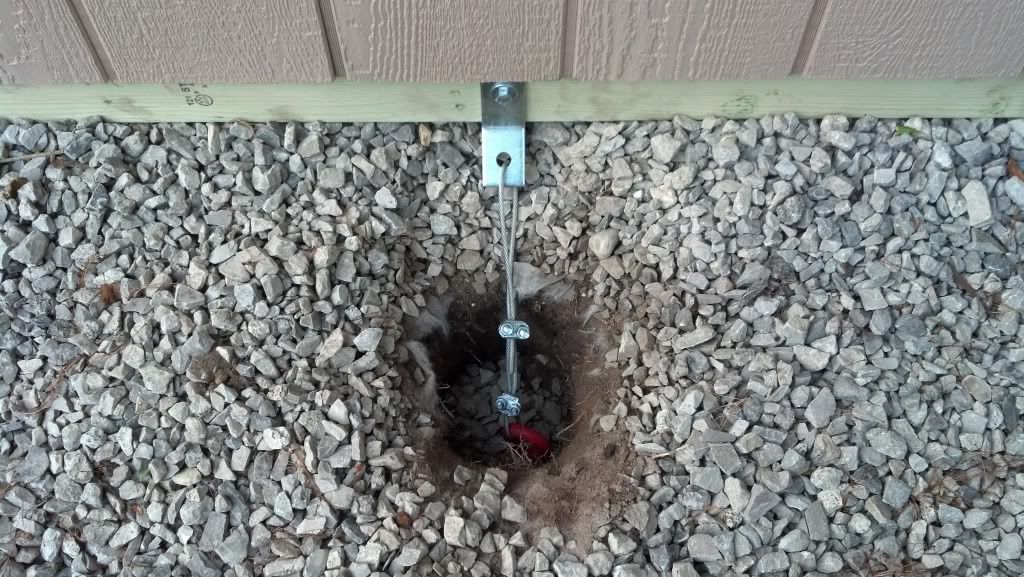
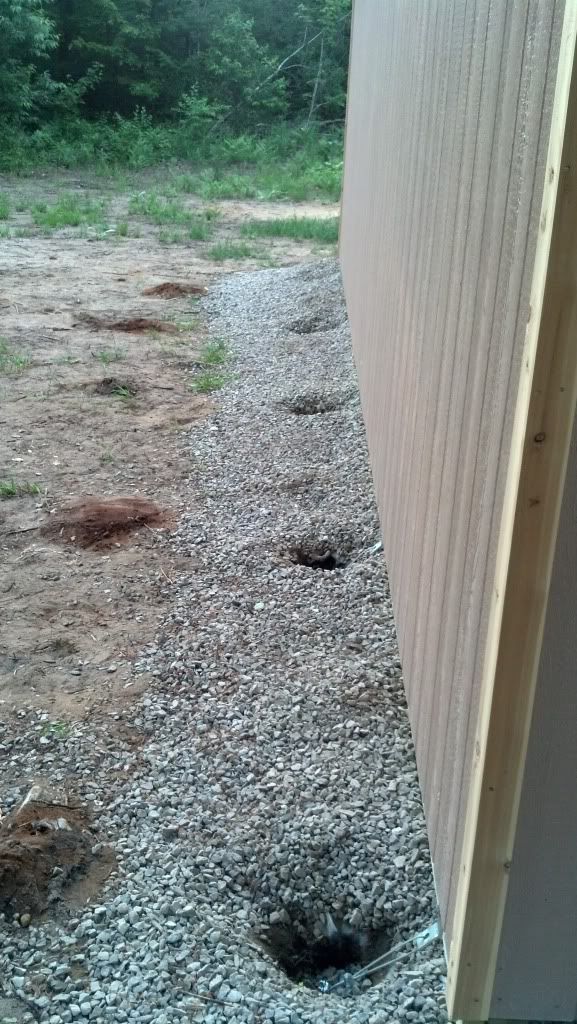
Part of getting ours inspected is to have it mounted to the ground. We're in Michigan and still need to satisfy some hurricane rules. Lol. We put in 10 30" ground anchors. Made a tool out of a threaded eyelet. Ground the threads down on 3sides to fit in a chuck. Then cut an opening to just fit over the end if the auger eyelet. Spun them in with a large drill off my genny. We had some brackets and tied it all together with some braided cable. Just took a few hours and only ran into to PITA tree roots. Here's what we did.

|
|
OwenChristensen
Member
|
# Posted: 26 Jun 2013 07:11am
Reply
Thanks for that tip.
|
|
|
MI drew
Member
|
# Posted: 1 Jul 2013 06:35pm
Reply
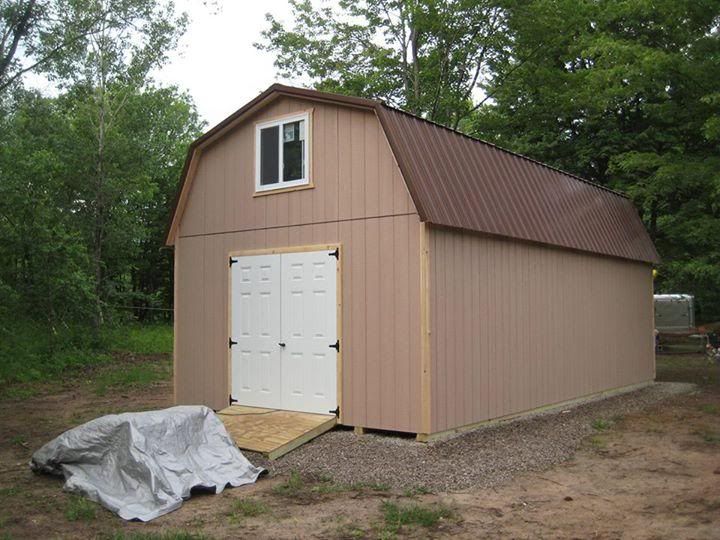
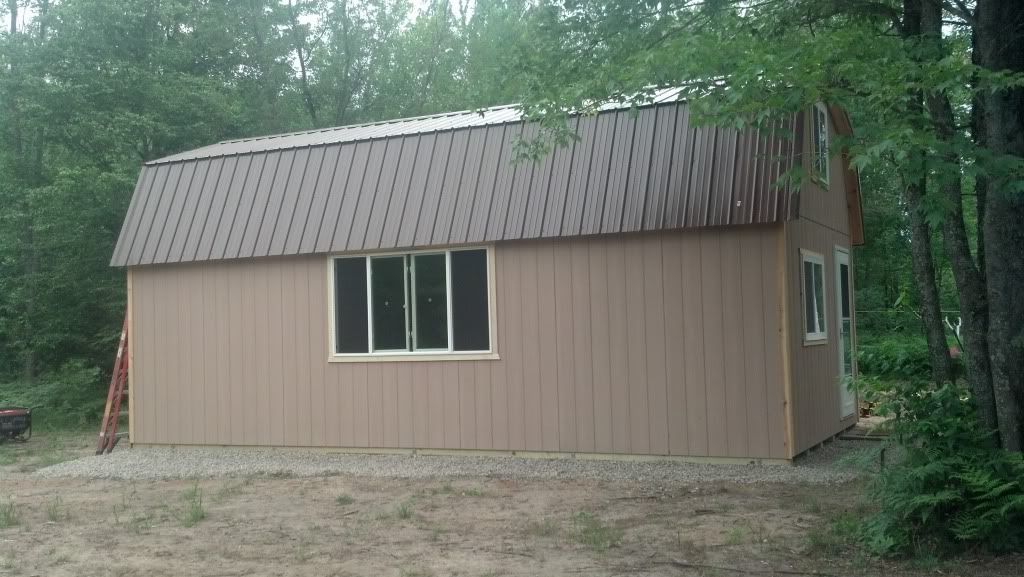
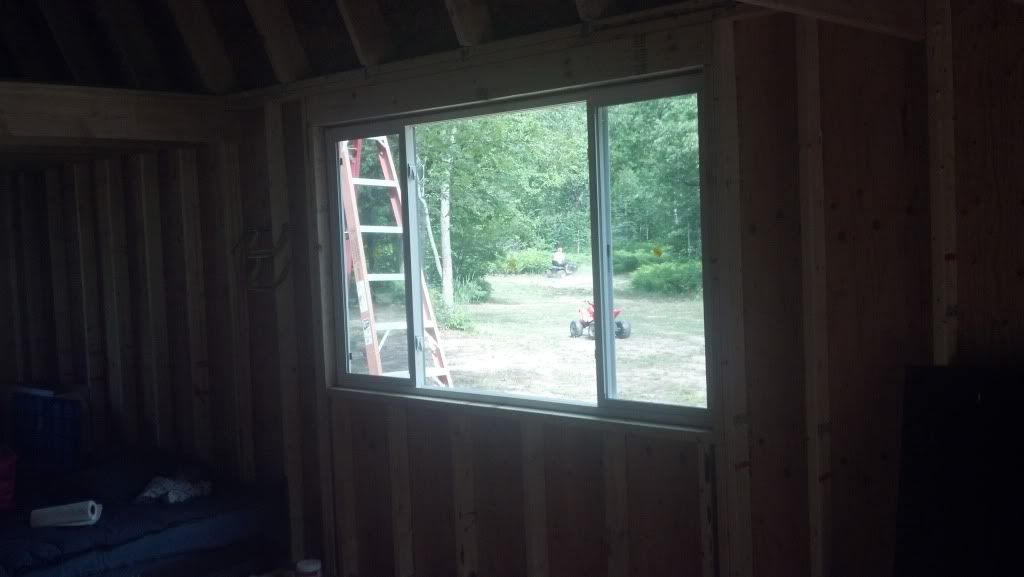
Well... got our final inspection done on the shed. Now its time to make it cabin like. Ordered the 4x7 window from Menards and saved $50 over the store price. It took me and the wife no time. Adds a ton of light and ventilation... well worth the $249 it cost 4sure. Can't wait for my 2weeks off at the end of July. Wonder what we'll get done then.
|
|
BlaineHill
Member
|
# Posted: 4 Jul 2013 07:40am
Reply
Nice cabin! Thanks for posting the details of the ground anchors. I had never seen anything like that before. Best of luck on making progress during your 2 week stretch.
|
|
MI drew
Member
|
# Posted: 7 Jul 2013 11:41pm
Reply
Here is the info on the anchors I used. Tractor Supply seemed to be the only store in my area that actually stocked them. They can be used for mobile homes as well. I used the 30" ones but they offer them in 15",40", and 48" models. The brackets on the frame are actually from UniStrut. Per our building inspector the 30" were just fine for our area and we needed to be 1ft from the corners and aprox 6ft of spacing between each one. They just started allowing the use of these on "storage" buildings in my area this year. Hope it helps others if you go the permit route.
http://www.tractorsupply.com/en/store/harvest-30-in-l-earth-anchor-with-3-in-dia-auge r?cm_vc=-10005
|
|
MI drew
Member
|
# Posted: 30 Jul 2013 09:27pm - Edited by: MI drew
Reply
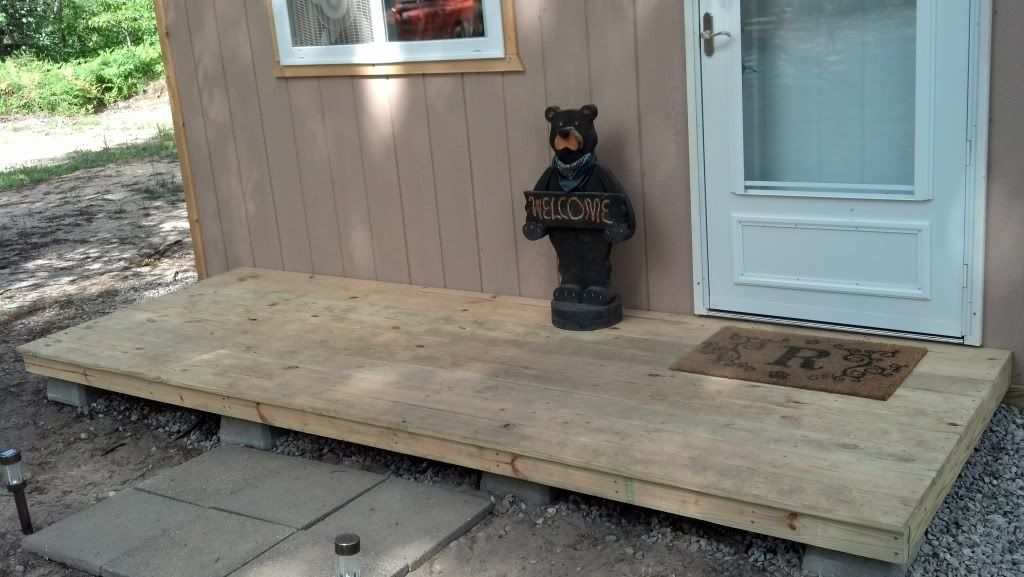
Well I was on a 2 week vacation. It was some real weid weather while we were up there. It was 90+ the whole first week. The second week barely over 70 with night time lows in the 40's. So we went to the lake 2x per day the first week and once the second.
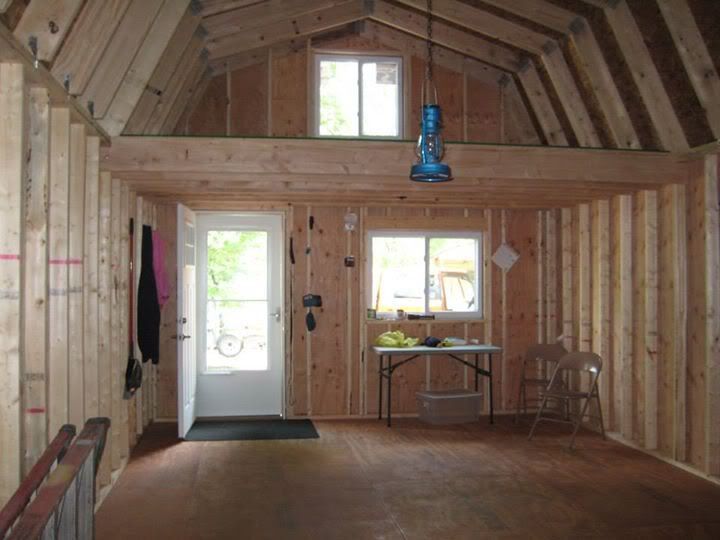
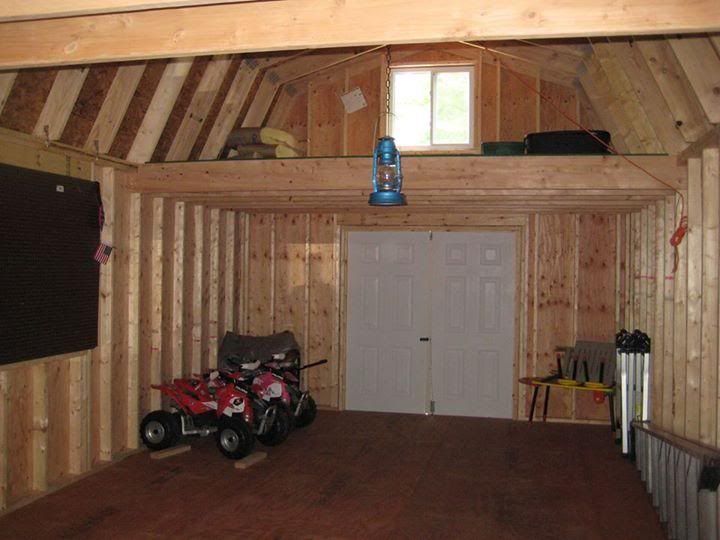
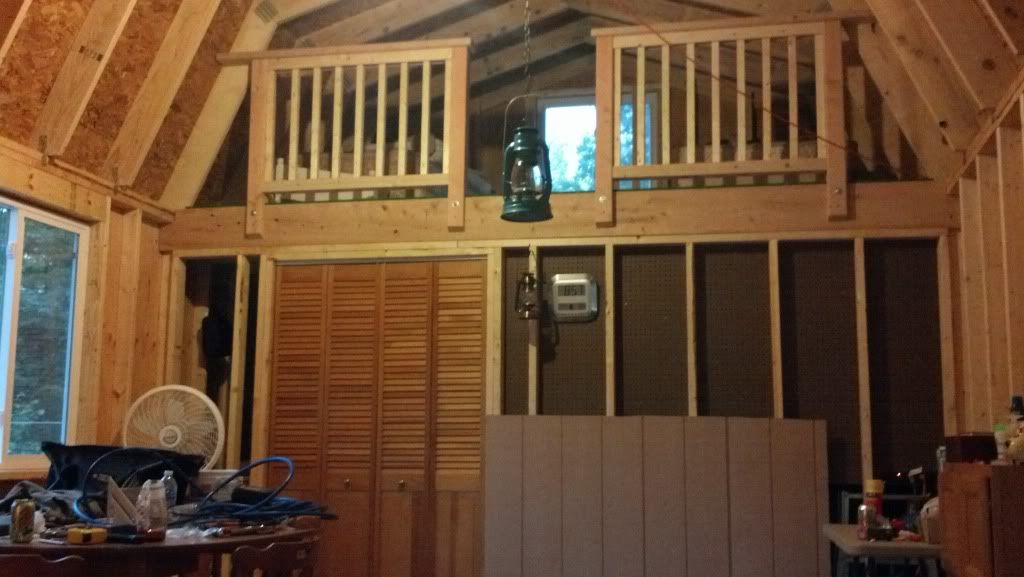
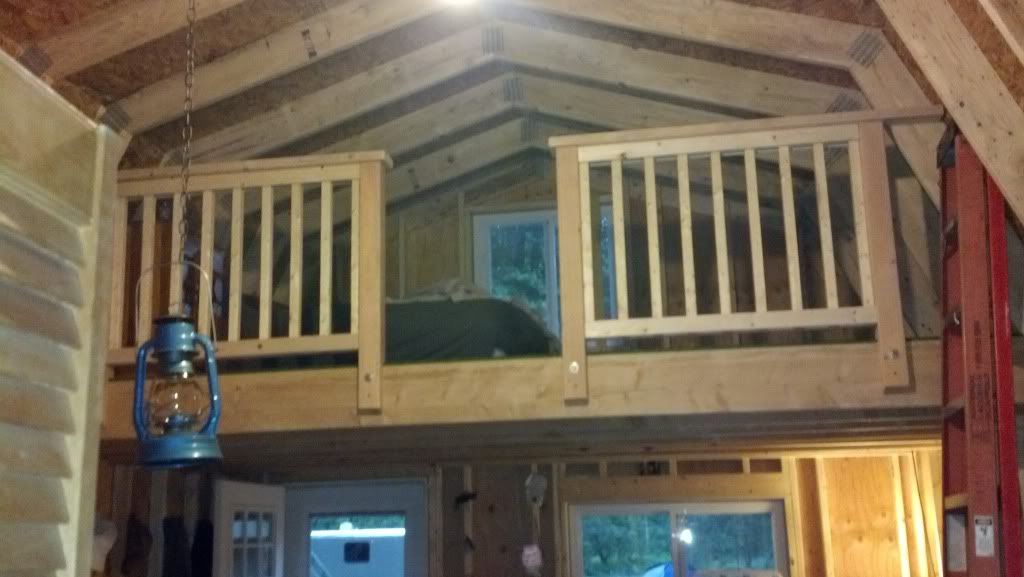
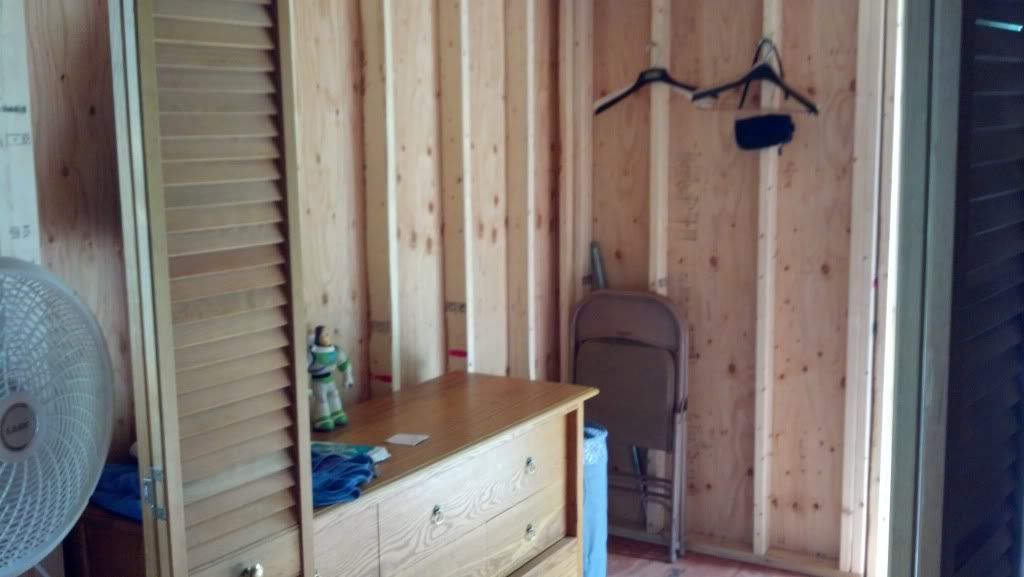
Did get a few things done. Built a 4x12 deck on the front, built a wall with a 4ft closet door, and got the loft railings done. The area behind the wall is for storage and will building shelves in a couple weekends along with the ladders for the lofts. The 4ft opening is very nice and keeps a roomy feel and the louvered panels will let heat in the area.
|
|
justincasei812
Member
|
# Posted: 1 Aug 2013 09:10am
Reply
Place looks great MI drew! I have a place just south east of Grayling.
Kevin
|
|
MI drew
Member
|
# Posted: 1 Aug 2013 09:20pm
Reply
Kevin,
Thanks.
Were not far from you. Were up by Mancelona.
|
|
naturelover66
Member
|
# Posted: 4 Aug 2013 05:51pm
Reply
Yes, the weather has been a bit weird... this week is going to be perfect though .. nice progress on the cabin
|
|
MI drew
Member
|
# Posted: 27 Aug 2013 06:36am
Reply
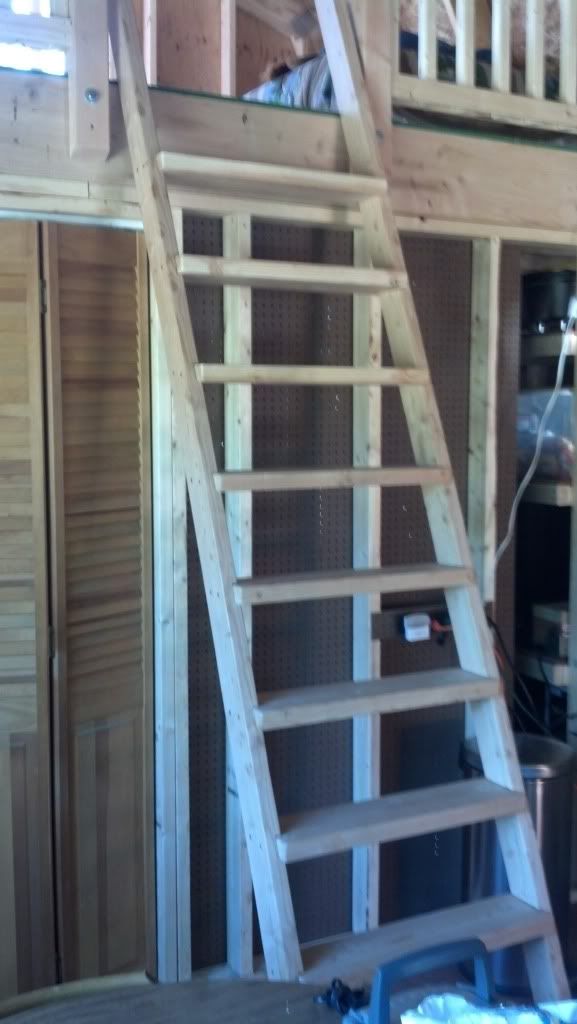
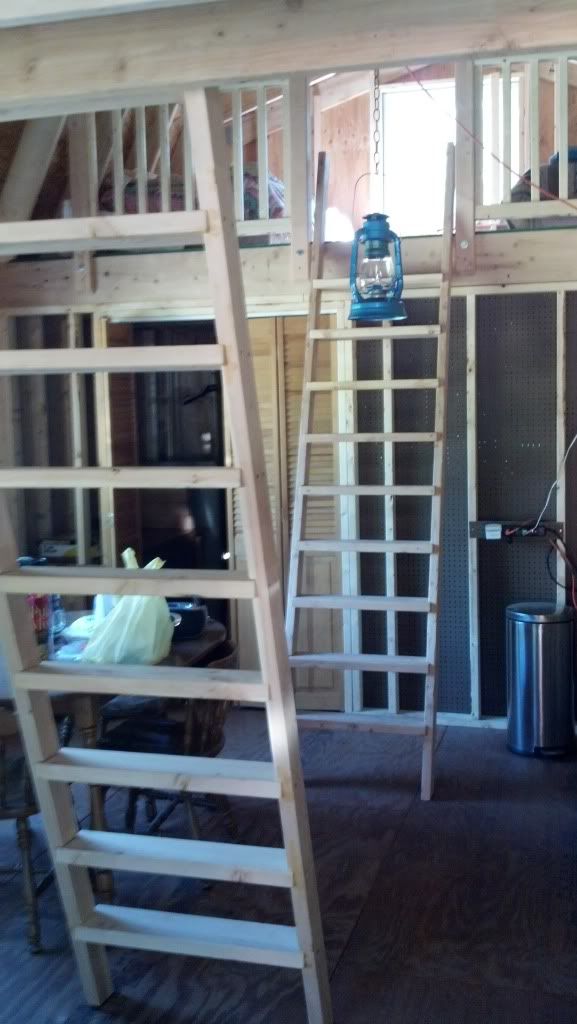
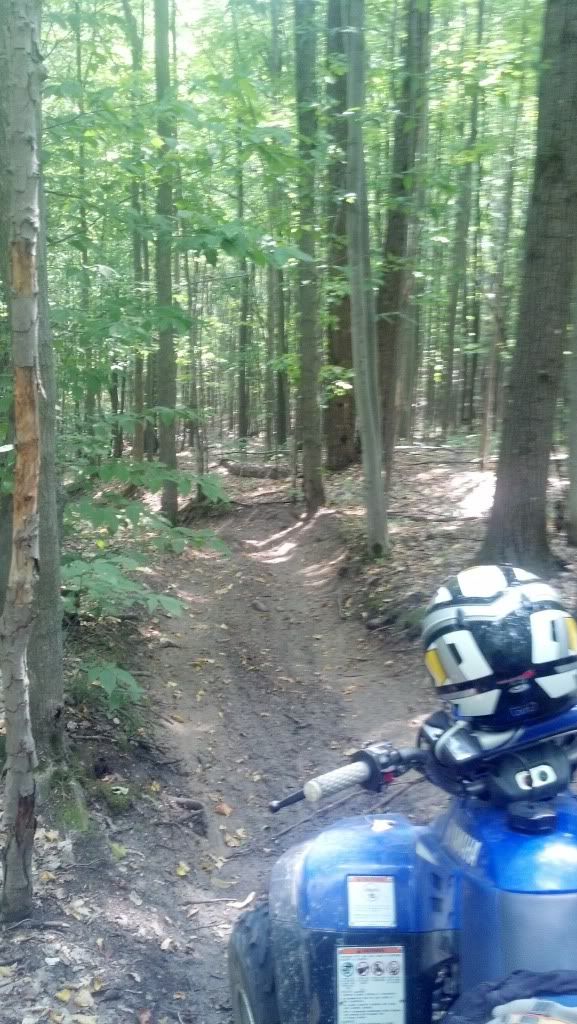
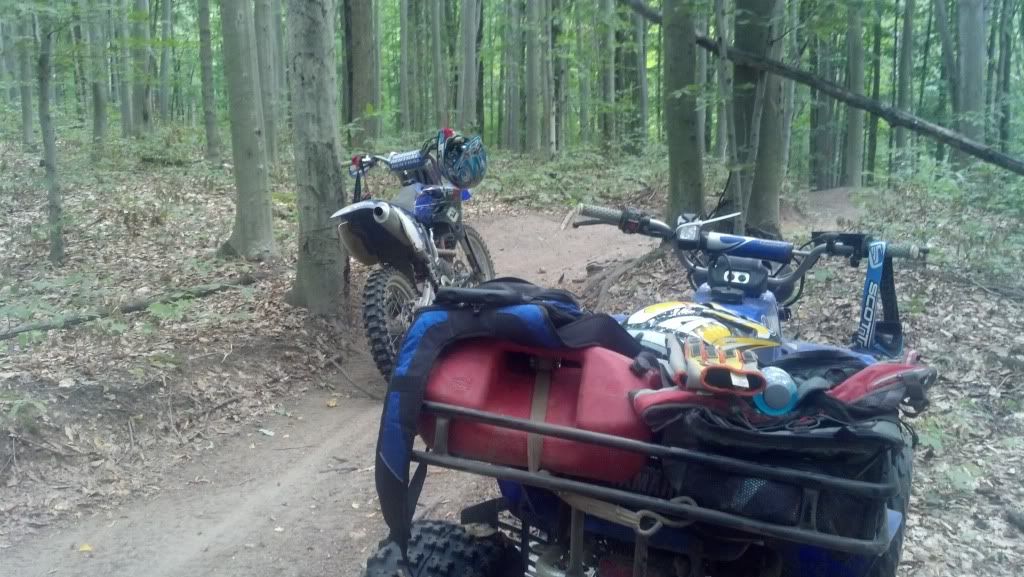
Well got a few more things done to the cabin. Finally got the loft ladders built and took them up this past weekend. Their 2x4 rails with 2x6 rungs. They feel more like a stair than a ladder and are a huge improvement to the A frame I was using. All work and no play makes life dull so a buddy came up with me and brought some toys to play with. I have been riding sleds in my area since 1996 and this was my first time on the ATV trails. Miles and miles of fun... didnt realize that the ATV and sled trails were not one in the same. Saw many many new areas and will be venturing there this winter. Next time up I'm putting up a small storage shed. Picked up a small 8x10 metal one off a friend for cheap. Will make a great area for my lawn tractor and generator.
|
|
OwenChristensen
Member
|
# Posted: 27 Aug 2013 07:57am
Reply
Did you get a dado blade to build those ladders? I have built some like that, but it is sure easier with one in a radial arm saw. Sleds? Yep that's my bag.
O
|
|
MI drew
Member
|
# Posted: 27 Aug 2013 10:41am
Reply
Owen, I marked them all and then cut the top and bottom line with my circular saw to give me a straight edge. I then cut out the rest with my router. I went down a 1/2". Dado blade would have been the ticket for sure but couldn't justify the cost for as little wood working I do. I then screwed and glued them together. Their rock solid.
I'm sure your counting the days till winter as I am. Can't wait till the first ride from MY cabin's door... been dreaming about this for years.
|
|
MI drew
Member
|
# Posted: 27 Aug 2013 02:08pm
Reply
Here are some pix from when I was building the loft ladders. I went to a 10" step height which is the OSHA min for a ladder (just in case the county makes me call this a cabin). I did keep the ladder at 75deg angle and with the 2x6 steps it doesn't feel much like a ladder. The rungs were cut at 24" and routered in a 1/2" from the 2x4 rails giving an overall width of 26" plus support for the rungs. Anyway... hope this helps anyone looking on trying to figure on building a loft ladder.


|
|
kuskus
Member
|
# Posted: 29 Dec 2013 09:30am
Reply
MI drew,
Did you buy the cabin as a kit? If so where? or where did you buy the trusses?
I'm looking to just buy the roof trusses that you used for a 12' wide cabin.
Thanks, J
|
|
MI drew
Member
|
# Posted: 1 Jan 2014 01:24pm
Reply
It wasn't a kit. Had an Amish builder construct it on site. He pre made the trusses before he arrived. He may build them just as a truss package? It's Miller's Woodworking out of Clare, MI.
|
|
bronco_ed
Member
|
# Posted: 2 Jan 2014 12:39pm
Reply
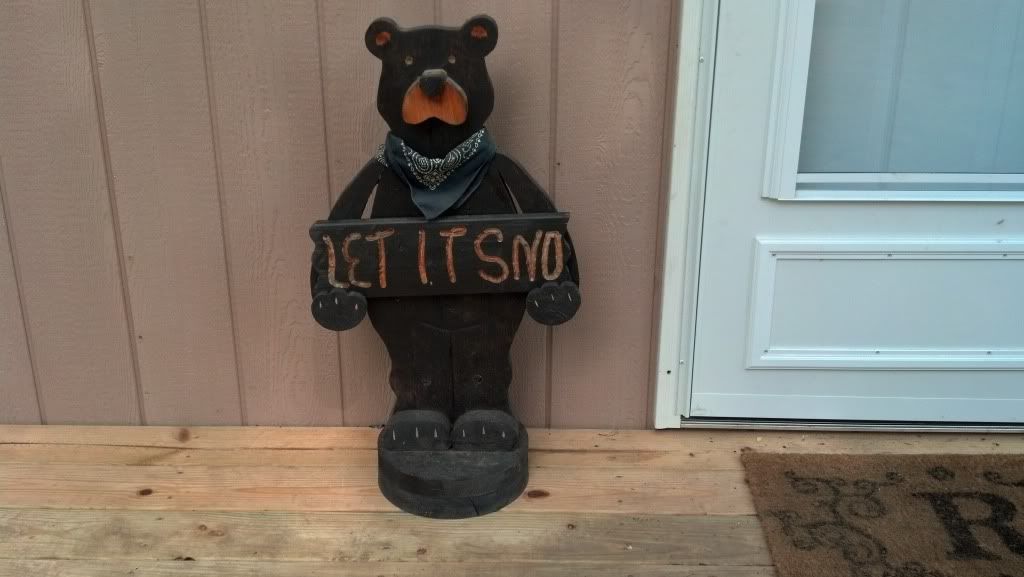
"Let it sno"
Getting your snow...
|
|
OwenChristensen
Member
|
# Posted: 3 Jan 2014 08:32am
Reply
bronco_ed
Bronco? I have a 66 Bronco.
|
|
MI drew
Member
|
# Posted: 3 Jan 2014 09:11am
Reply
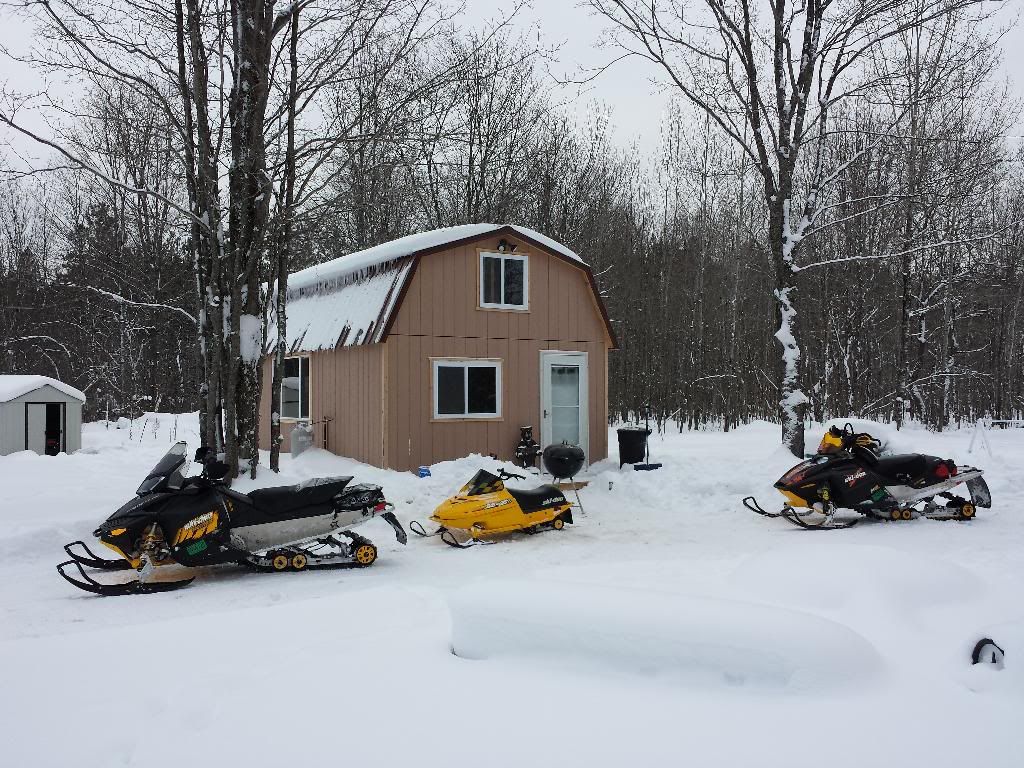
Oh, we have some snow. 80" so far. Finally got a Winter pix.
|
|
ChuckDynasty
Member
|
# Posted: 3 Jan 2014 09:23am - Edited by: ChuckDynasty
Reply
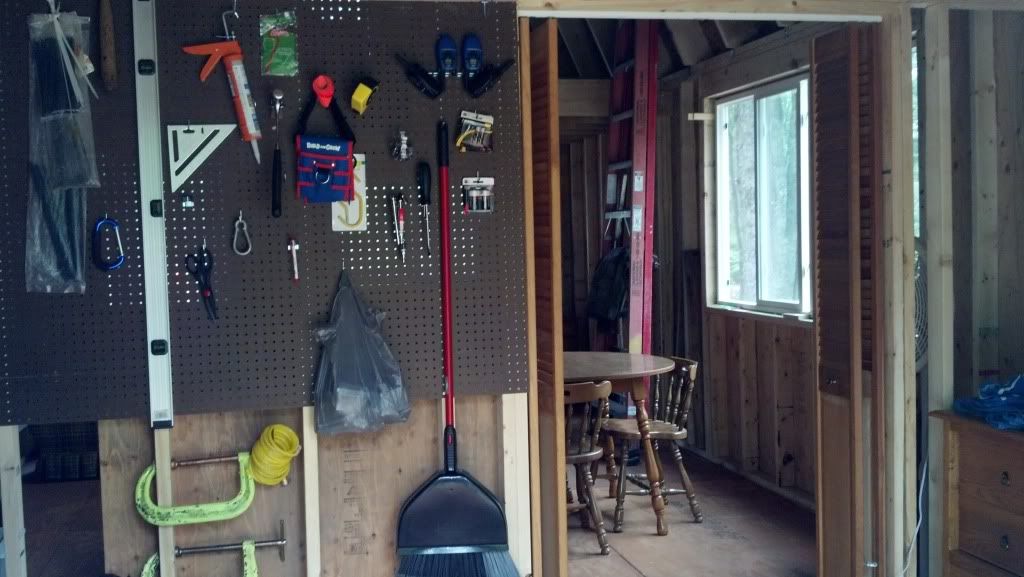
Great place, thanks for the detailed views of the tie downs and tools. A couple of questions:
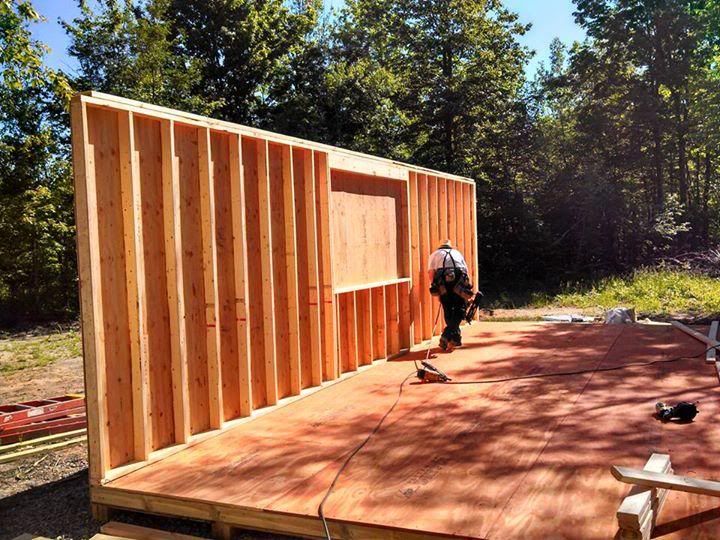
The pic of the single framed wall I see double wall studs, one shorter than the other...Is the shorter one for the loft floor joist?
Is the structure only sitting on a gravel bed?
What is the depth of the gravel and how many yards did you need?
How did they go about insulating the floor?
Thanks for the great pics.
|
|
MI drew
Member
|
# Posted: 18 Feb 2014 06:34am
Reply
The double studs you see in the pix are actually just a shadow. The only doubles I have are around any opening. It is sitting right on the limestone. The front is 6-8" the rear is 12". I believe he used about 12 yards. This will let any water drain through and not puddle underneath. The way it was built the 4x6 treated skids were laid out first, then the 1/2 treated ply, followed by the floor studs and insulation. Finally the 3/4 t&g floor.
Sorry for the late reply. I didn't get an email that someone replied.
|
|
MI drew
Member
|
# Posted: 7 Jul 2014 10:47pm - Edited by: MI drew
Reply
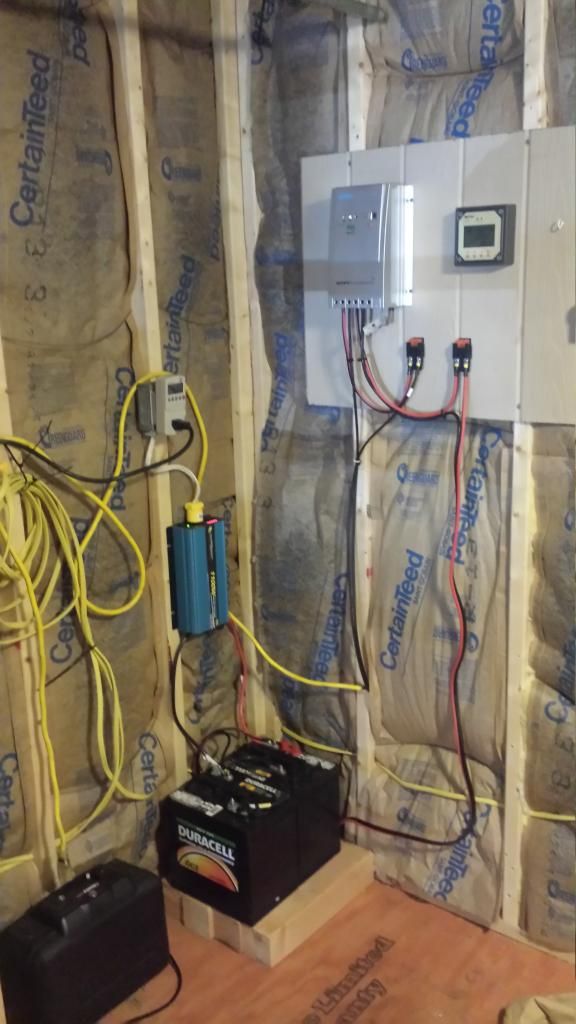
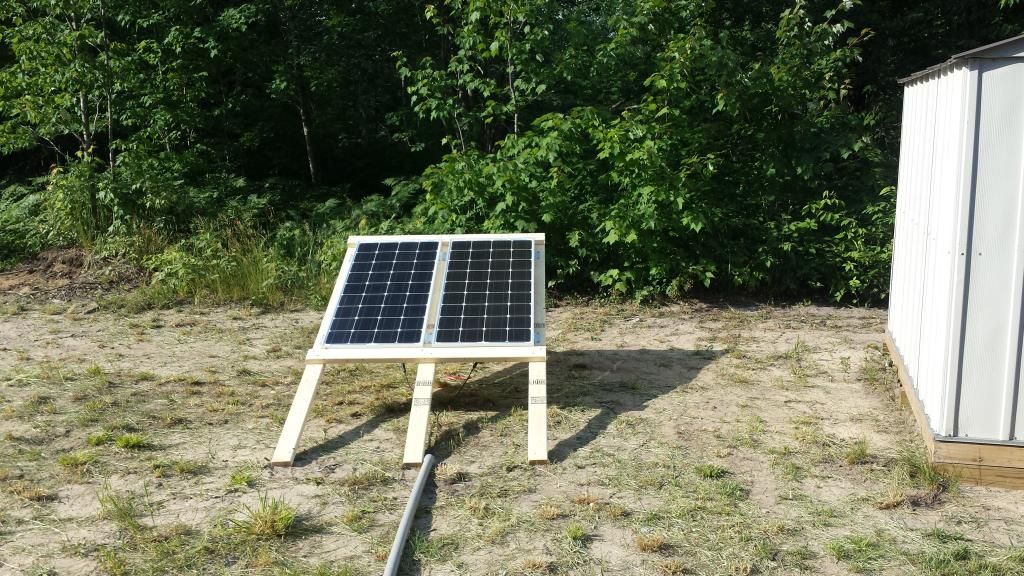
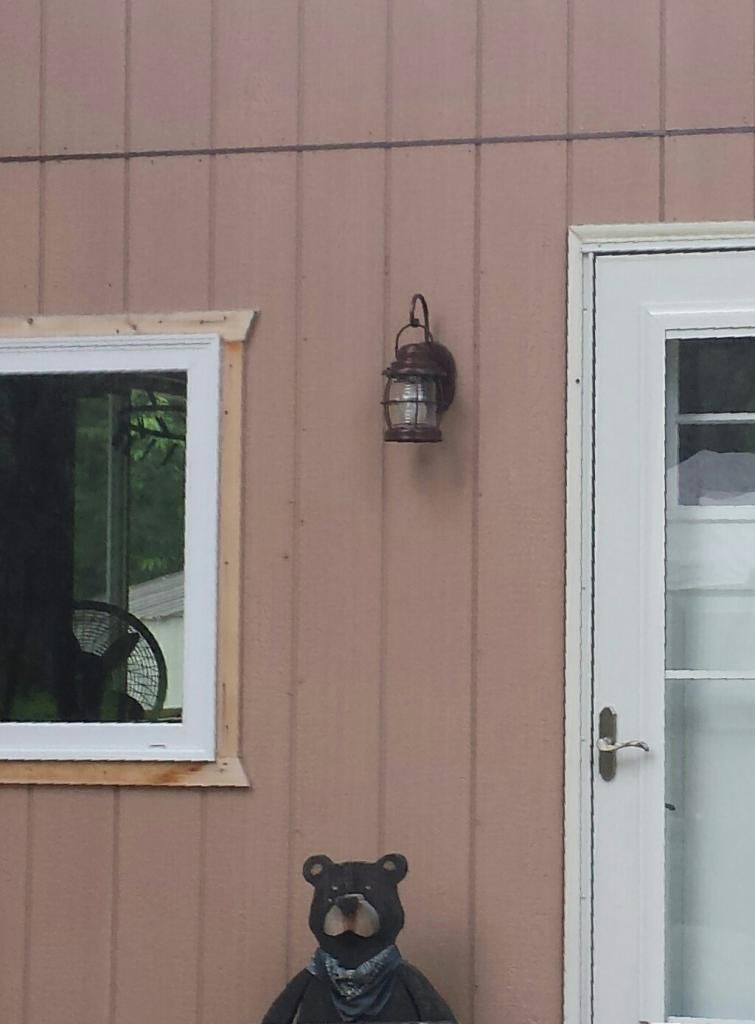
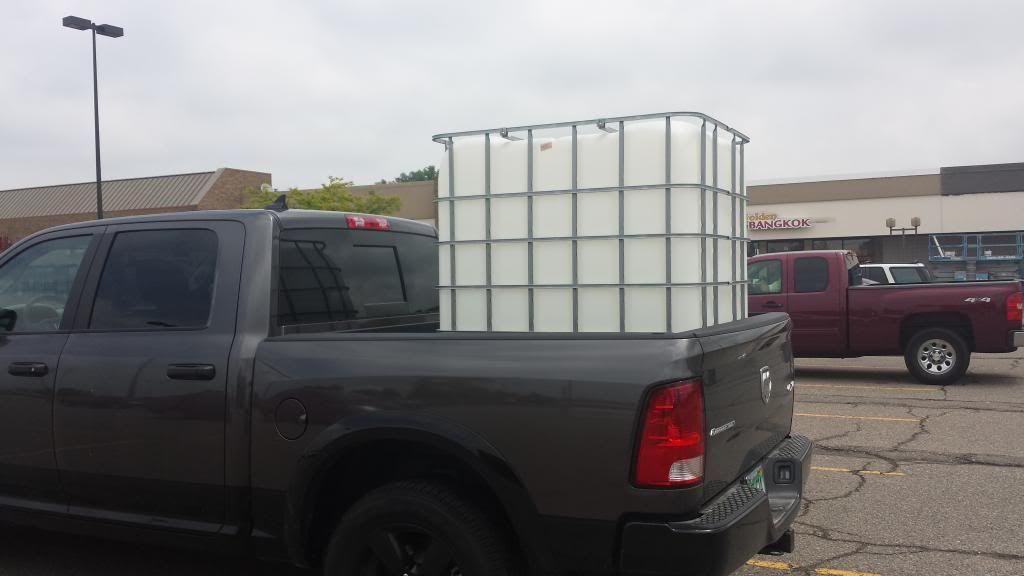
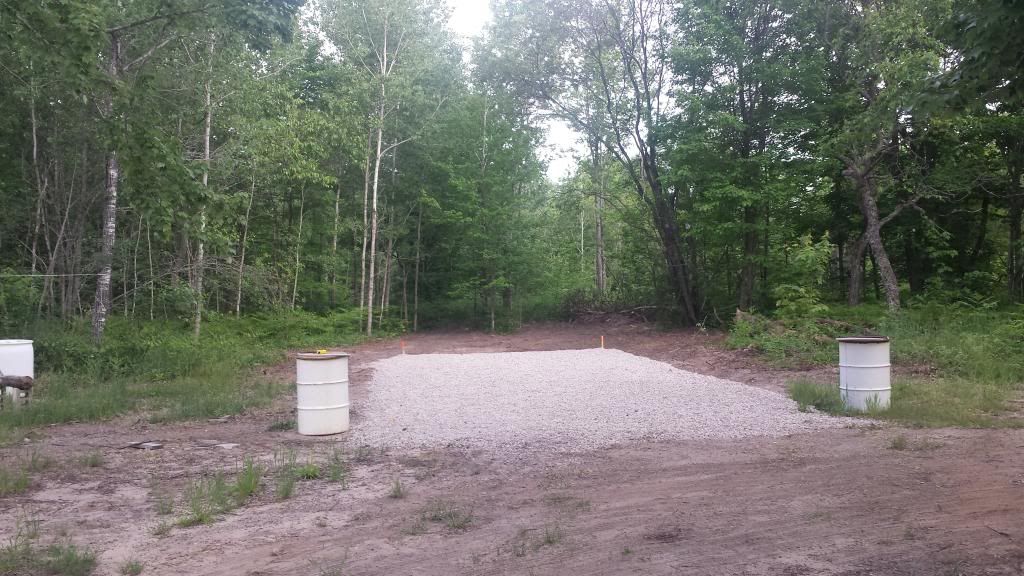
Well... got some updates to the cabin since winter. We got our solar wired up. Went with Renogy and very happy with our choice. Going to get 2 more panels. Bought my first LED light bulb and very impressed with its output. Going to switch all of our lights over to LED at some point. They were $5 at HD last weekend so I got that one and the porch fixture. Also scored a free 275 gallon water tank from a buddy at work. We will using that as our rain collector. Biggest news is that we have decided to have the Amish come up and build a 16 x 32 garage. We got the area cleared and the stone put down. They will be up the last weekend of July for the build. I'll run downspouts off the garage. I'll update more when the garage is done.
|
|
TheCabinCalls
Member
|
# Posted: 8 Jul 2014 09:05am
Reply
Do you not need footings for your garage? Will the floor be gravel?
|
|
MI drew
Member
|
# Posted: 8 Jul 2014 09:46am
Reply
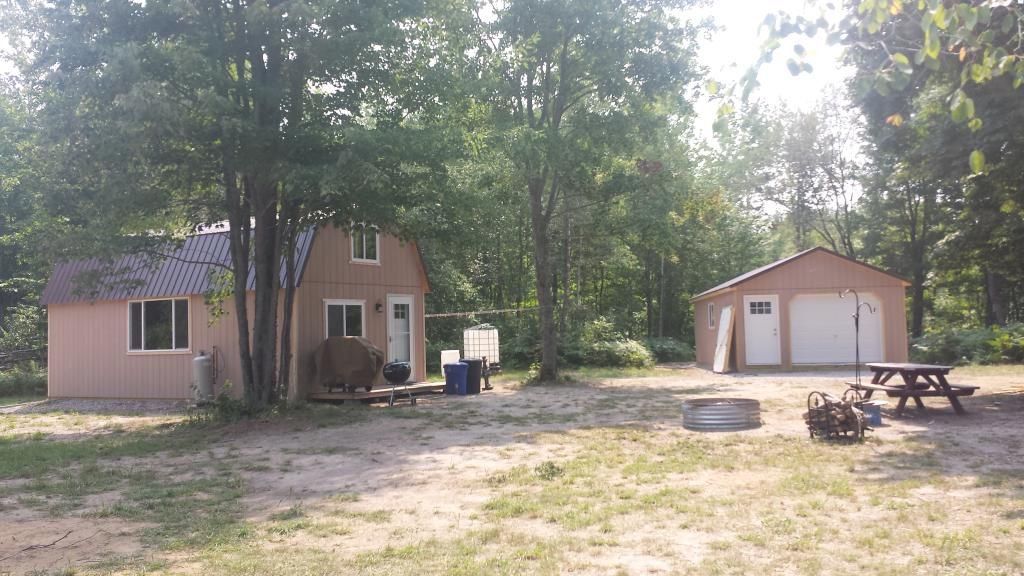
The floor will be built just like the cabin. Insulated on skids. In the future the back 10x16ft will be a visitor bunk room. Front 22x16 will be a hang out/sled&atv repair area. The floor will be covered by rubber coin flooring (much like in toy hauler travel trailers) they stuff is at Costco and is resistant to water, gas, oil, etc and they sell it in 8x16ft rolls. We are planning a 30x40 pole barn for true storage down the road. This way I have a smaller area to keep heated in the winter than a really large barn. Also, this will hopefully keep all tge dirt, etc out of the cabin. We're going to get a screen to put up in the 8x7 door opening. Weather turns bad in the other months and we have an area for more than just my family a 4 to hang out, play cards etc. Here's a pix of what the garage will look like.

|
|
MI drew
Member
|
# Posted: 10 Aug 2014 09:01am
Reply
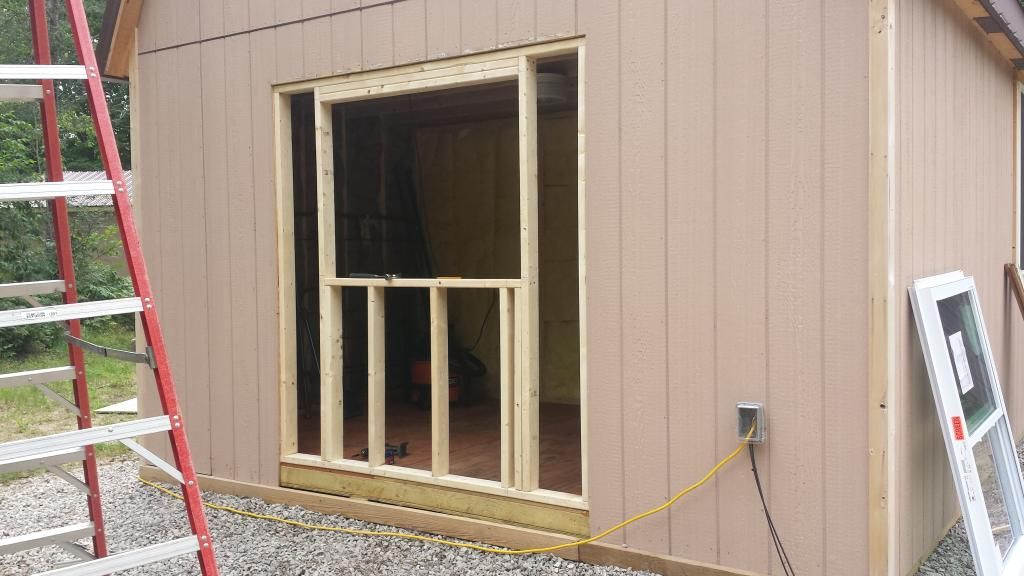
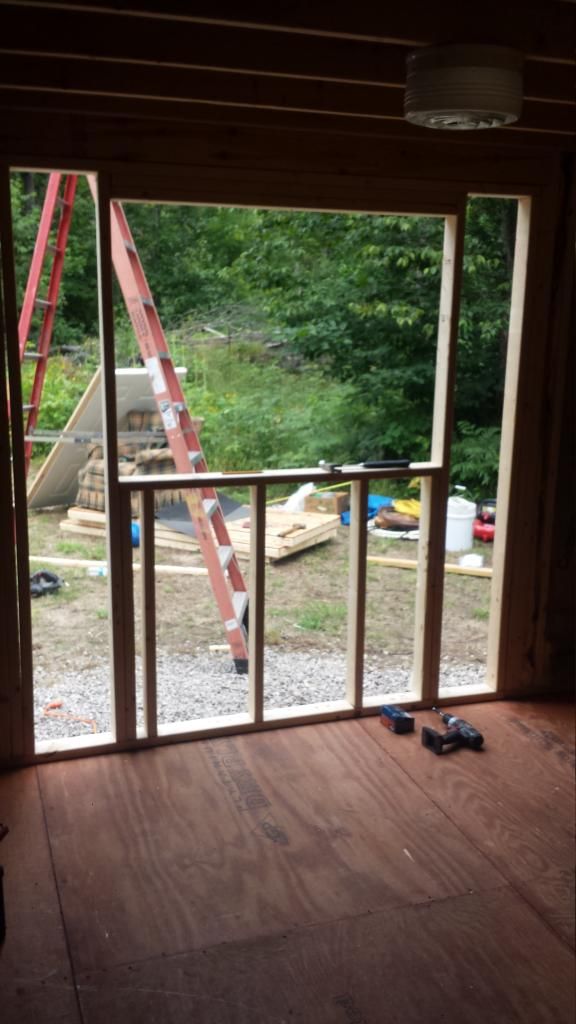
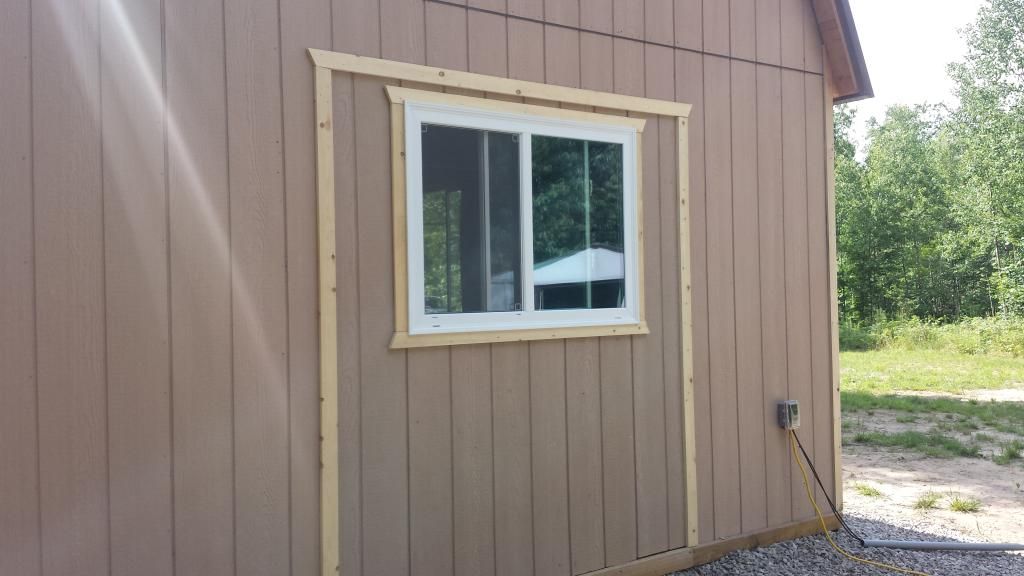
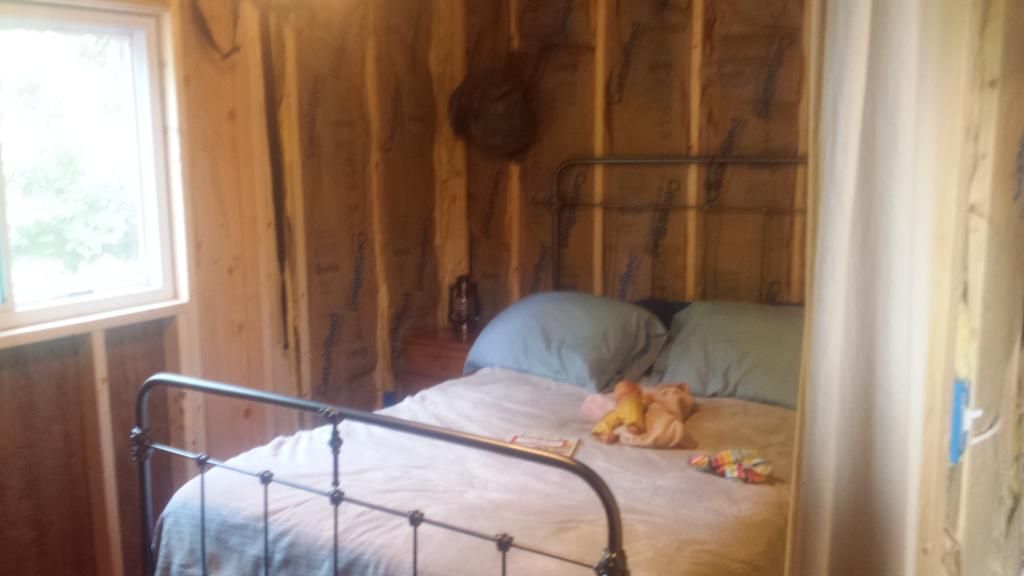
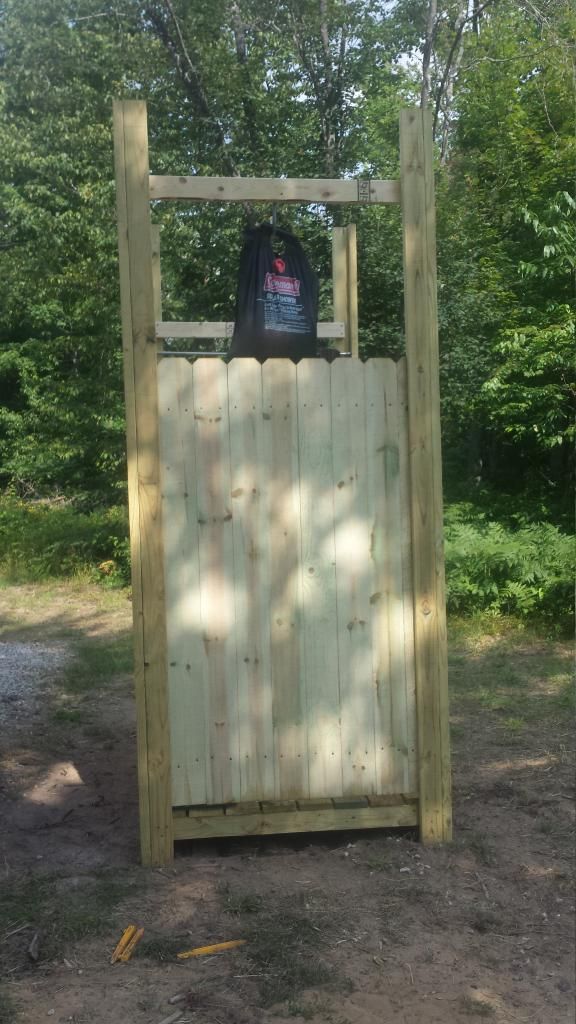
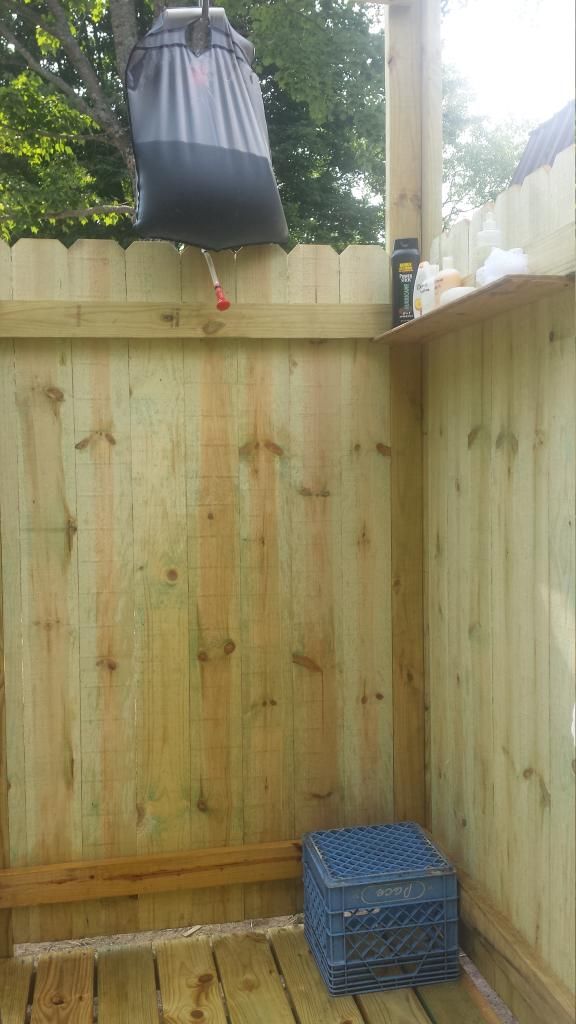
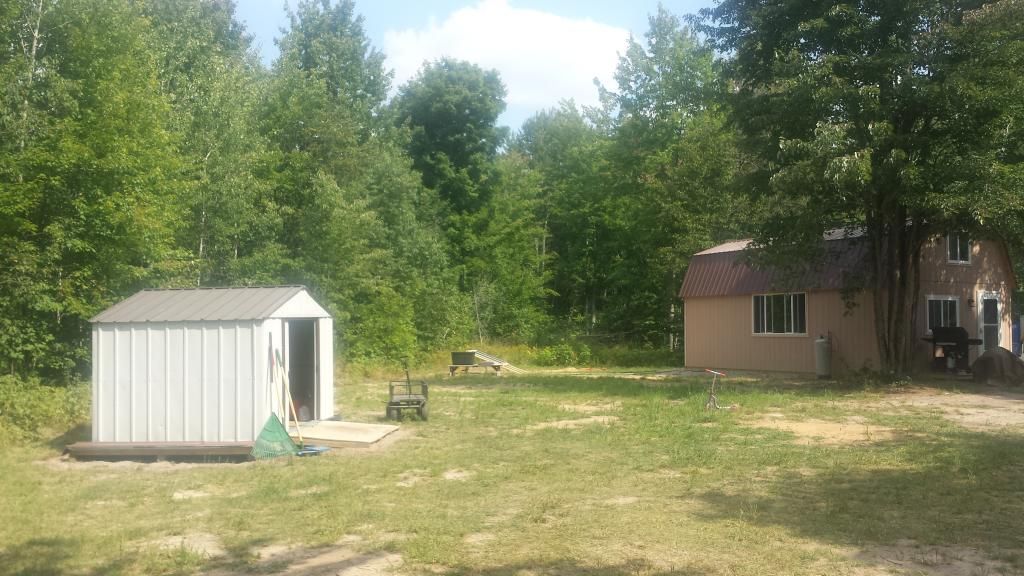
Well we just got back from a couple weeks at the cabin. It was fun, relaxing, and very productive. The Amish built our 16x32 garage, I walled off the previous storage room in the cabin to make our bedroom and added a window, built a outdoor shower (ran out of wood and still need a couple slats and the middle braces), and I moved the old shed further away from the house. The shed will be where the inverter, batteries, and generator will be stored.

|
|
|
