|
| Author |
Message |
Littlecooner
Member
|
# Posted: 23 Apr 2016 10:59pm
Reply
After being here on the forum for over two years, it has finally dawned on me that I have not started a thread on my build. Probably because I found the forum when I started the cabin, which became an idea and a site 25 months ago. Also, what I am construction is so far from what most of these threads are doing, being new, I just did not post photos. So, this is my thread of my project.
Today, I reached a milestone, after 24 months of part time on the project, the house wrap was placed around the one room 12 x 20 cabin that sits on the slopes of the Appalachian Mountains in the northeast part of Alabama. Most of the work has been preformed by me, designed by me with the help of the son on some weekends. I will start uploading photos now, as it is not your typical build. Most of the work to now has been with scrap material, throw away material, donated material and material salvaged from storm damage and material found in the woods. Lucky to live in a place where no one cares what you build.
It is finally taking shape and I will share the crazy redneck design and construction going forward. I have learned so much from the forum and enjoy all the "yen-yang" (old southern term) that goes on here on forum. We are all pulling for Julie to find that perfect spot in the NW.
I hope to get the photos from today off the smart phone and on the computer so I can show the cabin with house wrap. It has been a long trip and a lot of man hours.
|
|
Littlecooner
Member
|
# Posted: 23 Apr 2016 11:14pm
Reply
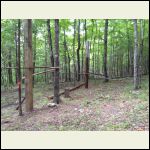
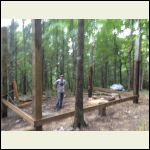
Thanks to a friend, we make the journey to Ft Morgan, Alabama back in 05-06 to the disaster that hit the Gulf, with one Hurricane hitting west Florida a month before Katrina hit Mississippi and the Big Easy. We picked up these 8x8 post about 14-15 foot long that had been cut out from under one of the beach homes that was not total destroyed. The owner had jacked up the beach house, installed new post and had this piled at the street. When we were there, both houses on each side of that resident were piled street side for removal. They had been bulldozed to the right of way, total destruction. These four post were left of our stash, and were mine and helped contribute to the decision to build the cabin. First hole dug in the limestone, went 34 inches in good dirt. no problem. Second post shown went 12 inches to rock and the center short post went 30 inches. This is the east or up side of the cabin. Lower post was no problem, about 34-36 inches when I quit digging. The last post, hit rock at 2 inches. OK, is cabin over before it gets started? I spend two days about 5 hours each ( 10 hours) with a 3 pound hammer and tools beating out limestone rock, one small piece at a time and finally quit at about 30 inches. Everything got concreted in. By this time, the hot spring weather had arrived in the south.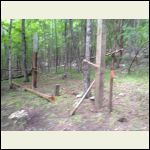
post_being_placed_in.jpg
| 
post_being_placed_in.jpg
| 
Erik_with_4_post_onl.jpg
|  |
|
|
Littlecooner
Member
|
# Posted: 23 Apr 2016 11:22pm
Reply
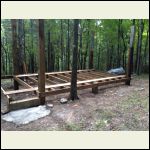
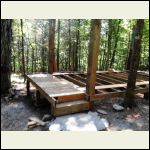
Put down a couple of the main floor (12x20) boards to look at and then build a 4 foot porch on the south side for the main entrance. Everything you see here is free lumber in money ( lot of sweat equity). I was living on a river in central Alabama and during one of the major ( 100 year floods) people were loosing docks to the flood. Neighbor and I pulled three docks over to my property, floated them in the flood up on the bank in the yard and when the water went down, I got out the impact driver and took everything apart. The stringers were in great shape, flooring on all were 5/4, all treated. One dock was almost new. So, everything got moved to higher ground.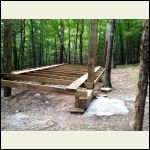
Beginning_of_floor_m.jpg
| 
FloorStringers.jpg
| 
Front_Porch_floor_go.jpg
|  |
|
|
Julie2Oregon
Member
|
# Posted: 24 Apr 2016 12:16am
Reply
WOW! Those are some serious beams! That's going to be a mega-sturdy cabin! And it ain't going anywhere with all of that stone support. Can't wait to see more pics!
Thanks for your good wishes, too!
|
|
Littlecooner
Member
|
# Posted: 24 Apr 2016 09:07am
Reply
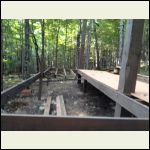
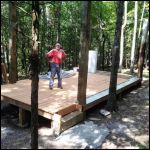
By the end of August, 2014, I had finished the main cabin floor and the 4 foot porch and started on the 6 foot porch on the "down side" or west wall. My buddy where we make the salvage runs to the beach for the hurricane damage with, had decided to redo a 12 x 30 foot section of an open deck on the back of his house, pulling off the 30 year old treated 5/4 that appeared to have never had any attempt at preservation. He placed new 5/4 and piled the old boards to burn. I needed more boards for the porch and floor so we go thru the stack of old boards and used his radial arm saw to saw out selections of 72", 48" and 44" boards that looked "ok" as one grade above "junk for burn ring". Well, I had sufficient boards to finish the porch and main floor without having to purchase any board. By the end of August, in the hot 95 degree days and humidity that you could cut with a knife, I was approaching finishing the floor to the complete cabin site.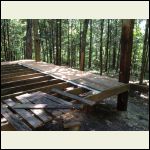
Main_floor_under_way.jpg
| 
porch_in_progress_Se.jpg
| 
Aug31Cabinfoor75_2.jpg
|  |
|
|
Littlecooner
Member
|
# Posted: 24 Apr 2016 09:31am
Reply
As hunting season approached in September, I am finished with the floor and thinking about the lucky redneck salvage lumber build. By this time, my total cash outlay was for a bucket of 1750 deck screws, about 30-40 joist hanger, two gallons of deck paint and a one gallon (cheap find at a salvage place) of wood stain in a gray shade). So I have around $ 200 out of pocket, many hours of sweat and many gallons of gas in the truck hauling this stuff from as far away as 500 miles from the gulf coast to the mountains of the Appalachian. Time to take a break and design the remainder of the cabin.
The stain to all the outside stringers and post to one color with a $ 5 gallon of wood stain helped my moral compass on the build for it at leased looked better being all one color. I picked the dirt brown floor color for a match to the woods. The young guy that was a very close buddy with my son had started hunting with us. His dad runs a commercial construction business ( mostly concrete and steel type building). With his looking at the floor and post to the cabin, he says, hey, we have these 2x6's that have been in the attic in storage over the office for 6-8 years and we do not have any use for them, do you want them for the cabin? Sure, why not, trying to build on the cheap and will take any donations. He tells me they are 22 feet long. Nawww, everyone knows that 20 feet is maximum length you can purchase a 2x6 at the building supply.
OK, so I go to pick up these donated 2x6's. They have 13 of these Canadian Fir grade 1, 2x6's that were special ordered for a job and they are 22 feet long. Bring them home and back to the design table. Ok, flat roof coming, with about 8 inches of fall in that 20 feet. Find another $ 5 gallon of paint at the salvage store ( love the $ 5 gallon "seconds" of paint). Paint the 13 boards for some weather resistance, etc and decide to use two for the "wall plates" and that turns the other 11 into a perfect match for the 20 main cabin.
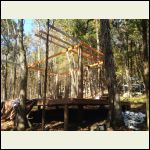
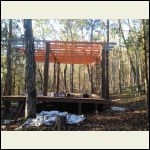
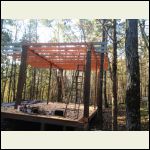
October is arriving in the South, leaves are turning, 95 degree heat is going away, so rafters are installed.
Super solid in the downward direction, very shaky in the horizontal with this crazy redneck construction design and sequence. Hey, its fun of trying to decide what to do next and with what building product!
That little tag a long trailer with the long tongue I built for hauling the Kayak was the perfect way to get these 22 footers to the cabin up in the mountains.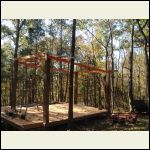
Oct_26_installing_ra.jpg
| 
Oct_26_installing_ra.jpg
| 
Oct_rafters_2.JPG
| 
Oct_with_rafters_1.J.jpg
|
|
|
Littlecooner
Member
|
# Posted: 24 Apr 2016 09:56am
Reply
On labor day, they have this event beginning in Alabama and running north across Tennessee, into Kentucky that the call the "1000 mile yard sale". Any good redneck trying to be a cabin out of junk, salvage and cheap used stuff needs to hit part of that near home. Hit the gold mine. Some guy living on the state highway that worked at a building supply place a few miles away dug a bunch of stuff out of the back of the building of unsold, special order and junk. OK, how much do you want for these brand new, half round, double pane windows? O, I would have to have $ 5 for the 18 inch one and $ 7 for the 24 or 30 inch one. OK, just found three windows for the east side of the cabin. how much for that big box of solid brass door handles and dead bolts, O, if you are buying all three windows, I need another $ 5 for that box. OK, pile in truck, give him a $ 20 and have a big smile on my face. Hey, this building a cabin is fun if its not 95 degrees.
Started to leave and did give him $ 10 for a rehung interior 30" door with one piece of trim gone.
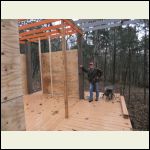
Telling my hunting buddy and showing him the "cabin" as we ready for deer bow season. Few days later, he says, dad has this bunch of plywood in the way in the back of one of the storage buildings, It was used for forming some concrete we poured a few years ago and he says he would like the room in the storage building and will give it to you for sheathing if you want it. I think it is 3/4 inch.
OK, so this stuff is mostly brand new, 3/4 exterior grade and there is sufficient to do all the sheathing of the 12x20 with me only having to buy 2 more sheets. Gold mine, found gold again. More sweat equity. I had also found this 24"x24" skylight at a surplus place that had just opened near me. I threw it on the check out counter and told the guy, "hey, i will give ya a $ 20 bill for this thing". Putting that in the truck, I am wondering, is this a great find for $ 20, or am I asking for a headache?
In all the search for gold, I had found this cedar stump that was just right for a stool and flat limestone rocks are everywhere, so by this time, it had made its way to the new home on the porch. Sits a lot more conferrable that a lot of stools I have tried before that cost a lot more.
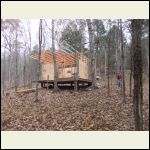
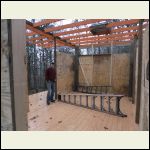
Not a great deal of bow hunting going on this October and November, too busy putting up sheathing on the redneck cabin on the side of the mountain.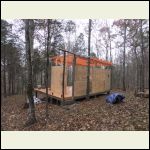
Cabin_in_Rain_Nov_15.jpg
| 
Cabin_with_Erik_Rain.jpg
| 
Erik_in_rain_Nov_15..jpg
| 
Jim__on_Porch_Nov_15.jpg
|
|
|
Littlecooner
Member
|
# Posted: 24 Apr 2016 10:04am
Reply
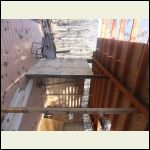
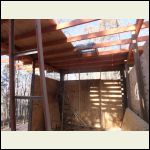
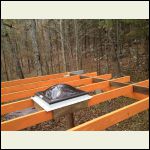
OK, gun deer season is rapidly approaching, along with winter, so I scramble to put start some type of roof cover up, so we can "batten down the hatches for the winter". And putting down some sheathing on those rafters will stop some of that horizontal shake by adding bracing. So the next few days are spent adding plywood sheathing to the roof.
And then there is the pesky $ 20 skylight. Just whose idea was it to install that thing?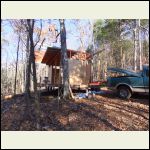
Roof_sheathing_in_pr.jpg
| 
roof_sheathing_in_pr.jpg
| 
Roof_Sheating_in_pro.jpg
| 
skylight_installed.J.jpg
|
|
|
|
Stein
Member
|
# Posted: 24 Apr 2016 10:35am
Reply
Fun build! I like "Darn-Near-Free".
|
|
Julie2Oregon
Member
|
# Posted: 24 Apr 2016 10:06pm
Reply
Amazing. You attract free stuff and incredible deals like flies to honey. So, what's this cabin going to cost you, all told? About $200? Plus sweat equity, subtracting the satisfaction of getting all of those donations and bargains! 
|
|
Littlecooner
Member
|
# Posted: 25 Apr 2016 09:16am - Edited by: Littlecooner
Reply
I am now down towards the end of the free stuff and spending money. We put the house wrap up Saturday set 3 small windows yesterday afternoon and i hope the one big window goes in today. A large part of the expense has been in "connectors" as there are very few nails in the structure, it is bolted and screwed together and all the screws are either stainless steel or coated deck screws. If I think it may slip or come apart after one screw, then I just put in another. I will post more pictures in the order of construction in a few days. We are out with the large window in a few minutes. Due to the redneck design, I have spent some time placing the front door over the past couple of weeks, having to build the door frame due to the opening I created in the framing and the use of that very non typical 8x8 post at the door entrance. Just having fun building and designing as we go.
|
|
Littlecooner
Member
|
# Posted: 6 May 2016 05:02pm - Edited by: Littlecooner
Reply
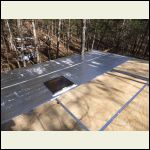
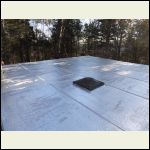
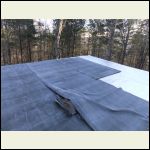
I may have saved a little too much money on the plywood decking. I opted for 1/2 inch to save money. It went down. Found this bubble pack insulation with aluminum coating at one of the local flea markets, so gave the guy 60 bucks for two rolls, enough to do one under the decking for the floor and one on top to kick the UV heat back up. Buddy donated some left over flat roofing membrane so I got that on most of the cabin roof before winter. Still had a little bit of the main cabin not covered and the 6 foot porch was not covered. The rest got the blue tarp treatment for the winter. Dang pesky $ 20 skylight is in the way again.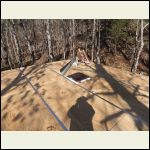
Roof_sheathing_1.JPG
| 
Raiant_Barrier_going.jpg
| 
radiant_roof__final.jpg
| 
Roofingpart_rubber_.jpg
|
|
|
Littlecooner
Member
|
# Posted: 6 May 2016 05:31pm
Reply
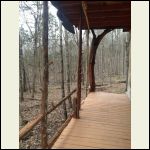
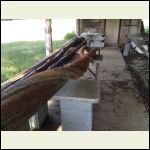
Over the next several months, many steps were made in the mountains of north Alabama, roll of surveyor tape in pocket and looking for that special dead eastern red cedar tree with "character". Some days, everyone thought I was hunting deer, moving thru the mountains with a rifle over the shoulder, but in reality, after those quite mornings with no game in sight, it was a hunt for the red cedar. Many pieces were flagged, cut down with a battery powdered saw and tired to the ATV for the trip to the covered range and on the the tables. Wire bush removed the gray and made everything red. It is amazing these vertical lines that appear after decades of weathering where the bark and sap rot and only the red heart remains. I was at an art and craft show a few weeks ago and some guy calling himself an artist was selling lamps and things made from the western juniper with those vertical grains. wow, it was expensive, but it was beautiful and was impressive to this old mountain redneck. My son says that big corner tree was the toughest part of the cabin. I have to agree. It was a killer to remove and a killer to put in place. The two of us, with a come-a-long attached and also a rope and pulley attached to the ATV. That would have made a great youtube video of it going in place. It is unreal how hard this wood is when you start drilling or cutting and it has been dead for decades. The corner porch big post was growing on top of a limestone outcropping and I really believe the thing was there when the guys came ashore at Jamestown in 1607. Can not prove that, but it has been dead for over a hundred or so years to reach the stage it is in today. The porch post go in in February and I am now on to beginning the siding.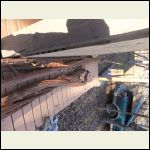
Cedar_Post_on_porch_.jpg
| 
Corner_post_Feb_6_2.jpg
| 
Corner_post_in_works.jpg
| 
IMG_1392.JPG
|
|
|
Littlecooner
Member
|
# Posted: 6 May 2016 05:51pm - Edited by: Littlecooner
Reply
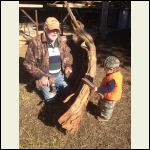
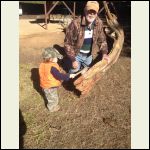
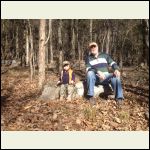
Dang, now the photos are begin to turn sideways. Though I would throw another photo in the mix of my son on the porch after the corner post went in and the rails were attached. It was kind of like a jig saw puzzle putting all the rails in the post as they were attached. Most of the work has been done by only me except for several days when my son helped when two people were the minimum needed for the days task. He has gotten excited about the build now that it is taking shape. My oldest grandson showed up one afternoon while I was working on that big corner post with the wire brush. We took sufficient time to have the daughter make a "Popee and me" photo of two rednecks sitting on a limestone rock in the woods. This entire project was begin when he and the other one, who is 6 months younger, came into my life. I want to give them that love of the outdoors that my father gave to me. One day they will spend some nights in the cabin on the side of the mountain. A long way from TV and electricity. They will probably have cell phones, because the 3G is great at the cabin. Anyway, we will be in the "mountains" watching the wildlife walk and fly by the front porch.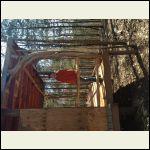
IMG_1395.JPG
| 
IMG_0936.JPG
| 
IMG_0937.JPG
| 
IMG_0938.JPG
|
|
|
Don_P
Member
|
# Posted: 8 May 2016 07:15pm
Reply
Well done, nice porch post too 
|
|
creeky
Member
|
# Posted: 9 May 2016 09:43am
Reply
Looking real good.
With that roofing rubber you could do a green roof. And have stuff growing up there. 
|
|
Littlecooner
Member
|
# Posted: 11 Jan 2024 09:23am - Edited by: Littlecooner
Reply
I have not updated my progress on the cabin in many years. So this is the beginning of posting photos of the journey.
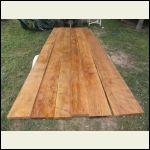
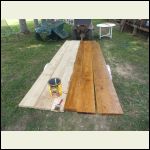
Attached are photos of the exterior of the cabin. Wanting something to last for many decades, I searched the local saw mills with a request for 1000 board feet of 12 foot by 8 inch 5 quarter black locust (Robinia pseudoacacia). Black Locust wood is very slow to rot and decay because of a high concentration of Lignin within the heartwood, as well as the presence of two fungus killing flavonoids. Finally one of the mills called and said he just purchased a tract of timber that contained a good amount of Black Locust trees.
I was able to obtain 700 board feet for the cabin, just enough to enclose the cabin. The photos attached are the process of staining and coating the lumber, preformed in the back yard before transportation to the cabin. I would do small sections at a time and precut a lot of the material and then put in place. I chose the Australian Timber Oil product for the stain, which produced a nice brownish look that fits into the mountains.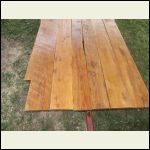
DSCF1849.JPG
| 
DSCF1848.JPG
| 
DSCF1845.JPG
|  |
|
|
Littlecooner
Member
|
# Posted: 11 Jan 2024 09:41am
Reply
It has been an been a most enjoyable journey. These photos show some of the quest to find and put in place the cabin in the woods.
Somewhere in a big yard sale/outdoor thrift store, I found the end of a wooden box that says Yukon Jack Trading Post. Wow, that needs to go over the door, so the place has a name, Yukon Jack Trading Post.
And a guy who hunts on my property finds a whitetail skull and rack in the woods, nice 8 points and no one around could identify as being shot, so if makes a great add to the cabin door, then the squirrels cut the rack off, shucks.
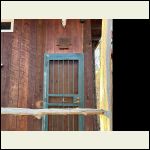
Rambling in the recycle metal places, I find this very old, very heavy security door that is a perfect fit for the front door. Wow, what a find for only $ 50 and it becomes the locked door for the cabin.
So the attached photos show the front door, all in place and a good look at the finished look of the Locust siding.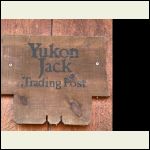
Yukon_Jack_Trading_P.jpg
| 
Front_Door_YJTP.jpg
|  |  |
|
|
Littlecooner
Member
|
# Posted: 11 Jan 2024 10:03am - Edited by: Littlecooner
Reply
Kitchen Furniture, needing to stay with the look of a "Yukon Jack Trading Post" in the middle of the Wilderness, I looked around for what was in the construction pile. The Porch area on two sides were of an exact height of 10 feet, so they are several pieces of 8 inch Locust boards that are 24 inches long laying around.
The first stool was made by a scavenger hunt to the woods to find something for the legs. The white look is that first stool, made from White Ash. Finished the top and legs with The Minwax Helmsman Spar Urethane, and I got the custom directional look to the stool.
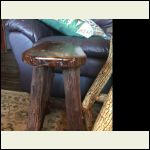
Out for the second scavenger hunt and found the perfect eastern red cedar "log" in the woods. Some of this stuff is also the rails to the porch. Eastern Red cedar also is rot resistant and the red part last for decades in the woods. A few of this stuff has this look I love, where after decades of weather, the sap all rots away, leaving on the red heartwood and for some reason on some trees, you wind up with this linear look to the "log". A wire brush on a drill and all the outside stuff is gone, leaving a bright red look of the eastern red cedar. The Spar Urethane makes this stuff a very deep maroon color, Ok, we cannot make it be the same height for the rustic look and that fits with the fact that once assembled, we have to just keep working on removing minor parts of the bottom of the legs until the stool is a perfect level and does not rock.
Third look for leg material. Need something different. OK, we did this one in Hickory. Wow, did it ever turn out heavy. Does not move much when you sit it on the floor.
I will post a photo of the table later. one piece of black walnut on the cedar legs. That took some time to make, but its in place and I did not save the photos to the computer photo file.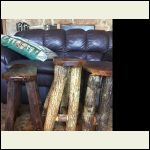
Three_stools.JPG
| 
Cedar_Stool.JPG
|  |  |
|
|
Littlecooner
Member
|
# Posted: 11 Jan 2024 10:11am - Edited by: Littlecooner
Reply
The front porch coffee table.
During all the scavenger hunt, I find this old cedar stump sitting in the woods. Up on the four wheeler and back to the house. It looks like the roots can be snipped to make it sit flat by just a little off one root. Yay, it is now flat. The search for just the perfect flat rock for the top and now we have a table for the porch. Yukon Jack would be happy that we are repurposing the stuff that mother nature left in the woods.
|
|
|

