| << . 1 . 2 . 3 . 4 . >> |
| Author |
Message |
BlaineHill
Member
|
# Posted: 27 May 2012 07:20am
Reply
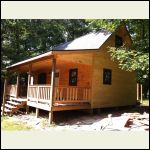
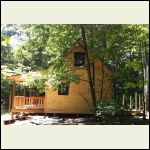
Except for a couple of small bits here and there, I have finished the siding. I also added a couple of more porch railing sections.
I put down 3 coats of satin poly in the bunk room. The can said 3 coats were recommended and it really didn't look right until the 3 coats were applied. The bunk frames were built from 2x8's with a 2x4 ledge. The mattress decks are built from the same 2x6 T&G I used for the loft floor. It is hard to get a decent picture in there, but you get the idea.
I put together a photomontage of the some of the pictures I caught during the first week of the time lapse camera. I recognize that guy as one of the neighbors. I run into him every few months. I know he is just curious about my project, but I did start locking the cabin after I saw this. The sequence of him leaving the cabin is 2 second imagery.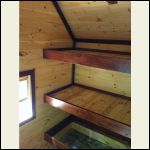
bunk1.jpg
| 
outside1.jpg
| 
outside2.jpg
| 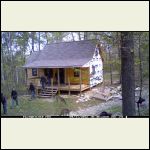
PlotWatcherPro photomontage. Left to Right: curious neighbor, deer, turkey
|
|
|
ErinsMom
Member
|
# Posted: 27 May 2012 01:59pm
Reply
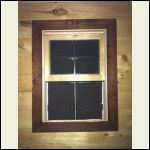
The cabin is beautiful. I would like to see a photo of the shutters closed from the inside of the cabin.
I can't believe all you have done on your own! I would add a clapping smiley but can't get it to work. AMAZING WORK!!!
|
|
BlaineHill
Member
|
# Posted: 27 May 2012 04:39pm
Reply
ErinsMom,
Thank you for your kind words. It's been nearly a year and a half and I am starting to see the light at the end of the tunnel. I have taken over 1000 pictures of this process, but I don't have the picture you are looking for. I will take a picture next time I am out and post it on my next update. As it turns out, if you intend to put screens in your windows and want to close the shutters, this is the first step in the shutter closing process: remove screen.
|
|
BlaineHill
Member
|
# Posted: 11 Jun 2012 09:10pm
Reply
I caulked all vertical seams and around the windows and finished the exterior painting on the bunk room. I intended to paint it all the same color, but in the end, I painted the window trim, shutters and soffit/fascia boards a shade darker than the body of the cabin. I am very happy with the result. Compared to the bare wood, it has a very calming effect and seems to blend into the natural surroundings.
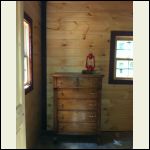
I have started to scout for some antiques to outfit this cabin. I am a huge fan of Empire era stuff and I was happy to find this old dresser. It really gives the place an old world feel.
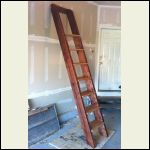
I pre-built a ships ladder in my garage to serve both upper bunks. It seems like the standard incline for ships ladders is 68 degrees. I don't know the history on that, but I followed tradition and built this ladder with a 68 degree incline. It is built from 2x8's, 1x8's, and oak stair treads. I took a picture of it while it is still in my garage as I will have a hard time getting a good picture of it after it is installed in that little room.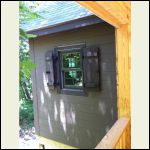
outside.jpg
| 
Empire dresser
| 
Ships ladder
| 
For ErinsMom
|
|
|
trollbridge
Member
|
# Posted: 11 Jun 2012 11:17pm
Reply
Wow...thanks for updating! Good choice going a little darker on the trims-Love those shutters-very handsome looking!
You must be nearing completion...can you believe it? Good luck with the fun search for antiques-what an exciting time!
|
|
turkeyhunter
Member
|
# Posted: 12 Jun 2012 07:53am
Reply
looks great---- really like the shutters as well
|
|
naturelover66
Member
|
# Posted: 12 Jun 2012 10:01am
Reply
looks awesome !!!!
|
|
hattie
Member
|
# Posted: 12 Jun 2012 12:17pm
Reply
Nice dresser - it fits right in!!! Love the ship's ladder and also the working shutters. Beautiful work!!!
|
|
|
jessafiddle
Member
|
# Posted: 30 Jun 2012 01:53am
Reply
man, im inspired, going to show the wife your thread, do you have any building plans?
|
|
rayyy
Member
|
# Posted: 30 Jun 2012 08:15am
Reply
Coming along nicely.One day at a time,piece by piece.The progress is so thrilling to see.You will always have that wonderful sense of accomplishment.
|
|
Malamute
Member
|
# Posted: 30 Jun 2012 11:09am
Reply
Looking good!
I'm curious about your shutter hardware, the hinges and latches. Do you happen to have any close up pictures of them or links to where they are available?
I've made shutters, but haven't seen hinges like that.
|
|
BlaineHill
Member
|
# Posted: 8 Jul 2012 07:11pm - Edited by: BlaineHill
Reply
Thanks for all the nice comments since my last update. Sorry for the delay in getting back to those who asked questions. Even though I am subscribed to this thread, I missed the email alerts on the 30th.
jessafiddle, I drew up some basic plans on paper, but do not have any real building plans for the cabin. Anyone looking closely at this cabin should be cautioned as it does not meet general building codes (no egress window, staircase is 4 inches too narrow, etc).
Malamute, Here are the links to the shutter hardware I selected. Low price was the main driver in my selections, but it's still running about $95/window.
Hinges:
http://houseofantiquehardware.com/strap-shutter-hinges-tapered-set
Shutter Dogs:
http://houseofantiquehardware.com/cast-iron-shutter-dog-spear-post
Slide Bolt:
http://houseofantiquehardware.com/surface-bolt-door-hardware-6-3-8-iron-slide
Shutter Pulls:
http://houseofantiquehardware.com/shutter-hardware-cast-iron-shutter-ring-pull
I put 3 coats of satin poly on most of the walls and the ceiling. I wanted to get that out of the way before I started putting down the flooring because I didn't want to worry about a drop cloth. Currently, I have installed about half of the flooring. I am using a 4" sculpted hickory. The flooring has a nice texture and I am really happy with the quality of it. I had to wait to install the 2x6 T&G mattress deck on the lowest bunk in order to have access to that part of the floor.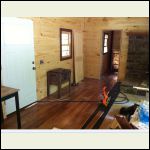
Installing floor
| 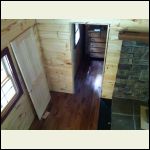
From the edge of the loft.
| 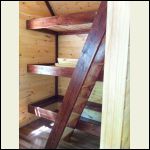
Ladder in place. I still need a couple of safety rails.
| 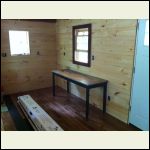
Old farm table
|
|
|
trollbridge
Member
|
# Posted: 8 Jul 2012 09:09pm
Reply
Beautiful floors...I like them a lot. Looks really nice with your trim work. The old farm table is beautiful as well. Was this one of your recent finds? You look as if you are on the home stretch! YAY! Give yourself a big pat on the back!
|
|
BlaineHill
Member
|
# Posted: 9 Jul 2012 11:25pm
Reply
Thanks for the encouragement TB. I actually have a lot to do before I consider this cabin "done". I still have to finish painting the outside of the cabin, build exterior railings, and finish the flooring. I designed the staircase, but have not started it. I also have to build in the kitchen section. I am planning on putting in a 24" gas range. I will have to do a natural gas to LP conversion and even at that I will not be able to work the stove part without generator power. I took a half-day time out to process a half cord of firewood from one oak and one hickory blow-down. If I don't take another week of work to work on this cabin I don't think it will be done by winter. Yeah... It's a lot of work. It's not time to rest yet, but I look forward to that.
|
|
trollbridge
Member
|
# Posted: 10 Jul 2012 11:52am - Edited by: trollbridge
Reply
LOL! Okay...so there is more to do than meets the eye...not the home stretch yet but getting closer at least!!! Hope you survive the heat and can keep plugging away-my guess is you won't be doing any exterior painting anytime soon! Hope you don't get more bad storms either. You'll get there though...you've shown much determination and persistance-something I really admire    
|
|
Dillio187
Member
|
# Posted: 10 Jul 2012 12:02pm
Reply
thanks for the earlier tip on getting the 1x8 T&G from Menards. I have been checking around as I want to use the same material in my little cabin.
Did you poly and sand it before installation?
|
|
BlaineHill
Member
|
# Posted: 10 Jul 2012 06:41pm
Reply
Dillio187, I installed the 1x8 T&G before I did any finishing. It's a long story, but the way I did the soffit vent, I pre-painted a couple of sections of that material and found that the tolerances on the milling are pretty tight and I had a difficult time getting the thickness of the pre-painted tongue into the groove. I would plan on doing all finish work after the wood is installed. I used Rustoleum satin interior poly. The can said I did not need to sand between coats so I didn't. I decided not to apply any stain to the interior walls and just let them yellow naturally over time. I have been happy with my choice to use the 1x8 T&G as an interior finish. Good luck with your project.
|
|
Dillio187
Member
|
# Posted: 10 Jul 2012 07:57pm
Reply
thanks, I figured that the tolerances might be tight if coating prior to install.
|
|
BlaineHill
Member
|
# Posted: 5 Aug 2012 06:08pm - Edited by: BlaineHill
Reply
Hard to believe it has been another month already. If the weather is decent, I make time to paint the outside of this cabin. Otherwise, I work inside. I have nearly finished installing the flooring, started the staircase, wired-up the panel, and worked a lot of odds and ends. I don't have a lot to offer this time in terms of photo updates.
Steps 1 and 2 are ready for polyurethane. Steps 3 through 5 are roughed-in. I have not yet started steps 6 through 11. I bought oak treads and risers. I decided to face-screw everything, which is sacrilegious, but I am saving myself a lot of aggravation. At 31.25 inches wide, this stairwell has the feel of a back/service staircase in an old farm house and I am happy with the way it is turning out.
I found an old, wall-mounted, railroad lantern stamped "DT&I". It's a relic from the now-defunct Detroit, Toledo, and Ironton Line. It is of local historical interest and I was glad to find it.
I have been running the time lapse camera, taking 5-second imagery, for several months now. As it turns out, the "curious neighbor" documented here on 5-27-2012 continues to stop out at the cabin. He is very predictable – every other Wednesday. He spends a few minutes looking around the outside of the cabin and looking through windows. Then, he sits on the front porch anywhere between 20 minutes and an hour and a half.
|
|
Swamphunter
Member
|
# Posted: 5 Aug 2012 06:20pm
Reply
Id compile all those pics of your neighbor snooping and mail them to him....
|
|
Swamphunter
Member
|
# Posted: 5 Aug 2012 06:30pm
Reply
I see where the original red cabin is 16x24... what size did you end up building?
|
|
ErinsMom
Member
|
# Posted: 5 Aug 2012 07:29pm
Reply
It looks great. Thanks for the shutter photo posted sometime back.
|
|
BlaineHill
Member
|
# Posted: 5 Aug 2012 09:33pm
Reply
The main cabin is 16x24 with a 12x8 bunk room. Since I am doing all the work myself, as it turns out, I am getting about twice the cabin for the money compared to having a shell delivered.
As for that curious neighbor, he lives in a house the size of my cabin with 4 other adults, has lost most of his teeth and has lived a hard life as a logger. I find it a little unsettling, but if he wants to sit and rest for a while, I guess it's okay. He has walked my land since 1958. I am from the city and I guess I am lucky he and others have accepted me into the community at all. I think, when the cabin is done, and as the years pass, he probably won't visit there anymore.
|
|
TomChum
Member
|
# Posted: 5 Aug 2012 10:31pm - Edited by: TomChum
Reply
Nice cabin, I like the looks.
I think you are right about the neighbor. He is coming and sitting because he has not yet granted you exclusive rights to the land he's accustomed to roaming. I had a little of that the first year. Dirt bike tracks circling the cabin and beercans discarded . But in 2nd year haven't seen any further evidence. I would avoid admitting that you have pics of him, which would put him on the defensive. It's best if he simply gives it up for lack of interest or once it looks finished or looks like you've 'moved in'.
|
|
bugs
Member
|
# Posted: 6 Aug 2012 07:34pm
Reply
BB
When/if our shack ever grows up I want it to be like yours.  A very impressive build and still keeping the SMALL cabin perspective. A very impressive build and still keeping the SMALL cabin perspective.
Hopefully your neighbours will be watching out for you rather than using your place as a convenience store. I may be old school but I still think most people are inherently honest and trying to help.
bugs
|
|
trollbridge
Member
|
# Posted: 7 Aug 2012 12:06pm
Reply
BH...always a joy to look at your pictures. We worked on our staircase this past weekend too. Pine treads and risers but also face screwed them. Ours are ready for poly also.
I wouldn't worry about your neighbor...he probably finds it so peaceful to get away and come sit at your place and ponder about what it would be like if it was his own. I'm sure he is harmless and would want to see no harm come to your place.
|
|
BlaineHill
Member
|
# Posted: 17 Sep 2012 10:45pm
Reply
Because I decided to build the top porch step the same height as the front porch, I had to build those little horizontal railing sections in order to make the stair railing look right. It wasn't that bad, but if I had it to do over again, the top step would have been done a little different.
The table is new but looks old. The bent-back chairs are old (1940's). I had to drive to Louisville, KY to get the hutch and it is old (1890's).
I am getting close. Maybe 2 more updates.
|
|
trollbridge
Member
|
# Posted: 18 Sep 2012 03:35pm
Reply
Quoting: BlaineHill Because I decided to build the top porch step the same height as the front porch, I had to build those little horizontal railing sections in order to make the stair railing look right.
Yes...us too...kinda a pain! I love your porch-I would sit there and do nothing for hours!!! It is a really good size I think! Love your choice of table/chairs and hutch and the dark stain on them. Your place is coming together beautifully!
|
|
BlaineHill
Member
|
# Posted: 14 Oct 2012 08:08pm
Reply
I just finished all exterior painting on the cabin—just in time for winter. The porch and back deck railings are rough sawn cedar and they really took in a lot of paint. Aside from a few more sets of shutters, I think I have finished all the outside work.
There are 2 cabin trips scheduled with friends in November. That is really the forcing function to get the outhouse finished. The outhouse turned out to be another pre-fab project in my garage. I have since hauled the 4 walls and base out to the cabin, and started digging the pit. According to the 1917 topo map I tracked down from the USGS historical site (http://nationalmap.gov/historical), the cabin sits in, what used to be, a farm field. The outhouse is on the edge of the field. I think the people who used to work that land cleared rocks from the fields and dumped them on the tree line. I hit no rocks when building the cabin foundation. That was not the case for the outhouse.
Outside the cabin, I placed a 40 lb bottle of LP. The only thing I am fueling is the cook stove. I searched for an off-the-grid cook stove for awhile, and was happy to find a nice solution. Brown Stoves makes some nice off-the-grid stoves. They used to do pilot lights until the EPA crack-down. They redesigned their off-grid stove to have electronic ignition with two 9V batteries. It even came plumbed for LP instead of natural gas so I did not have to do a jet/regulator conversion. I bought the stove from Lehmans. They are located in Ohio Amish country and offer an awesome assortment of off-grid products. If you are within a couple of hours of their store, it's probably worth the drive. Here is the stove I bought:
http://www.lehmans.com/store/Stoves___Cook_Stoves___Gas_and_Kerosene_Burning___Brown_ Gas_Ranges___20LP30#1236790123679512368001236805
I am trying to build-out the kitchen area before those cabin trips. We will see how it goes.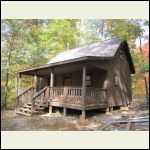
Front of cabin
| 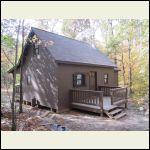
Back of cabin
| 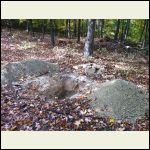
Digging the pit
| 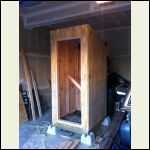
Outhouse pre-fab
|
|
|
BlaineHill
Member
|
# Posted: 5 Nov 2012 07:56pm
Reply
Outhouse continued ...
I finished the outhouse, more or less. I would still like to get a vent pipe on it, but I think I am done working on it for now.
I ordered a plastic skylight for the roof to let in some light. I also ordered barn door hinges and a D-handle for the door. It's not exactly what I had in mind, but I needed to get something functional out there for the fall season so I didn't spend a lot of time on it. I guess regulations on these old-fashioned toilets vary from place to place. I have read through discussions here on the forum concerning outhouses. I get the feeling a project like this, constructed in some parts of the country, would have got me arrested, handcuffed, and perp-walked.
Maybe it's just me, but when I see an outhouse, I wonder about the pit. It seems mysterious and strange. I dug a hole 24" wide, 34" long, 40" deep and lined it with 2x treated lumber. It's a very occasional use cabin and I am sure this outhouse will provide years of service.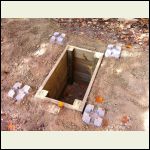
Outhouse Pit
| 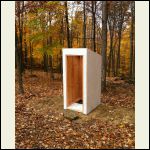
Base and panels assembled and primed
| 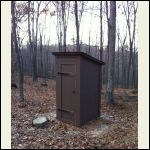
Completed Outside
| 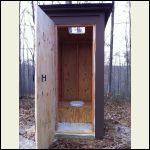
Completed Inside
|
|
|
| << . 1 . 2 . 3 . 4 . >> |

