| << . 1 . 2 . 3 . 4 . >> |
| Author |
Message |
trollbridge
Member
|
# Posted: 28 Oct 2011 11:42
Reply
Your stovepipe should be above the highest peak for proper draw. We went with the corner but paying for all the stainless double wall was not fun :( In the long run though I think it is better to spend the money and put it where it gives you the most leftover workable space-that way you won't regret it. Good luck!
|
|
Mark2011
Member
|
# Posted: 28 Oct 2011 13:34
Reply
That is what I was thinking, also hoping not. I looked at your picture with your pipe. I guess i'll be placing my stove in the middle and since its open, just running black pipe up to the roof and then putting an insulated cap at the peak to outside.
|
|
trollbridge
Member
|
# Posted: 28 Oct 2011 13:40
Reply
Be careful with that futon though-you don't want to awake with your bed on fire!!!! Maybe the futon could be moved to a safer distance.
|
|
Montanan
Member
|
# Posted: 28 Oct 2011 15:56
Reply
We did the same as trollbridge- put it in the corner, as that worked the best for us in terms of usable space. But yes, that double wall chimney pipe was $$$ and wow- HEAVY! We had a heckuva time getting the pipe all set up- especially the support box. Ugh. But I tell ya, it works GREAT. We have excellent draw and it heats the cabin nicely. FYI- there are very specific guidelines for installation and clearances, so follow the directions!
|
|
soundandfurycabin
Member
|
# Posted: 28 Oct 2011 17:19
Reply
Too late now, but sometimes it's cheaper to build the cabin a couple feet longer than to pay for all the extra chimney pipe!
|
|
marker2011
|
# Posted: 29 Oct 2011 19:59
Reply
Thanks guys for the information
Well the futon is just for a spare bed, it will be used mostly as a sofa. Our bed will be on the loft. Also its an airtight wood stove with a glass door. Im going to put it in the middle or i'll have to spend alot more of insulated pipe to go outside. plus in the middle it'll look nicer.
|
|
Mark2011
Member
|
# Posted: 4 Nov 2011 12:57
Reply
Just thought I drop in and add some more pictures.
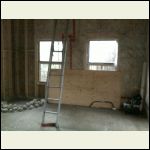
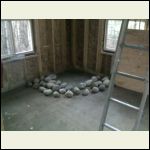
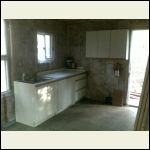
I found a complete kitchen cabinet set for free on kijiji. I just had to remove them. I only had room in my truck to bring up half. Im going to bring up some more and then sell the rest. I have all the insulation and vapour barrier in. Only spot I need to put some is behind where the wood stove is going. Im going to build a stone base for it. As you can see in the picture.
Enjoy!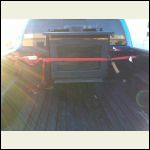
10252011287.jpg
| 
10302011289.jpg
| 
10302011290.jpg
| 
10302011292.jpg
|
|
|
trollbridge
Member
|
# Posted: 4 Nov 2011 16:14
Reply
Nice looking wood stove! Did you decide to go with the corner placement? I like the stone very much!!
|
|
|
marker2011
|
# Posted: 8 Nov 2011 10:13
Reply
Thanks, the wood stove is going to work great for the winter.
Yea I decide to go in the corner, i'd spend a little extra to save space in the cabin. It just makes more sense to put it in the corner.
Built my stone base this past weekend and set up the kitchen area. Plus did the wiring for some outlets.
Its coming along, also getting very cold up there.
|
|
Nirky
Member
|
# Posted: 15 Nov 2011 21:19
Reply
This looks like a wonderful cabin. Have been following your progress, looking forward to seeing more interior & exterior pictures.
|
|
Mark2011
Member
|
# Posted: 12 Dec 2011 12:31
Reply
Hey all!
So I started putting up the pine interior walls this weekend. I only bought a small amount to get started. I started in the loft area up stairs, so once that area is done we can block it off and have it has a sleeping area. It looks pretty nice.
Enjoy.
|
|
Mark2011
Member
|
# Posted: 12 Dec 2011 12:33
Reply
Here's a picture of the wood stove with its stone base. Works great!
And the kitchen set up. I got this whole kitchen for free + I still have 6 other cabinets that I'm not going to use. There's a picture of the stove/oven I bought, works great on a 20lb propane tank.
|
|
trollbridge
Member
|
# Posted: 12 Dec 2011 14:57
Reply
Looks real nice. I like your stove/oven! Your wood upstairs and your stone for your wood stove sure looks great! Good find for free(cabinets). Your really coming along nicely!!! Congrats!
|
|
Mark2011
Member
|
# Posted: 13 Dec 2011 13:48
Reply
Thanks, It sure is coming along nicely. I'm going up for 2-3 days over my xmas week off from work. Going to buy a whole lot of pine board and get the majority of walls finished and also lay down some red pine floorings.
I fould this guy who mills pine wood. He has over 100 different shapes, size and etc of what he can mill. I'm doing the interior walls with a 6" wide t&g V joint board. It costs .35 cent a foot which is pretty good price considing the same pine board is at home depot for .50-.60 a foot.
As for the flooring, he has red pine 6" wide t&g planks for .45 a foot. I bought a few boards to get a feel for them. Red pine isn't has soft as I was told by people. He also sells nice pine siding. Which i'll be doing in the spring.
This winter the focus is to finish the inside and once spring comes around, finish up the outside. If all goes to plan this cottage would have taken 11 months to complete on most weekends.
|
|
Montanan
Member
|
# Posted: 13 Dec 2011 14:33
Reply
Looking great- congrats on all the good finds! I'll be watching for updates with the walls and floors in.
|
|
customrunner
Member
|
# Posted: 13 Dec 2011 18:42
Reply
Mark2011
Were are you getting your pine sounds like a great price.
Thanks chad
|
|
Mark2011
Member
|
# Posted: 14 Dec 2011 20:12
Reply
Thanks everyone.
I can't wait to have some more pine done on the walls/floor. Its going to look very sharp and rustic.
On my way up this past weekend I found a deer skin in the middle of the road that had already been cleaned. I'm guessing a hunter had it in the back of their truck and lost it. I grad it anyways. Not sure what i'll use it for but I didn't want to see it go to waste.
Now that the walls/floor are coming along. I'm starting to figure out a way to heat water for the shower. I think I might use a 12 volt pump and put some plastic pipes in before I close everything up in the kitchen.
|
|
Mark2011
Member
|
# Posted: 14 Dec 2011 20:14
Reply
Here's a picture of the whole stove set up. It worked out pretty good.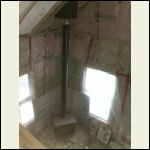
12112011314.jpg
| 
12112011318.jpg
| 
12112011319.jpg
|  |
|
|
marker2011
|
# Posted: 13 Mar 2012 14:15
Reply
Just wondering does anyone know where and how much septic holding tanks are?
|
|
trollbridge
Member
|
# Posted: 13 Mar 2012 14:26
Reply
Do you mean the big concrete ones for houses...or small ones for an outhouse???
|
|
Mark2011
Member
|
# Posted: 14 Mar 2012 08:58
Reply
I mean the big water plastic ones.
|
|
Mark2011
Member
|
# Posted: 14 Mar 2012 08:59
Reply
Here's an update on the cabin
Cheers
|
|
Mark2011
Member
|
# Posted: 14 Mar 2012 09:01
Reply
I'll try and post some more pictures after this weekend. The inside is pretty much done. Next step is to finish the wood floor and put up a railing.
|
|
trollbridge
Member
|
# Posted: 15 Mar 2012 15:58
Reply
Wow...you have certainly been busy haven't you? Looks great!!!
About your septic tank question I would suggest you maybe ask on a separate thread....you may get many more suggestions and there may be others interested in the same info too. Do you have codes you have to meet?
|
|
Mark2011
Member
|
# Posted: 16 Apr 2012 15:59
Reply
New pictures
|
|
Mark2011
Member
|
# Posted: 16 Apr 2012 16:00
Reply
More new pictures
|
|
Montanan
Member
|
# Posted: 17 Apr 2012 12:54
Reply
Wow- great progress! Looking good.
|
|
mark2010
|
# Posted: 19 Apr 2012 14:15
Reply
Thanks Montanan,
Its coming along nicely. I can't wait to get the 3 other sides of the cabin finished on the outside. Hopefully build my water tower soon so we can take showers and have running water inside.
|
|
hattie
Member
|
# Posted: 22 Apr 2012 12:26
Reply
mark2010 - Your place is coming along great! I really like the placement of your staircase (great space saver). Nice work!!!
|
|
Mark2011
Member
|
# Posted: 22 May 2012 13:29
Reply
Hey everyone!
So the cabin is almost finished and I just thought I'd come give an update with some photos!
Enjoy
|
|
| << . 1 . 2 . 3 . 4 . >> |

