| . 1 . 2 . 3 . >> |
| Author |
Message |
Moontreeranch
Member
|
# Posted: 19 Mar 2009 02:13pm
Reply
Hello everyone,
We made the plunge last December and Signed the deal...The land is ours....we still owe a bunch bu the goal is in sight,
In about a week and half we will return to the land fo rthe first visit since closing and begin the process of figuring out where the cabin will go...we cant wait.
Eventually we will build bigger and have running water and electric. but for now we are planning on 200 sq ft, of vacation cabin. A phone call to the local code guys confirmed that we could go up from our original plan of just 120 sqft.
Our cabin will have passive sola, and a woodstove for the winter. we will bring in water at first.
|
|
Anonymous
|
# Posted: 19 Mar 2009 11:53pm
Reply
Congratulations
|
|
CabinBuilder
Admin
|
# Posted: 20 Mar 2009 09:41am
Reply
Good luck with your project, Moontreeranch.
Keep us posted.
|
|
swanugly
Member
|
# Posted: 9 Apr 2009 11:31pm
Reply
hey that sounds great . lots of land to choose a good spot for the cabin on 40 acres . way to go
|
|
Moontreeranch
Member
|
# Posted: 8 Jun 2009 05:12pm
Reply
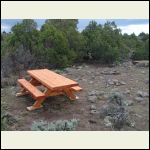
We spent the memorial day weekend at the ranch...Our primary goal was to get the road back to the cabin site put in, and drop off the picnic table.
We accomplished both...the road is a bout 1/4 mile long it stll needs some "clean up work" but considering we didnot bring a "real shovel" and did some of the clearing by hand with a hatchet...we are pretty happy with it.
I built a "drag sled" out of 6 x6 timbers and 2x6 and pulled it behind the truck a bunch of passes and we could find our way.
the picnic table weighs in at about 500 pounds....should not blow away:)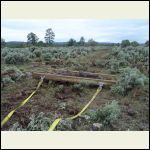
sled_in_use.jpg
| 
Table_at_Moon_Tree_R.jpg
|  |  |
|
|
Moontreeranch
Member
|
# Posted: 8 Jun 2009 05:33pm
Reply
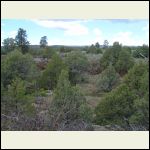
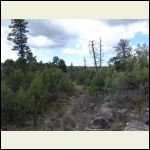
I forgot to post the pics we picked out for the cabin itself. The prayer flags mark the location of the cabin, the picnic table is about 75 feet around the junpier t the NW.
cabin2 is the view from across the gully lookig back west toward the cabin site.
pic 3 is looking down the gully from the rim about 75 feet south of the cabin site.
We found a cool area just north of the cabin site that will become the "formal firepit" picnic area......I might put in masonry fireplace/ outdorr BBQ area...there are a few junipers nearby for some cooling summer shade...the 4 days we we down there we got rained on about 85% of the time...rain in the desert on our weekend...go figure?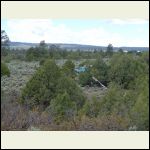
cabin_site_1.jpg
| 
cabin_site_2.jpg
| 
looking_south_into_g.jpg
|  |
|
|
lawnjocky
Member
|
# Posted: 19 Jun 2009 08:08pm
Reply
That looks very nice and a great area. I have been through it several times on my way to CO.
Jocko
|
|
swanugly
Member
|
# Posted: 20 Jun 2009 12:21pm
Reply
my dad would do the same , tow a big log to level the driveway , worked good for him. thats is a nice looking spot .
|
|
|
NewMexicoOffGri d
|
# Posted: 22 Jul 2009 02:32am
Reply
I also bought land in NM and am wondering what the maximum size structure I can build on my property without a permit. Do you know if the 200 sq ft you mentioned is a state code or local max? I want to use a compost toilet and do not want to deal with septic since I feel that I can deal with my "waste" in a very env. friendly way. Have you researched this at all?
|
|
Moontreeranch
Member
|
# Posted: 28 Jul 2009 12:38pm
Reply
NewMex off grid....Our land is in Taos County...not sure if it is state wide...the 200 foot limit is for structure with out power or plumbing. we are planing a very small PV system to power a hand full of LED's lights, and run the ipod ...I just finished Jenkins humanure handbook and the sawdust bucket method will be our answer.
I vaguely remember that the "power" requirement depends on weather your conected to the grid. Taos is pretty forward in its alternative building since it is the location of the "greater world comm..."
where In NM are you? we are about 3 miles south of Tres Piedras
|
|
Moontreeranch
Member
|
# Posted: 24 Aug 2009 11:42am
Reply
Well, summer has been waning away and we have not been down since memorial day...its a true crime in my book. This weekend we have some local camping planed and then for labor day week end we plan to get down there and put in some footers...working on labor day seems fitting. To kick start some of the process, we might pull some $$$ from the IRA. We so desperately want to relax there this fall and into the winter...and walls and a roof will make it so much more pleasant.
|
|
Moontreeranch
Member
|
# Posted: 24 Sep 2009 08:44pm - Edited by: Moontreeranch
Reply
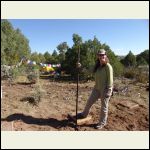
We Came, We Saw, We Mixed and Poured Concrete...Labor day was laborious...Tori had a minor misstep and suffered a minor sprain to her ankle. So by default I got to be the primary concrete laborer...hauling 100 yards from the "parking area" to the cabin site. despite a raining weekend we go all the footers in.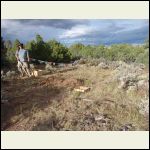
the start
| 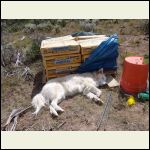
maybelle helping
| 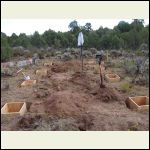
ready to pour
| 
Tori queen of the tamp
|
|
|
Moontreeranch
Member
|
# Posted: 24 Sep 2009 09:01pm
Reply
I was back solo a week later to start the build...I brought down the trailer with windows, insulation etc.
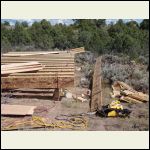
Monday morning I got the beams set...used 6x6 pt for columns. beams are 3 (2x8 PT)
Home depot was a day late in getting the delivery out, plus I had to scrable to get replacement BCI's they were quoting 7 more days...Randal lumber came through the next day but at 30% more ouch.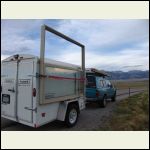
loaded and on route ...6 hour drive
| 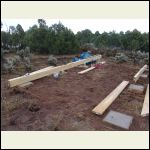
setting beams
| 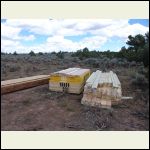
future cabin?
| 
setting joists
|
|
|
Moontreeranch
Member
|
# Posted: 24 Sep 2009 09:06pm
Reply
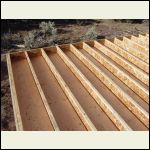
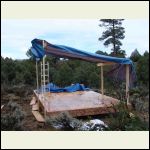
Setting the beams only took a couple hours, a day latter I got the "deck set" so at the end of 1 work day I had an insulated dance floor.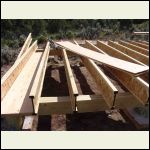
3/8 ply inset between I-joists
| 
bring on the battts
| 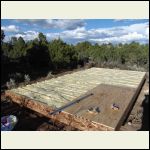
r-30 floor
| 
start of day 2
|
|
|
Moontreeranch
Member
|
# Posted: 24 Sep 2009 10:01pm
Reply
Day 2...in and out with rain got the gable walls set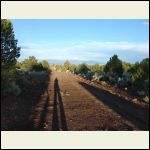
Moon Tree Trail off hwy 285
| 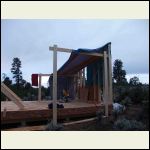
gable ups
| 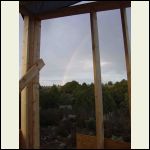
ranch rainbow
|  |
|
|
Moontreeranch
Member
|
# Posted: 24 Sep 2009 10:06pm
Reply
Again more racing with the weather, got north and south walls started, to place some rafters and poly tarps.
|
|
Moontreeranch
Member
|
# Posted: 24 Sep 2009 10:30pm
Reply
The end of the 3rd day I had four walls and rafters overhead, the 4th day was spent adding window bucks and more exterior sheathing. roofing membrane and some windows, Saturday morning I got a few minutes help from Gil's laborer to set the slider and picture window...those rascals are just too big to set safely by myself.
I got a half day in before have to drive back home...I'll be back in about 2 weeks to finish the roof framing some facia work and hopefully set the metal roofing and the rest of the windows.
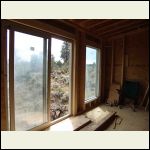
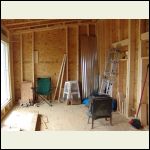
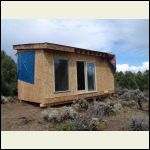
this time I hope to coordinate with the weather forcast...that bloody rain is a drag...On a nice note though I will no longer need the tent...I'm dried in enough to spend time inside!! had my first meal in there friday night and coffee sat morn...what a joy that is!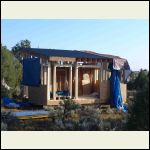
sat morn
| 
sat afternoon 1
| 
sat afternoon 2
| 
sat afternoon 3
|
|
|
Anonymous
|
# Posted: 24 Sep 2009 11:52pm
Reply
WOW! Gary and I can't believe how much of that cabin you have done already -- it is sweeeeeeeeeeeeeet :-) Look forward to seeing it in Nov!
|
|
CabinBuilder
Admin
|
# Posted: 25 Sep 2009 10:10am
Reply
Looks like you had a very productive few days, Moontreeranch!
I like that your cabin has large doors and windows.
|
|
Moontreeranch
Member
|
# Posted: 25 Sep 2009 11:00am
Reply
we are planing for a lot of passive solar....one more 3' x 4' window to the right of the slider and then some smaller ones east and west...the small 30" x14" seen stored inside are slated for the north wall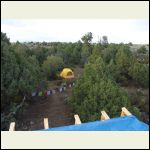
tent site north of cabin
| 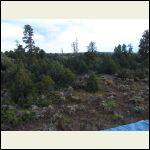
south view from above
|  |  |
|
|
JRanch
Member
|
# Posted: 18 Oct 2009 12:19pm
Reply
Moontree,
Our story is like yours, we just closed on some land in NM, Cibola Cty, North of Quemado.
I am going to call the County tomorrow to ask about permits (sq. footage...max). I appreciate you posting on here to give me some insight for our project.
I have some Q's for you.
1) what size is your cabin?
2) what ade you decide to use engineed floor joist vs. dimensional lumber?
3) Insulating your floor, could you please be more specific on how you did it?
Thanks in advance for you answers and keep up the good work, I will keep checking on the progress.
- keith
|
|
JRanch
Member
|
# Posted: 18 Oct 2009 03:16pm
Reply
Moontree,
One more question, On the St of Mexico site it states no permit required for any "shed" under 120 ft2, does this code differ from county to county?
thanks,
keith
|
|
lawnjocky
Member
|
# Posted: 19 Oct 2009 08:58am
Reply
Keith,
We are almost neighbors, my place is north of Magdalena.
My understanding is the only permits needed are for septic and wells. However there is an interesting provision in the NM tax laws that require an owner to inform the assessor of any improvements so they cna raise your taxes. The maximum they can go back is ten years after that your taxes are presumed paid.
Jocko
|
|
Moontreeranch
Member
|
# Posted: 20 Oct 2009 12:08pm - Edited by: Moontreeranch
Reply
Some answers for JRanch
Most states and Counties use the IRC (code book) as a basis for their specific codes...and most county will adopt sections completely and only modify parts...the 120 sq ft is pretty standard...my call to the county ...let me build to 200 sq ft with out permit...provided there is no plumb or elec....I'm hoping our 80 watt PV and single battery plans will not qualify...I remember the elec being "grid" tied.
the Cabin is 11 x 20 (outside) I originally thought about a 10 x 20..but the sqft limits are for Inside dimensions...so I added the the extra foot just before building...this gives about 20 more feet inside. without much added cost due to plywood sizes etc.
I chose the BCI I joists for a couple reasons...first is I am doing most of the work by my self and they are way lighter and easier to handle. Second is the way I designed the insulation for the floor. Taking Swanugly's design with ply strips attached the bottom of the joist to hold the insualtion I went with a better design.
the I joist rests on the built up beams, so the direct load bearing is still unchanged. With uniform spacing (16" OC) I cut some 3/8" thick plywood that will span the distance between the vertical parts of the I Joist, It rests on the top of the lower flange. ( I ripped these at home on the table saw) I attached them with some 16 ga finish nails to keep them in place. In fill with R-30 insualtion (9 1/2 inch to match the height of the I joists) then 3/4 ply floor decking over the whole thing. Look at the pics above. the continous 3/8 ply will also keep the critters out for the insulation.
|
|
Moontreeranch
Member
|
# Posted: 20 Oct 2009 12:25pm - Edited by: Moontreeranch
Reply
Back after nearly a week at the cabin...first time sleeping inside!!!
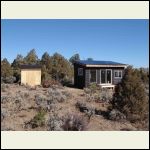
the first night was still quite chilly since the roof was still a blue tarp in spots...In my first day of work, I finished up the lookout rafters, got the roof ply on and boxed in the soffits and fascia. I also got the membrane down. On the second day I got the started on the metal roofing, Corrugated Galv....the sun was out and it was bit like working in a solar oven...glad it is oct and not July...that would have been a real cooker. I ran out of material so latter in the week I had to make a run to HD in Santa Fe...turned out to be a 6 hour adventure...Cabinets, insulation, roofing and more lumber for the woodshed...I spent an extra day there due to the material run.
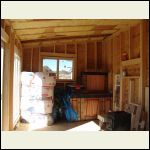
My third day I got 3 of the big windows in, built the small entry deck and the loft in side, On my last days I got the woodshed mostly built ( got to make the doors yet) and the dinette area...I got the dinette cushions from a RV salvage place, PV controls and Battery will go under the right bench.
Tori and I hope to get back down for thanksgiving and get the wood stove set...I was using a small propane heater and It keeps the chill out...getting more insulation in will also help....we are looking forward to heating with some great smelling pinyon. I had frost each morning but by mid day was working in shorts and a t-shirt...a whole week with no Rain...how cool is that!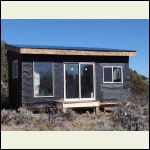
tar_paper_shack.jpg
| 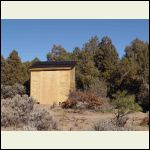
wood_shed.jpg
| 
compound.jpg
| 
cabinets.jpg
|
|
|
Moontreeranch
Member
|
# Posted: 20 Oct 2009 12:32pm
Reply
I had a visit from a "creepy" neighbor...did not know these guys lived there...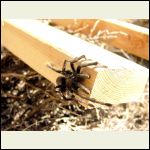
creepy Neighbor
| 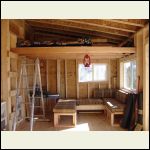
loft and Dinette area
|  |  |
|
|
richardwand
|
# Posted: 22 Oct 2009 08:45am
Reply
Kev,
Looking good. I'm pretty sure that the tarantula sighting would have convinced Annette that we bought in the wrong area....we're both sort of arachnophobes, but still the place looks like it's coming along.
What's the plan? Moving there some day soon or sometime way out in the future? I'm about halfway through with this nursing program, so my free time should really increase in about 6 months or so. Maybe we can get together sometime.
Richard.
|
|
JRanch
Member
|
# Posted: 22 Oct 2009 10:42am
Reply
Moontree,
How deep did you go with your concrete pads and where did you get the water to complete the pads?
Thanks, Keith
|
|
Moontreeranch
Member
|
# Posted: 22 Oct 2009 11:03am
Reply
JRanch
we brought 15 gallons in our "camping jugs" (we often camp in the desert for a week or more and can supply the needs of 4 from 10 gal.)
we were also able to nab some water (about 20 gal) from our neighbors stock tank. We got our land from them and they own about 650 acres around us. They graze horses and cows there and have a 8 foot diameter stock tank near our road in. Gil fills it from a huge tank on a trailer that he brings in from their "other" 70 acre ranch up the road that has water.
The footers are 16 x 16 and 12" thick...about three 80 pound bags per hole...figure on 1 gallon of water to mix each 80 pounder...and a few gallons to clean up tools when completed.
The part the sucked the most was hauling everything to the build site...parking is about 50 yards away. Man hauling nearly of ton of concrete and every stick of lumber gets pretty old pretty quick. Fortunately the bulk of the man-hauling is complete.
when we put in the large deck next year or so I plan to use 8" sono tubes...digging was a bit easier than I had feared and should only come out to about 2 bags per hole.
|
|
JRanch
Member
|
# Posted: 22 Oct 2009 09:18pm
Reply
Thanks,
Thats good info to know, I dont have any water at my site. Did you miv the crete in the "hole or wheelbarrow?
Did you use pressure treated for your built up beams?
Thanks, Keith
|
|
| . 1 . 2 . 3 . >> |

