| << . 1 . 2 . 3 . 4 . 5 . >> |
| Author |
Message |
creeky
Member
|
# Posted: 9 May 2013 18:35
Reply
That's some nice woodworking. congrats.
|
|
jaransont3
Member
|
# Posted: 27 May 2013 01:19
Reply
Jill and I are a little disappointed we didn't make the trip up to the cabin this weekend. Just too far to go for a 3 day weekend. Planning on going for the week of the July 4th now.
Anyway I decided to tackle a little project for the cabin this weekend. About a month ago I picked up a load of rough sawn wide pine boards and some 2"+ thick, rough sawn cedar planks.
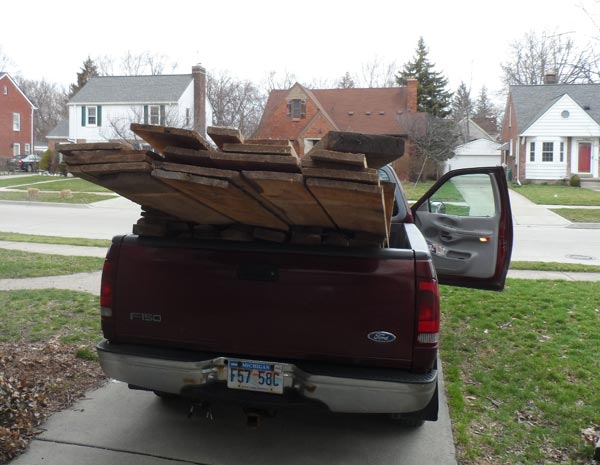
The wide pine will be used for some of the interior trim at the cabin. The cedar was for some adirondack chairs for the porch. So yesterday I started out by planing all the cedar down to 1-1/2" and 1" thick planks.
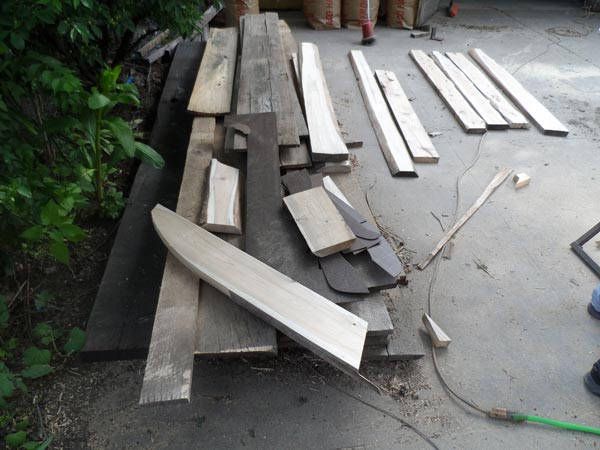
After modifying the plans I had to better fit the material I had available, I made some full-scale templates and started cutting out the pieces.
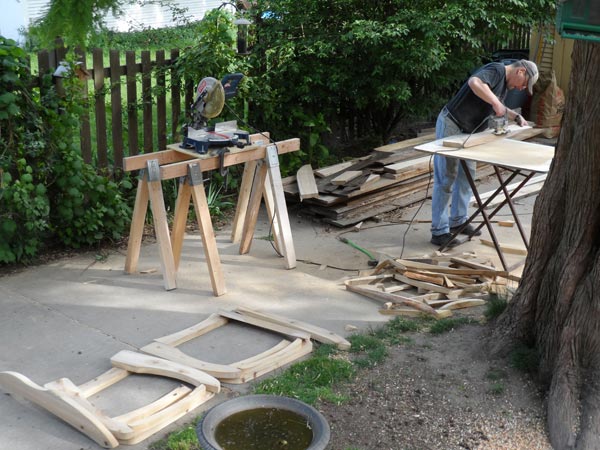
I managed to get one of them fully assembled.
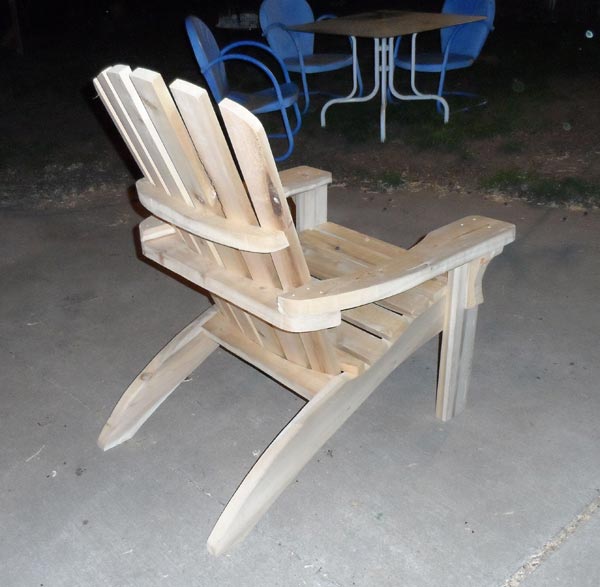
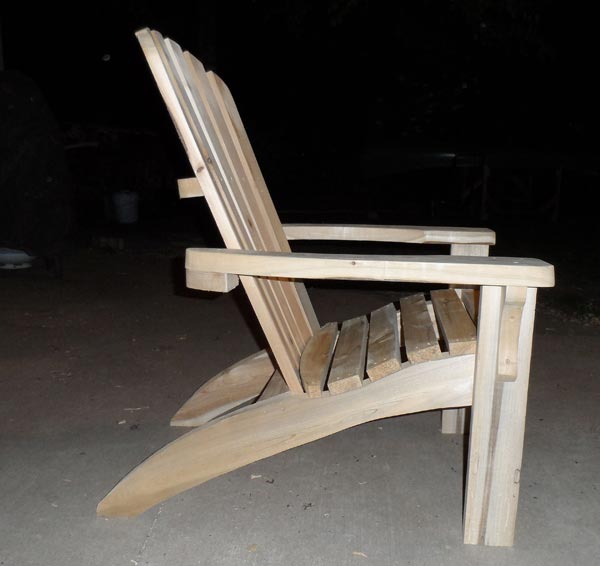
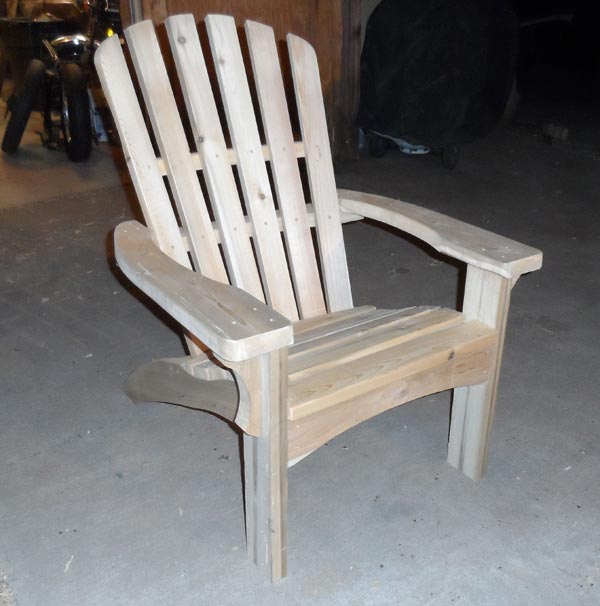
I still need to decide what I want to do for a finish and assembly the other chair. They are super comfortable....

Perfect for relaxing after a long day with a cup of Diet Mountain Dew...
|
|
OwenChristensen
Member
|
# Posted: 27 May 2013 07:03
Reply
Very nice, I gotta get me a couple of them. Maybe with your great pictures , I can.
|
|
jaransont3
Member
|
# Posted: 27 May 2013 07:49
Reply
This is the plan that I used/modified....I photocopied it 10+ years ago. I get around to thing eventually....
Adirondack Set Plans
|
|
jaransont3
Member
|
# Posted: 27 May 2013 21:59
Reply
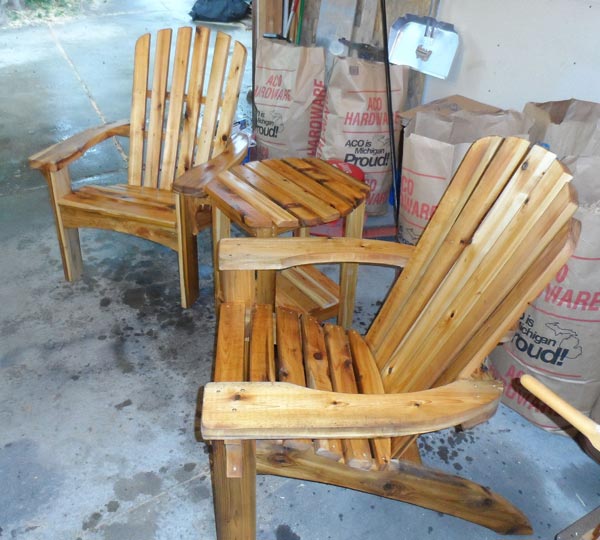
Got the second chair assembled today. Had enough cedar left over to build a small side table to match. Jill got them all sealed up with some Thompson's Water Seal. Should be good to go for a long time and they shouldn't turn too grey with the UV blocker in the Thompson's. Can't wait to get them up to the cabin and start enjoying them on our porch or deck.


I hope everyone a good and safe holiday weekend. We are jealous of those of you that got to spend it at your cabin.
|
|
OwenChristensen
Member
|
# Posted: 28 May 2013 01:40
Reply
My mother put Thompsons on her screenhouse I built her ,'cause she liked the color, it greyed anyway just as fast as if she had done nothing. Maybe it's better now. Good luck. they are still Purdy grey or brown.
|
|
jaransont3
Member
|
# Posted: 21 Jun 2013 12:51
Reply
Jill and I are getting excited. A week from today we are heading to the cabin for the week of the 4th. We are looking forward to getting some more projects done there and enjoying some R&R amd family time.
|
|
OwenChristensen
Member
|
# Posted: 22 Jun 2013 11:02
Reply
As much as I wanted to try building what you're doing, all I seem to be doing is repairing lawnmowers, and breaking beaver dams. Nice work, maybe someday I can try.
|
|
|
jaransont3
Member
|
# Posted: 27 Jun 2013 00:59
Reply
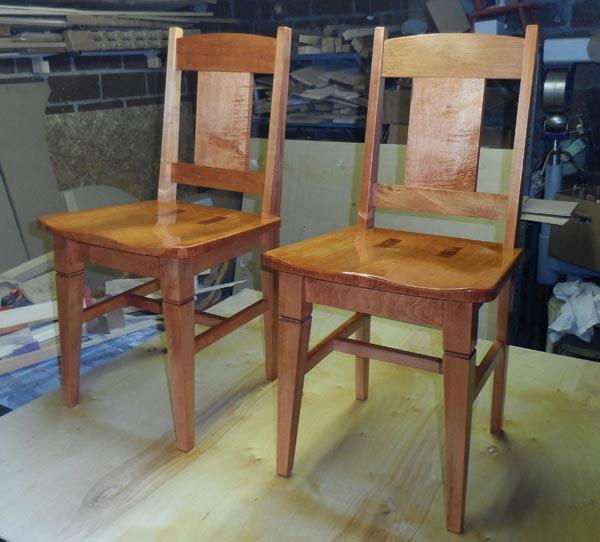
Over the last couple of days I have been working to get the dining chairs for the cabin done. I finally got all the pieces sanded and then got them stained...
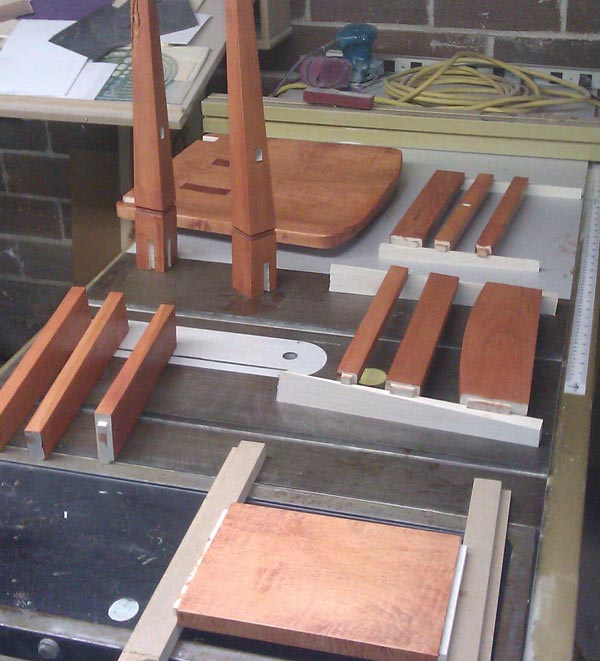
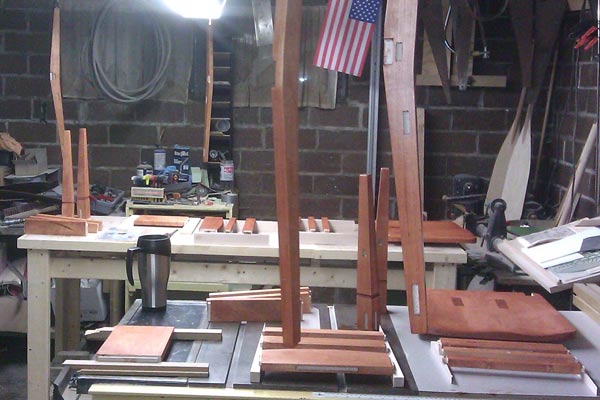
got them all glued up...
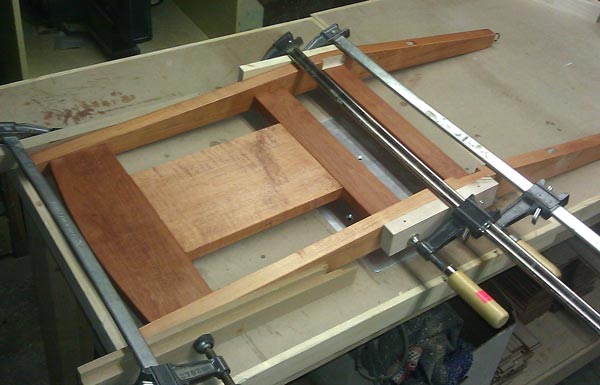
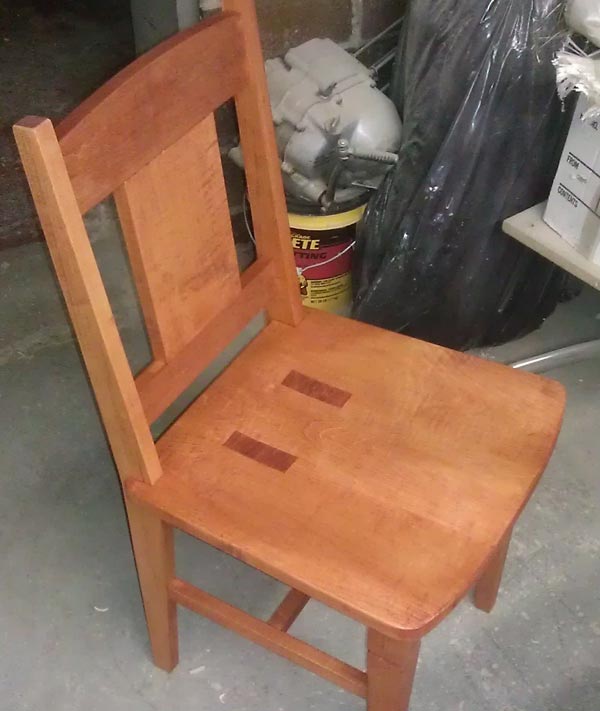
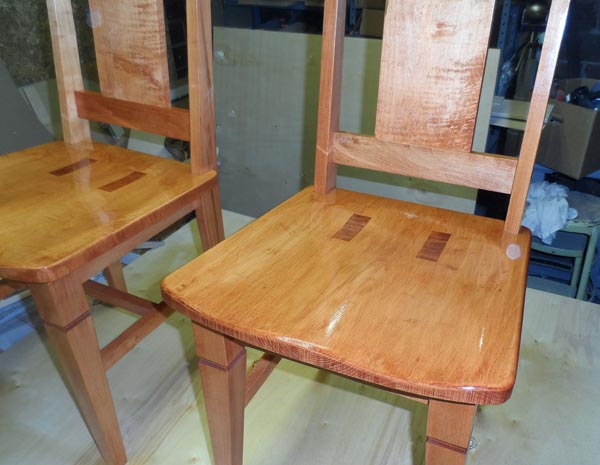
and got a couple of coats of polyurethane on them...
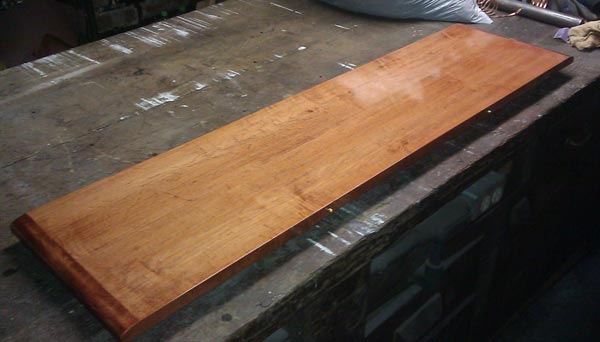
I even got the leaf for the table finished...
Just in time for our trip to the cabin next week.
|
|
jaransont3
Member
|
# Posted: 1 Jul 2013 09:21 - Edited by: jaransont3
Reply
Jill and I made it up to the cabin on Saturday afternoon. We are looking forward to spend a productive and relaxing week up here. First order of business is clearing the road into the cabin.
[img]https://fbcdn-sphotos-a-a.akamaihd.net/hphotos-ak-prn1/947203_692853724061634_16 02261325_n.jpg[/img]
Only one tree this time.
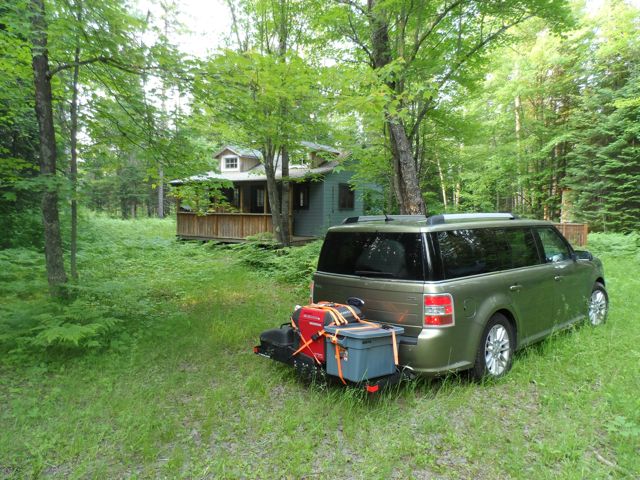
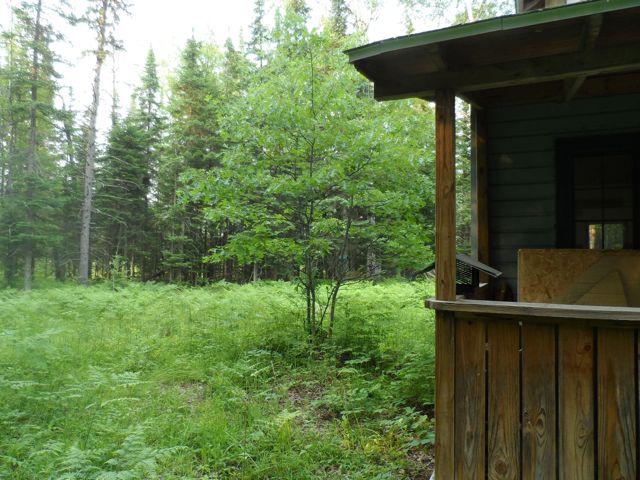
Everything safe and sound. Ready to open the cabin up and unpack.
[img=https://fbcdn-sphotos-g-a.akamaihd.net/hphotos-ak-frc1/1044844_692853677394972_9 29264870_n.jpg][/img]
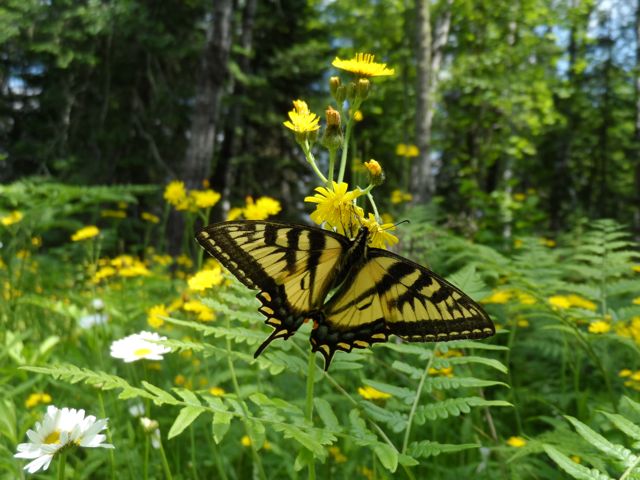
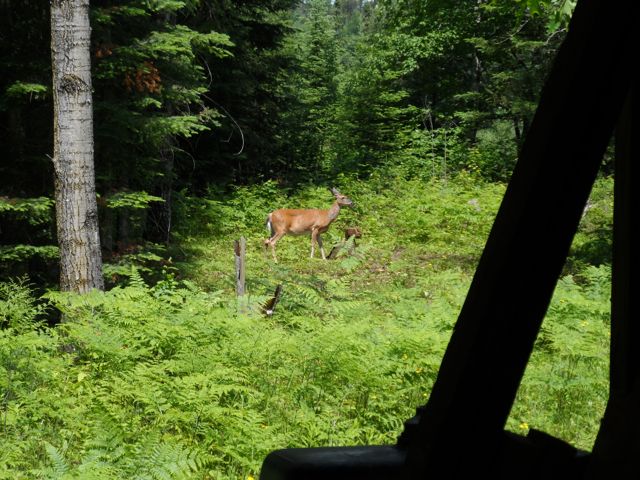
The wild flowers were ready to greet us along with some woodland friends....
[img=https://sphotos-a.xx.fbcdn.net/hphotos-prn1/931238_692854077394932_1032507374_n. jpg][/img]
[img=https://sphotos-b.xx.fbcdn.net/hphotos-ash3/1010794_692853744061632_1845023620_n .jpg][/img]
[img=https://fbcdn-sphotos-h-a.akamaihd.net/hphotos-ak-prn1/11515_692853654061641_207 3050430_n.jpg][/img]
[img=https://fbcdn-sphotos-b-a.akamaihd.net/hphotos-ak-prn1/1013744_692853777394962_1 965316010_n.jpg][/img]
[img=https://fbcdn-sphotos-d-a.akamaihd.net/hphotos-ak-ash4/999506_692854010728272_85 2370164_n.jpg][/img]
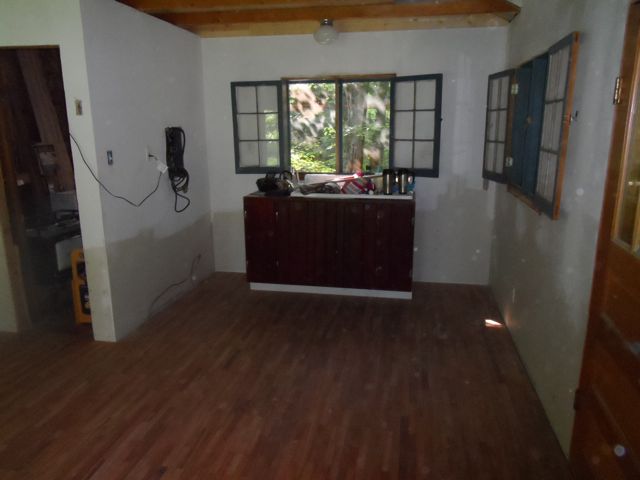
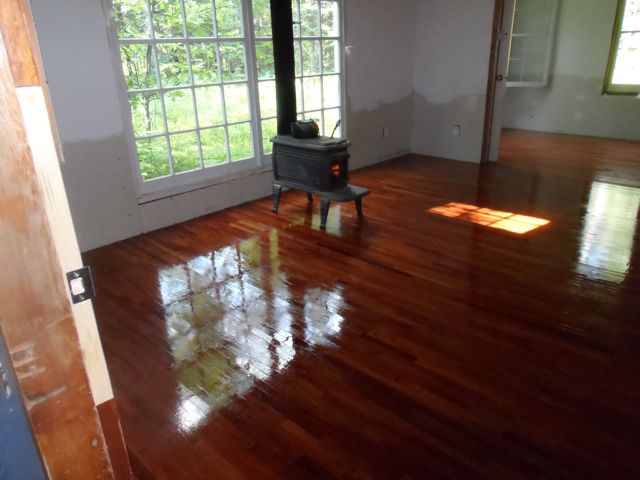
First project for this trip is to get some finish on the hardwood floors we installed last time. Emptied the cabin and swept and dusted them off.
[img=https://fbcdn-sphotos-f-a.akamaihd.net/hphotos-ak-ash3/1013116_692853820728291_1 225557185_n.jpg][/img]
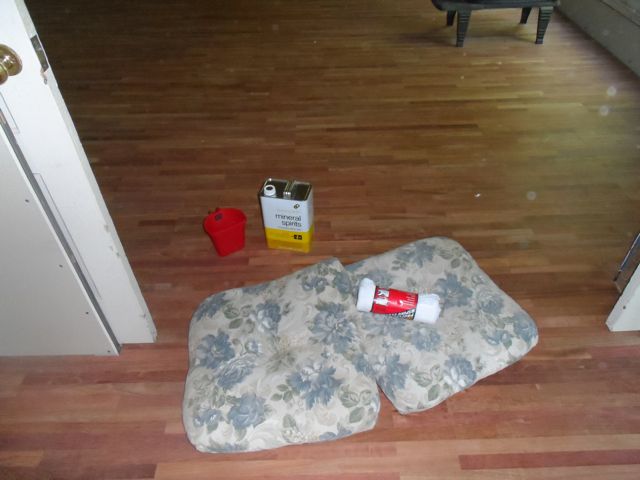
First step is wiping them down with some mineral spirits.
[img=https://sphotos-a.xx.fbcdn.net/hphotos-ash3/600487_692853837394956_169314325_n.j pg][/img]
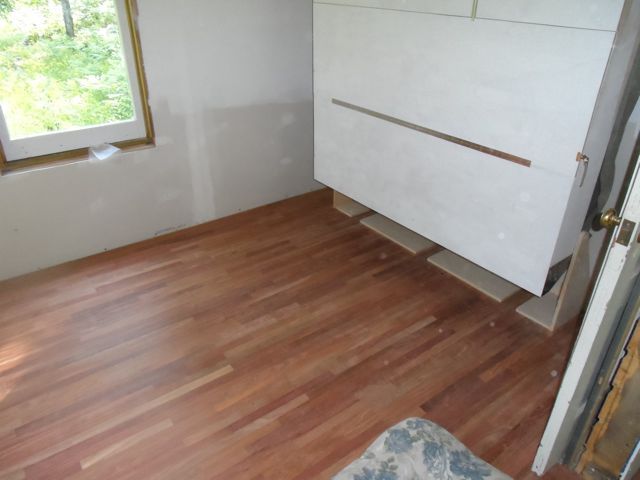
Waiting for the mineral spirits to dry, but it gives a sneak preview of what they will look like with the poly on them.
[img=https://sphotos-a.xx.fbcdn.net/hphotos-ash4/1003692_692853880728285_716888617_n. jpg][/img]
Next is a coat of sanding sealer...
[img=https://sphotos-a.xx.fbcdn.net/hphotos-prn1/1016303_692853930728280_1734945503_n .jpg][/img]
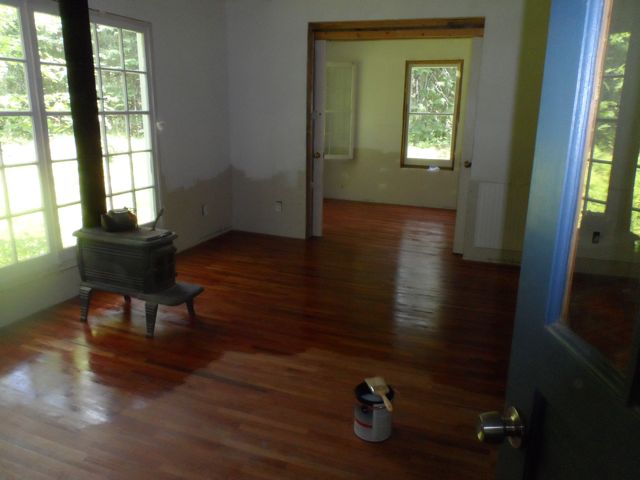
After the first coat of polyurethane. We are using Minwax's "Super Fast Drying" Floor Poly. This coat was dry enough to walk on after 4-5 hours. The second coat is got put on at about 9pm last night. Should be able to walk on it by lunch today. Nice thing about this system is you don't have to sand between coats and two coats is all you need. We are very happy with the results.
[img=https://sphotos-b.xx.fbcdn.net/hphotos-ash4/1001345_692853964061610_1819821054_n .jpg][/img]
More later....
|
|
jaransont3
Member
|
# Posted: 1 Jul 2013 09:26
Reply
Will have to fix the links to the pics later. Sorry about that.
|
|
jaransont3
Member
|
# Posted: 13 Jul 2013 08:56 - Edited by: jaransont3
Reply
Doesn't look like I can edit the above post any more so here it goes again....lots more pictures to post.
Jill and I made it up to the cabin on Saturday afternoon. We are looking forward to spend a productive and relaxing week up here. First order of business is clearing the road into the cabin.
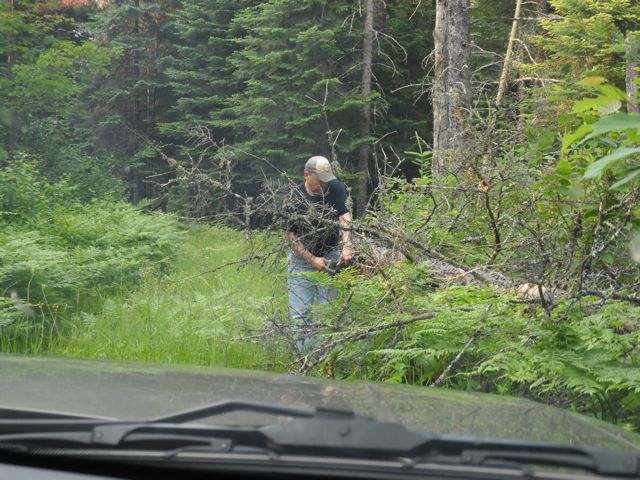
Only one tree this time.
Everything safe and sound. Ready to open the cabin up and unpack.
The ferns and wild flowers were ready to greet us along with some woodland friends....


First project for this trip is to get some finish on the hardwood floors we installed last time. Emptied the cabin and swept and dusted them off.
First step is wiping them down with some mineral spirits.
Next is a coat of sanding sealer...
Gives a nice preview of what the polyurethane will look like.

We are using Minwax's "Super Fast Drying" Floor Poly. This coat was dry enough to walk on after 4-5 hours. The second coat got put on at about 9pm last night. Should be able to walk on it by lunch today. Nice thing about this system is you don't have to sand between coats and two coats is all you need. We are very happy with the results.
Ok, that fixes the above post. Will continue with the week's adventures in another post....
|
|
creeky
Member
|
# Posted: 13 Jul 2013 09:28
Reply
boy that soft maple came out looking good.
look forward to more posts.
|
|
jaransont3
Member
|
# Posted: 13 Jul 2013 10:15 - Edited by: jaransont3
Reply
OK...on with the adventures....
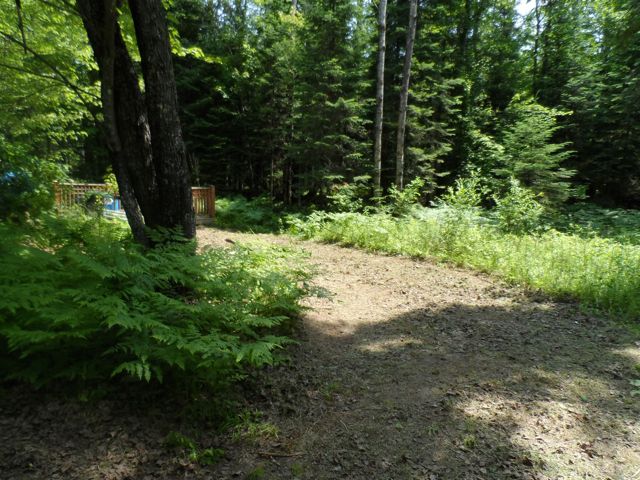
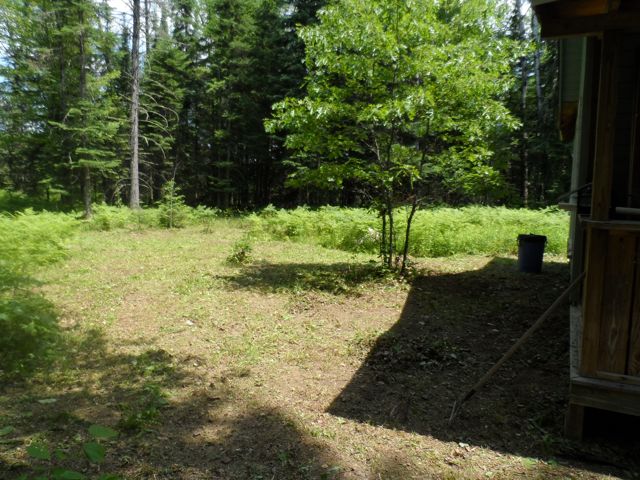
While we waited for the polyurethane on the floors to dry, we attended to some yard work and other outside activities. We borrowed my uncle's walk-behind weed whip (awesome machine, btw) and knocked down some of the ferns and weeds around the cabin....
and one of my absolute favorite and simple pleasure things from the whole trip...my screen door closing spring.
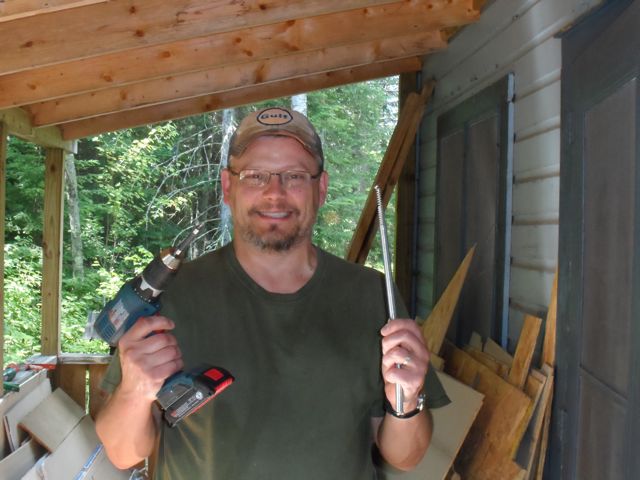
See, we never had a closing mechanism on the screen door before and I told Jill that I didn't want one of the new shock absorber style ones. I wanted a simple spring that when you let the door go, it banged shut and the spring and the screen rattled and revurbed. To me, that is what a cabin screen door should sound like. Found an actual screen door closing spring at Menards! Couldn't believe it. Had a small spring within a spring that you could twist to adjust the tension and everything. I was very happy. Jill thought I was a little nuts.
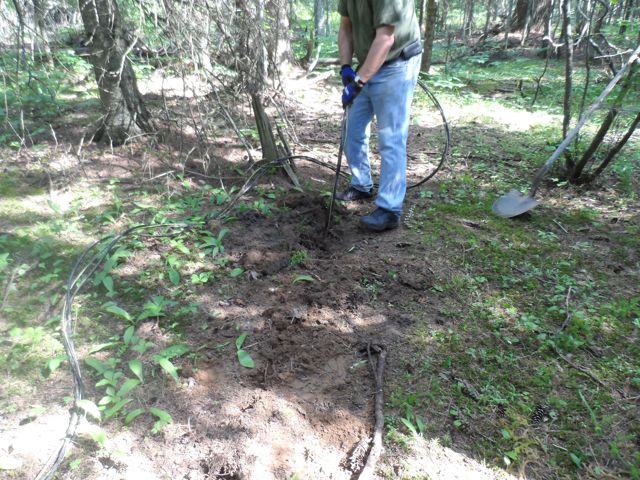
Other outdoor activities included pulling up the 100 feet of tri-plex I had buried to my nearest neighbors power meter a bunch of years ago. Fortunately I planned this to be temporary and only buried it about 6 inches deep. Wasn't too bad to pull up in our sandy soil.
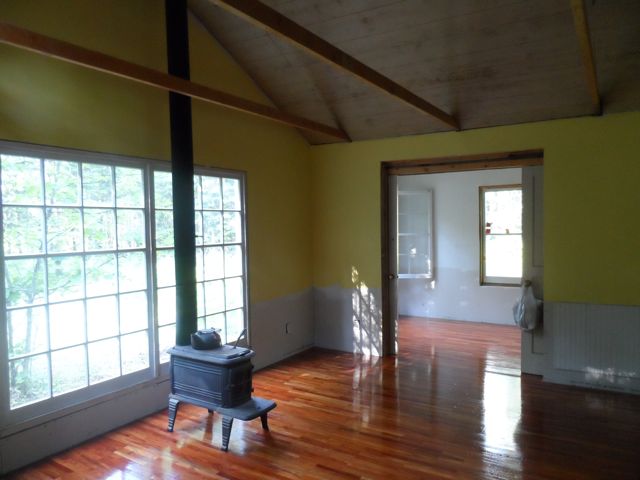
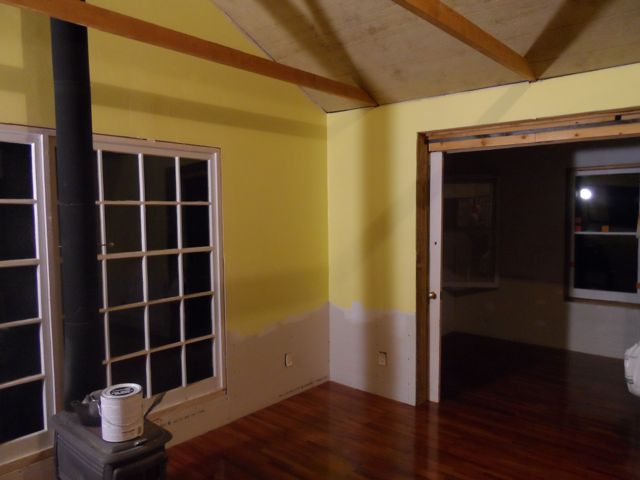
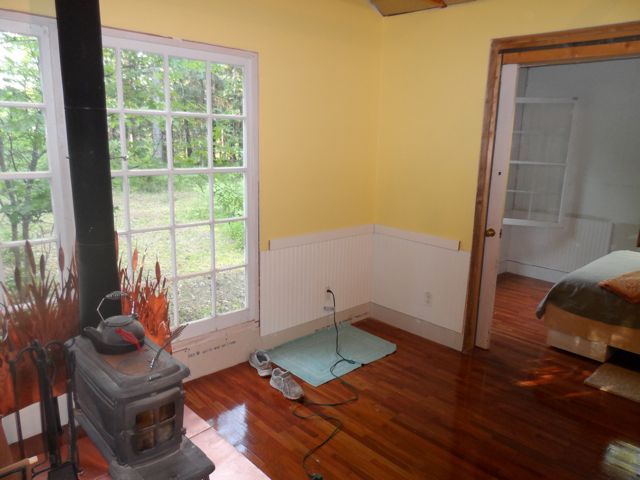
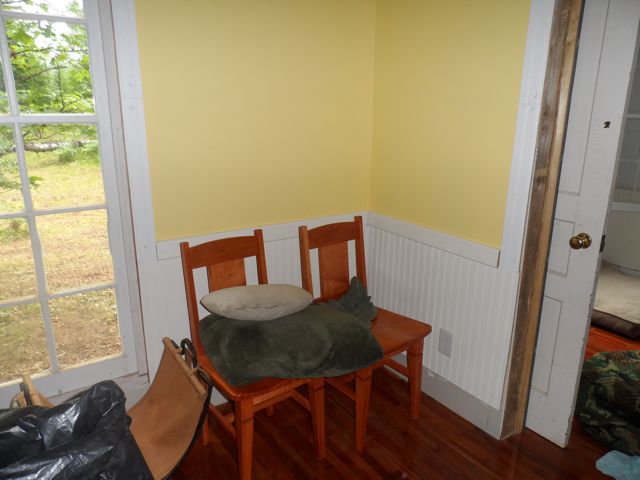
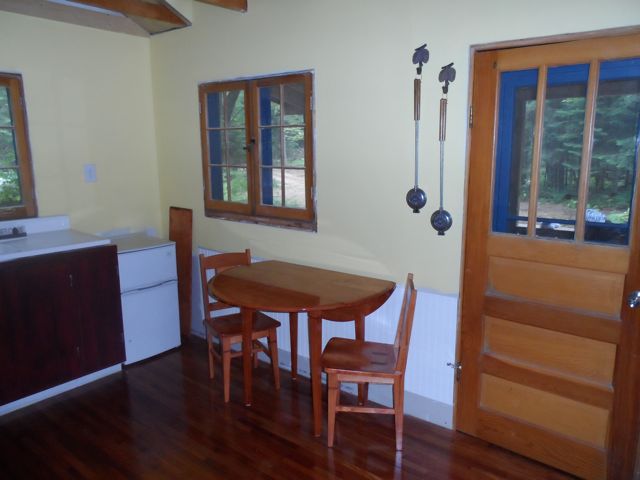
The day after apply the poly, you could walk on it, just not but furniture and stuff on it. So we got in the cabin and started painting. Jill and our sister-in-law Janet picked out some great colors for the main space...yorkshire pudding yellow and queen anne's lace off-white. The wainscoting and trim will be the white, the walls above that the yellow.
Once the poly had cured for a few days, we could start moving stuff back in....

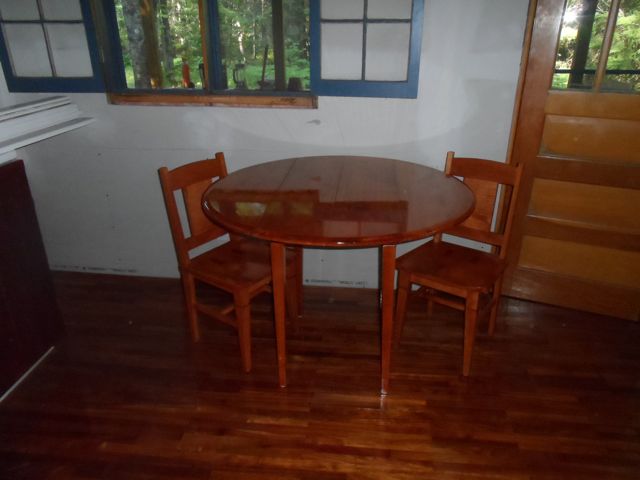
Including the table and chairs I had built. We are very happy with the way they look in the cabin and they functioned very nicely.
On Wednesday night, my brother and his family came out to hang out with us and give us a hand at the cabin. His girls stayed at Gramma's but Todd and Janet became our first overnight guests at the cabin...sleeping an the new floors with a blow-up mattress. It was great.
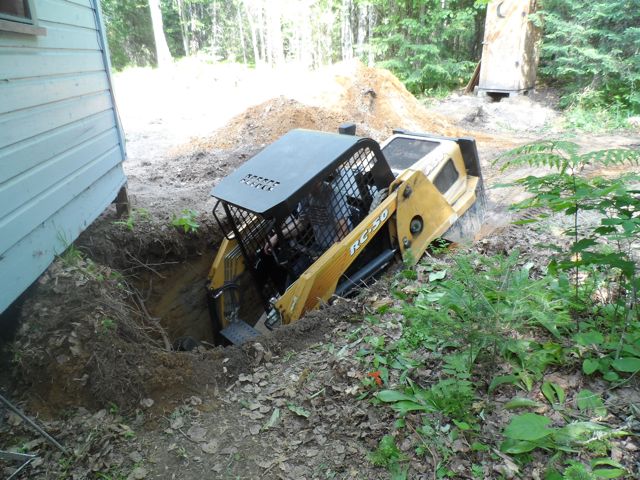
Todd also brought along his ASV...
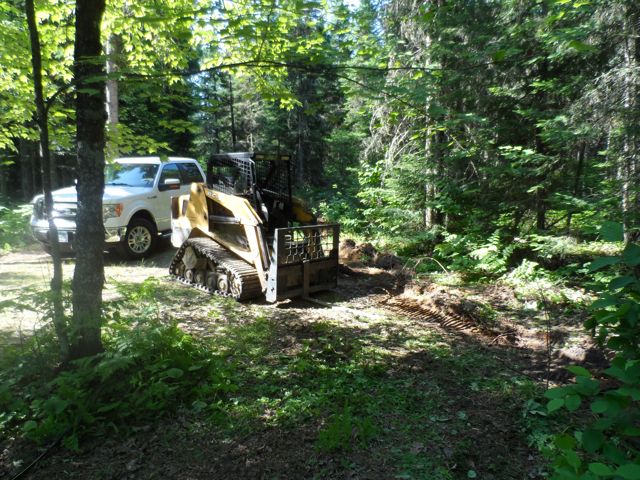
...to do some dirt work. We trenched for the re-routing of the tri-plex out to the future location of the generator/storage shed...
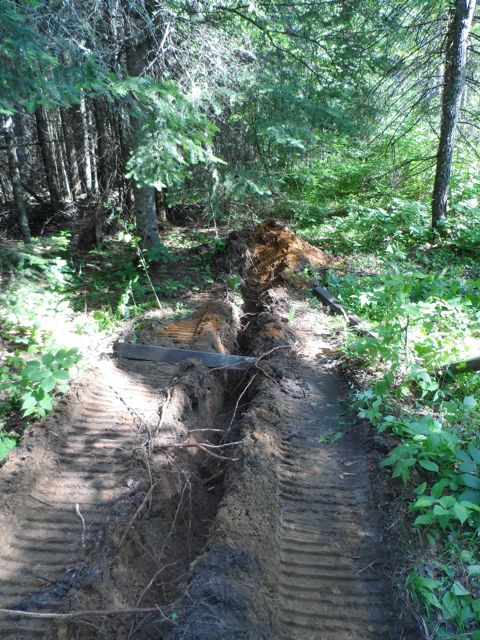
and for the sewer line for the indoor toilet...
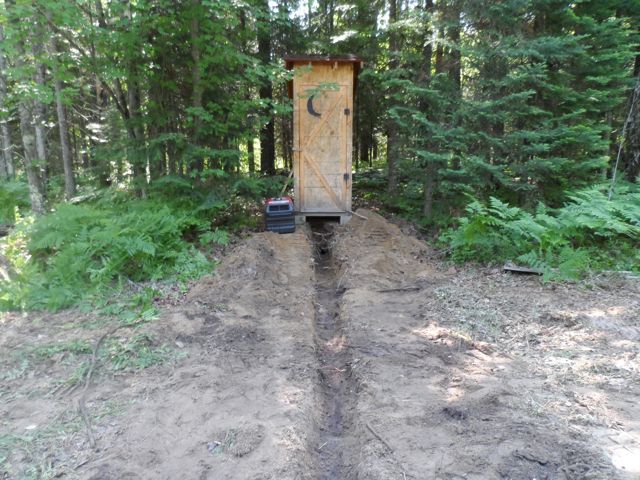
and the greywater drain field...
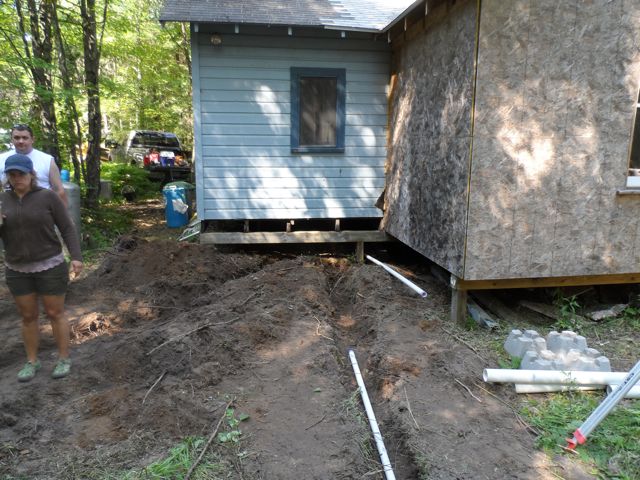
and he dug the hole for the 300 gallon rainwater cistern...
...to be continued.
|
|
jaransont3
Member
|
# Posted: 13 Jul 2013 12:23 - Edited by: jaransont3
Reply
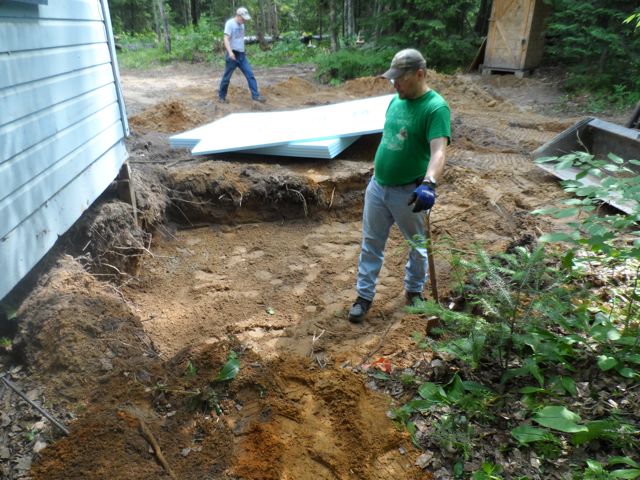
Ok....after digging the hole, we got the cistern tank in place...
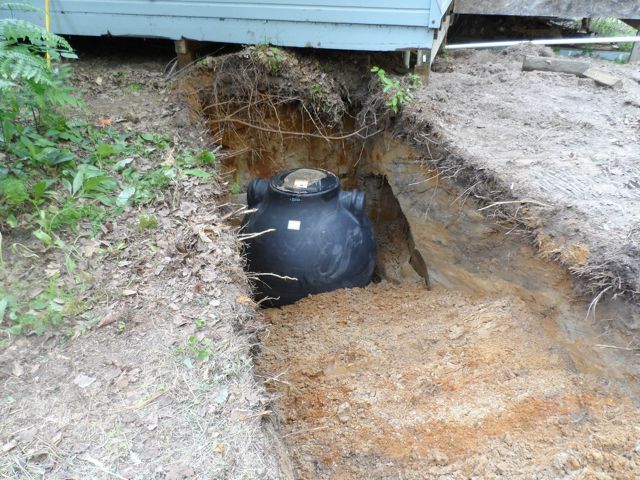
The bottom of the hole is about 6 feet. Our frost line is about 4.5 feet. the tank is about 4 feet in diameter. So we covered the tank with earth to the top of the lid and then placed 3 inches of 8 foot by 8 foot foam on the top and then an addition 1-1/2 inches about 6 foot by 6 foot and then another 1-1/2 inches that is 4 foot by 4 foot. That gives me a total of 6 inches over the entire tank...the equivalent of an extra 6 feet of buried depth.
All this plus the proximity to the cabin and the undisturbed snow cover should keep the tank from freezing in the winter. We will see. Next time we are back (hopefully in September) we will dig up the access to the tank and get the gutters and other plumbing to it hooked-up. Right now it is just storing 300 gallons of air.
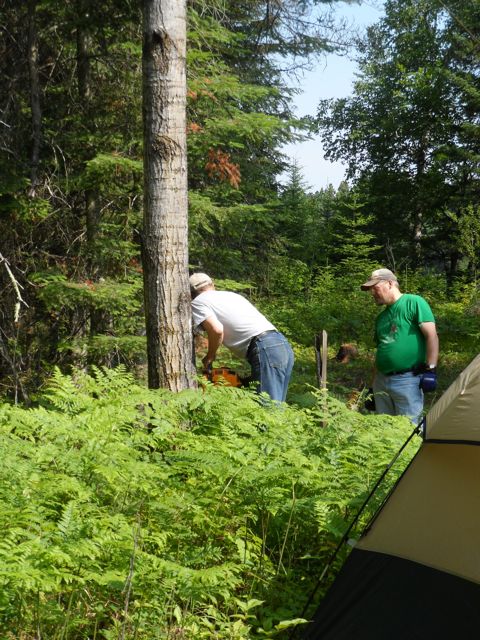
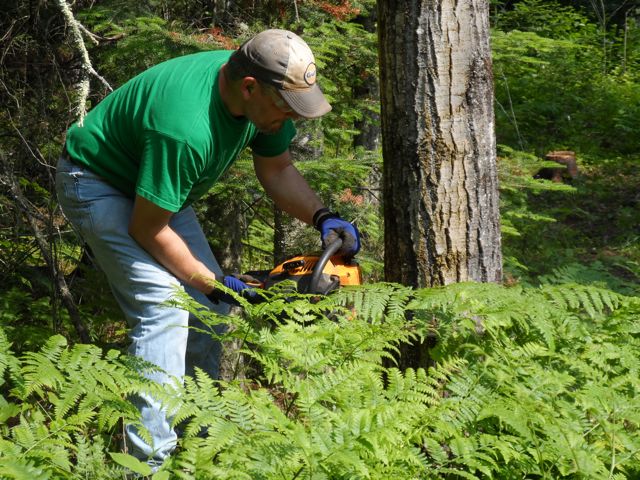
One of the other tasks for this trip was to cut down a dozen or so very mature poplar trees that were a threat to the cabin should they fall down. My brother and I used a rope and snatch block along with his ASV to help make sure the trees fell were we wanted them to. Worked great.
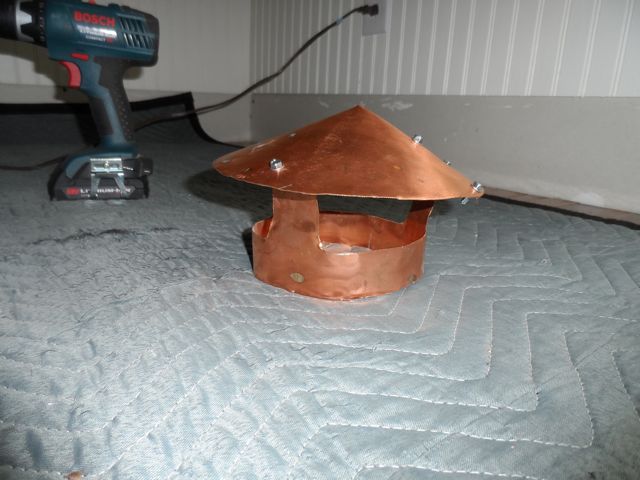
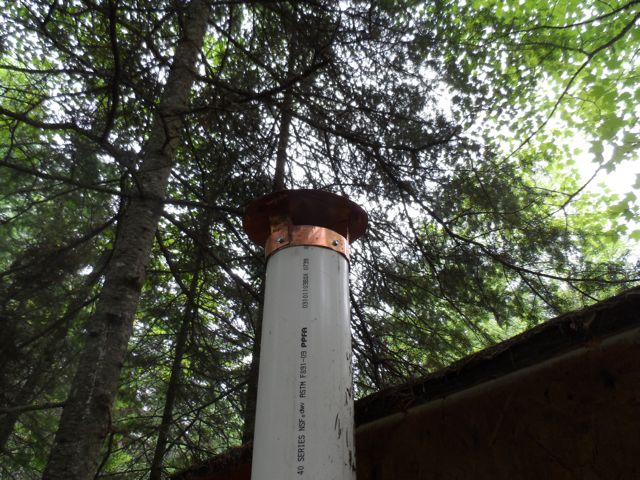
Little side project one afternoon was to make and install a small copper vent cap for the outhouse vent stack. Copper roofing sheet, some tin snips and a few sheet metal screws and you get this...
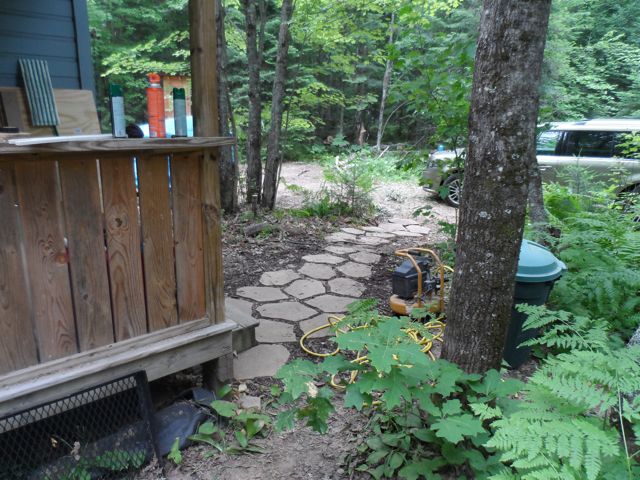
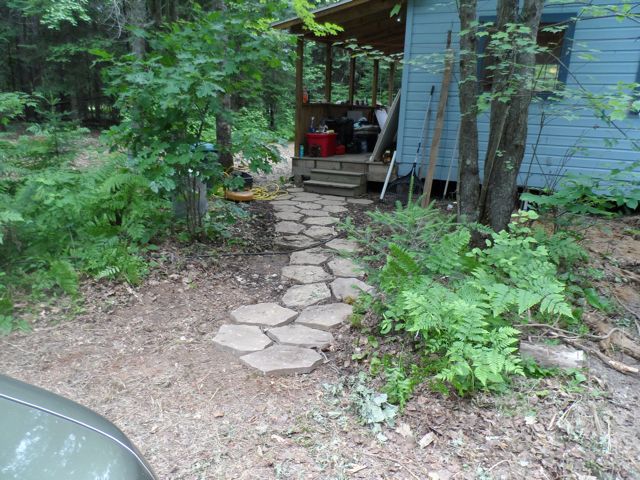
We also changed were we park the car and how we access the cabin steps. In the process we decided to add some patio blocks to form a little walkway. These are cast concrete from Lowes and are all the same shape. We were surprised at how natural they looked when the spacing and orientation wasn't very precise... and they were on sale for $4 each.
,,,to be continued.
|
|
jaransont3
Member
|
# Posted: 13 Jul 2013 13:43 - Edited by: jaransont3
Reply
OK....one more post from this trip.
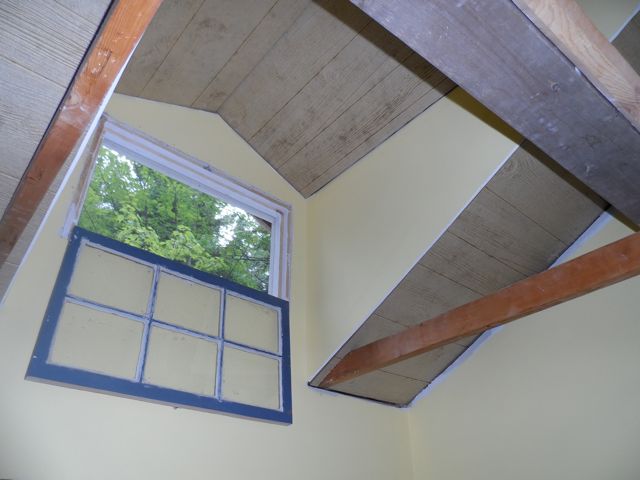
Another small project one afternoon was to make and install the screens for the dormer windows. Really nice being able to have these windows open and let all the hot year up there out. Helps with the cross flow too.
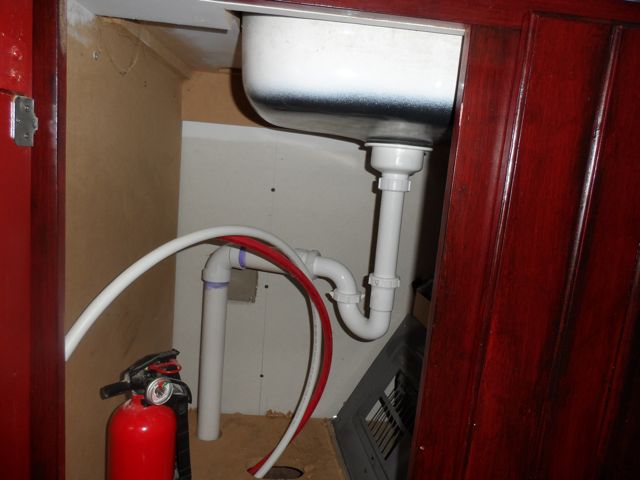
Couple more significant milestones this trip. We got the greywater drainfield in and got the kitchen sink drain plumbed in...
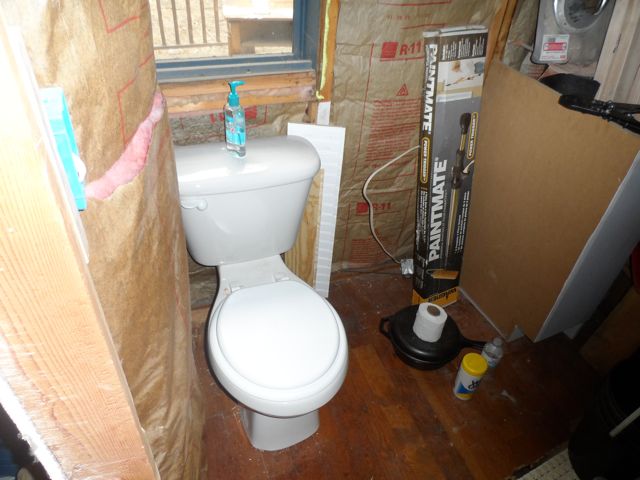
We got the sewer line in to the septic and installed the new toilet. Have to flush it with a bucket until we have water supply, but Jill really liked not have to go out to the outhouse in the middle of the night.
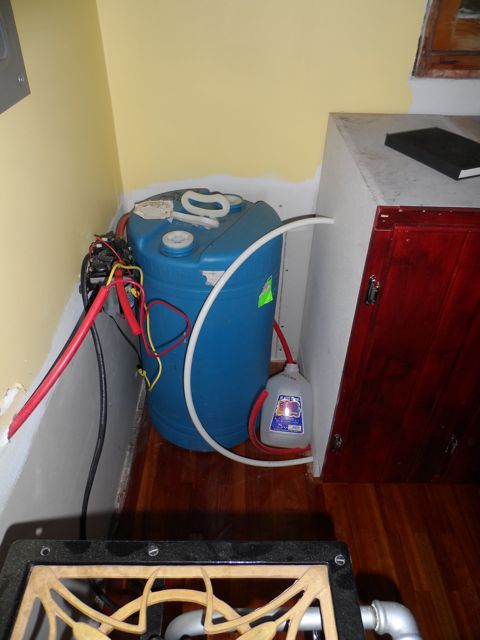
We got the tri-plex buried in its new home and installed a 60 amp A/C cut-off box to connect the tri-plex to a short piece of heavy SO cord with a twist lock to the 30A outlet on the generator. Got all the temporary wiring at the breaker box in the cabin switched over and closed it up with the panel cover. We also ordered and installed a Shurflo 4008 12 V on-demand pump. So far we have only verified that it pumps from one buck to another until we get the rest of the plumbing hooked up. Nice quiet pump, btw. You can see the pump, our battery box/inverter, and our 20 gallon holding tank in these shots...
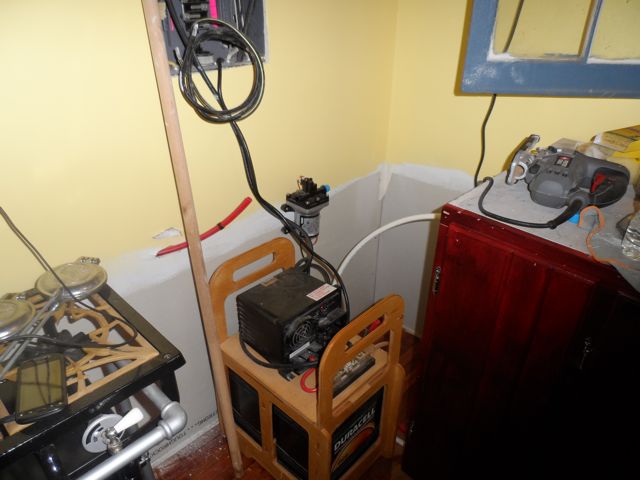
You can also see some of the pex tubing my brother started to run. Here is one more shot of the pex install...
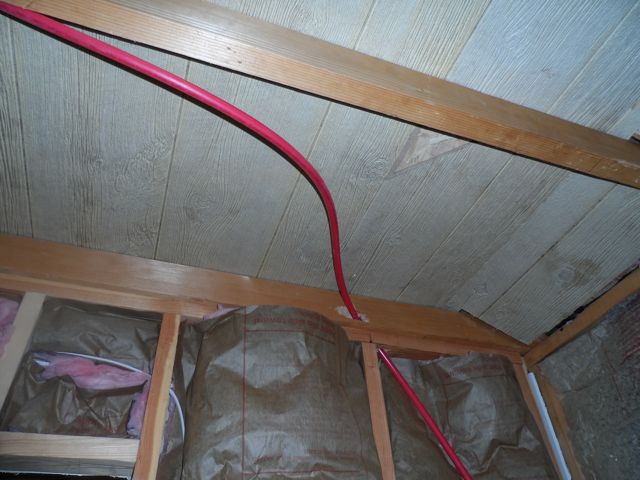
The pex is really nice to work with. Looking forward to getting the rest of it plumbed up and collect some water.
and finally just a few shots on the last day after cleaning everything up and shutting up the cabin until the next time.

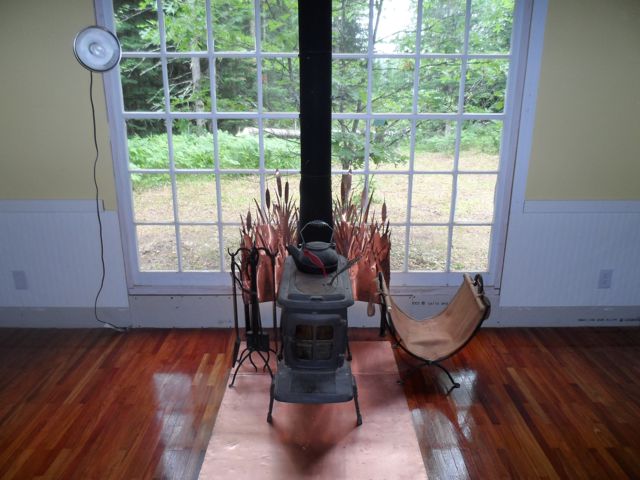
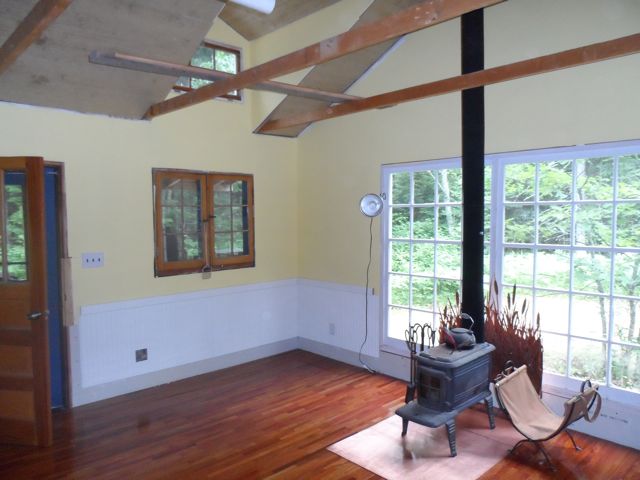
We had an absolute awesome week of family fun, relaxing, and extremely productive work. Looking forward to the next trip back already.
|
|
jaransont3
Member
|
# Posted: 29 Jul 2013 20:02 - Edited by: jaransont3
Reply
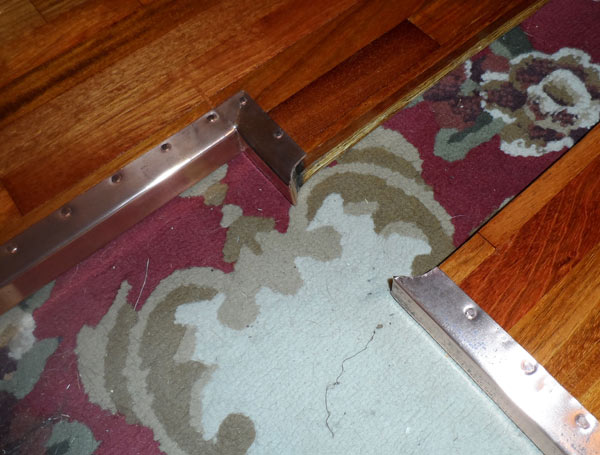
One of the projects I am working on before our next rip back to the cabin is the kitchen countertops. We are using some of the left over hardwood flooring for the countertops. I have managed to get the flooring nailed and glued to an OSB base and trimmed to fit.
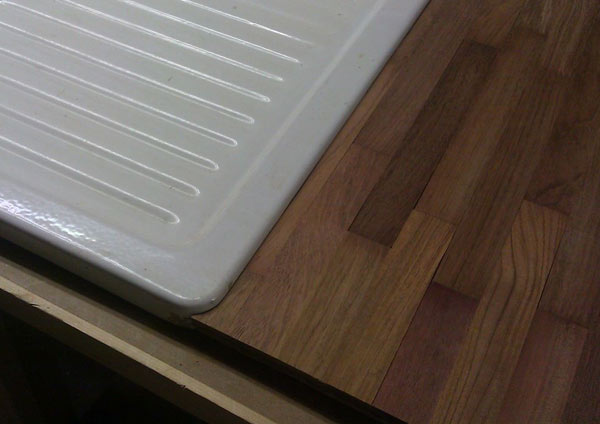
I still have lots of sanding to do and then putting the polyurethane finish on. I am also planning on wrapping the exposed edges with a bit of copper sheeting to tie it in with some of the other bits in the cabin.
I have both pieces ready for sanding. You can also see the double drainboard sink we are going to be switching to in this picture...
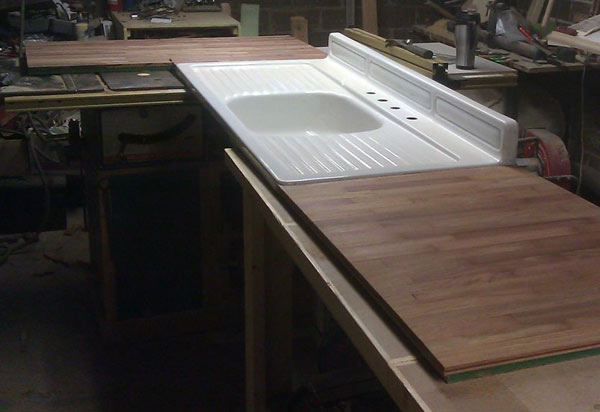
This sink is in a bit rougher shape than the single drainboard one we have at the cabin now, but it has 8" spaced holes for the faucets unlike the 6" spaced ones on the sink at the cabin. Will open up lots of other options for the faucets. Pretty limited selection in 6" spaced faucets. I will be sandblasting off the old porcelain finish and then powdercoating the sink white again. Should be very durable...especially for the use the cabin sink will see.
|
|
jaransont3
Member
|
# Posted: 12 Aug 2013 07:22 - Edited by: jaransont3
Reply
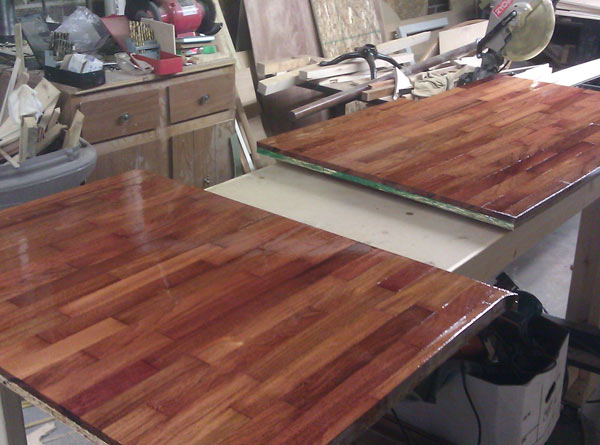
I got the counter tops for the cabin polyurethaned this weekend. Just need to add the copper edge wrap and they will be ready to go to the cabin over Labor Day week....
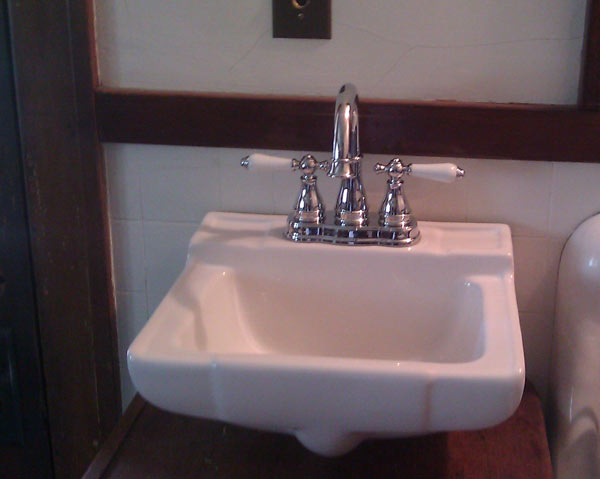
We also dug out the sink for the bathroom, got it cleaned up, and test fit the faucet. It is a small bar sink. Will be perfect for our small bathroom at the cabin...
We are really looking forward to our next week back there. Lots of little projects to do before the trip.
|
|
trollbridge
Member
|
# Posted: 12 Aug 2013 09:41
Reply
Wow! Everything is looking great! I love the walkway you made with the stones...very pretty!
Floors are beautiful and countertops will be equally as pretty! I'm sure you are really looking forward to the long weekend coming. Seeing all you have been accomplishing is motivation for us to kick it back up a notch...we've gotten pretty lax. I guess it is kinda hard to keep going at top speed indefinitely.
|
|
jaransont3
Member
|
# Posted: 19 Aug 2013 00:39 - Edited by: jaransont3
Reply
Got the countertops finished, including the copper edge wrap.

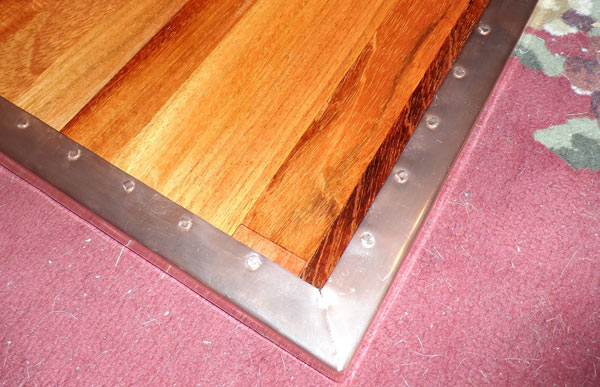
Now we just have to wait a couple of weeks for our next trip up there to get them installed.
|
|
jaransont3
Member
|
# Posted: 10 Sep 2013 10:13
Reply
Jill and I had a great week up at our cabin last week. We got lots done and even took some time to relax and enjoy the peace and quiet a couple of times. The weather was perfect. I will post pictures later today.
|
|
jaransont3
Member
|
# Posted: 10 Sep 2013 18:34 - Edited by: jaransont3
Reply
As promised, here a bunch of pictures from the past week...
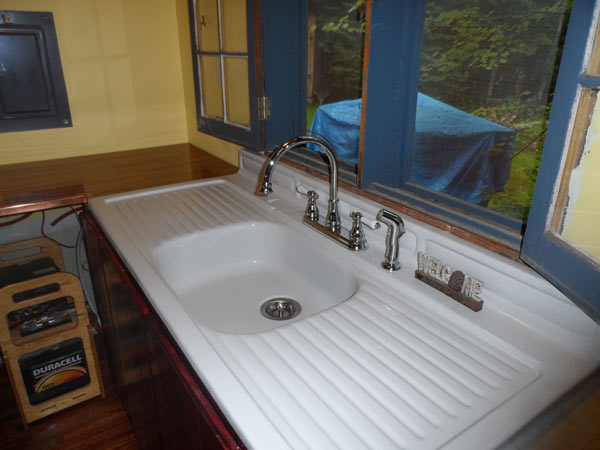
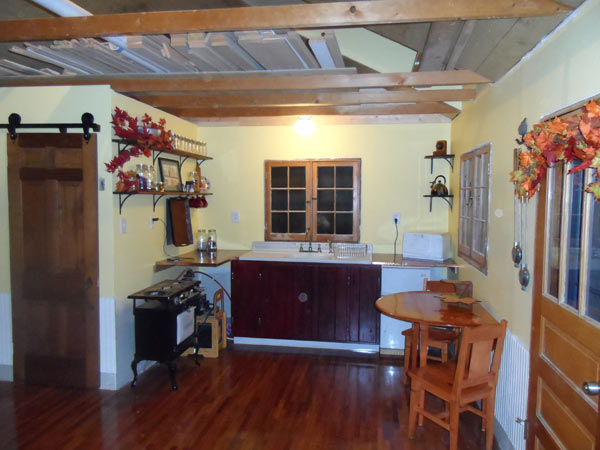
New kitchen counters in place. Same Brazilian Cherry as the floors.
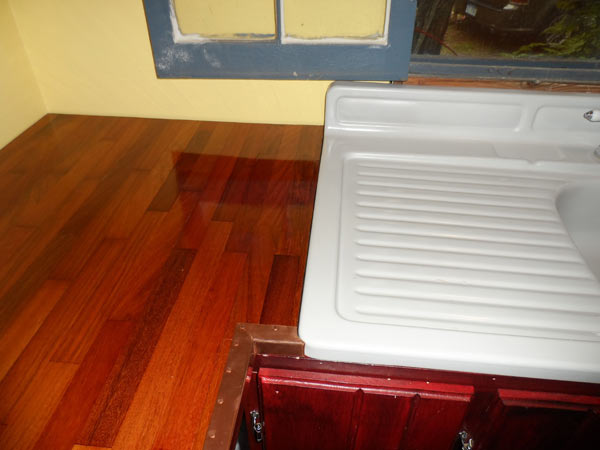
New sink and faucet installed. Faucet is only decorative right now....still need to finish the water supply system.
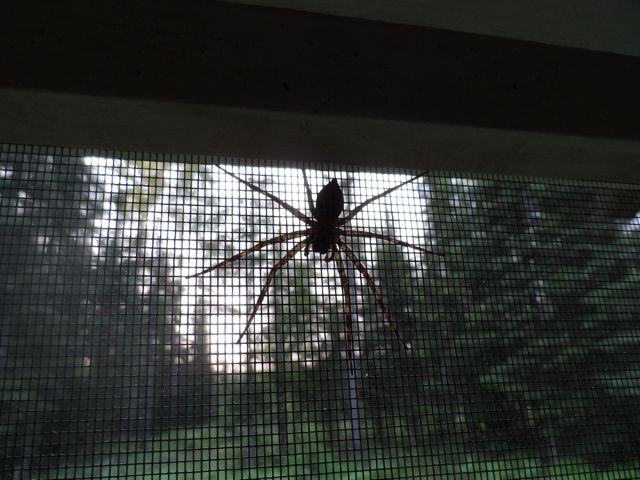
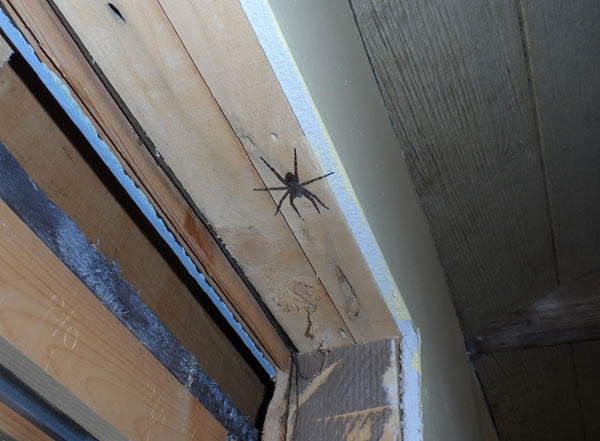
Friendly neighborhood spider.....NOT! We found three of these in the cabin the first day we were there. No more after that. This was the largest of them...that is a full rough cut 2x4 it is spanning...
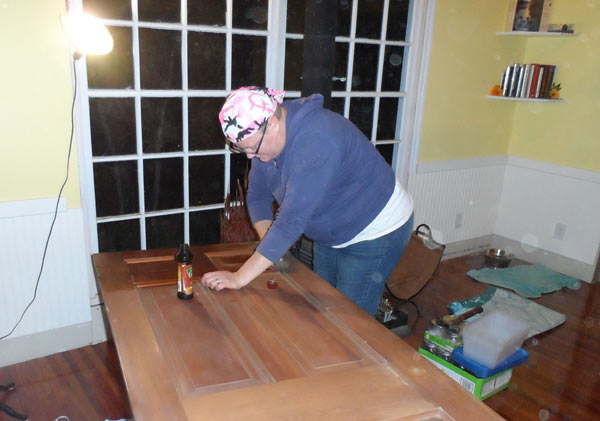
Jill refinished the bathroom door.
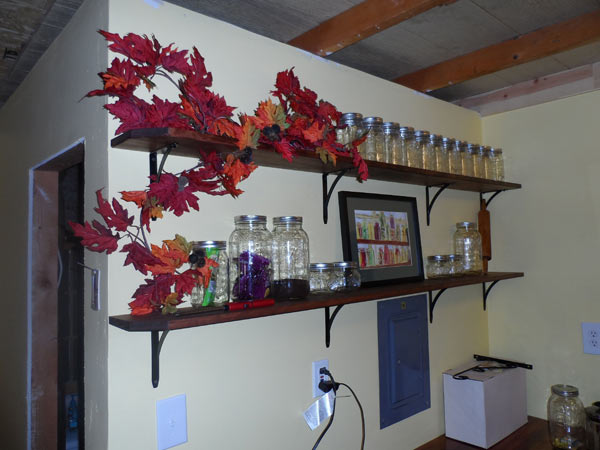
We built and installed kitchen shelves and put them to use.
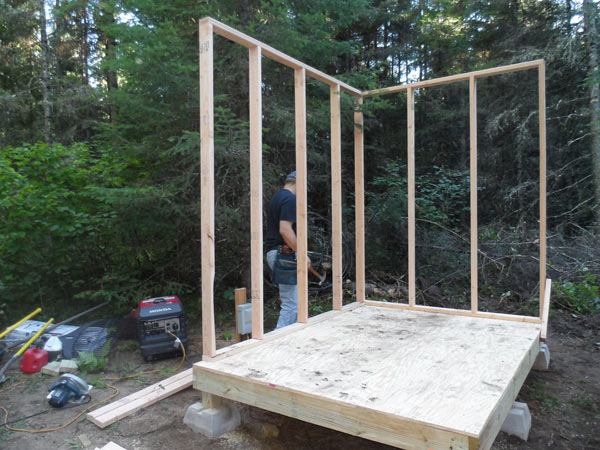
Shed floor framing with pressure treated 2x6s.
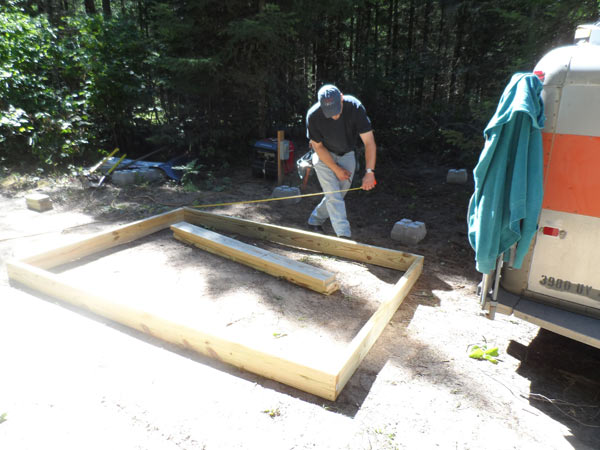
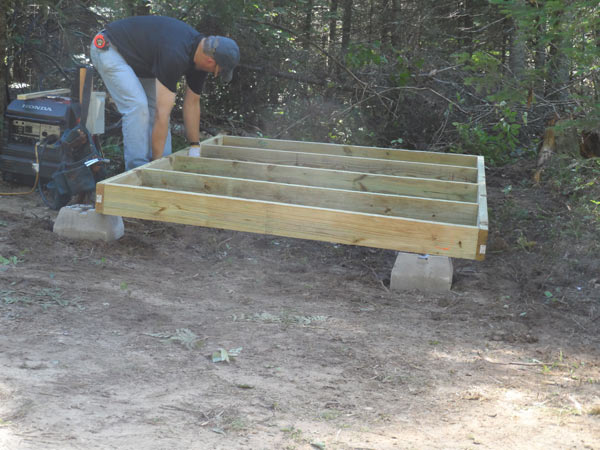
Floor frame complete. Shed is 6' x 8' with 8' walls.
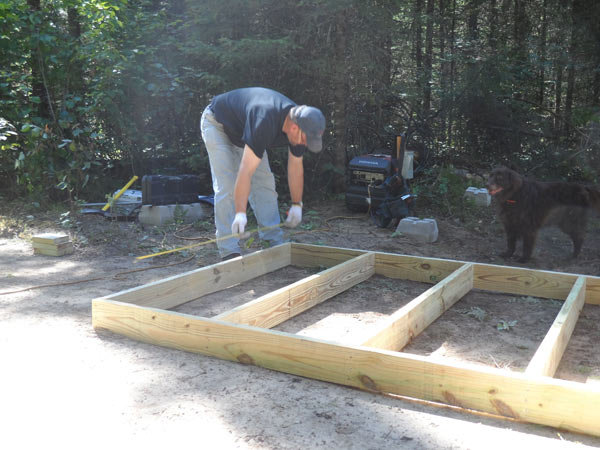
Getting the frame positioned over the concrete foundation blocks and the blocks in position. I used 4x4 pressure treated posts at each of the 6 foundation blocks. They were cut overlength, the floor leveled up and then nailed to the posts. Then the excess length was cut off.
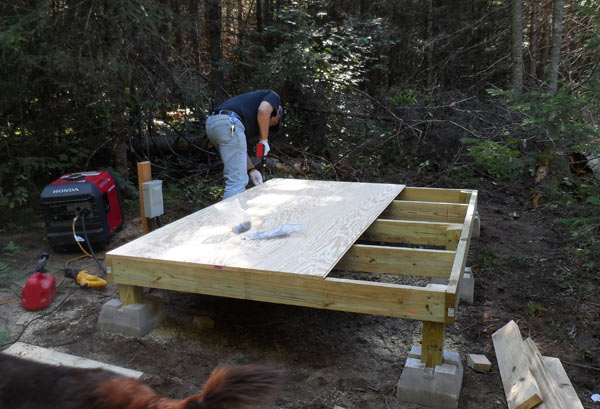
Floor leveled up and the first sheeting going on.
First wall going up.
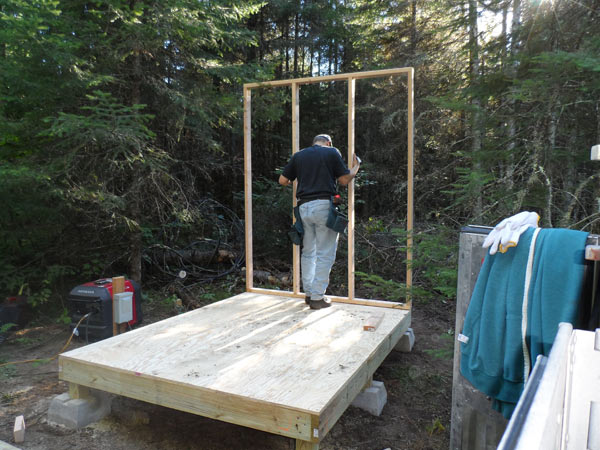
Wall #2
Wall #3
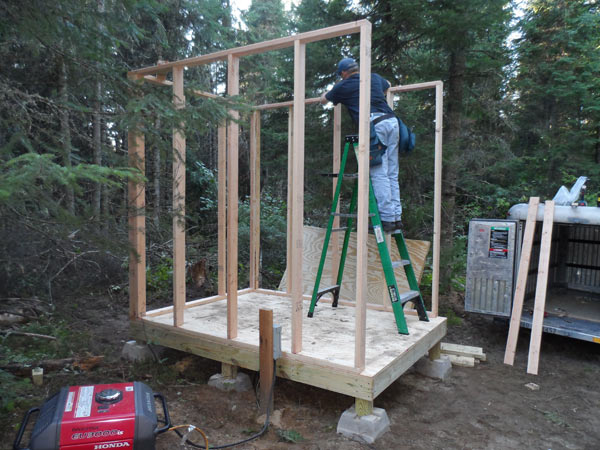
Hey...we need 4 of these wall things.
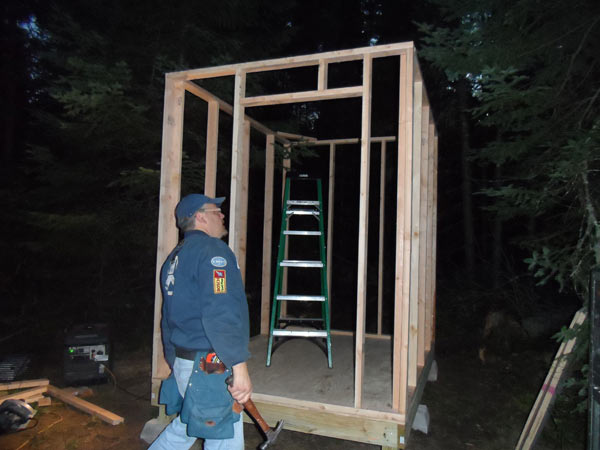
Rafters built.
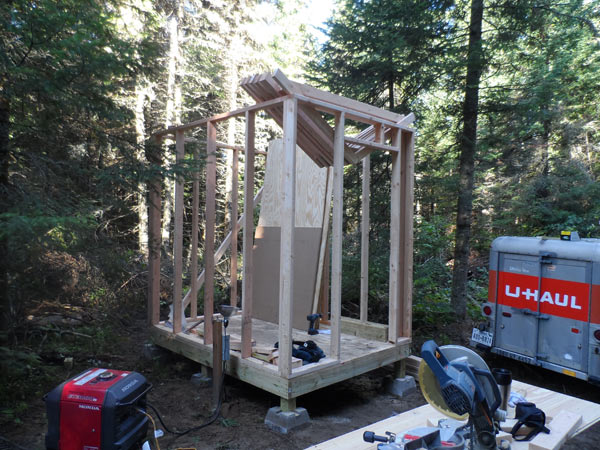
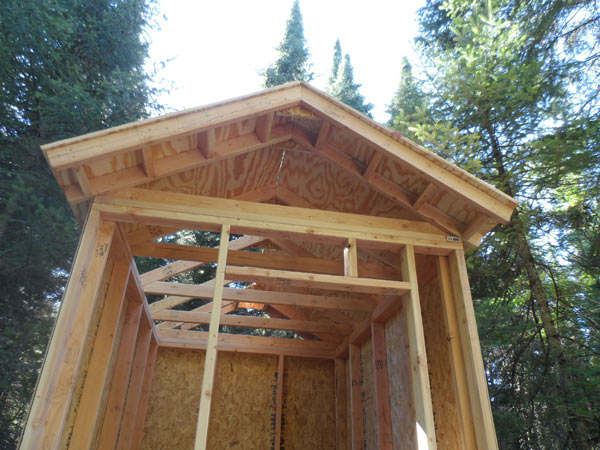
Gable overhangs.
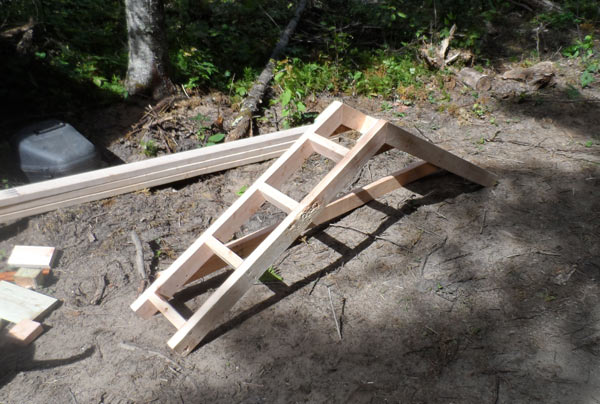
Me noodling on and trying to get the rafters evenly spaced....
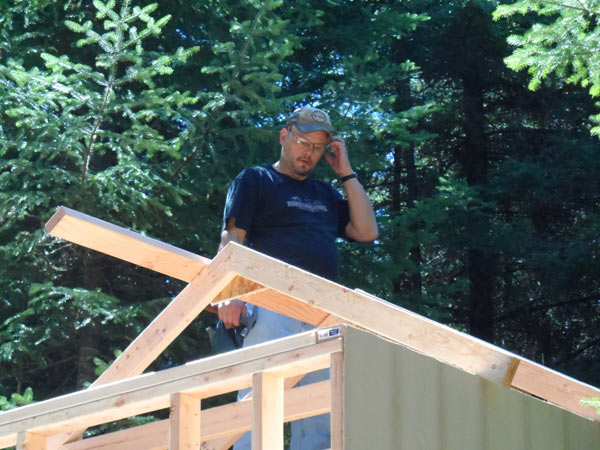
Most of the roof sheeting installed.
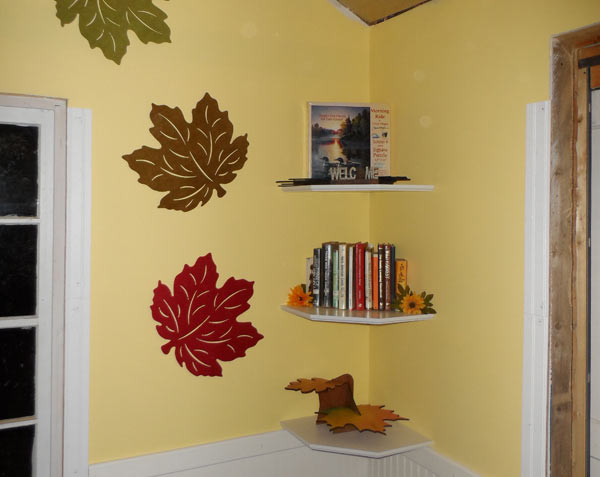
Corner kitchen shelves I built and installed to match the long shelves on the opposite wall.
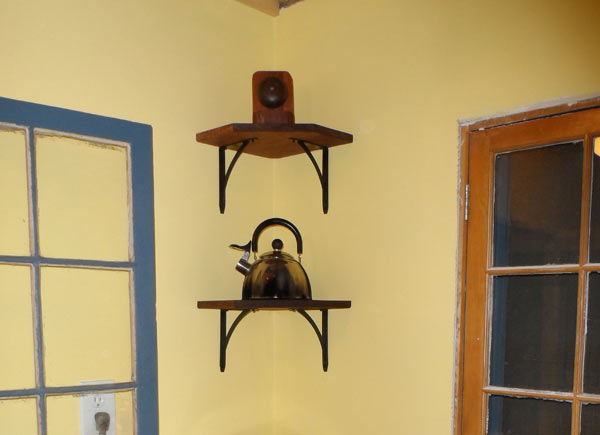
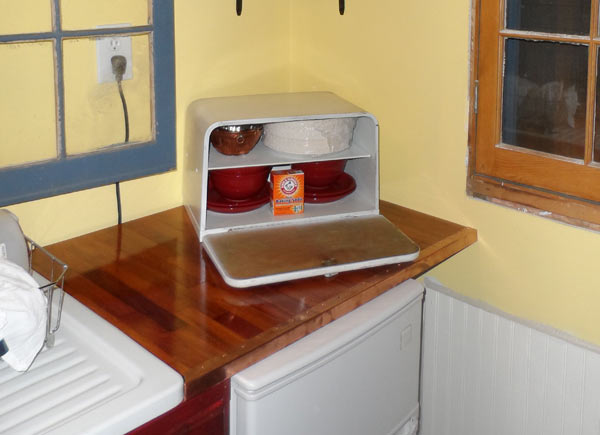
Very cool metal breadbox we found for $10 at a local antiques shop.
More corner shelves and Jill hung the leaf placements on the wall as decoration until we need them on the table.
Coat rack I built and the cool barn-style sliding bathroom door.
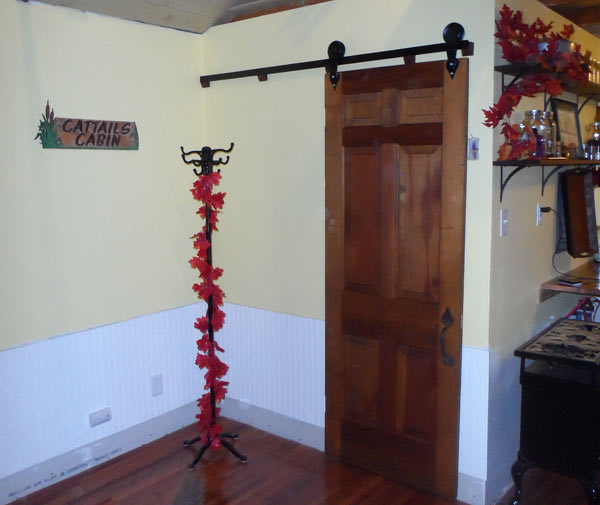
Close up of the door hardware. The rollers are modified v-belt idler pulleys from some car. Jill found them at a swap meet and I modified them.

Door handle we found a few years ago at an antique show.

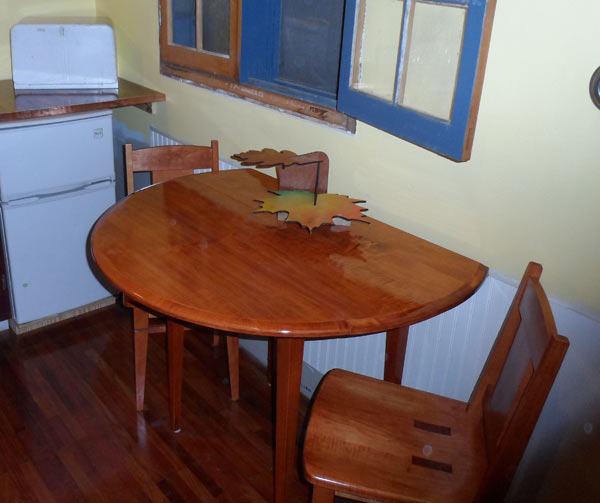
Table with a left-over center piece from our wedding.
Overall shot of the kitchen.
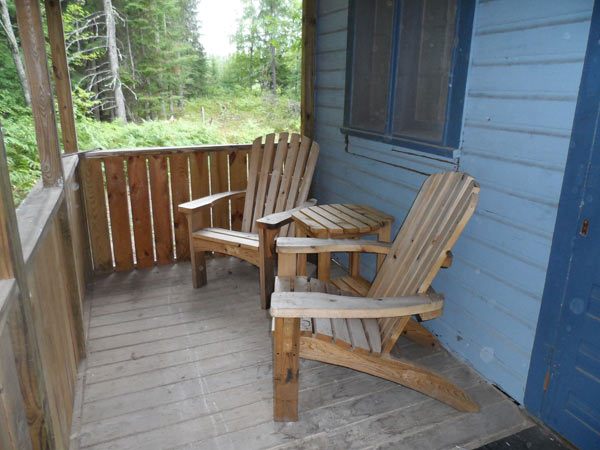
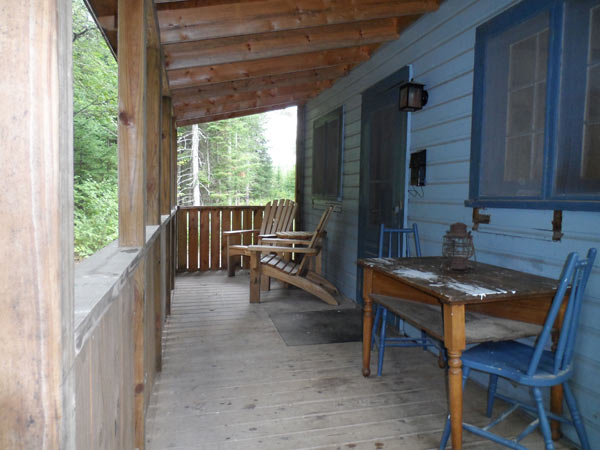
Storage shed let us finally clear the porch off and get the Adirondack chairs and table on it instead of a bunch of lumber and drywall.
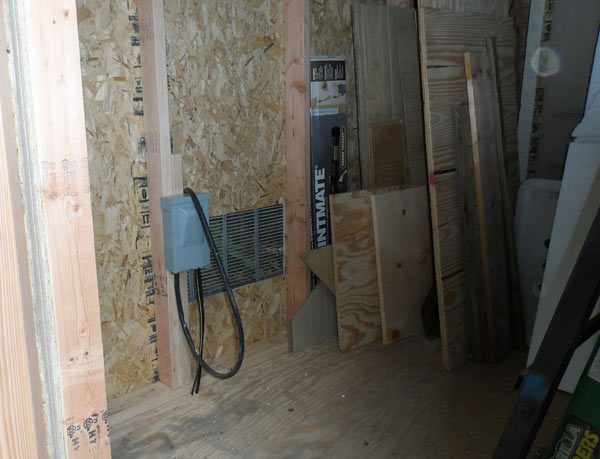
This is the exhaust vent for the generator in the shed. You can also see the screened air inlets up under the eaves.
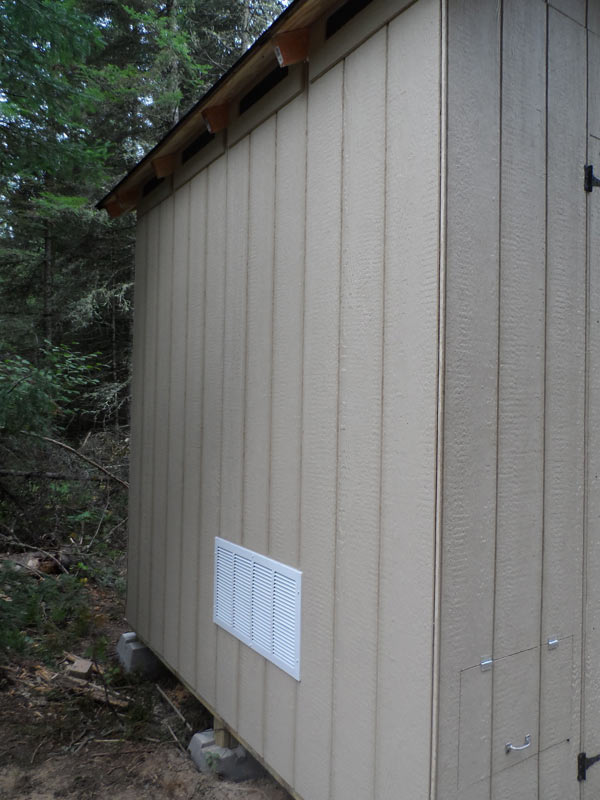
Access panel for starting and stopping the generator without opening the larger door.
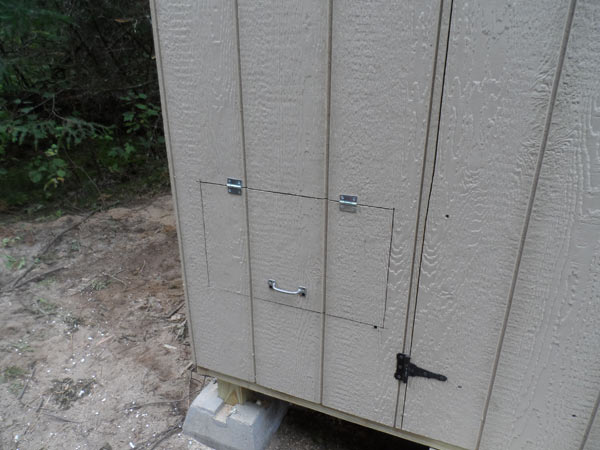
Electrical hook up for the generator and an inside view of the exhaust vent. Will be adding a fan to actively ventilate the shed anytime the generator is running.
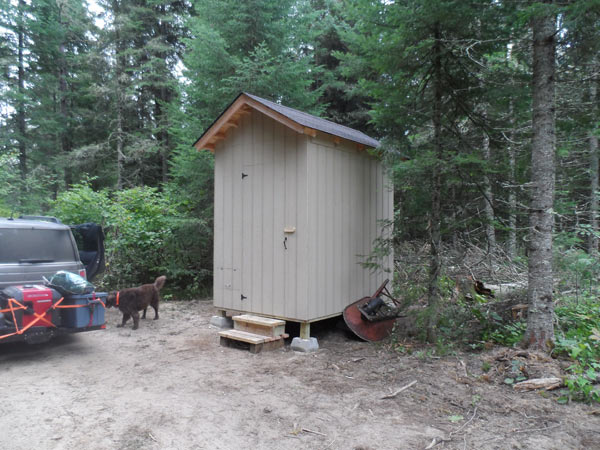
Shot of the finished shed... Shingled roof. All of the walls facing the cabin have been insulated to help with the noise. Really just can't hear the already quiet Honda generator when it is in the shed.
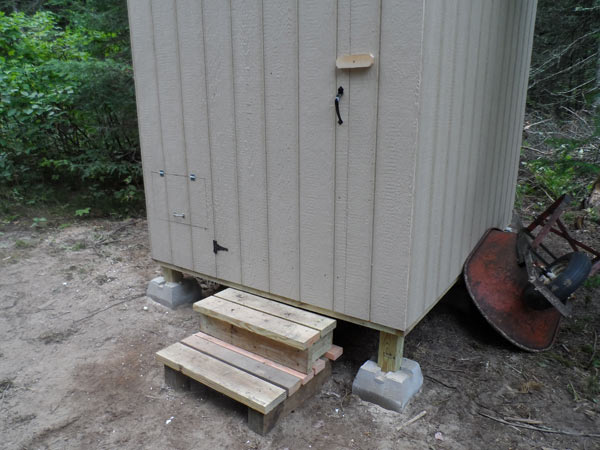
Jill built the very stout and solid steps for the shed.
All cleaned up and shut-up until the next visit.
Cleaned up porch.
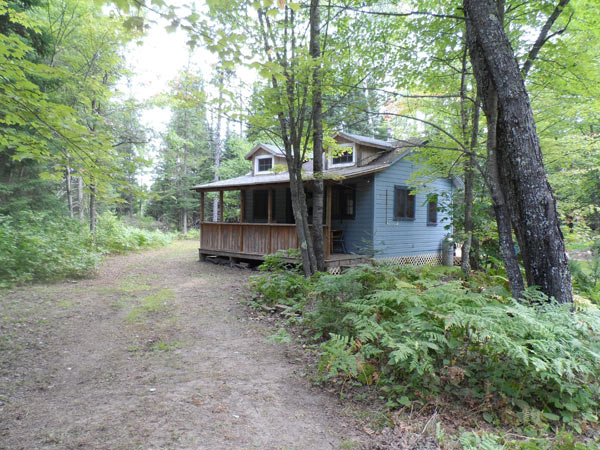
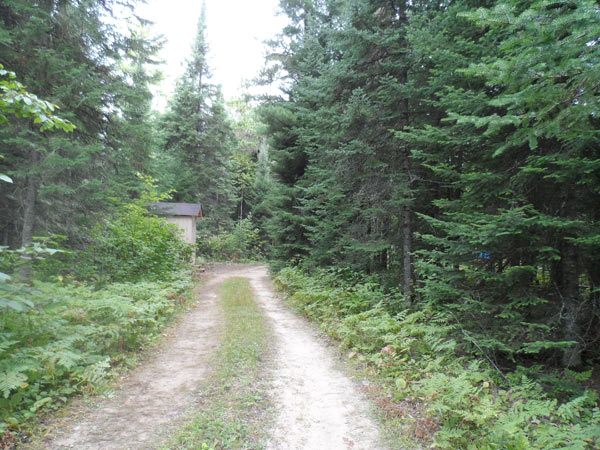
View of the shed as you come down the driveway. the cabin is just around the corner to the right.
|
|
OwenChristensen
Member
|
# Posted: 11 Sep 2013 07:29
Reply
Looks great. Is it time to kick back and enjoy yet? Great time of year ahead.
Owen
|
|
jaransont3
Member
|
# Posted: 11 Sep 2013 09:51 - Edited by: jaransont3
Reply
Thanks. We did take some time to just relax this trip.
Still lots of projects to do at the cabin. These things are never really "finished" are they?
Unfortunately, with the cabin being over 800 miles away, we are likely not going to get back there again until the weather is much colder. Maybe Thanksgiving or Christmas time.
|
|
Popeye
Member
|
# Posted: 11 Sep 2013 12:47
Reply
Fantastic work!
|
|
trollbridge
Member
|
# Posted: 11 Sep 2013 18:38
Reply
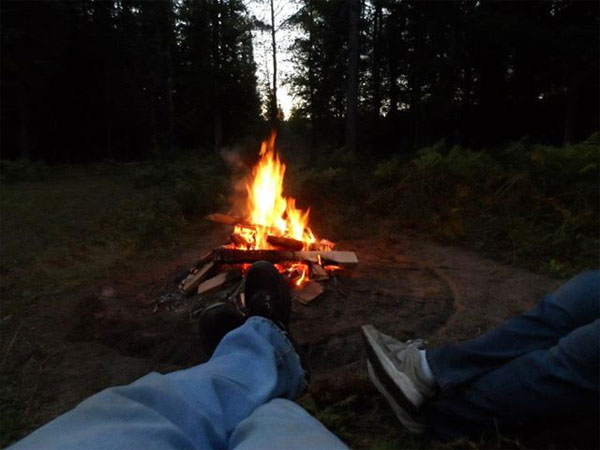
You and Jill sure do make the most out of your trips to the cabin! You must be going like "energizer bunnies". lol. I'm glad to see you did take at least one evening off to enjoy the campfire.
BTW.....if you ever arrive to find your kitchen and bathroom sinks have gone MIA....well, I didn't steal them  LOL.....I love them! Very nice LOL.....I love them! Very nice
|
|
jaransont3
Member
|
# Posted: 15 Oct 2013 23:07 - Edited by: jaransont3
Reply
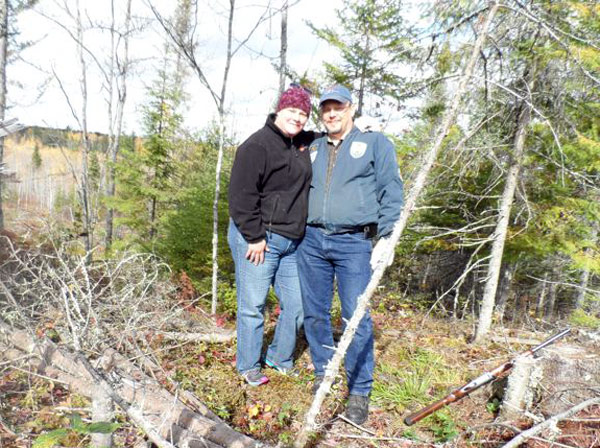
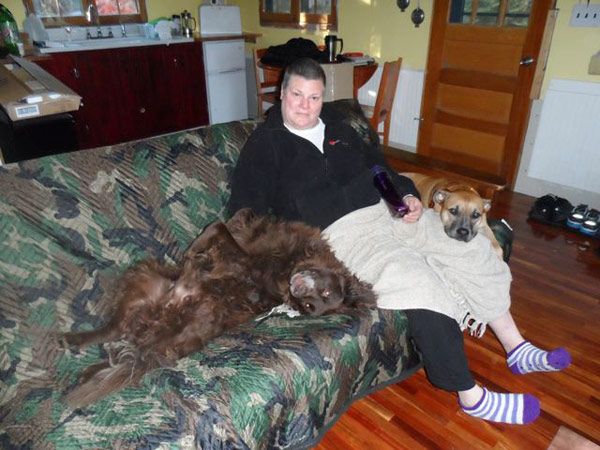
Jill and I got the chance to spend a long weekend at the cabin this past weekend. We went back for my grandmother's funeral which made the visit bitter sweet, but we did get to spend the weekend at the cabin. We didn't even bring any tools for projects....we just relaxed and enjoyed the time with family, friends, our dogs and the cabin. We even skipped the generator this time. We only took the battery/inverter box. It lasted the entire 3 days without even coming off the full charge indicator light. Granted we only used it for lights in the evening. Didn't bother to plug in the frig. It was also our 1 year wedding anniversary on Friday so that made it special too.
Anyway, here are a few pictures....
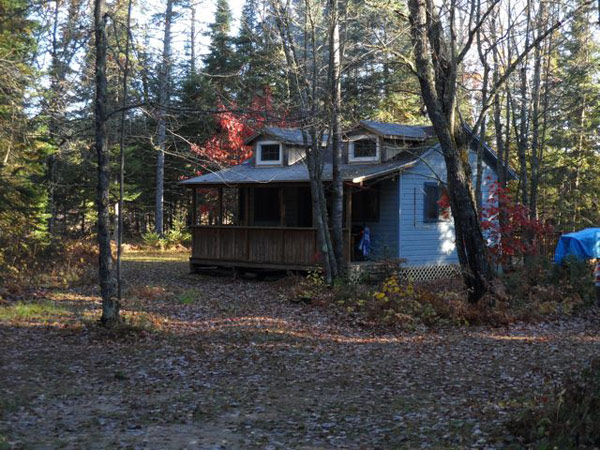
Jill and I exploring the logged off ridge south of the cabin. I used to hunt in this area while growing up, but it wasn't logged off then...weird to see it without all the trees...
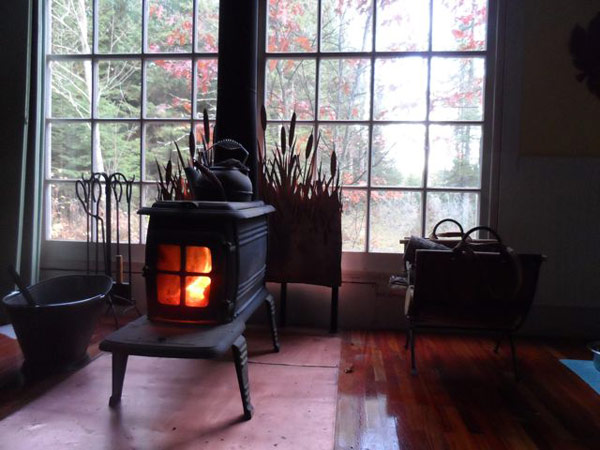
Love this time of the year in northern Minnesota...no bugs, great colors, and cold enough at night to need a fire...
Our "new" futon. We are now ready for overnight guests...

Futon was a hit...
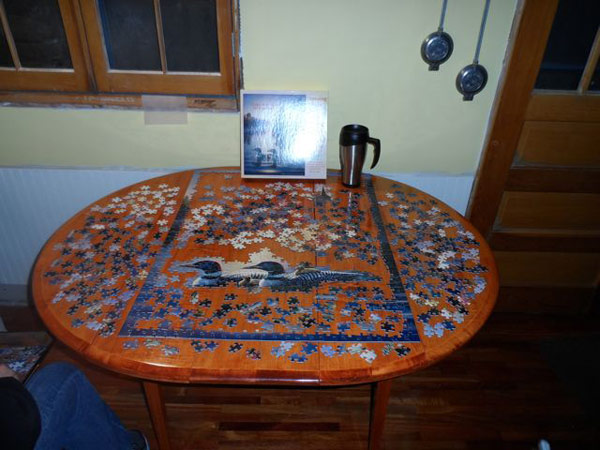
Just relaxed..even started a puzzle Sunday night. Perfect way to spend the evening with the fire crackling in the stove...
My favorite picture from the trip. Took this picture early Sunday morning as the sun was rising...
Looking forward to the next trip....
|
|
DackRetreat
Member
|
# Posted: 29 Nov 2013 21:37
Reply
Your woodworking and metal craftsmanship are awesome and really add to the charm of your getaway. Congrats!
|
|
jaransont3
Member
|
# Posted: 29 Nov 2013 23:01 - Edited by: jaransont3
Reply
Thanks. It is a labor of love. <G>
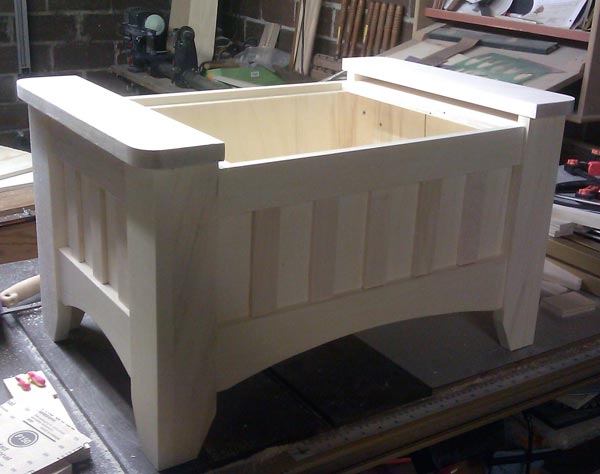
Here are some in-progress shots of my latest cabin project. We decided that we wanted a couple of ottomans to go with teh recently acquired futon. Figured it would be really nice to be able to put our feet up and relax in front of the fire.
Since the space is so small we also wanted the ottomans to have storage inside and have padded tops so they could be used as separate seating if necessary.
We couldn't find anything in the stores that met all of our needs so I designed some up and have been working on them last week or so. Hope to have them finished up before our Christmas trip to the cabin.
Started by building a simple plywood box...

Then I added the legs and some other details to match the style of the futon frame. You can see the plywood box and some other parts in the background of this shot..
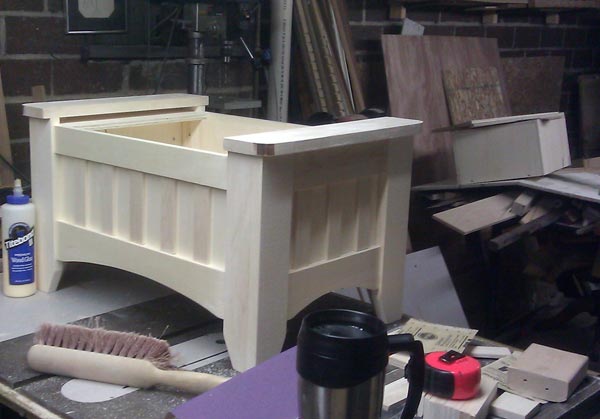
Here is a closer shot of the details...
I still have to do a bunch of sanding on the first one, assembly the second one, stain and polyurethane both of them and cut and upholster the foam removable cushions. We found some really neat burlap-like material with leaves printed on it for the covers. Will post more as I make progress.
Been a fun project so far.
|
|
DackRetreat
Member
|
# Posted: 30 Nov 2013 06:51
Reply
So far, it looks like something that I might be able to venture into making someday. Definitely post pics with details. Thanks.
|
|
| << . 1 . 2 . 3 . 4 . 5 . >> |
