| . 1 . 2 . 3 . 4 . 5 . >> |
| Author |
Message |
jaransont3
Member
|
# Posted: 3 Jan 2013 07:40pm - Edited by: jaransont3
Reply
My wife Jill and I have been working on our cabin for the last 10+ years. It started out as a 16x20 one room summer lake cabin that a friend of the family had. When they decided to build a retirement home on the same site as the cabin, my Dad, my brothers, and I moved the cabin on to our 5.5 acres about 4 miles away. The original cabin was gutted to just a shell. An 8x12 bedroom addition was added on to the back and a 6x20 foot porch was added to the front. Windows were added and some of the originals raised up to the correct height. One 5x6 corner of the cabin has been walled off for a future bathroom. It has been insulted and drywalled. I restored a small cast iron wood stove for heat and a small cast iron and tin propane fired cook stove.
We are off-grid running on a new Honda EU3000i generator. We will eventually put a small inverter and a deep cycle battery for a few lights at night and the occasional cycling of the compact frig when the generator is off for the night.
We finally got a functioning outhouse last summer and spent our first nights in the cabin this past Thanksgiving. Still lots of work to do, but we are having fun.
You might ask why it took us 10 years to spend the first night in it....the biggest thing is we are about 830 miles, one way, from the cabin. We get there 2-4 weeks out of the year. We are also doing all of the work ourselves....when we are there.
Here are a few pictures....
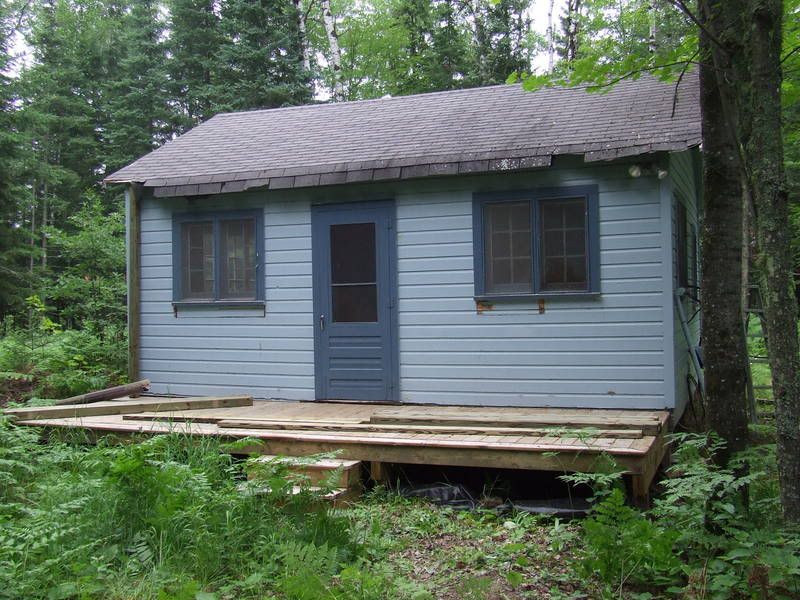
Adding the porch.
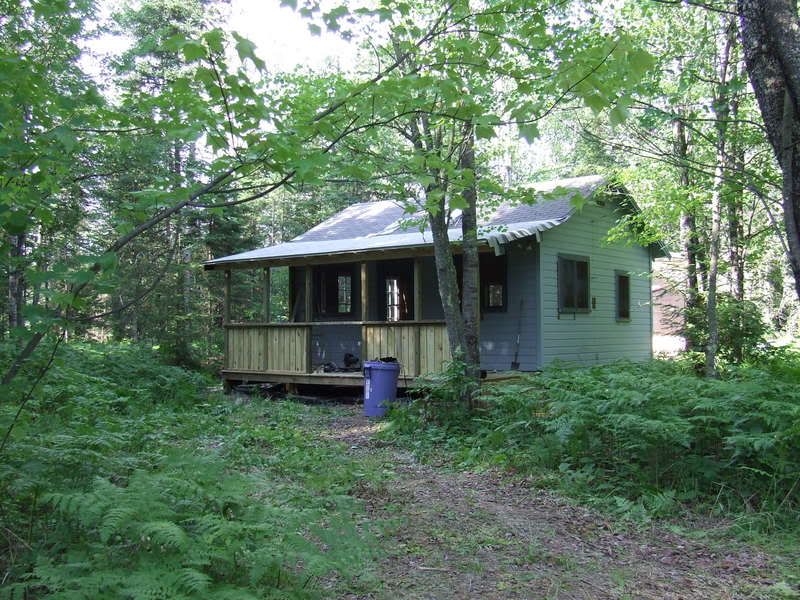
Porch mostly complete.
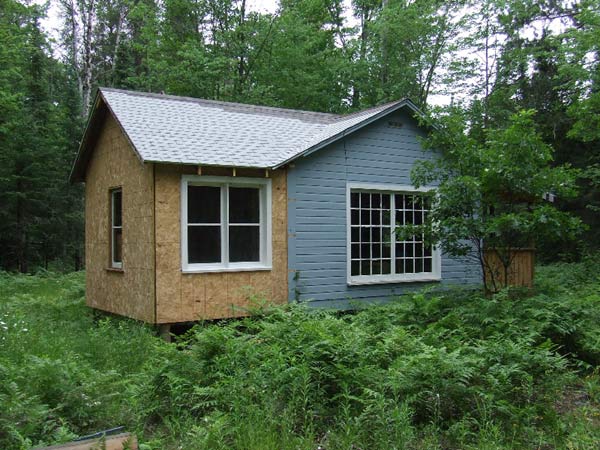
Bedroom addition.
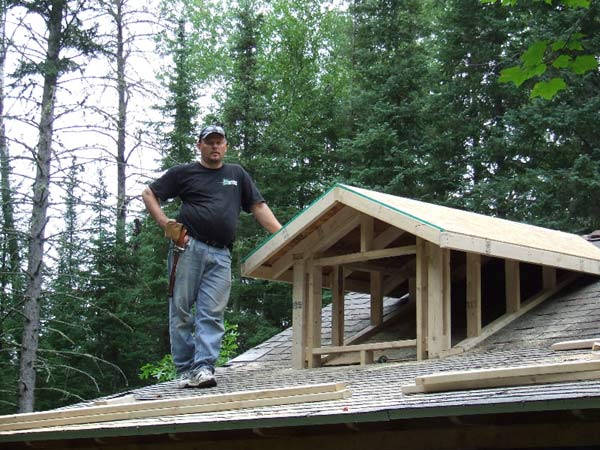
Adding some dormers.

Wood stove for heat.

Our privy.

Restored propane cookstove.

This past Thanksgiving. Closed up til the next time.

Our full-size murphy bed.
I have learned a bunch from surfing around this forum. We are looking forward to sharing more of our cabin experience and contributing to the forum.
|
|
Montanagirl
Member
|
# Posted: 3 Jan 2013 09:15pm
Reply
ADORABLE! Wow! dumb question, what purpose do the dormers server (besides adding a lot of character!) Love the murphy bed too.
|
|
jaransont3
Member
|
# Posted: 3 Jan 2013 09:36pm
Reply
Thanks. The dormers do add a bunch of character and that was part of the decision to add them. They are also there to provide some functionality. First they let in a ton of extra light and really make the small cabin seem bigger. Second, the windows are hinged at the bottom and we will open them (with screens on the outside) for extra ventilation in the summer. And third, there will be a loft over the kitchen and the dormer on that side will provide a bit more space and light for the loft.
The murphy bed is great. The recess in the bottom will eventually have a desk surface that folds out of it when the bed is in the stowed position so that we have somewhat of an office/studio space. The box under it in the picture is big enough to store the pillows and blankets and it pulls out to provide support for the foot of the bed when it is folded down.
|
|
Montanagirl
Member
|
# Posted: 3 Jan 2013 10:20pm
Reply
Love the hinged dormer windows for air floor. Very nice! (and you are right--they make it look much larger) Looking foreward to more updates. I'm in awe that you are 800+ miles away! : :
|
|
Purplerules
Member
|
# Posted: 3 Jan 2013 11:07pm
Reply
Wow, that is a sweet cabin. Just love what you have done so far. I will be looking for all future updates.
|
|
Purplerules
Member
|
# Posted: 3 Jan 2013 11:09pm
Reply
Oh! also I love the sculpture you have behind wood stove.
|
|
jaransont3
Member
|
# Posted: 3 Jan 2013 11:17pm
Reply
Thanks.
The sculpture is something I designed and made. It is a heat shield to keep the wall and window cool when the stove is roaring. It is waterjet cut from 0.030" thick dead-soft copper roof sheeting. There are two layers separated by about an inch air gap.
It is not only beautiful, but effective as a heatshield. The leaves and cattails even wave with the slightest air movement.
Here is a better picture before adding the legs.

|
|
hattie
Member
|
# Posted: 4 Jan 2013 12:24am
Reply
Beautiful, beautiful work!!! I also love the heat shield. It is very unique! Keep the pictures coming. Can't wait to see the murphy bed opened up.
|
|
|
TheCabinCalls
Member
|
# Posted: 4 Jan 2013 11:10am
Reply
What hardware did you use for your murphy bed?
|
|
keastvol
Member
|
# Posted: 4 Jan 2013 11:33am
Reply
What kind of wood stove is that. I have a Vogelzang boxwood stove and would love to see the fire through the front door and I can't seem to find a door like that. Does anyone know if they sell these.
|
|
jaransont3
Member
|
# Posted: 4 Jan 2013 12:02pm
Reply
Quoting: TheCabinCalls What hardware did you use for your murphy bed?
The murphy bed is my own design. It is just a couple of simple steel reinforcements with shoulder bolts through them for a pivot. It does not have any kind of counterweight or springs yet. Right now it is light enough to lift without them. Maybe when I am older I will have to look into adding something...or just leave it down all the time.
I did work hard at keeping the bed frame lightweight and we only have the mattress...no boxspring. It really isn't too bad.
Here are some pictures....

The bottom of the bed frame is a gridwork of 3/4" poplar strips 1-1/2" tall. It is then sheeted on both sides with 1/4" birch plywood. You can also see the floor bracket in this shot. It is 1/2" birch plywood.

The frame sides are also 1/2" birch plywood. Strong and light.

This shows the steel reinforcement on the floor bracket for the pivot. I had to make some modifications when I found out the ceiling joist was only 7'9" from the floor, not the full 8' that I remembered. One of the issues with being over 800 miles from the cabin.

Here it is folded down with the mattress in place. We stapled velcro straps to the inside of the bed frame on the two foot end corners and then wrapped them over the mattress to keep it in place when it is folded up. Works great.

I simple hook and eye hold it in the up position for now.
Glad you all like it. It really is a space-saver. I have some more detailed plans if folks are interested.
|
|
jaransont3
Member
|
# Posted: 4 Jan 2013 12:14pm - Edited by: jaransont3
Reply
Quoting: keastvol What kind of wood stove is that.
The wood heating stove is an old boxwood stove that I pulled out of my aunt and uncle's shed. It was a mess. I sandblasted it made new stove bolts, applied new stove black, and reassembled it.
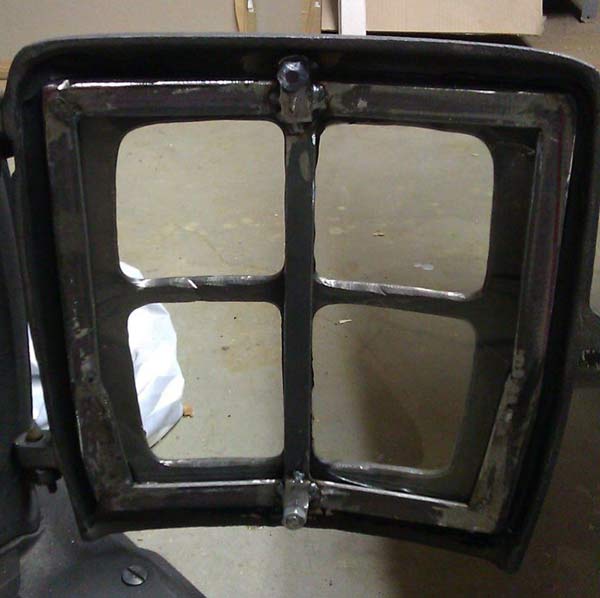
One of the things we didn't like about it was the solid cast iron door. My wife and I both like being able to see the fire. So I used a cut-off wheel in my 4" grinder and a couple of carbide burrs in my die grinder to cut the window openings in the original solid cast iron door.
Then I fabricated a steel frame to hold two pieces (side by side) of 1/4" tempered glass. I welded a couple of threaded studs to the back of the door to hold the frame to the door. I used high temp silicon sealant to seal the glass to the door and frame. I used two pieces of glass due to the curvature of the door in that direction.
BTW, do NOT use the stove cement to seal the glass to the door. It dries hard as a rock and the thermal expansion when the door and glass heat up with a fire burning caused the glass to crack the first time I used it. I got new glass and used the silicone sealant and haven't had a problem since.
|
|
trollbridge
Member
|
# Posted: 4 Jan 2013 03:53pm
Reply
Very cool project you have been working on! I like the improvements you've made...especially the dormers and the porch. Where or rather how far north is your cabin in Minnesota? You must miss it when you are not there...since you are so far, how often do you get to come work on it?
I'm looking forward to watching your progress. Welcome to the forum...it's a great place with great people!
|
|
Oowasa
Member
|
# Posted: 4 Jan 2013 05:00pm
Reply
Very nice! I live in West Central MN and cant wait until we get our land up north! Looking forward to seeing more pictures as things progress!
|
|
jaransont3
Member
|
# Posted: 4 Jan 2013 05:13pm
Reply
Quoting: trollbridge Where or rather how far north is your cabin in Minnesota? You must miss it when you are not there...since you are so far, how often do you get to come work on it? I'm looking forward to watching your progress. Welcome to the forum...it's a great place with great people!
Our cabin is on the Iron Range about 1/2 way between Duluth and International Falls.
We try to make a point of getting back there for a week a couple of times each year. It has been 3 or 4 times each of the last couple of years. We have family nearby and so it lets us stay connected with them without having to stay with them all the time.
I also try to take measurements and plan projects that I can work on here and then bring there...like both stoves and the bed and such. This winter's project is a drop leaf kitchen table and maybe a couple of chairs.
Thanks for the welcome. I really like what I have read and seen on the forum so far.
|
|
jaransont3
Member
|
# Posted: 4 Jan 2013 05:27pm - Edited by: jaransont3
Reply
Found a picture of the frame I built to hold the glass in the wood stove.
You can make out the two studs and nuts that hold the frame to the door at the top and bottom in the center.
|
|
trollbridge
Member
|
# Posted: 4 Jan 2013 05:33pm
Reply
We try to do the same as you when we are at home for a weekend -often we are working on something for the cabin...this weekend it will be a light fixture and maybe some cabinet doors if I can find the measurements we took 
Our cabin is up near Duluth but in Wisconsin just south of Superior. There are quite a few members here who also have places up that way. Did you grow up on the Iron Range? Where do you live now?
|
|
jaransont3
Member
|
# Posted: 4 Jan 2013 05:40pm
Reply
Born and raised on the Range. Went to school in Hibbing, home of Bob Dylan and Kevin McHale and iron ore.
We live in Dearborn, MI now. I work in the research lab at Ford Motor Company.
|
|
trollbridge
Member
|
# Posted: 4 Jan 2013 05:55pm
Reply
Bob Dylan, Kevin McHale and iron ore...lots and lots of iron ore...and cold temps!
|
|
jaransont3
Member
|
# Posted: 4 Jan 2013 06:26pm - Edited by: jaransont3
Reply
Found some pictures from 10 years ago when we moved the cabin to our site....
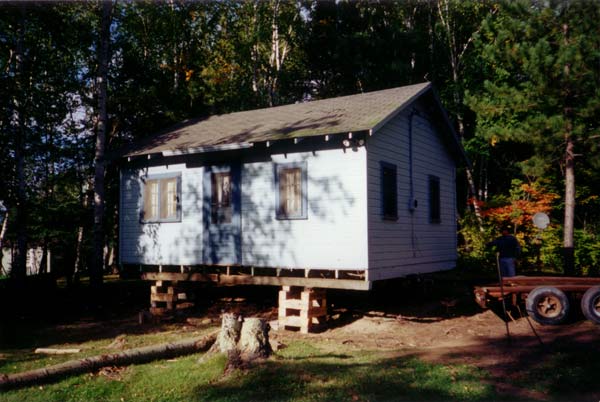
Jacked up on cribbing at the original location.
JBacking the trailer underneath.
Making sure everything is strapped down.
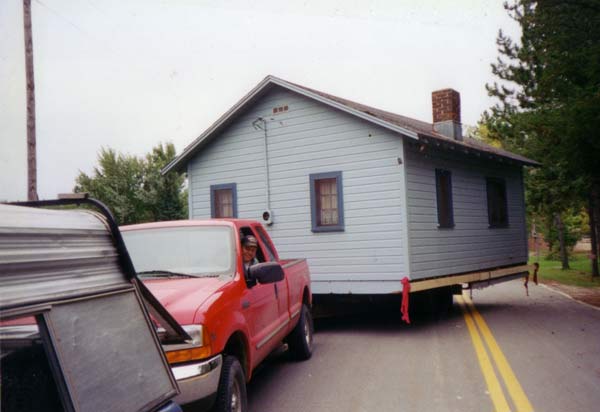
Starting the 4 mile or so trip.
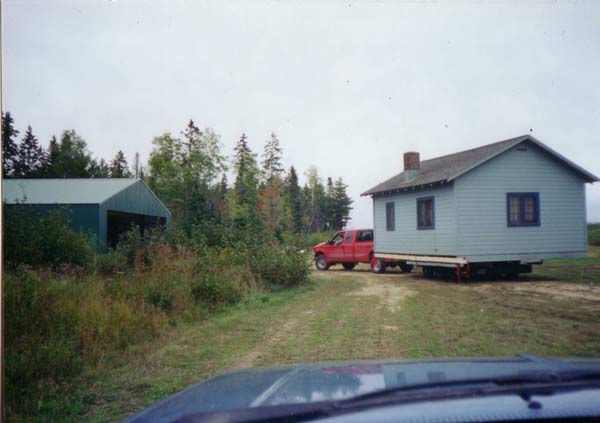
At my brother's place for staging while we finish the foundation. This is about 1/4 mile from the final site.
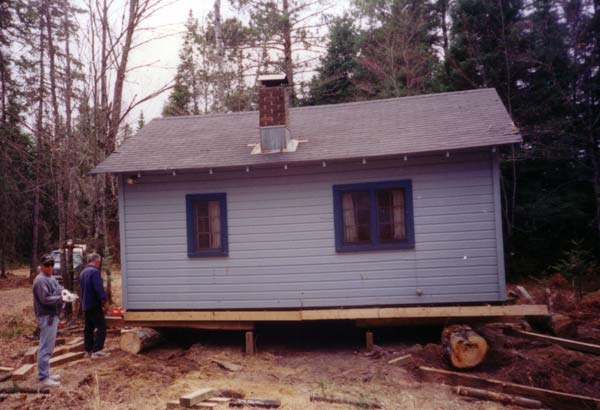
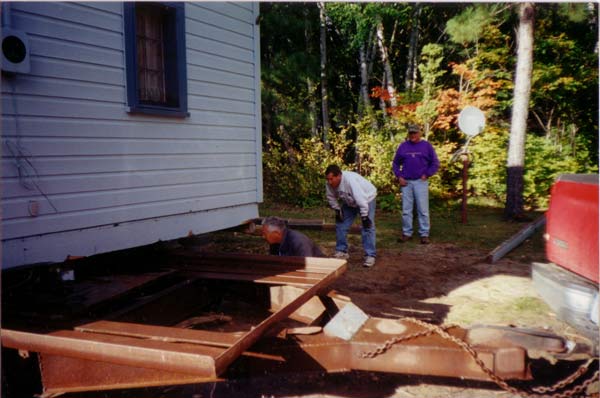
Almost in place. We lowered the cabin into the logs and used them to skid it in place over the pressure treated post foundation.
Getting ready to jack it up, get the logs out, and the beams in.
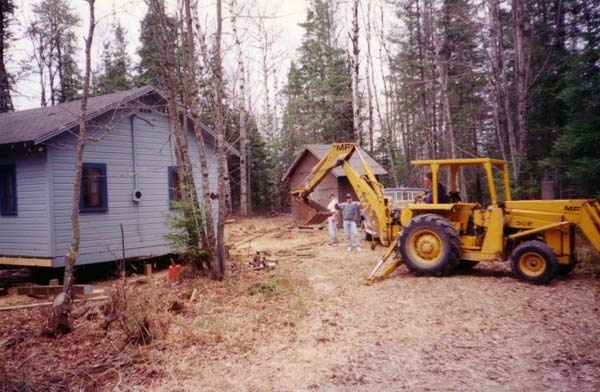
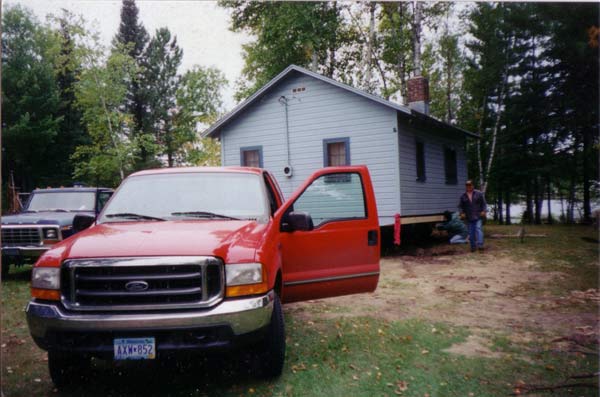
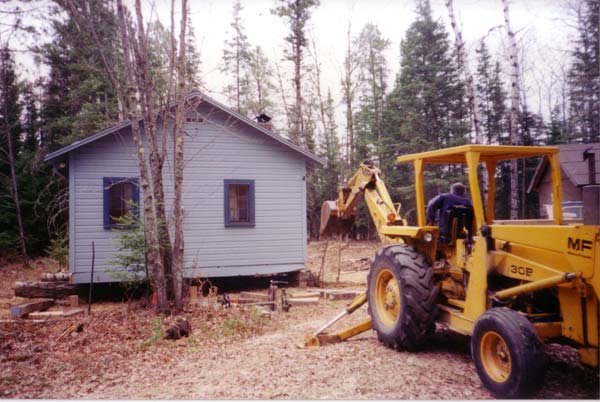
Some minor tweaking with the backhoe of the position of the cabin.
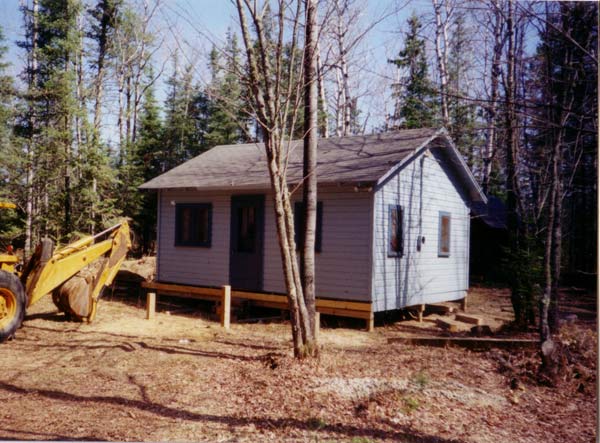
Finally settled in place. You can see the posts for the future porch sticking up in front.
|
|
Purplerules
Member
|
# Posted: 8 Jan 2013 06:58pm
Reply
Wow that was some project, but it is all looking so nice.
Thanks for posting such great pictures for us to see step by step how you are doing some of it.
That heat screen is to die for!!! Gorgeous! You are so talented.
|
|
jaransont3
Member
|
# Posted: 18 Jan 2013 12:35am - Edited by: jaransont3
Reply
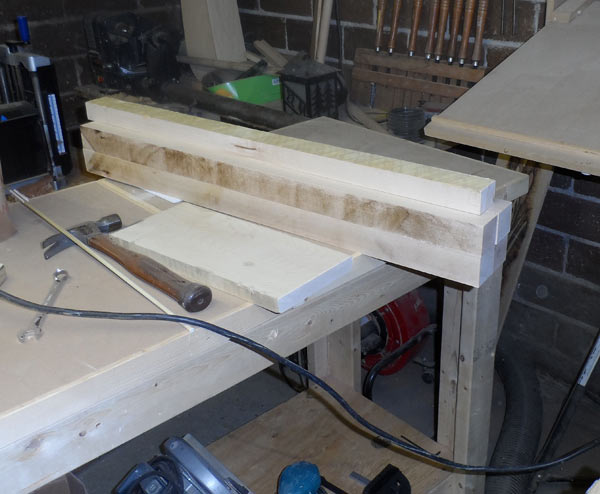
Picked up the materials for the next cabin project last week...
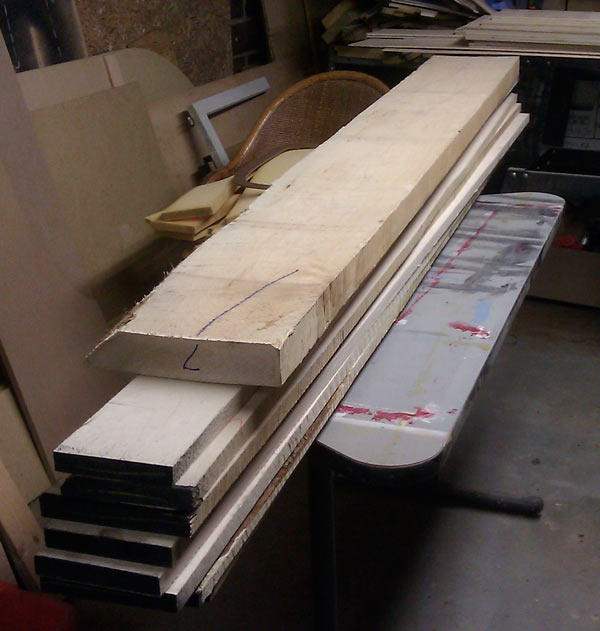
40 plus board feet of rough sawn soft maple.
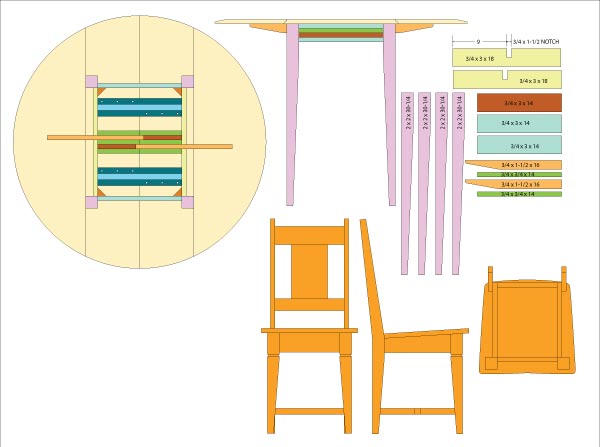
Going to be a 42" diameter round drop leaf table and a couple of chairs of my own design.
Hope to have it done by Easter when we are thinking of going to the cabin for the week. Will post progress pictures as I go.
|
|
jaransont3
Member
|
# Posted: 21 Jan 2013 11:11pm
Reply
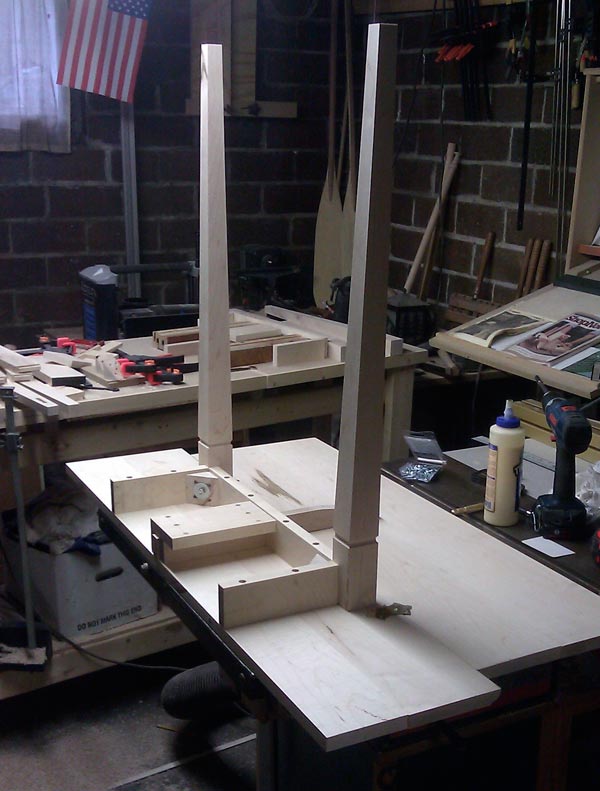
Got a bunch done on the dining room table for the cabin this weekend. Started out by roughing out the stock for the legs...
Then cut the tapers and the routed details...
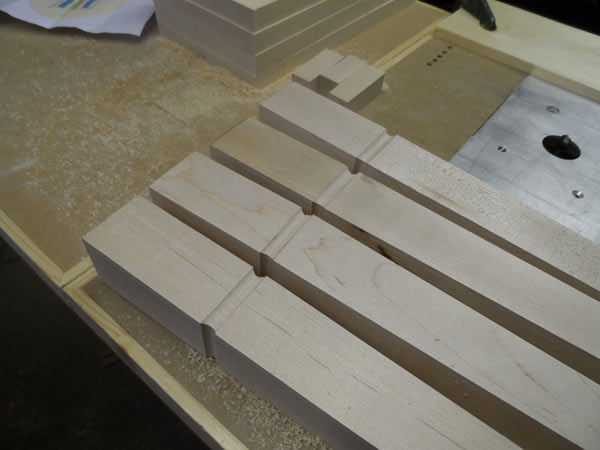
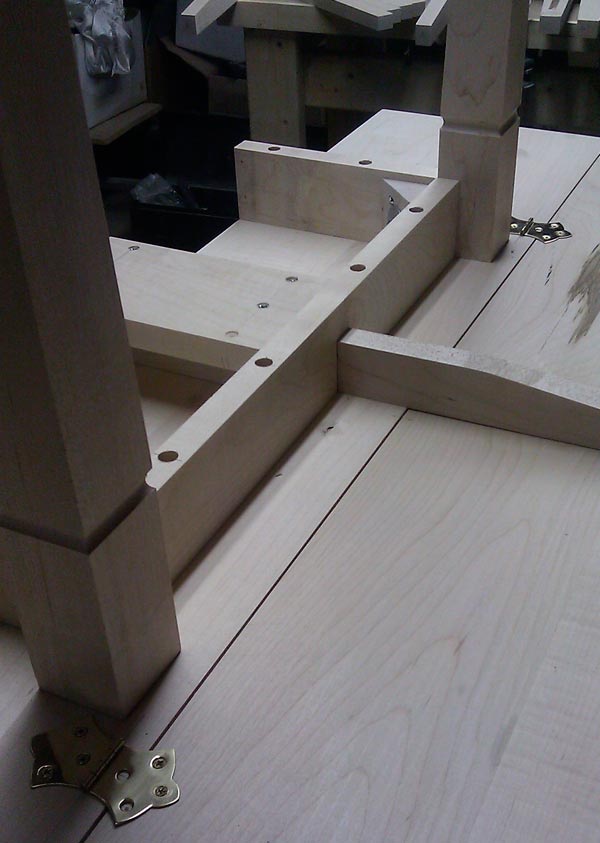
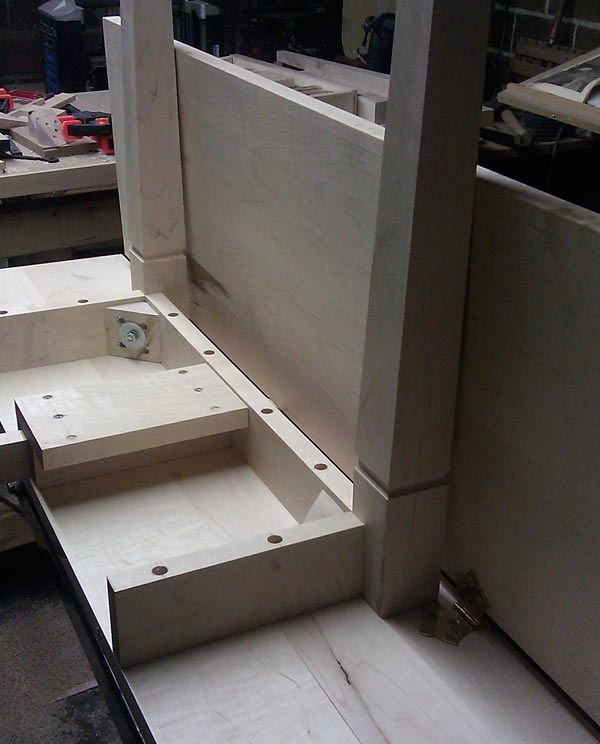
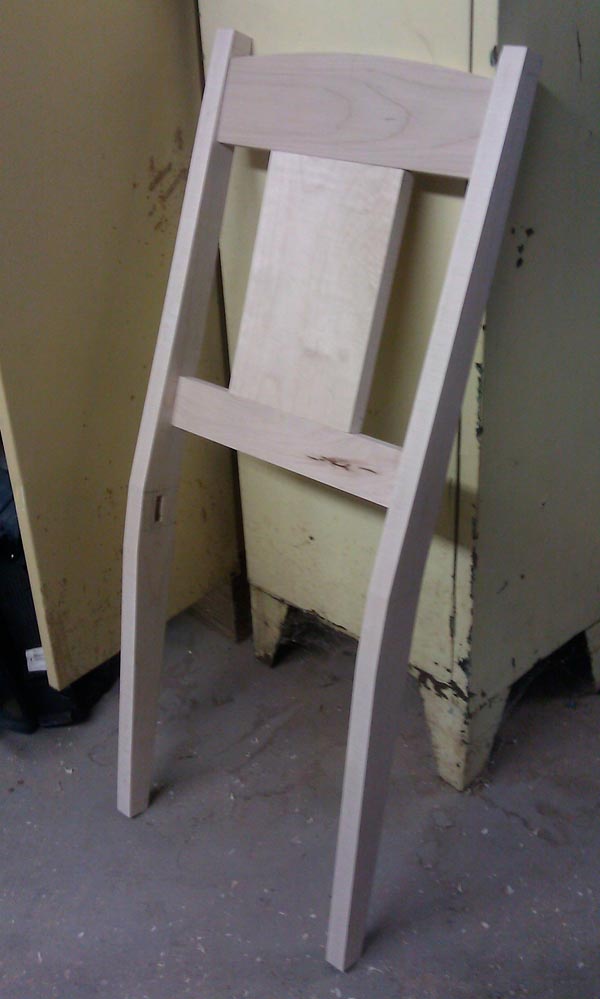
Got the skirt boards cut, the corner braces, and the front legs and rear legs/backs for the chairs cut...
and a detailed shot...
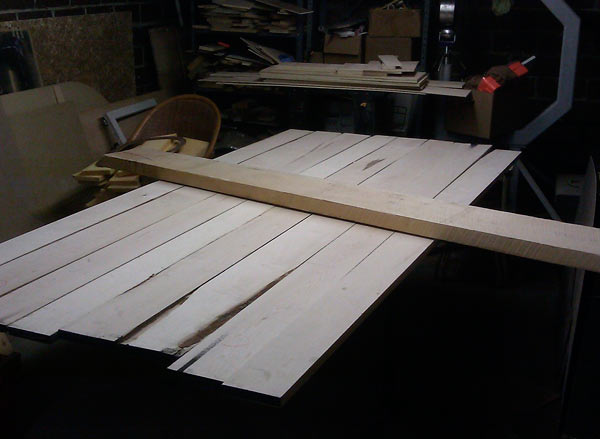
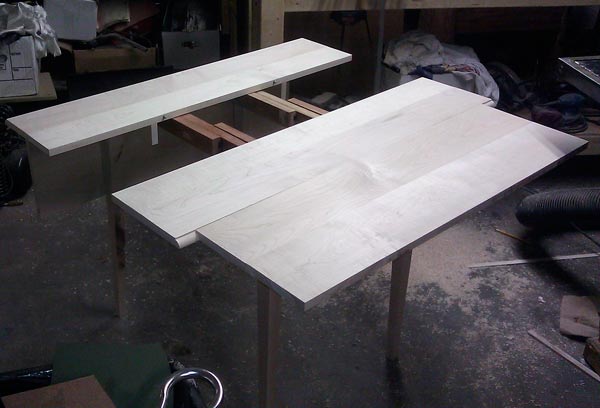
I also got all the glue-ups for the table top (drop leaves, center leaf, and both side of the table) and the two seats for the chairs....
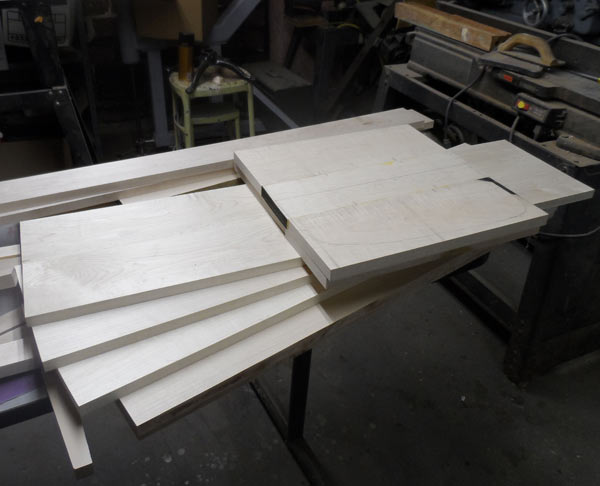
Ordered the router bit set for the drop leaf detail tonight. I have some more pieces to cut and then I can start assembly and finishing. On track to have it done for our next trip to the cabin in March.
|
|
Jerry
Member
|
# Posted: 22 Jan 2013 02:09pm
Reply
Nice work, cabin and all. My cabin is near Forbes on a small lake. I live in Hermantown so I get up there quite often. Keep up the good work.
|
|
aktundra
Member
|
# Posted: 22 Jan 2013 05:32pm
Reply
Nice work!
Love the table...keep us updated on your progress!
|
|
naturelover66
Member
|
# Posted: 22 Jan 2013 07:07pm
Reply
Dearborn? Twenty minutes South of me! LOVE your cabin....can't wait to see more!
Welcome to the forum...lots of wonderful ppl here.
Lisa
|
|
Purplerules
Member
|
# Posted: 22 Jan 2013 10:25pm
Reply
I see another gorgeous piece to add to you cabin. It may be taking you years to get there, but it is going to be a showplace when it is done. Based on pictures you have posted thus far!
|
|
jaransont3
Member
|
# Posted: 24 Jan 2013 12:06am
Reply
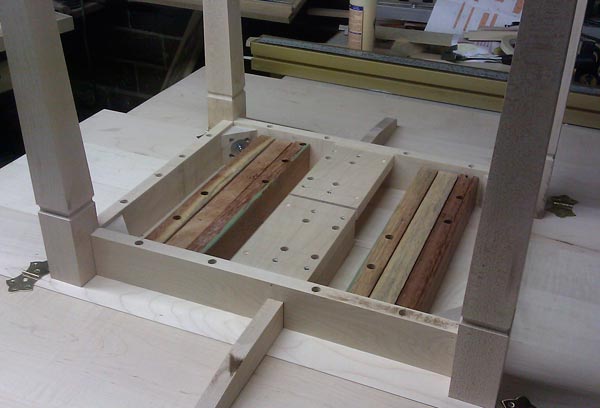
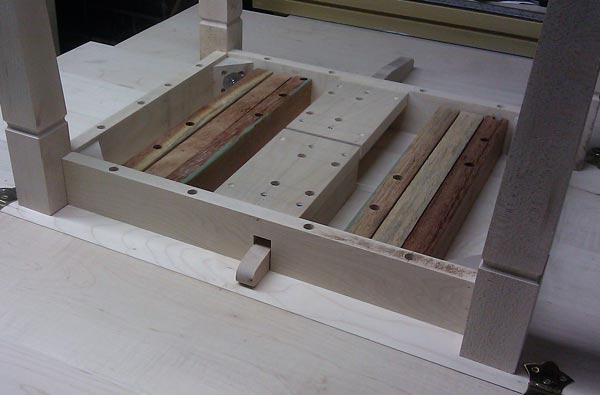
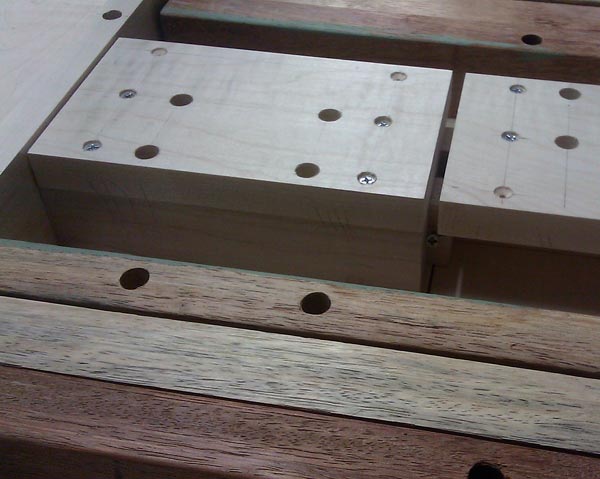
Made some more progress on the table tonight. I got the slides for the table center leaf modified to fit my design. I salvaged these slides from an old table top I found in the trash.
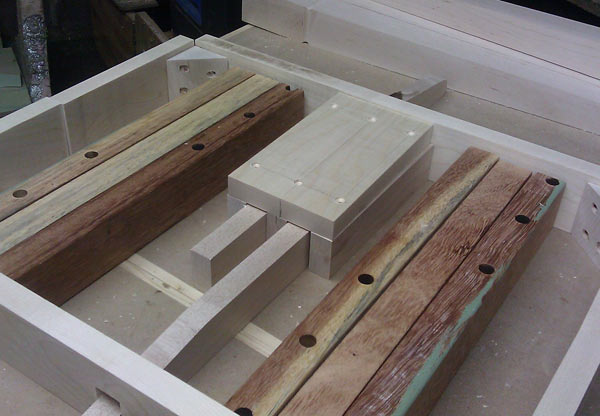
I also got all the pieces for the drop leaf supports milled and ready for assembly.
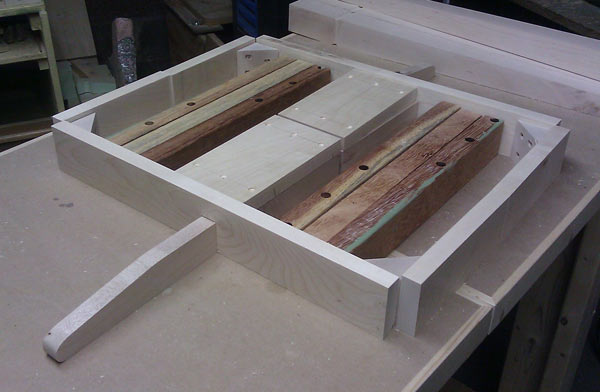
Just waiting on the router bit set to start assembling the table. In the meantime, I will starting milling out the rest of the bits and pieces for the chairs.
|
|
Timberjack
Member
|
# Posted: 24 Jan 2013 08:06am
Reply
Very nice work, 800 miles away, now thats dedication!
|
|
jaransont3
Member
|
# Posted: 29 Jan 2013 10:56pm
Reply
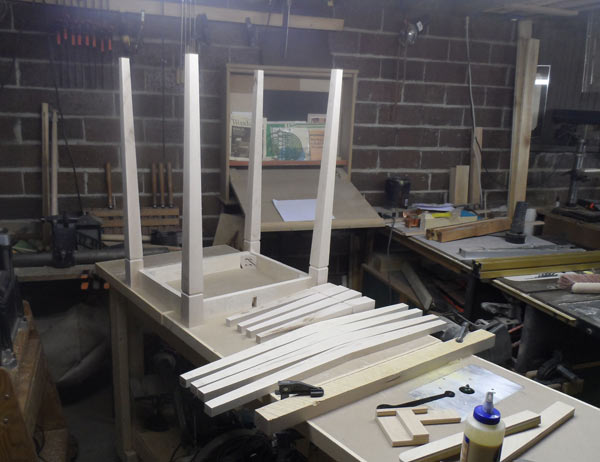
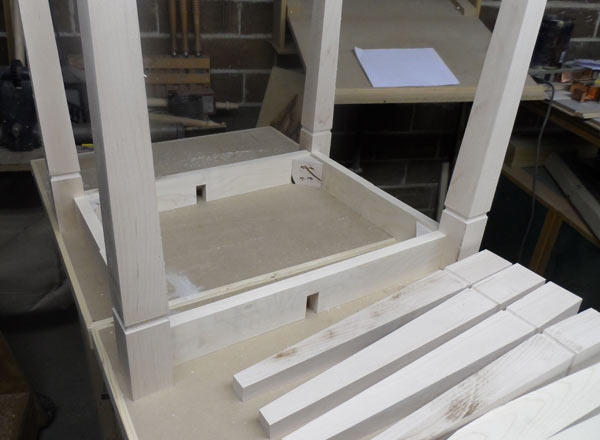
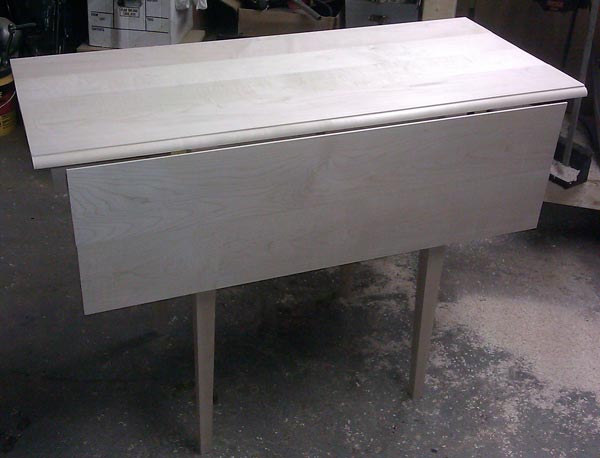
Got a bunch more done on the table and chairs for the cabin. Here are some pictures....

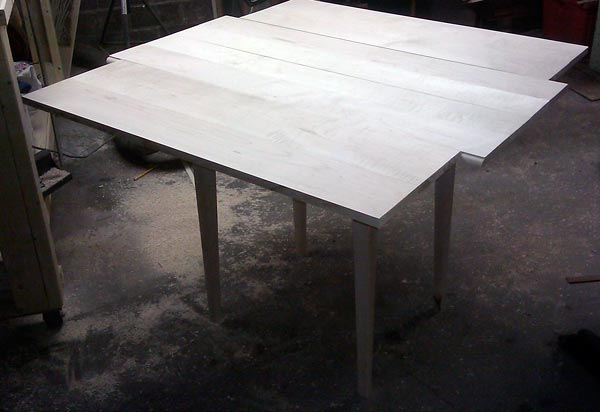
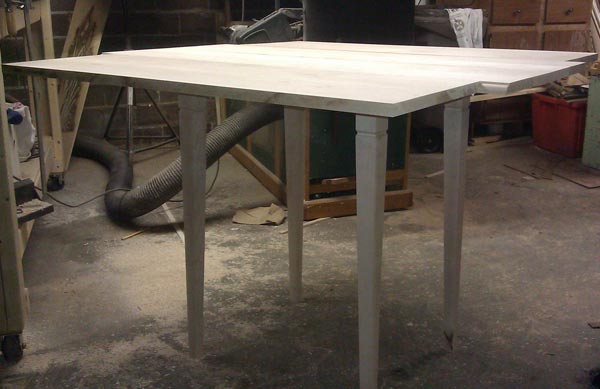
Got one chair back dry assembled too.
Shot of them together...
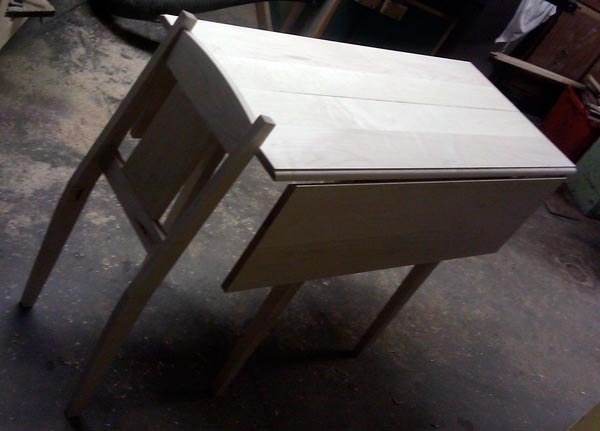
Lots more assembly, sanding, and finishing to go, but I am happy with the results so far.
|
|
| . 1 . 2 . 3 . 4 . 5 . >> |
