| << . 1 . 2 . 3 . 4 . >> |
| Author |
Message |
LoonWhisperer
Member
|
# Posted: 19 Oct 2014 06:14pm
Reply
Great looking bunkie fitz!. And 9 x 12 isn't small if you are stuck in a 8x8 like we are lol We are in Haliburton. Enjoy!
|
|
Baseball queen
Member
|
# Posted: 2 Mar 2015 07:20pm
Reply
We are looking to build a similar bunkie but without the porch in lake St. Peter. Can you tell me if there is a hight restriction?
|
|
fitzpatt
Member
|
# Posted: 2 Mar 2015 11:22pm - Edited by: fitzpatt
Reply
From my understanding as long as you are under 100 sq ft you can theoretically go as high as you want, the caveat being that the structure must still be in compliance with the provincial building code. I would contact the building inspector at the municipality to be sure prior to the build. Many are very helpful and will help you avoid potential trouble in the future. Good luck on your build.
|
|
fitzpatt
Member
|
# Posted: 31 Jul 2015 09:24am
Reply
Well after years of suffering all the blackflies and Mosquitoes we decided to build a much needed screened gazebo. Took us four full days to complete.
|
|
fitzpatt
Member
|
# Posted: 31 Jul 2015 09:24am - Edited by: fitzpatt
Reply
and the final pictures...
|
|
creeky
Member
|
# Posted: 31 Jul 2015 12:10pm
Reply
inspiring builds fitzpatt.
I want to say something rude about builders who know what they're doing. that gazebo would take me a month.
I've become a fan of the metal posts too. i used the screw type for my winter bedroom. the "chalet" rocked a bit when they first went in, but after one winter it seems they solidify.
|
|
fitzpatt
Member
|
# Posted: 14 Aug 2015 09:29pm - Edited by: fitzpatt
Reply
Quoting: skootamattaschmidty Looks great! Just need to cut a moon in the door!
and finally got the moon in!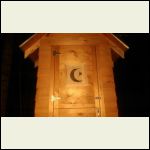
20150801_21.18.51..jpg
| 
20150801_21.19.00..jpg
|  |  |
|
|
littlehouseontheprarie
Member
|
# Posted: 15 Aug 2015 03:41pm
Reply
Love that outhouse.
|
|
|
fitzpatt
Member
|
# Posted: 19 Oct 2015 10:58am
Reply
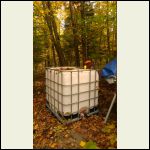
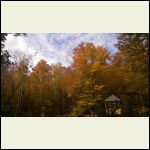
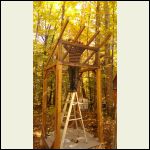
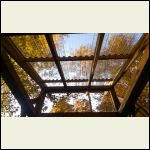
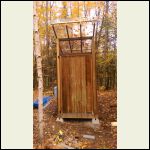
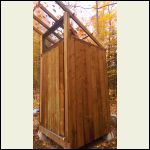
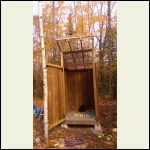
Outdoor shower building finally complete before the snow. Will add gutter, rain catchment, battery, solar panel, pump and on demand propane water heater in the spring.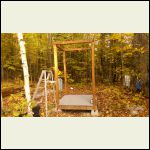
20151010_17.01.13..jpg
| 
20151010_17.01.39.jpg
| 
20151011_12.04.54.jpg
| 
20151011_14.05.21.jpg
|
|
|
fitzpatt
Member
|
# Posted: 19 Oct 2015 10:59am
Reply
few more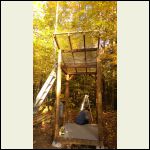
20151011_16.58.19.jpg
| 
20151011_16.59.00..jpg
| 
20151017_15.53.51.jpg
| 
20151017_15.54.13..jpg
|
|
|
fitzpatt
Member
|
# Posted: 19 Oct 2015 10:59am
Reply
and the last two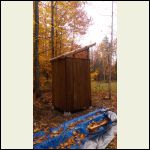
20151017_15.54.37.jpg
| 
20151017_16.46.41.jpg
|  |  |
|
|
DotCanada
Member
|
# Posted: 20 Mar 2016 12:37am
Reply
Hi fitzpatt -
Looks great! I realize that this thread is a little older, but we are looking to build a 9x12 bunkie at our cottage in northern Muskoka area and in looking for ideas I came across your post. I am looking to build something under the "permit required" specs - so 108 sq ft. I am hoping to fit two double beds in the main area and a loft for an additional bed. Your bunkie looks like it fits what I had in mind! Do you happen to have any photos of the inside of the bunkie now that it is complete?
In looking at your floor space, do you think that two double beds could fit in the floor area (thinking headboard on 12 foot wall, side by side with a small cabinet/nightstand in between them). I was thinking of having the door on the opposite 12' wall, so you would walk in the door and there would be a bed to the left and one to the right running the length of the 9' wall. And, hoping for a loft in addition to that.
Hope you understand what I am saying:/
Thanks for your time 
|
|
fitzpatt
Member
|
# Posted: 21 Mar 2016 09:15am
Reply
Hi DotCanada,
Great to hear that you are planning a build. Your idea sounds good, but I would be concerned about the space on the main floor. You could make it fit, but it would be cramped. There is also issue of loft access that you would have to resolve. We use a hinged ladder that we built that levers down from the wall. I don't have any photos on hand, but we have been able to comfortably fit a queen in the loft space, and a day bed on the main floor with enough room for shelves and seating for two. If you search for the Cottage Life Bunkie pdf plans you can find a pretty close proximate of what we built. Here are some layout options for the main floor included in those plans. Good luck and it would be great to see photos of your progress.
|
|
Just
Member
|
# Posted: 21 Mar 2016 05:35pm - Edited by: Just
Reply
Quoting: DotCanada two double beds
built this one on lake huron a few years back .It has room for two dubble beds up stairs in the loft. they are sepateted by a wall and have 6 ft of private standing head room for each bedroom .
It also has a full staiway not a ladder. down stairs there was a pullout queen futon , a 60 in IEKA kitchen with dubble sink ,small fridge and microwave and a pull down table . I do not have a lot of pics as it was befor the days of digital cameras send a few .
8ft. 6in x 12ft,6ln. 108 sq. ft. 80 in . head room first floor . total building hight13 ft..
|
|
DotCanada
Member
|
# Posted: 10 May 2016 08:43pm
Reply
Thank you so much fitzpatt and Just!
So much work, so little time!! Looks like we have some friends who are eager to help on the long weekend, so we are trying to finalize our plans/layout and both of you have been very helpful!!
Just - can you give me an idea of how much space that stairway takes up? I am wondering whether that would take less space or an "attic" ladder. I need to maintain as floor space as possible with a 9x12!
thanks again!!
|
|
Just
Member
|
# Posted: 11 May 2016 02:52pm
Reply
The stair was 20 in. wide and 8 steps so about 8 sq. ft. the steps were often used for seating and there was lots of usable storage underneath . so its not all lost space . Good luck with your build .
|
|
fitzpatt
Member
|
# Posted: 12 May 2016 02:16pm
Reply
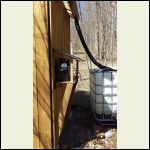
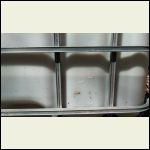
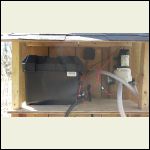
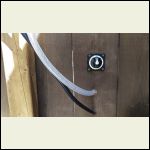
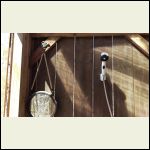
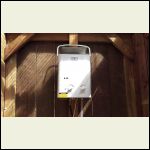
Finally got the shower plumbed and electrified. Captured over 300L of rain water with only a few showers. 12V Battery is maintained by a 40watt solar panel. Hot water is provided by an on demand propane heater. Beats bucket baths!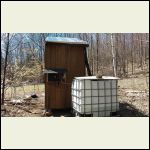
IMAG0111.jpg
| 
IMAG0108.jpg
| 
IMAG0110.jpg
| 
IMAG0107.jpg
|
|
|
fitzpatt
Member
|
# Posted: 12 May 2016 02:40pm
Reply
and the interior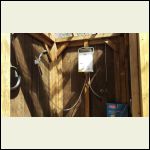
IMAG0112.jpg
| 
IMAG0113.jpg
| 
IMAG0114.jpg
| 
IMAG0115.jpg
|
|
|
fitzpatt
Member
|
# Posted: 8 Sep 2016 08:34am - Edited by: fitzpatt
Reply
Got some much needed storage built. When we poured the forms for the big cabin this summer, we used the extra concrete for a 10x12 slab hidden in the trees. I installed a french drain around the perimeter. Not quite finished. Still have to install the doors, windows, shingles, trim and loft storage, but it is such a relief to have more space to store things. It makes the three things I hate the most (setting up, finding and putting things away) much easier.
|
|
fitzpatt
Member
|
# Posted: 8 Sep 2016 08:52am
Reply
few more
|
|
fitzpatt
Member
|
# Posted: 8 Sep 2016 08:58am
Reply
and some more, including including the foundation work
|
|
fitzpatt
Member
|
# Posted: 8 Sep 2016 08:58am
Reply
and the foundation done.
|
|
fitzpatt
Member
|
# Posted: 14 Oct 2016 02:50pm
Reply
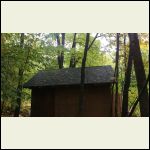
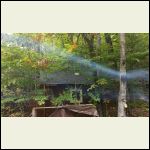
Got the shingles on and windows in. It's ready for winter!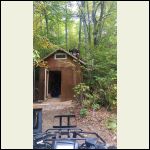
IMAG03712016100213.jpg
| 
IMAG0517.jpg
| 
IMAG0516.jpg
|  |
|
|
fitzpatt
Member
|
# Posted: 14 Oct 2016 03:00pm - Edited by: fitzpatt
Reply
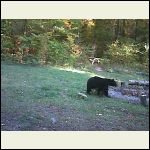
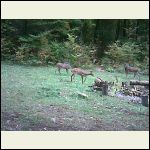
Here are some great shots of the milkyway a friend captured with 30 second exposures. Also some cabin critters caught on camera.
DSC_0518_8bit_adjhue.jpg
| 
mw2.jpg
| 
bear.JPG
| 
deer.JPG
|
|
|
LoonWhisperer
Member
|
# Posted: 14 Oct 2016 03:25pm
Reply
Really enjoying this thread fitzpat. We are bunkie folk as well and not far from you.
Question... we have a similar setup for the shower (a hacker's version lol) and was wondering if you think we could attach a similar catchment system to the shed we are using. Are these parts commonly available? The difference would be that the water would go to the rain barrel.
Please see pic. Thanks!
|
|
fitzpatt
Member
|
# Posted: 14 Oct 2016 04:04pm
Reply
Thanks LoonWhisperer! I love your setup. I have actually seen your same shed at a friends and was very close to using it. I definitely believe you could easily setup a rain catchment on this platform. The only difference would be that you may have to consider installing two gutters instead of one (and using a t connection to attached your line after the downspouts). One gutter would also work, though you would only be capturing rain from one side of your roof. That being said, I am confident that one gutter would fill that barrel in short order. You could possibly fill the entire barrel in one rainy day in our area, especially in the spring. Looking at the roof of your shed I see a possible lip where your drip edge appears to be installed over the roof. Depending on how the water flows you may want to correct for this by applying silicone in the joint or placing something over it to allow the water to run into the gutter more effectively. The best way to test for this is simply to get on a ladder and start pouring water on the roof to see how it flows.
Here is a simply catchment calculator that will help you estimate how much water you can expect to collect: URL
In terms of supplies I would recommend the following or something similar (assuming you already have a pump and propane on demand heater):
1 - Gutter
2 - Flexible downspout
3 - Foam Filter
4 - Drop Outlet
5 - End Caps
6 - Mosquito net to cover barrel hole.
Shouldn't be a big project to get this all put together. You can drill a large hole on the bottom of the gutter prior to installing the down spout and then put everything else together.
Hope this helps.
|
|
LoonWhisperer
Member
|
# Posted: 14 Oct 2016 05:53pm - Edited by: LoonWhisperer
Reply
That was a HUGE help! Thanks so much for taking the time to break it down and including links. This is at the top of my project list now 
Sorry... one last question. Where did you get the water tank?
Cheers!
|
|
fitzpatt
Member
|
# Posted: 14 Oct 2016 07:03pm
Reply
No trouble. I am interested to see your project. Please let me know how it goes. I got the cubed water tank at the Rona in Bancroft. They have a few for sale now. I think it was just over $100. If you have access to a truck, I've also seen them on Kijiji. They hold 1000 litters. I put a bit of bleach in mine to keep the bacteria at bay, I've also seen many ppl paint them black to help do the same if they are in the sun, which would help heat the water as well. Take care.
|
|
fitzpatt
Member
|
# Posted: 1 Nov 2016 02:18pm - Edited by: fitzpatt
Reply
Happy to have built this off-road generator platform! No longer have to lug this thing around. Looks like a clown car with the red funnel!
|
|
fitzpatt
Member
|
# Posted: 12 Jun 2017 01:19pm - Edited by: fitzpatt
Reply
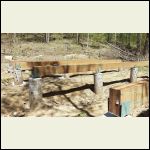
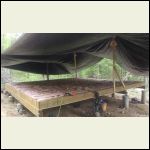
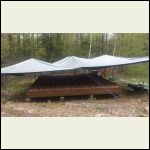
Built the beams and insulated the floor last weekend. It rained so much that we had to put up the largest tarp I have ever seen over the weekend. It is now covered with that same tarp until we get the walls and roof on in August.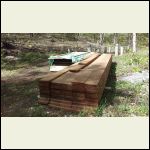
IMAG1245.jpg
| 
IMAG1251.jpg
| 
IMAG1254.jpg
| 
IMAG1255.jpg
|
|
|
| << . 1 . 2 . 3 . 4 . >> |

