| . 1 . 2 . >> |
| Author |
Message |
unixfmike
Member
|
# Posted: 16 Apr 2011 10:12am - Edited by: unixfmike
Reply
I spent the last few days playing with sketchup. This is what I came up with.
--MikeW
|
|
Just
Member
|
# Posted: 16 Apr 2011 11:28am
Reply
There is a lot of common sence here or is it experance !! i like it,, simple clean fast frugal done !!
|
|
unixfmike
Member
|
# Posted: 16 Apr 2011 12:01pm
Reply
A combination of both. This is just a "glorified tool shed".
--MikeW
|
|
turkeyhunter
Member
|
# Posted: 16 Apr 2011 10:34pm
Reply
looks like a great deer camp to me!!!!! good luck on you new rebuild!!!!
|
|
unixfmike
Member
|
# Posted: 17 Apr 2011 12:57am
Reply
Thank you. As soon as I can get some free time, I'll start posting pictures of the garage build.
--MikeW
|
|
unixfmike
Member
|
# Posted: 30 Apr 2011 04:44pm
Reply
So I after going in standing in 3 different sheds built by a local builder, I chose to go smaller. 8'x12' will work for me. I'm still building by "kit" method here at home. Same name, different size.
--MikeW
|
|
unixfmike
Member
|
# Posted: 30 Apr 2011 04:50pm - Edited by: unixfmike
Reply
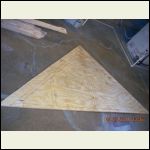
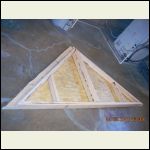
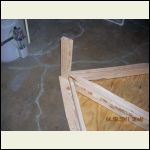
Well, we all know how this cabin building thing goes. You get the bug, then it becomes part of life. Even after a fire you have to keep building. So after a lot of drawings, and floorplans, and wasted paper, I finally have the right size for what I need. I also have the plans as you can see in the previous post. Here is the great part, the best part, the most awesome part!
1. A layout of the gable end.
2. The gable end sheeting cut to size.
3. One completed gable.
4. A 2x4 block temporarily placed where the ridge beam will go.
Now to build the other side and keep the dreams alive!
--MikeW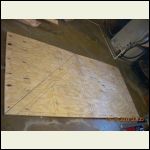
01_gable.jpg
| 
02_gable.JPG
| 
03_gable.JPG
| 
04_gable.JPG
|
|
|
naturelover66
Member
|
# Posted: 30 Apr 2011 06:39pm
Reply
Awesome !!! Great start !
|
|
|
Just
Member
|
# Posted: 30 Apr 2011 07:44pm
Reply
I know it's non of my bizz , but if it were me i would rotate the roof 90 * and maybe even make it a hip roof < gives u room for two bedrooms up stairs , with little more cost
|
|
unixfmike
Member
|
# Posted: 30 Apr 2011 08:26pm
Reply
Nice cabin. I'm pinching pennies to rebuild. That was the big reason for downsizing from 16'x16' (the one that burned down), to 12'x12', now to an 8'x12'. I can build my "kit" and drive it up there in a few weeks. My son moved out to persue his education in California, and my friends who went up might be moving out of state soon. All I have to sleep now is my wife, daughter and myself, or me and my hunting buddy. Not much of a need for a whole bunch of space now.
--MikeW
|
|
Just
Member
|
# Posted: 30 Apr 2011 08:51pm
Reply
aaaaa i c u have allready started i thought that was a model !! it's amasing how much u can do with 9 x 12 . it took about a week full out to build that one on sight . doing the bits at home will save alot of time on sight . any fire protection considerations in the plan ??
|
|
Gary O
Member
|
# Posted: 30 Apr 2011 09:37pm
Reply
Quoting: unixfmike The gable end sheeting cut to size
Likin' that, Mike.
Never even considered actually putting on the sheeting beforehand (at home).
I cut all the angles of the framework at home, but the sheeting, well, seems the thing to do.
Quoting: Just any fire protection considerations in the plan ??
On that note, anyone ever use that Thermo-Gel?
I know being away from the cabin makes stuff like that ineffective, but if neighbors could coordinate.....
|
|
unixfmike
Member
|
# Posted: 30 Apr 2011 10:17pm
Reply
Quoting: Just any fire protection considerations in the plan ??
This time I am going to build a proper fire break. Might even use a metal siding.
Quoting: Gary O Never even considered actually putting on the sheeting beforehand (at home).
I have found a way to fit everything in my suburban and my utility trailer this way. I can build my "kit" and drive it up. I will only have to assemble sections, and build the subfloor and roof on site.
I'll still have room to carry my pocket generator, misc tools, and a cooler full of food and beer for the weekend.
--MikeW
|
|
unixfmike
Member
|
# Posted: 1 May 2011 07:58pm
Reply
Quoting: Gary O On that note, anyone ever use that Thermo-Gel?
I looked into the Thermo-Gel. It looks like one should be in the general vacinity of the fire and spray just before or as a fire enters your area. It doesnt look like something you can spray on and just let sit. Their website also mentions that it is sunlight degradeable. This would have worked if I was up there at the time of the fire.
--MikeW
|
|
toyota_mdt_tech
Member
|
# Posted: 4 May 2011 12:30am
Reply
Mike, just saw the outcome of your last cabin, what an absolute shame. So sorry to hear about that. You worked your tail end off too. But your spirit is very uplifting. I think most in here would agree, if there was ever time for a cabin raising/work party, yours/this would be it.
I was thinking of the "pre fab" unit too. Kinda like what you are doing. A great way to have a dried in shell in a single weekend.
|
|
unixfmike
Member
|
# Posted: 4 May 2011 08:59pm
Reply
I just got more wood too. Tomorrow the other gable will be built during my lunch break from work! I love the kit idea.
--MikeW
|
|
unixfmike
Member
|
# Posted: 6 May 2011 04:41pm
Reply
So, the second gable is built. These are 2 of the hardest parts for me to build.
--MikeW
|
|
unixfmike
Member
|
# Posted: 7 May 2011 05:30pm
Reply
The left over corners from the 4'x8' sheets of plywood were used! I was able to cut them wisely to make my toilet. Yet another problem sovled! Now I won't have to worry about where to "go" when that time arrives.
--MikeW
|
|
unixfmike
Member
|
# Posted: 14 May 2011 07:36pm - Edited by: unixfmike
Reply
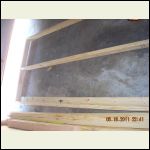
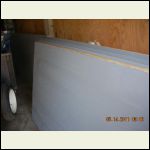
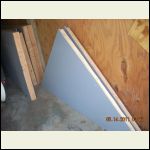
I went to Home Depot this morning and bought me some wood. I built 5 sections of walls. That is the complete left wall, and the complete rear wall. Since I was already there, I bought paint and had it color matched too. There was a younger kid working there and I asked him to cut some dimensions for me. After that I only had to make a 4 cuts at my house to get the dimensions correct for the rear wall. I realized, why wait untill this is standing to paint it. I painted the exterior for now, and I will only have to do touch up later. I feel like I am cheating on this build since everything is so much easier here at home than it is on the build site. Here is some pictures of progress. Thank God for that 4'x8' utility trailer from Harbor Feight Tools. This "kit" will be easy to transport up and "build" in a couple of days.
--MikeW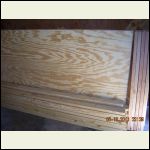
01_lumber_load.JPG
| 
02_building_wall_sec.jpg
| 
03_wall_sections_pai.jpg
| 
04_gables_painted.JP.jpg
|
|
|
Scott_T
Member
|
# Posted: 15 May 2011 12:01am
Reply
Quoting: unixfmike I feel like I am cheating on this build since everything is so much easier here at home
You deserve the break. Your method for building this cabin is my inspiration. My property is 240 miles from home, so anything I can do here without hauling my entire shop down there is a huge timesaver. I just ordered a utility trailer for hauling cabin "modules" down over the summer and fall. I enjoy watching your progess. You really are an inspiration to all of us.
|
|
unixfmike
Member
|
# Posted: 20 May 2011 02:22pm
Reply
I just bought more lumber. I should be able to have the front wall with all the windows and doors cut out sometime tomorrow. Hopefully I'll have it painted and done before noon.
--MikeW
|
|
mrmiji
Member
|
# Posted: 20 May 2011 04:17pm
Reply
MikeW,
I intend to flatter you endlessly...by copying your work on a level that redefines plagiarism.
Thanks for the effort on the diagrams. I too intend to build in subassemblies in the garage and assemble on site. Your work has saved me a lot of thinkin'.
|
|
unixfmike
Member
|
# Posted: 22 May 2011 07:28pm
Reply
Thats awesome, take some pictures and hang them up around here if you don't get too busy!
--MikeW
|
|
mrmiji
Member
|
# Posted: 23 May 2011 09:54pm
Reply
MikeW,
Hey, I showed my wife both plans and she likes the 12X12 ones. Also, I'm looking to go with 12' 2X4s cut to 11'6" to allow the sheeting to be slotted for the rafters. The cost of going higher is marginal - about 30 bucks additional for the longer studs and 40 bucks for the additional OSB. Seems like minimal cost considering this will allow for elevated bunks and lots of place for above ground storage.
Three more weeks with the Dr imposed 10 pound weight limit and I'll get started.
|
|
Montanan
Member
|
# Posted: 25 May 2011 12:37pm
Reply
MikeW~ I'm new here and just read your whole story and followed over to see how your new project is coming. So sorry about the loss of the last one. I'm not sure if you are even interested in insurance, but I was able to get insurance coverage for the cabin we're building from USAA (available if you're military or related) and it's only $300 for the year. Hope that helps.
|
|
unixfmike
Member
|
# Posted: 27 May 2011 03:01pm
Reply
I already have an account with them. Thank you for that info.
--MikeW
|
|
Anonymous
|
# Posted: 24 Jun 2011 01:04am
Reply
mike i know your building the cabin already so my suggestion is look at where you locate the cabin and if possible later to add on to the back like the porch is on the frount. could make for a cheap addition if you want in the future enclosed or open as you want. good luck
|
|
unixfmike
Member
|
# Posted: 17 Jul 2011 07:11pm - Edited by: unixfmike
Reply
I was able to go up and clear some land. I cleared about 600 square feet for parking. I was also able to recover my 3 trough feeders, only 1 had slight fire damage and remains useable. I will post pictures once I find my camera. --mikew
|
|
unixfmike
Member
|
# Posted: 18 Jul 2011 01:44pm - Edited by: unixfmike
Reply
I found my camera. I was able to ride my quad around and locate my feeders I built last year. I was also able to find a not-so-rocky place to locate my parking spot for the suburban and my trailer. Where the last cabin was there was a big problem getting out of there once the ground was wet. 2WD, rocks, and rain don't mix well.
Anyway, here's the pictures of my progress. Most of my 5 hours was spen't riding and searching for a "dirt" area big enough to park and rebuild at. There is a picture with a red rectangle in it, that is the outine of the NE cornor post of my land.
--MikeW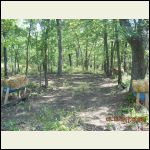
I found all my trough feeders.
| 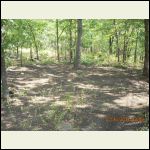
The NE corner of my land.
| 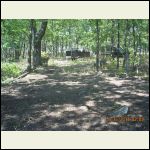
From my parking area to dirt road (60').
| 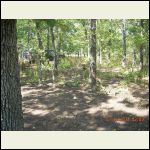
Parking area and trough feeders.
|
|
|
BlaineHill
Member
|
# Posted: 19 Jul 2011 08:58pm
Reply
Nice work on the pre-fab Panels. I was too afraid to attach exterior sheathing as part of the pre-fab as I am not sure I have it all perfectly square. I think I may want an oppertunity to beat those things on-site, corner-to-corner, into submission. Keep us posted. I am enjoying your process.
|
|
| . 1 . 2 . >> |

