| << . 1 . 2 . 3 . 4 . >> |
| Author |
Message |
countrygirl
Member
|
# Posted: 18 Jan 2013 10:53am
Reply
Just looking through you picture your cabin look great. The view to die for. Can't wait to see what you do this summer.
|
|
razmichael
Member
|
# Posted: 18 Jan 2013 11:06am
Reply
Quoting: countrygirl Can't wait to see what you do this summer.
Either can I! Waiting for early spring to get back to work. Thanks for the kind comments.
|
|
razmichael
Member
|
# Posted: 28 Apr 2013 07:17pm
Reply
Like many on this forum I recently headed up to see how the cabin survived the winter. With trepidation I went up the driveway and was relieved to see a standing cabin that still seemed straight and true (at least as straight as after I built it). I was up by myself and spent a very cold Friday night wrapped in three or four sleeping bags!
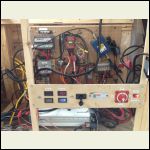
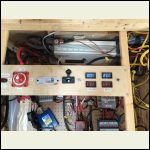
Last fall I started running with wiring for the 12 Volt system and my plan was to install my control panel and test at least on circuit (photos below). You may ask why such a complex system? - simple answer - long cold Canadian winter with way too much time on my hands. When I designed the system I wanted to reduce any voltage drop as much as possible. A friend had a bunch of 10/3 cable (actually with 4 conductors including the ground). Before putting the floor on I ran two sets of this cable to three spots around the cabin where I would be distributing power to lights and wall sockets. With each pair I used one as the positive and one as the negative, thus effectively resulting in a very low voltage drop (very high gauge wire). There are risks to this technique if trying to push amps through (lose on conductor and too much current may be going through the remaining) but in this case the maximum current at each distribution site could actually be carried easily by a single conductor safely. The "control center" provides the initial fusing to the main distribution runs among other things. The outdoor motion sensor lights are run from a separate circuit (off the solar charger load output) which is intended to be on all the time. The rest of the cabin runs through a latching relay in case we forget to turn off the power and something drains the batteries faster than they recharge. The battery pack is beside the panel and will be enclosed and vented outside before I finish hooking up the panels and/or charging with the generator. The 10/3 cables break out into 12/3 cables (where, again, I use two pairs of the conductors for Pos and Neg) where they are fused again and run through wall switches to lights (all LEDs). I wanted 3-way switches for the lofts but didn't want to run all that cable back and forth so I'm using very low draw relays so the wiring between the switches can be much smaller gauge. My outdoor lights are connected with separate motion sensors but I wanted to be override them so we could have the lights on without needing to jump up and down every minute so I included a relay so an internal wall switch could bypass the motion sensor relay. It was my ten year old who mentioned "what about having a campfire when we do not want the lights on at all" - back to the drawing board. I added a timer for outside that is 'normally on' but can be set for up to an hour which turns off the lights completely.
Complete build photos (and some schematics) available here Photos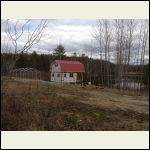
Cabin Standing!
| 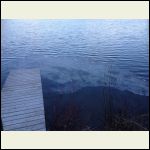
Last Ice on the Lake
| 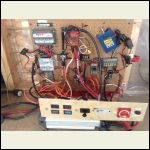
Control Panel
| 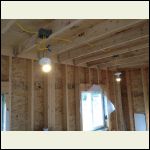
We have Lights!
|
|
|
trollbridge
Member
|
# Posted: 28 Apr 2013 10:03pm
Reply
OMG...Way, way over my head...all that electrical talk!!! Ha!
But I did want to pop in and tell you I'm glad you got there and that everything is still standing as you last left it  yay! yay!
|
|
razmichael
Member
|
# Posted: 29 Apr 2013 11:00am
Reply
Thanks Trollbridge - I'm sure many of us let out a sigh of relief when we first go up in the spring! We got so much done last fall in such a short time but now I see the huge amount of work ahead - siding, insulation, inside walls, floors etc etc. Then the decorating starts! Lots of great inspiration from what others have done.
|
|
trakker
Member
|
# Posted: 8 May 2013 12:18pm
Reply
razmichael,
Any updates or new photo's?
|
|
razmichael
Member
|
# Posted: 8 May 2013 12:28pm
Reply
Thanks for asking Trakker but nothing worth posting. I was up there last Saturday and got most of the wiring complete so we have lots of light. I was amazed at the real brightness of the 6W LED bulbs. I have way more wired than really needed but my theory is it is better to be able to turn on/off single or pairs when and where needed rather than have just a couple of switches with lots of lights on each circuit. Naturally only time will tell if my theory turns into practice. I'm really happy with the 3-way switches for the lofts - switches at the base of the ladder and in each loft so the lights can be turned on and off from either place. I'm using low power relays at both locations so the direct wiring is limited in distance but running very light (16g) between the switches - work like a charm.
|
|
creeky
Member
|
# Posted: 9 May 2013 06:26pm
Reply
i like the roof beams. and your solar control system makes me smile. it's amazing how many pieces are required for solar control ...
|
|
|
razmichael
Member
|
# Posted: 9 May 2013 06:34pm
Reply
Thanks creeky. I've decided to just consider the electrical system in the cabin as a hobby - fun but not always practical! As I said earlier - it is the result of long cold winters and the ease of shopping on-line!
|
|
razmichael
Member
|
# Posted: 20 May 2013 09:13am
Reply
Black Flies! Change of of plans: Long weekend in Canada and we headed up to the cabin - first time this year as a family. I took my tools with me to dig into the long list of projects yet to be completed and the kids brought books and games. Plan was to canoe, kayak, work, eat and play. I remember last year going up on the May long weekend (when we used the pop-up trailer) and spent one night there and came home - driven out by the black flies. Well we arrived at the lake Friday afternoon (we are making this an extra long weekend), let the dogs out of the van and immediately swarmed by black flies. The kids starting singing the song The Black fly Song as we sprayed everyone with Deep Woods Off.
Well, my plan to finish up the wiring (which seems to be a never ending plan) was superseded by these tiny little creatures and I went to work framing in part of the side of the deck and then stapling up screening everywhere. We had purchased a "Garage Door Screen" from Homedepot which covered the full 16' front of the deck and I had one of those really cheap magnetic closing screen doors. Took about 3 hours early Saturday morning and we now had an ugly but functional screened in porch to enjoy - without sharing with black flies! I would have taken pictures but that meant leaving the porch!
Glad black flies have a short season - then the mosquitos, then the deer flies, then the horse flies then winter.
|
|
trollbridge
Member
|
# Posted: 20 May 2013 09:36am
Reply
Lol...oh dear, all those pest can really ruin a great time, huh?
Maybe you should consider a permanent screened in porch? I absolutely love ours at our cabin, it's awesome!
What was your Canadian long weekend honoring or celebrating and what is the holiday called?
|
|
razmichael
Member
|
# Posted: 20 May 2013 10:20am
Reply
Hi Trollbridge. The plan is to screen in properly - it just was not high on the priority list (siding, inside walls, insulation - all those other things first). My wife decided this weekend to add walls on the left and right side of the porch part way to the front where stairs will be. This will provide walls to store things like coats, shoes, BUG SPRAY etc. So I did this basic framing to give me something to put the screening on. The homedepot garage screen is temporary as it is really too dense/dark and wrecks the view but it was cheap and easy to install. We are doing a number of things in a temporary manner until we have more time and experience to figure out waht works best.
The weekend is Victoria Day - "Victoria Day celebrates Queen Victoria's birthday (May 24th). Canada is still a member of the Commonwealth of Nations, of which the Queen is head. " - just a good excuse for a long weekend in spring. I believe it always falls the week before your Memorial Day.
|
|
trollbridge
Member
|
# Posted: 20 May 2013 10:33pm
Reply
Ah, thanks, I have heard of that.
Totally get the temporary fix...we've done lots of that ourselves
Sounds like another great idea your wife came up with-the short walls really will come in handy.
|
|
razmichael
Member
|
# Posted: 1 Jul 2013 07:39pm
Reply
Happy Canada Day to all us Canadians! Hope everyone had a great long weekend and got to spend time at their cabin. So far this year I have not got nearly as much done as I hoped. Way too much work travel and bad weather. Not to mention canoeing, kayaking, exploring getting in the way. Sometime this summer I need to take a bunch more time off and get the siding on but for now it is small bits and pieces.
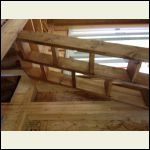
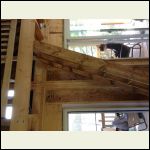
This weekend I installed the alternating treads ladder I built at home. I was very surprised that I got all the measurements right and, but for a small adjustment it fit into the the loft cut-out. We are amazed at how easy it is to get used to the alternative steps. Much easier to use than a ladder and the kids need to be told not to go down facing forward. The only tricky thing is if you stop in the middle the tendency is to put your second foot down even with the first - no tread there! Overall it works really well and takes up so little space. I may add some handles along the sides if I can find things that look good.
Also started to frame in my power center.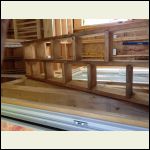
Ladder1
| 
Ladder2
| 
Ladder3
| 
Power Center
|
|
|
trollbridge
Member
|
# Posted: 2 Jul 2013 04:31pm
Reply
I'm glad the stairs work out to be easy to use. Pipe would be kinda a cool handrail.
|
|
razmichael
Member
|
# Posted: 2 Jul 2013 04:36pm
Reply
That's a great idea. I was thinking of a series of handles but one (each side) black iron pipe would work great and look the part. Thanks.
|
|
razmichael
Member
|
# Posted: 30 Jul 2013 08:18am
Reply
I HATE SIDING!
Spent all last week at the cabin with my father in-law installing siding. I had forgotten how much I hate staining large quantities of wood (I stained the pine board and batten for our house - 14 years ago). Given the size of the cabin and the need for 3 coats (one on the back and two on the front) I figure I stained about 2100 sq ft of wood. The wood is pine with a rough finish so it soaked up the stain. The pattern meant that I also needed to use a brush (along with my 20 year old Wagner power roller). Good news was the weather was really hot so things dried fast - the bad news was the weather was really hot.
To make matters more complicated I went with a rain shield installation so prep work took much longer than just nailing on the siding. After a solid week of long hot days we still did not get around to doing the front (lake side). This will be the tricky part as it is over the deck and way up high (due to ground slope) so all ladder work. This happens next week!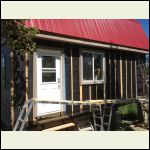
Staring on one side
| 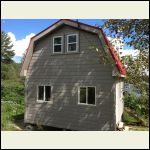
Almost Complete back end
| 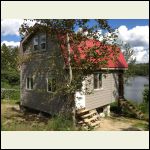
Thats all for this week
| 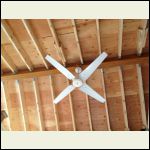
My 12v Vari Cyclone fan
|
|
|
creeky
Member
|
# Posted: 31 Jul 2013 10:24am
Reply
a lot of work but you only do it once right 
and it looks great.
|
|
razmichael
Member
|
# Posted: 2 Sep 2013 05:05pm
Reply
Update - Siding, stairs and outdoor sink: Couple of weeks ago I was able to complete the front (under the deck overhang/loft) so, except for some trim that nightmare is done. This long weekend I went up with just my 8 year old son (my oldest was in a race on Saturday so we decided to take advantage and split them up for a few days - much more pleasant apart). My 8 year was a great assistant - he screwed in all the "hangers" for the stairs, learned to use a jigsaw (with lots of assistance) and generally had a blast. It may have slowed the work down but the look on his face when he was the first to stand on the new deck stairs that he built was well worth it!
Main project was to work on the slightly overhanging outdoor/deck sink and work area. We got that partially finished must faster than I thought we would so I then started to migrate the water pump and bits and pieces to under the counter. I was limited on the crimps and other bits and pieces but I got everything put together using up every single crimp I had - ya! Then inside to drill through to run the power and faucet micro switches wires - ended drilling right through a Pex line! Not to be defeated I spliced the hose together with standard clamps, stood back and let my boy turn the tap on ... pump started, water started spraying out of the splice and then out the faucet. Turned on hot tap and we had hot water! YES! Next trip I bring more crimps. The eccotemp heater on the wall is temporary as I intend to build a cabinet to protect it when not in use (and add door switch so it will not run until the cabinet is open. Need to move real storage tank etc etc etc. Key thing is my wife loves the outdoor sink and my son had a blast.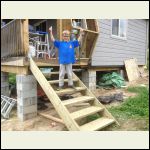
Proud Builder
| 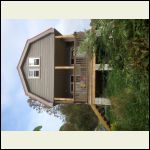
Under Deck Siding Finished
| 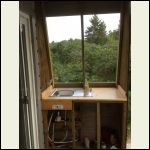
Inside view of Outside Sink
| 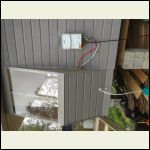
Outside View of Outside Sink
|
|
|
razmichael
Member
|
# Posted: 4 Sep 2013 04:12pm
Reply
By the way - I was searching for a good value on a sink for the outdoor "kitchen" and found it in an unlikely place - IKEA. The model I bought (shown in the third picture above) includes the integrated drain board and strainer for $50 CND - FYNDIG sink.
|
|
creeky
Member
|
# Posted: 4 Sep 2013 04:35pm
Reply
you've got a lot done this year. what kind of hose is that to your water heater?
and nice score on the sink.
|
|
razmichael
Member
|
# Posted: 4 Sep 2013 04:38pm
Reply
All pex up to the metal braided pieces at the heater. When I left I covered up the Pex tubing (not UV friendly). Next time I'm up I'll bring up some of that foam pipe cover until such time as I build the cabinet and enclose the whole thing.
|
|
razmichael
Member
|
# Posted: 15 Sep 2013 04:16pm
Reply
Productive (short) weekend at the cabin. Took the two boys for a male only weekend so needed to divide my time up a bit but they both decided it would be a relaxing weekend with reading, card games (and the occasional brotherly fight). First up was to install the propane heater. This started out well as I got the propane connected from outside (no leaks), put together the double chimney, cut the hole in the wall and connected everything together. Looks great as you can see from the photo below but I'm not at all comfortable with the amount of heat coming off the outside chimney pipe. I'll be posting for suggestions in a more specific post a bit later. I finally took the chimney apart and will wait for plan B.
I added the drain pipes for the deck kitchen sink. At some point I will need to move the grey water pit I put in a few years ago before the cabin as it is too far and high to use now. For the time being I'm just draining the sink into a bucket and dumping this into the original pit (or woods!!). I used a trap below the deck and put netting on the far high side. The intent (not sure if it will work) is to prevent food waste from making it out into the grey water pit and it is a quick job to unscrew the bottom cap to drain the water and food at the end of a weekend or when needed.
Big thing was finally getting around to installing the post and mounts for my solar panels (2x165 watts). The home made mount works great and I can adjust the panels for the seasons. It's already down to 44 degrees were I am. It was late in the day Saturday when I finally hooked everything up to the controller and my gauges showed about 12.5 volts and 0 amps. I knew that my ammeter reads low but was concerned that my wiring was wrong. As it got darker the voltage dropped and then the controller shut down so I quit and played crazy eights. Pleasant surprise when at 0800 this morning with a very cloudy day it was reading 13 volts and .4 amps. By 1100 it was up to 17.6 volts and almost 3 amps and increased from there. This gives me confidence that even with some very cloudy days the panels will hold their own given our limit usage (and make up the difference if needed through the week). I'm really looking forward to being there on a sunny day to see what we get!
All in all a successful day and a half.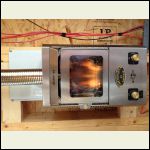
Heater
| 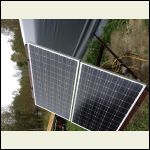
Solar Panels 1
| 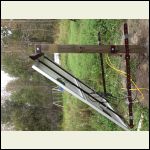
Solar Panels 2
| 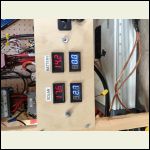
Meter
|
|
|
creeky
Member
|
# Posted: 15 Sep 2013 09:14pm
Reply
thx for the tip on the sink. think I'm gonna get one and bump the current bathroom sink I have.
i would check with your manufacturer before worrying about your stove. it sure looks nice. and i hear that those kinds of stoves put out a pretty hot vented air. part and parcel of the 80% efficiency. cool outside air coming in around the hotter vented combustion gas should make for safe burning ?
guessing it did not come with a thimble but you installed according to spec 
i used roxul around my wood stove thimble inside the wall ... as recommended by wood stove installers. and that will insulate the wall from chimney heat as well as control cold air coming in through the thimble. that might be of use for you around your pipe?
one question tho. your solar system. what voltage are the new panels? are they 24 volt panels? might be time for an mppt controller. you know. cause you always need somethin'.
|
|
razmichael
Member
|
# Posted: 16 Sep 2013 07:55am
Reply
Hi creeky,
The heater puts out a far amount of heat and it is nice looking (you pay more for this!). Once I get the cabin insulated it should be able to take the edge off on cold mornings. No current plans for winter use. The installation instructions are very limited and, as it is designed for a boat, the diagrams indicate the pass through is at the end of the chimney (where it is cooler). I intend to call them today. Depending on what they say I suspect I will add a thimble (at a slight angle) through the wall. My current thought is to use a 4" thimble so I have some flexibility with the 3" pipe running through it and use stove gasket rope to seal the excess space at the two ends of the thimble (along with high temp silicone). Along with a 2-3" clearance of the thimble from any wood (and the rock wool insulation around) this should keep things cool going through the wall. Still have more research. I'm being a bit paranoid but better safe than sorry - what's spending another $100 when it might keep the cabin from burning down!.
The panels are 12 volt panels so the 17 volt output I say was in the range I would expect. The added output I might get from a MPPT controller would not justify the cost until I use the current controller for at least a year! Then ... Currently I have so many other things that I "need". It was just great to get up 'early' on a cloudy day and actually see something coming in!
|
|
creeky
Member
|
# Posted: 16 Sep 2013 09:21am
Reply
hey razmichael. it would seem you're on the right track. a pellet stove thimble should would work perfectly.
my wood stove thimble install just called for high temp silicone.
ya. when you're 12v all the way, no sense in going mppt.
|
|
razmichael
Member
|
# Posted: 15 Oct 2013 09:01pm
Reply
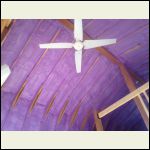
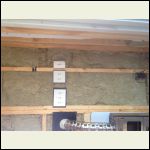
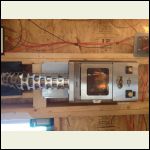
Happy Thanksgiving to all fellow Canadians. Sadly spent a bit of time at the cabin closing things down for the winter. Pulled out the dock, took down the shower tent and generally put stuff away. Ont he positive side, finally got a crew in to spray foam the roof (and did the loft end walls as well). Very expensive but it was in the plan as I did a "hot roof" to keep the build a bit easier (just my father-in-law and I). Great stuff but takes longer and much more messy than they show on all the home shows! I installed a stove thimble and ran the heater chimney through it and even started some of the downstairs batt insulation. Final job on Monday was to finish wiring a motion sensor and couple of small LED spotlights.
Solar system is working great and actually surpassing my expectations given the northerly location and time of year. I ran the small 120V vacuum for about 30 minutes and watched the charge controller replenish the batteries in no time. Love it!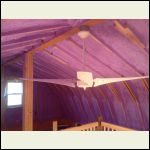
IMG_2745.JPG
| 
IMG_2742.JPG
| 
IMG_2707.JPG
| 
IMG_2667.JPG
|
|
|
razmichael
Member
|
# Posted: 13 May 2014 12:33pm
Reply
Spring 2014 Update 1 of 2
I'm splitting this in two posts as it is long (really just my own "diary".
Over six months since I closed up the cabin for winter (and a long cold snowy winter it was). I took a few days off from work and planned to go up and start some serious work on the inside of the cabin so it would look less like a construction zone. Like many of you, it is very nerve racking turning into the cabin driveway after being away for so long and not knowing what you may see (although I do know someone in the area who checks in on occasion to make sure nothing too serious has happened).
I arrived to find everything is great shape. Before closing up in the fall I completed the hookup of the solar panels and installed some motion sensor lights on a "security circuit" that would stay on even when the main cabin circuit was off. I took the brave/foolish decision to leave the batteries up there and trust the charge controller and panels to keep enough juice going to avoid frozen and cracked batteries. Amazingly it worked! Batteries fully charged - ready to go!
Now to work!
Insulation: Last fall the ceiling and loft end walls had been spray foamed so that was already complete. In the remaining walls I installed roxul batts (R22) and put up the vapor barrier. I like working with the Roxul far more than the pink stuff. It is so much easier to cut - this was really important due to the fact that the majority of the stud spaces did not seem to be the standard size due to the small wall sizes, windows, loft supports etc. What a difference a little insulation makes on those chilly nights!
Tongue and Groove: I lost half a day driving to the mill to pick up my order of T&G. I needed to borrow their trailer due to the 16 ft lengths so this meant two trips out and back. Then the real decisions needed to be made: the boards were 6" wide with a V cut on one side and flat on the other. Which way should we put them? Vertical or horizontal? I knew which way I wanted to do them but needed final approval from the boss so I was stacking up samples and sending photos to my wife. In the end we agreed on the flat side horizontal. I had been warned that putting up 16'T&G pieces up high by yourself was not an easy job - I discovered this to be an accurate warning (just one I decided to ignore).
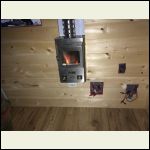
What did I discover about putting up T&G? Firstly, I have a very limited ability to figure out cut-outs around wall outlets/switches. To counter that, I also discovered that you can buy cover plates in much larger sizes than the standard. I suspect these are made specifically for people like me. I also discovered that no matter how hard I tried, I could not get the corners to line up better than 1/8" or so. So what? Nothing corner molding will not hide and, frankly, this is a cabin so any guest that comments on it gets kicked out!
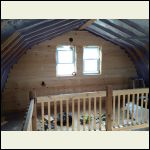
Oh - and I did realize that I had put up three boards the wrong side out! This was right after I mentioned to my wife on the phone what a great job I had done not getting any wrong. One was the bottom board along one wall that will be mostly covered by kitchen cabinets, one was a short piece being the door and the third will likely end up with a bunch of hooks in it to hang mugs. I'm going to challenge the kids to try to spot them. Again, if any guests comment on them they get kicked out - I see a new cabin rule being formulated here!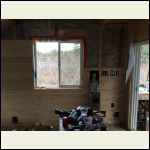
TandG_Sarted.jpg
| 
OneLoft.jpg
| 
HeaterGoing.jpg
|  |
|
|
razmichael
Member
|
# Posted: 13 May 2014 12:35pm
Reply
Spring Update 2014 2 of 2
Flooring: Final day - with all the walls complete I started on the main floor laminate flooring (yes - laminate!). Despite all the practice I had figuring out how to cut the T&G wall bits around switches etc, I did not really notice any great improvement when putting in the flooring around the ladder and the few other corners or obstacles. however, I did get into a routine and finished up by the end of the day in time to clean up, have a burger on the grill, a beer and admire what no longer looked like a construction zone (if you ignore the ceiling).
Throughout the 5 days I watched the solar panels have no problem keeping the batteries fully charged despite recharging my 18V power tool batteries, keeping the cell phone booster going, water pump, lights, recharging the phone and laptop and running the vacuum a lot and anything else I needed. Maybe not the same as having the whole family up there but it did feel good to be able to work for days off-grid with only battery powered tools and no need to run a generator (or compressor). By the way, the Ryobi 18V nail gun I got last year was finally put to the serious test with the T&G. I likely shot 2000 plus 2" nails and had about 4 misfires (just needed to release and fire again) and one nail jam. All running with the same batteries as my other tools.
Next tasks? Need to stain the walls - originally my wife was going to do the white wash thing that some decorator did on her cottage (does a million dollar property count as a cottage?". Once she saw the photos of the pine she has reconsidered so all bets are off (she is even considering a coffee stain). I have no idea what to do with the ceiling? Being a gambrel roof it will take a bit more work (really three angles due to the gussets). The good thing is it can wait a bit. Highest priority is to re-screen in the deck (this was only temporary last year). I also need to extend the dock with a ramp. Did I mention finish the kitchen cabinets I building and build some storage space a well. Good thing I find most of this fun!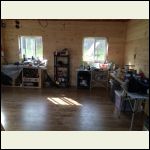
FloorComplete.jpg
| 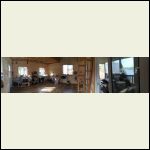
Panorama.jpg
| 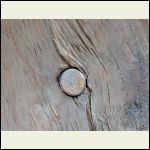
HiddenDime.jpg
| 
Solar.jpg
|
|
|
jrbarnard
Member
|
# Posted: 13 May 2014 02:53pm
Reply
I love that view....
Russ
|
|
| << . 1 . 2 . 3 . 4 . >> |

