|
| Author |
Message |
Nimitz
Member
|
# Posted: 17 Mar 2014 18:24 - Edited by: Nimitz
Reply
Should say North of lac st jean.
In October 2012 I won a 99 year lease with the government of Quebec for a plot of land on a lake. The total cost was around 2k for the up front cost. So far my yearly cost is under 300$ but that will go up when I am done and I get hit with school tax and property tax but it should still be pretty low.
The lake is about 2.5 hours from my house, of that about 1 hour is driving on a logging road in the deep woods.
First thing I did was build the road and clear the land
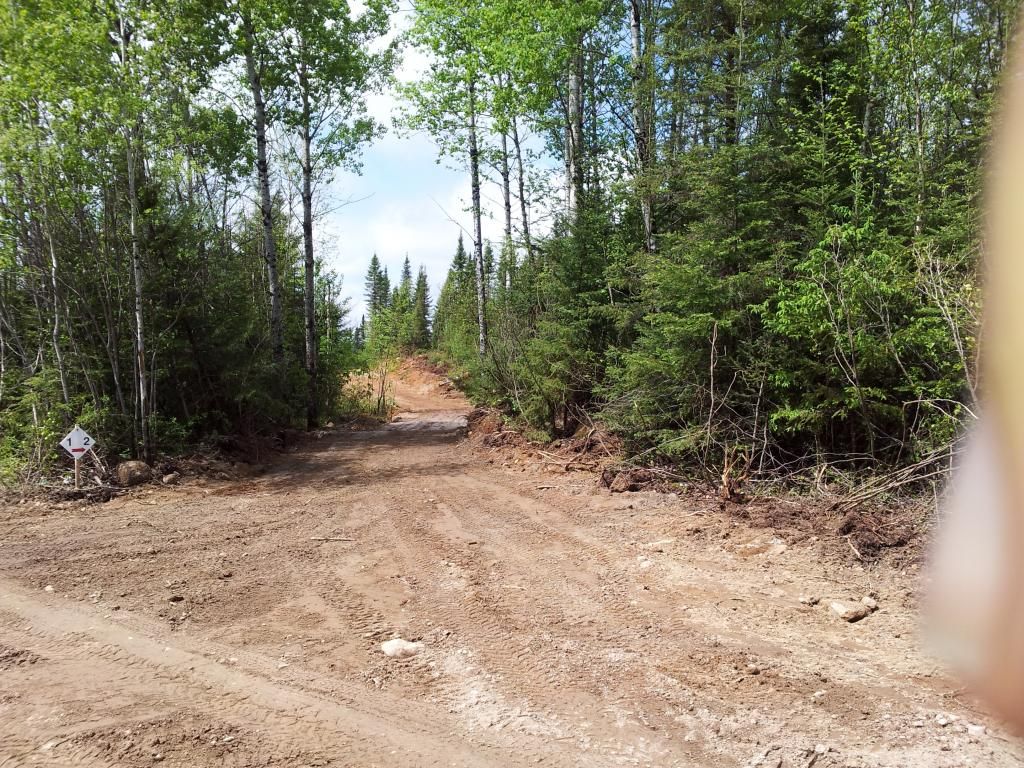
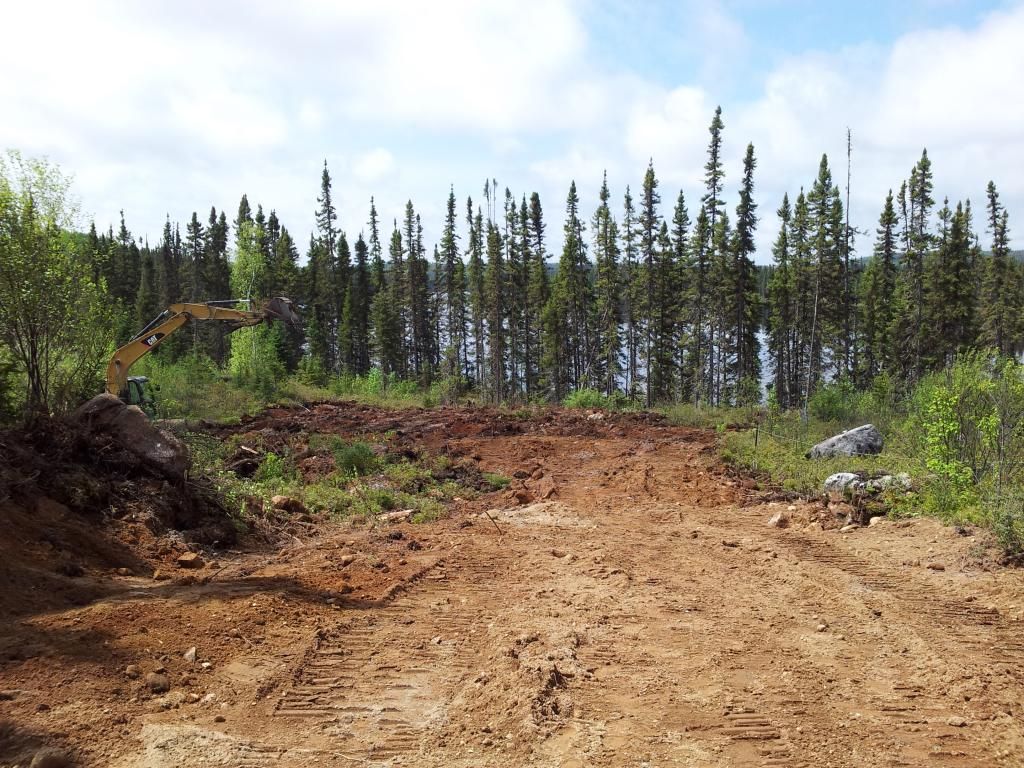

This is the path to my lake it is not yet finished.

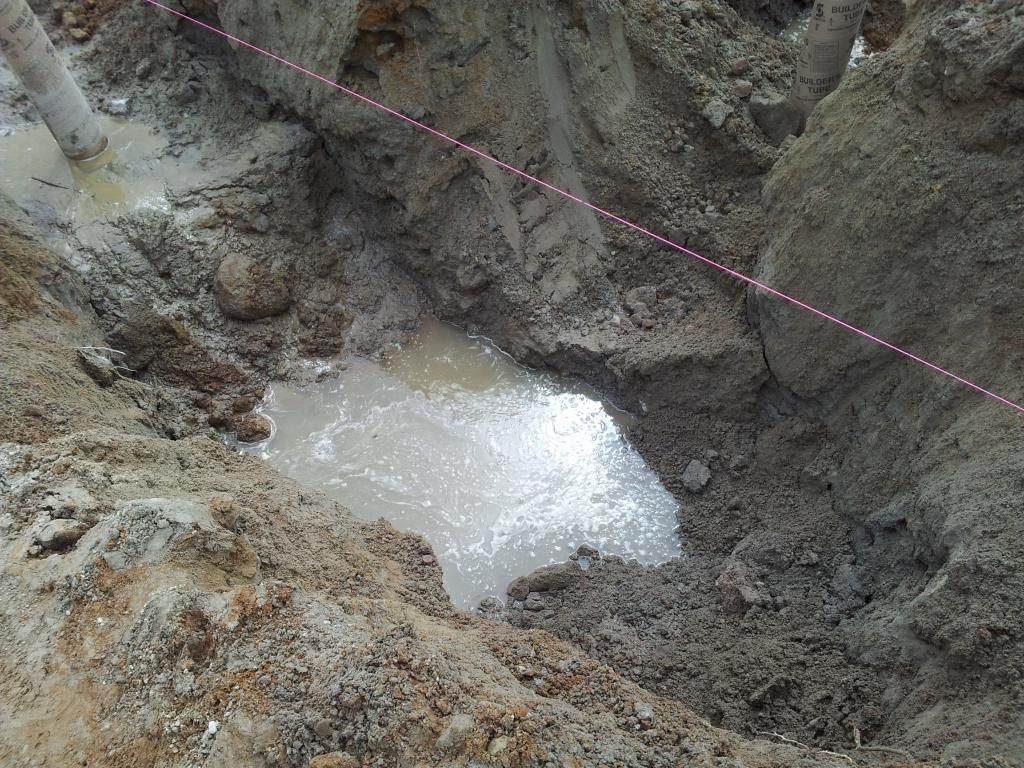
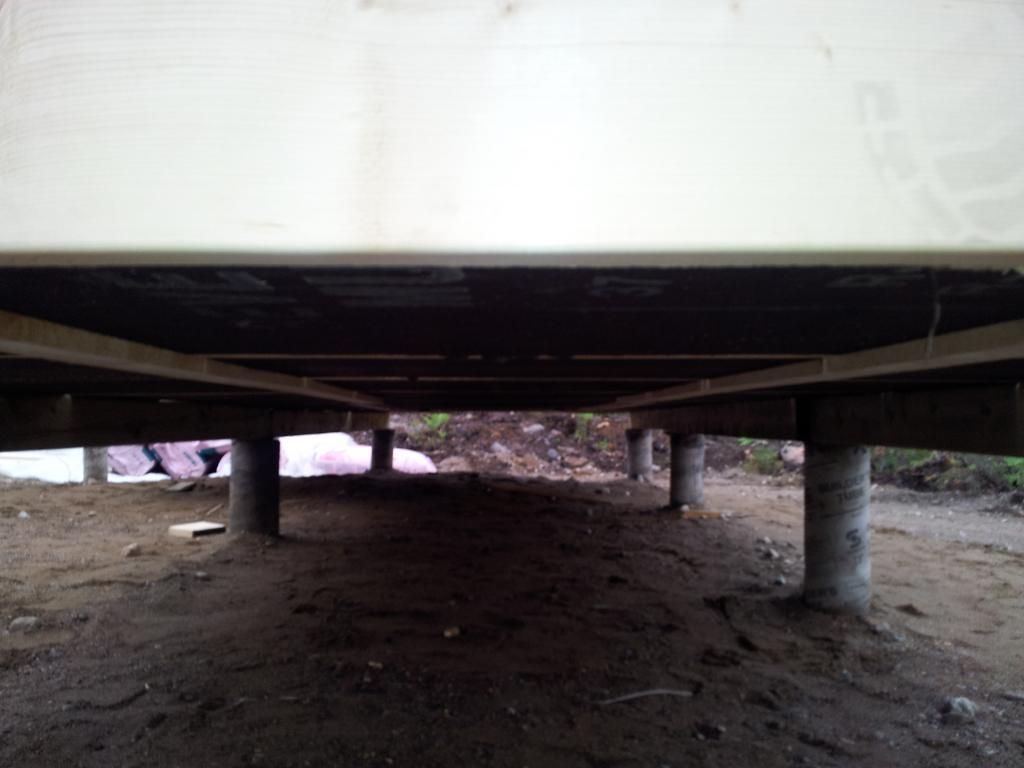
I then dug in some sono tubes, they where supposed to go 7 feet in the ground and 3 feet above, but we hit water the shortest is around 3 feet in the ground but that one in sitting on a gaint bolder the others are around 5 to 6 feet deep. What I will do is try and add more dirt under the cabin to get an extra two feet of ground soil. Ya I know adding soil under a cabin that is already built is going to be a pain but I will try and figure something out.

This is how it looked after the sono tubes where first covered.
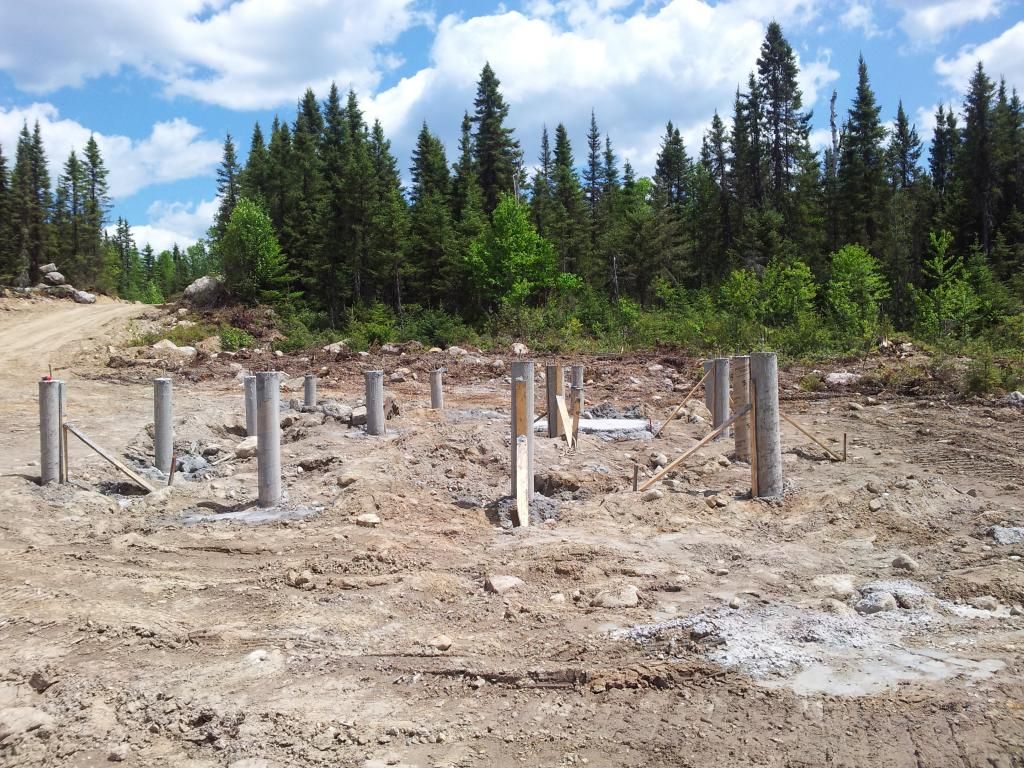
About a week later I then spent a few thousand to get dirt brought in to cover them even more the trip to the sand pit and back was around 45 minutes each way.
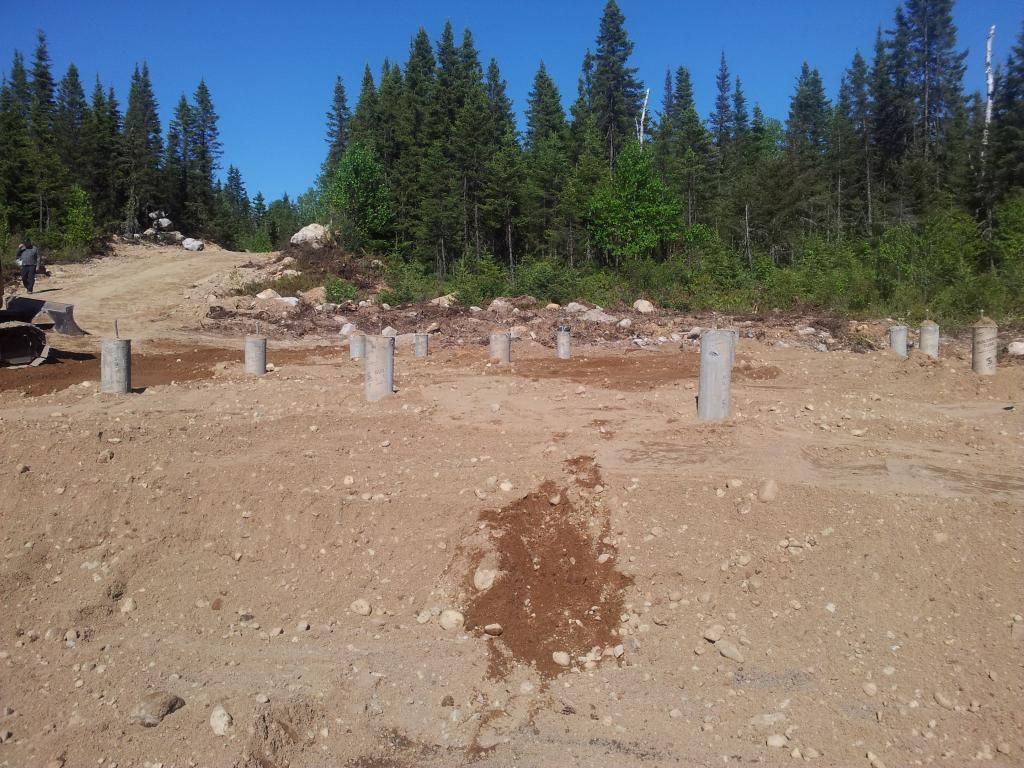
I would of liked to have added more but it was getting late and I did not want to pay for a second day since I only need about 3 more trips to be totally happy.
|
|
Nimitz
Member
|
# Posted: 17 Mar 2014 18:25 - Edited by: Nimitz
Reply
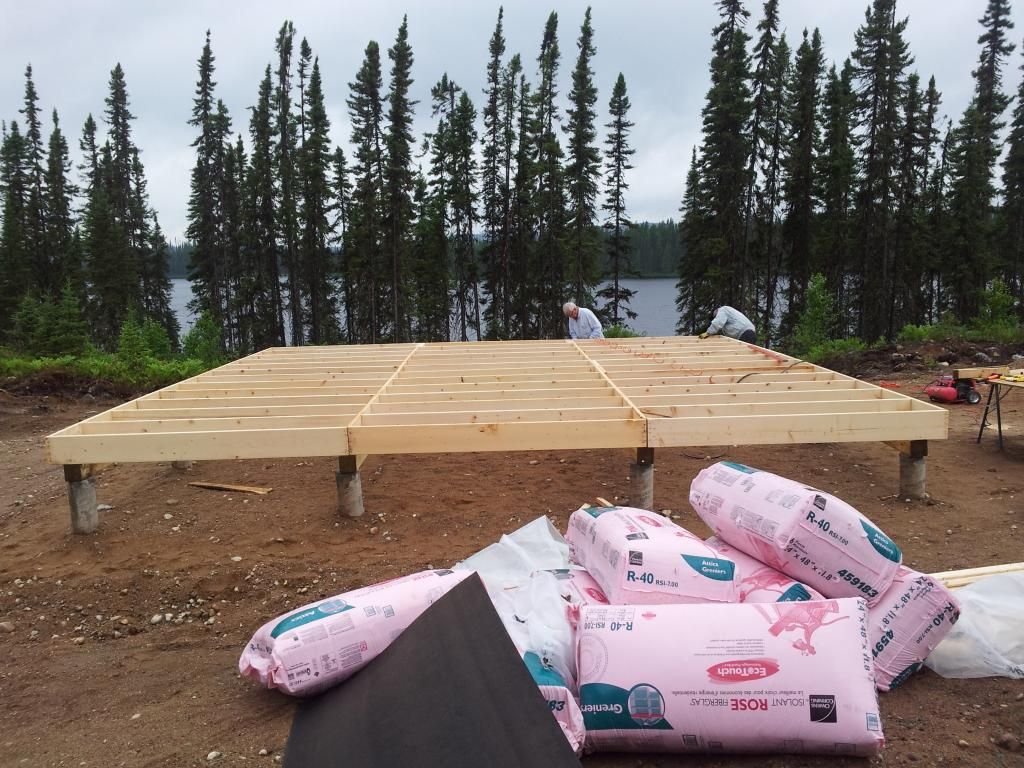
Next step was to build the floor, the frame is made with 2x10 sitting on 6x6 treated wood beams.
Made some rookie mistakes here, first I ordered and shipped the wood and the same time as the insulation for the floor so the insulation sat outside for a couple weeks, it looks like a bear got into one of them and took a couple bites before he figured out he did not like it.
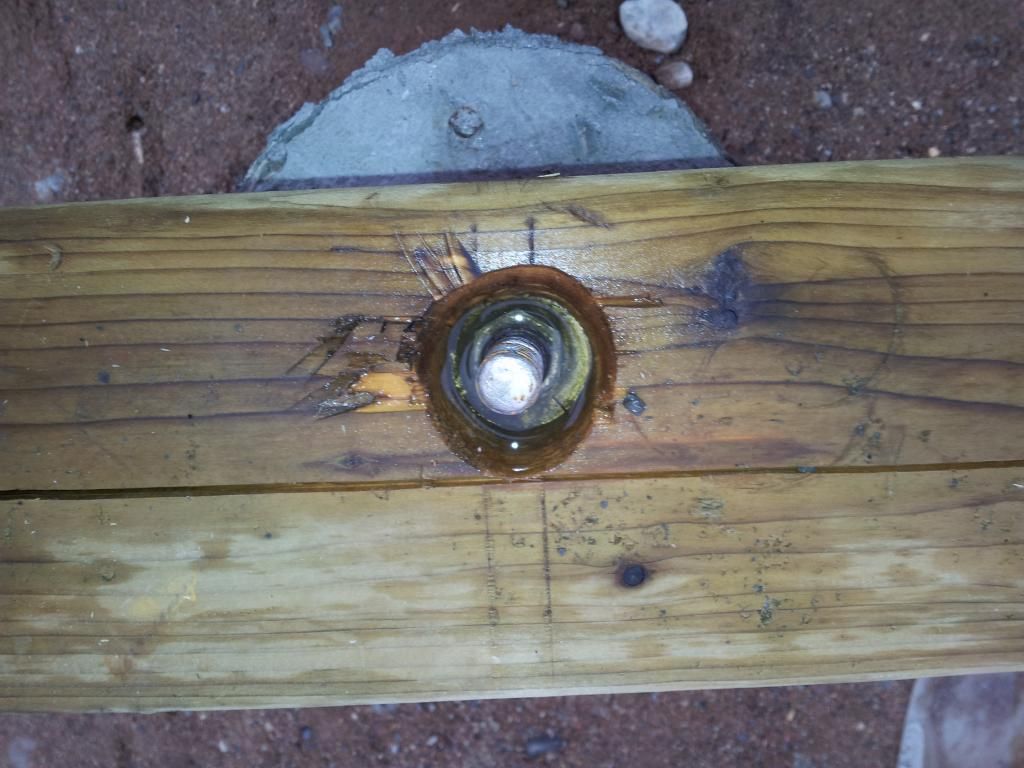
The sono tubes have 4 1-inch pieces of re-bar tied together with an anchor screw welded to them. I then bolted 6x6 treated beams to the sono tubes.
The two center beams are 12 feet long and bolted and bracketed together at the center tube where the meet up. The two end beams where supposed to be two 10 feet 6x6 beams with steps cut on the ends so that a 8 foot 6x6 steped the other way would fit into the steps to be bolted together. But that was not feasible onsite so the 10 feet beams are each bolted on two sono tube and then we took 2 pieces of 2x6 and screwed them on each side of the 6x6 to cover the 4 feet gap.
The first taught I had was to nail the 4x8 sheets by crawling under the floor after the first one I gave up on that idea. So what I did was nail in all the lats and then cut out the pieces so that why would fit in the gaps.
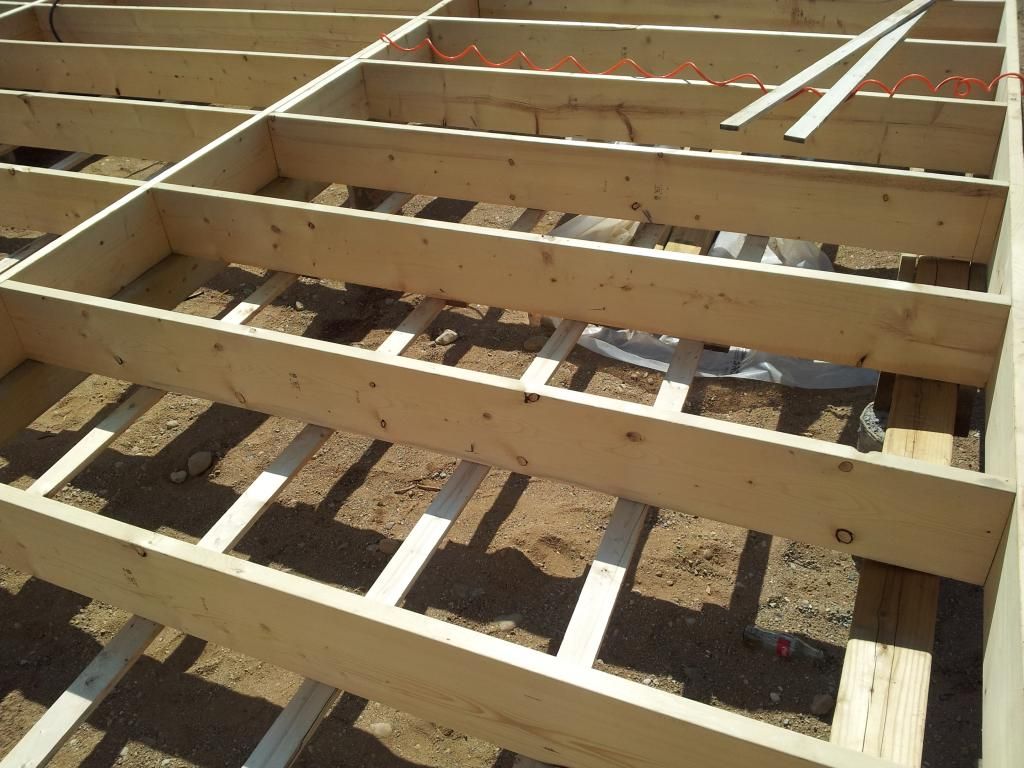
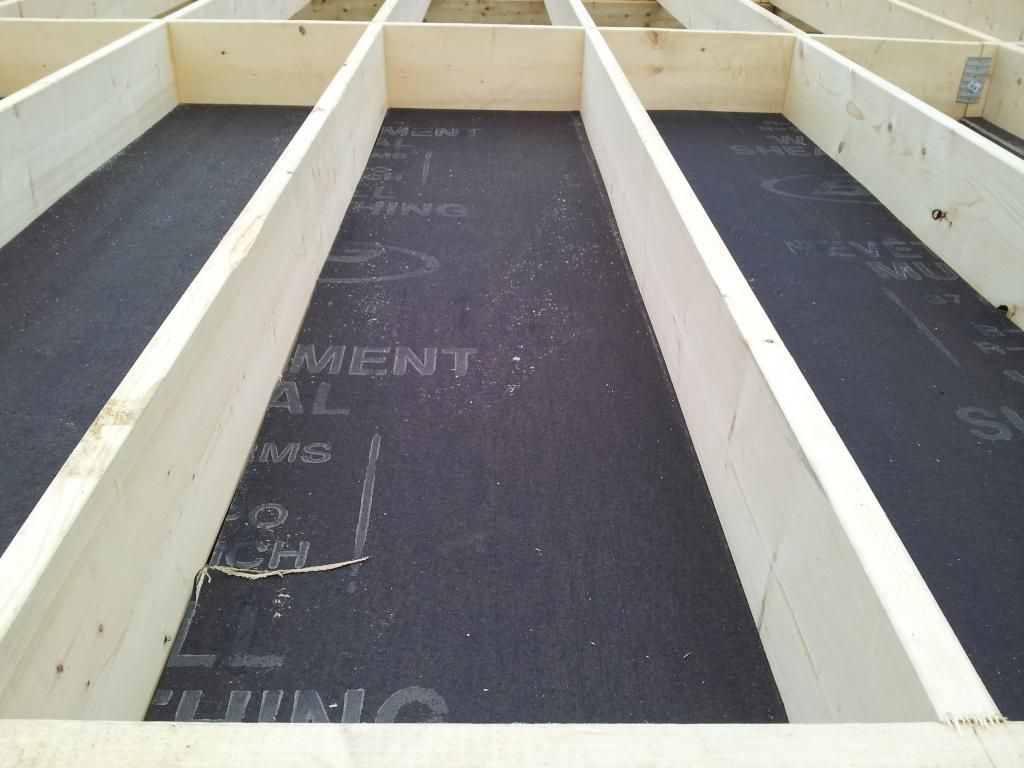
I then put in the insulation and covered it with 4x8 floor boards.
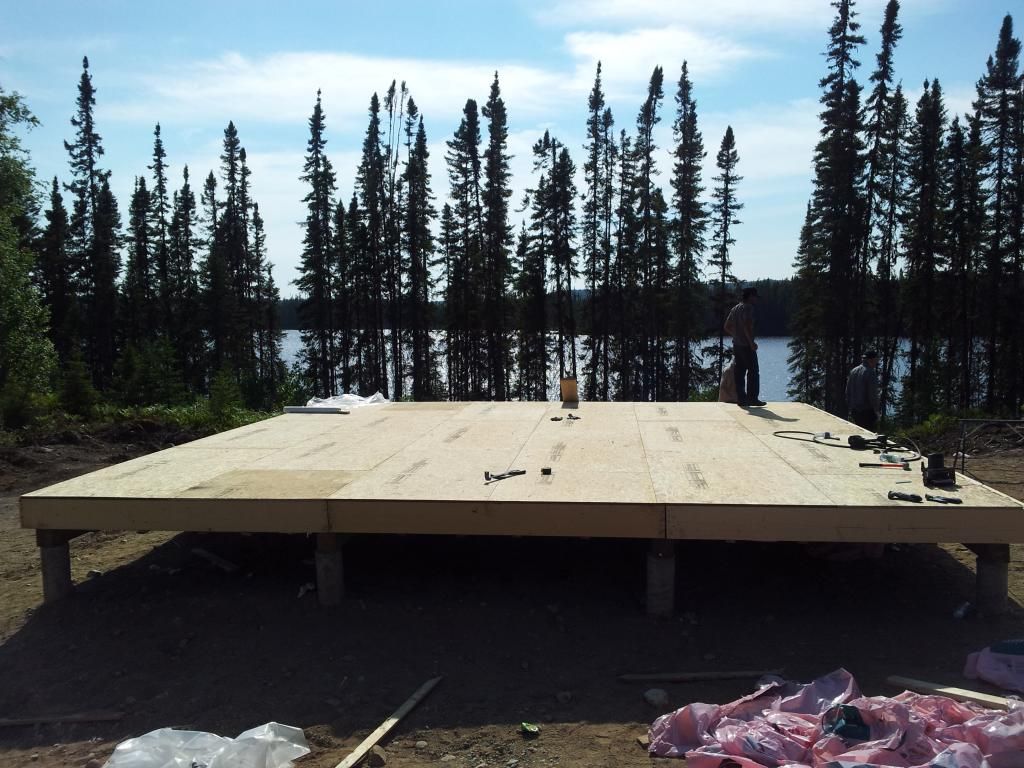
Other mistakes I made was driving up and down every day so we only got a little work done each day. also one the floor was done I had to leave for a couple weeks so we covered it with plastic. That did not work well it blew off in some spots and the water went under the plastic at other spots when it rained. I am pretty sure in insulation got pretty wet. I am really hoping that I did not ruin the insulation.
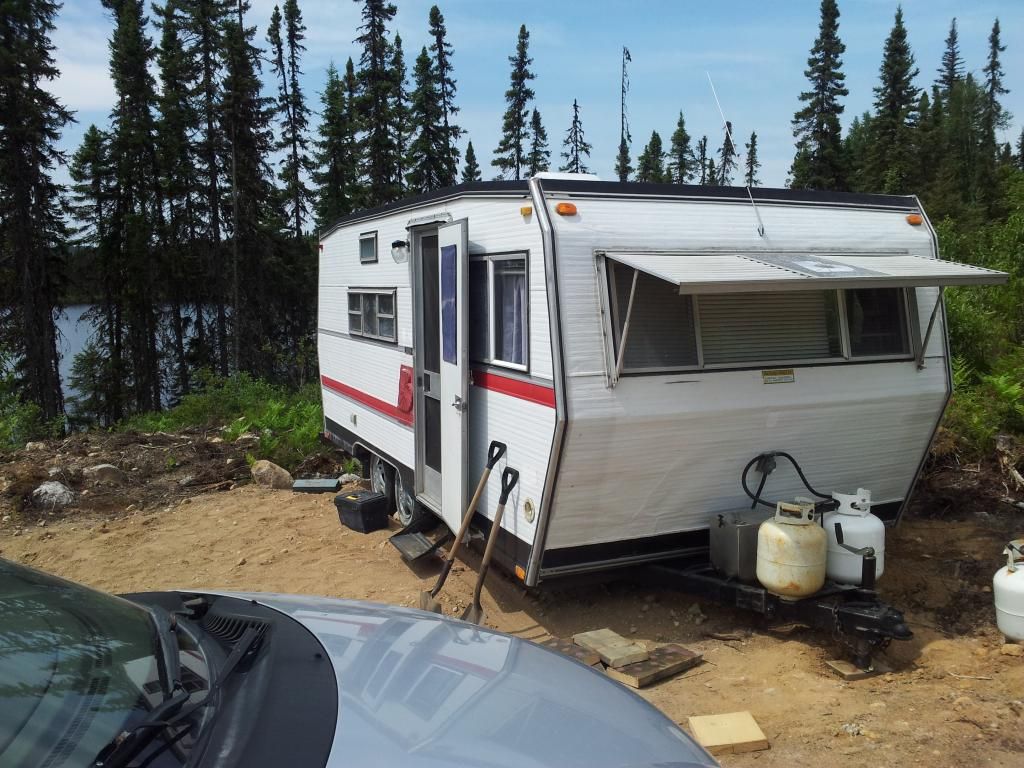
As for the driving up and down every day I decided to buy this guy for the next step of the operation.
|
|
Nimitz
Member
|
# Posted: 17 Mar 2014 18:26
Reply
Up to this point it was only me, my dad(84) and my uncle(82) doing all the work. So I hired a builder to help with the rest, dang at 30 bucks cash an hour he makes more than me. From this point we would go up on Monday work a bit, then work about 10hr a day on tue-thr and clean up and come back on Friday. I wish I have my dads and uncle health when I am 80+ and can put in a 10hr day of hard work. :P they got a lot of breaks me and the builder did most of the work but they still did 4 or 5 hour each day not counting when they were handing us tools or getting the equipment ready for the next task.
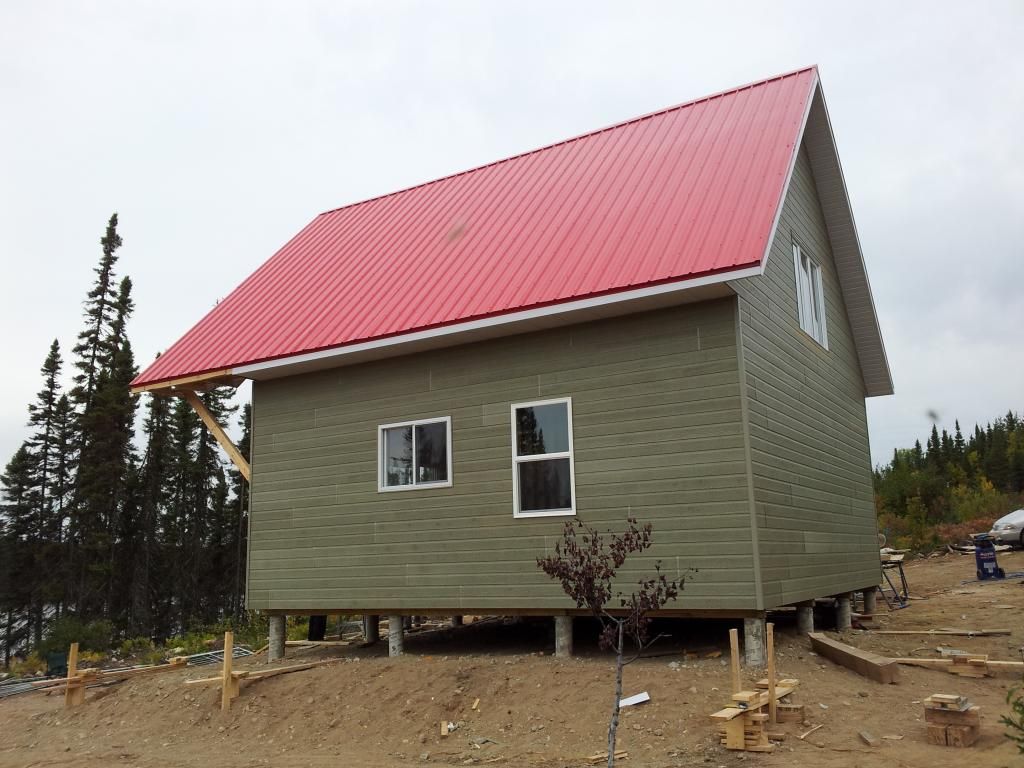
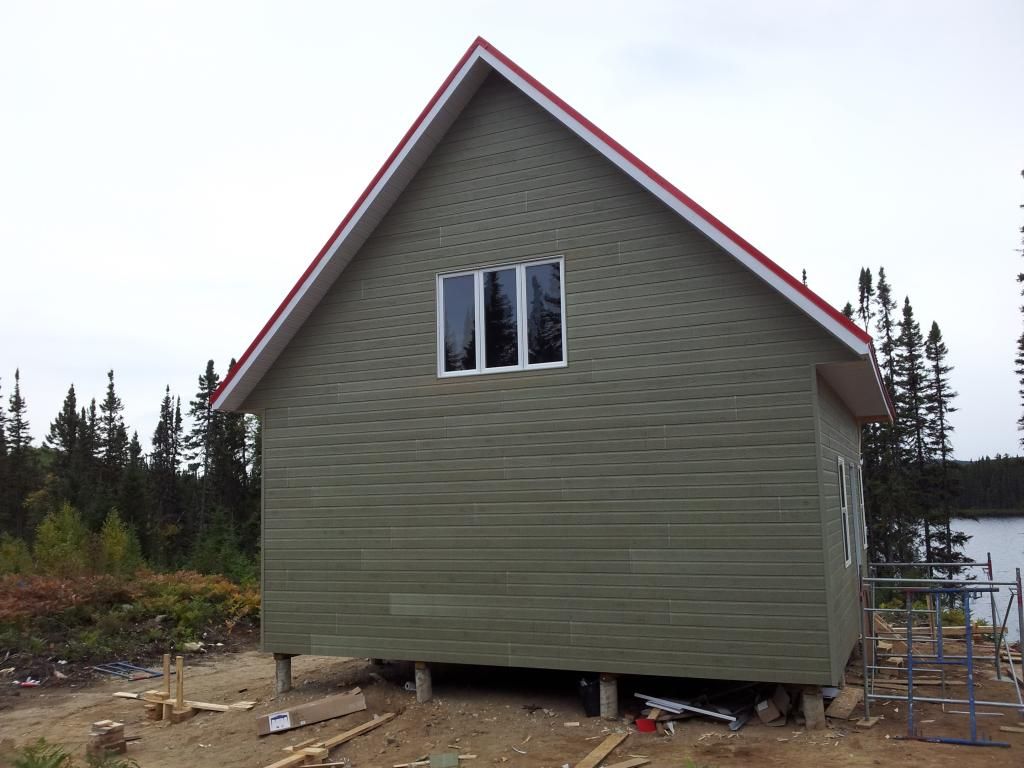
Next step was to build the walls, they are 10 feet high from the floor. The reason I did this was because I have a mezzanine the back half of the cabin. This allows me to have more space on the top floor before the roof gets in the way. I also lowered the ceiling in the bed rooms to 7'6'' from 8' to give me a little more space.
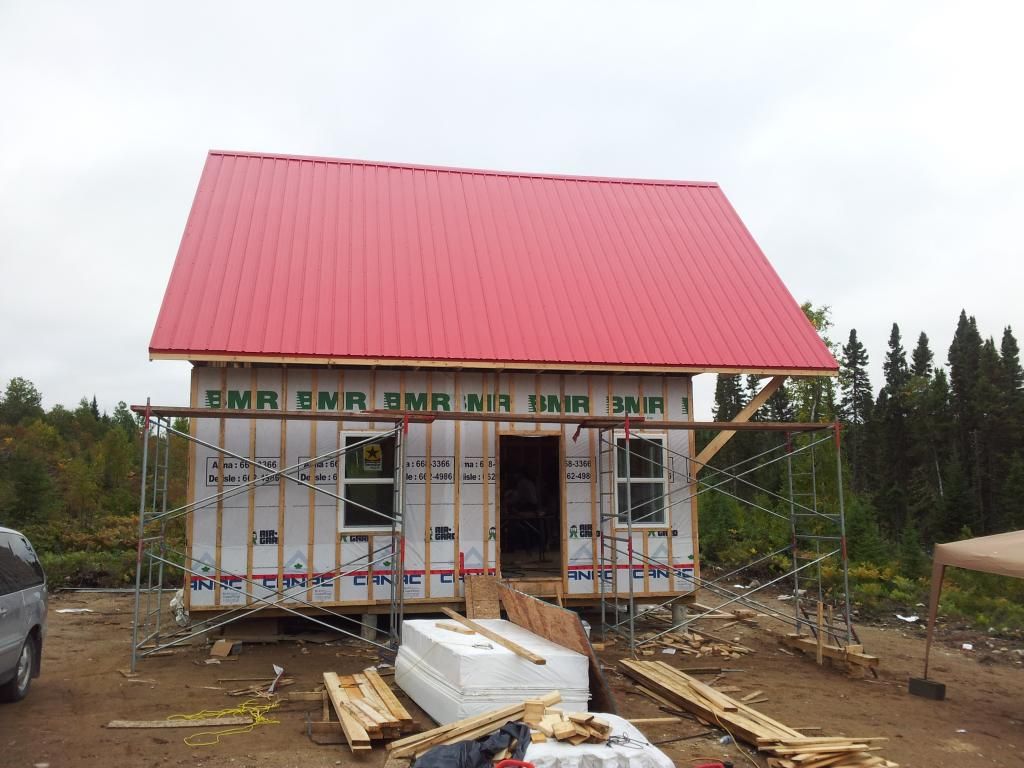
The roof was made by a local company that only makes roofs. The two center beams are 30 feet long and cost more than rest of the roof and shipping and probably labor also hehe.
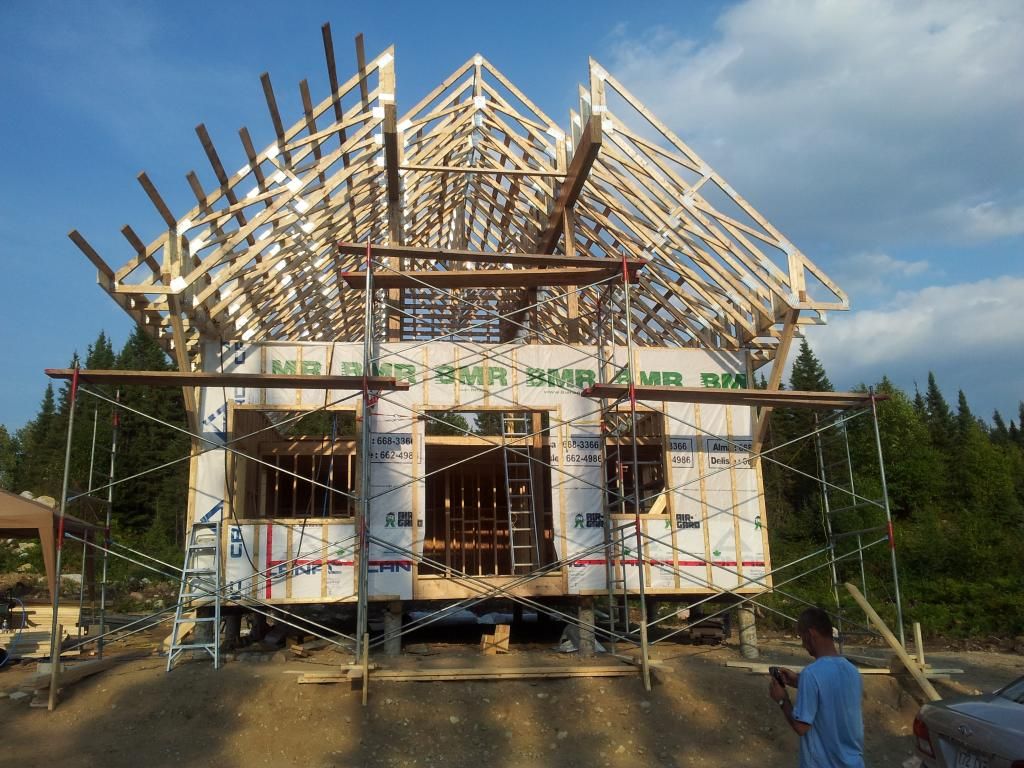

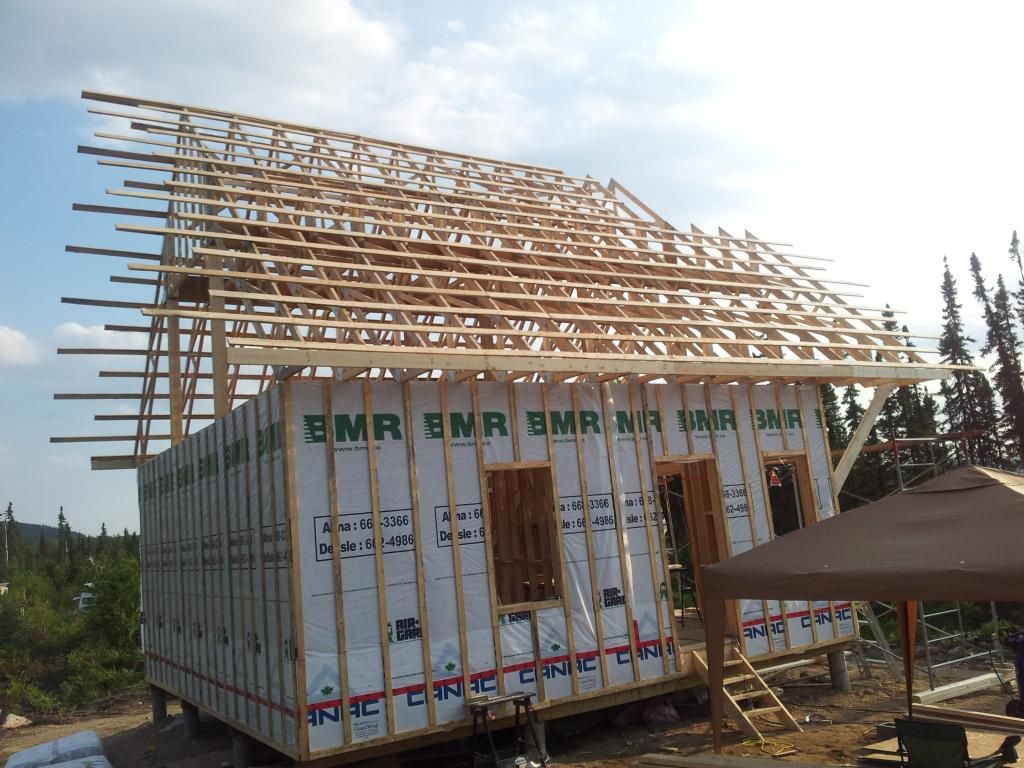
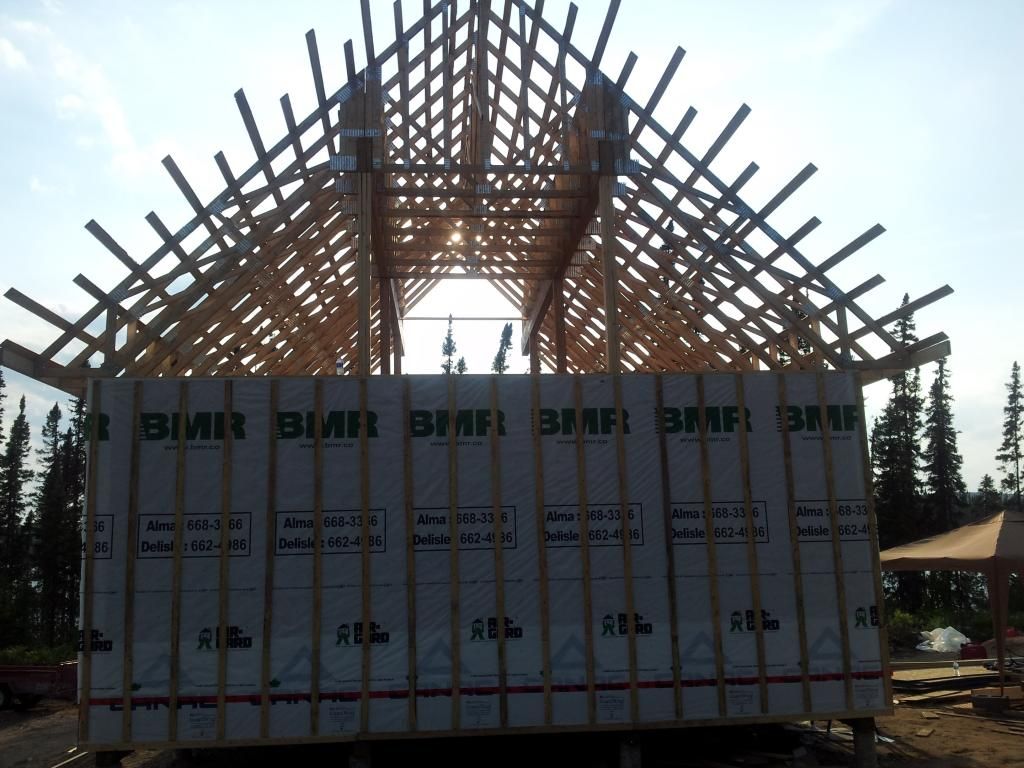
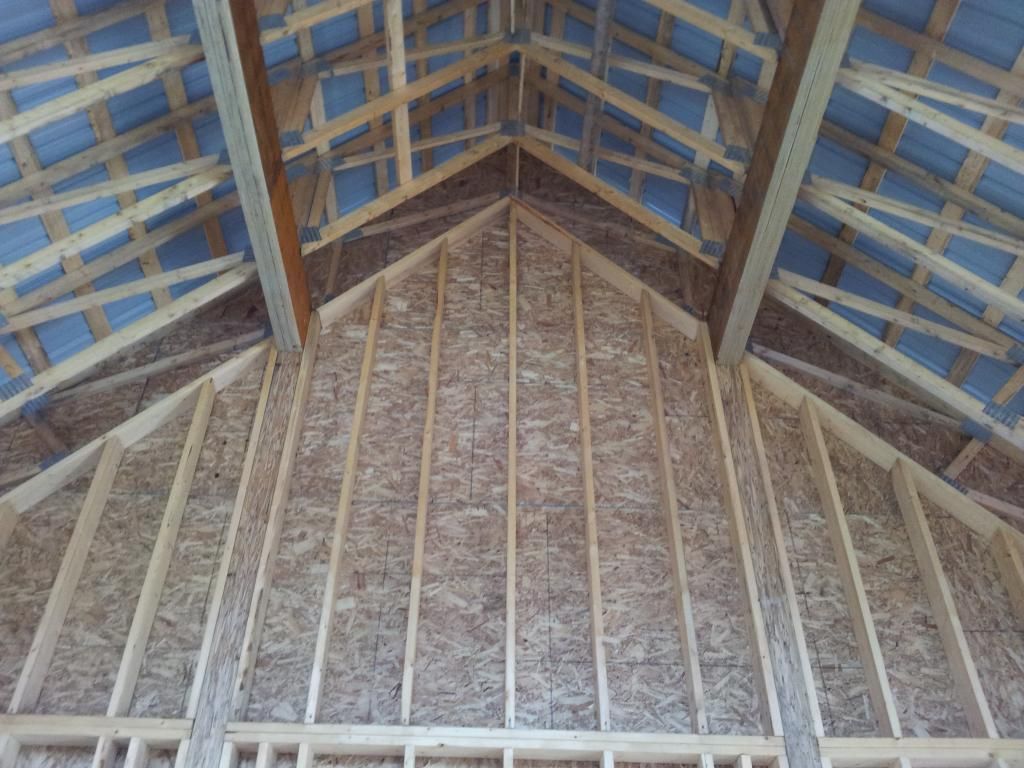
Next we put in the roof, from the tip of the roof to the ground was around 30 feet. I decided to go with a metal roof with a 45deg angle so the snow would slide off in the winter. Each sheet is just under 20 feet long and the four of us had a bugger of a time getting them up and in place.

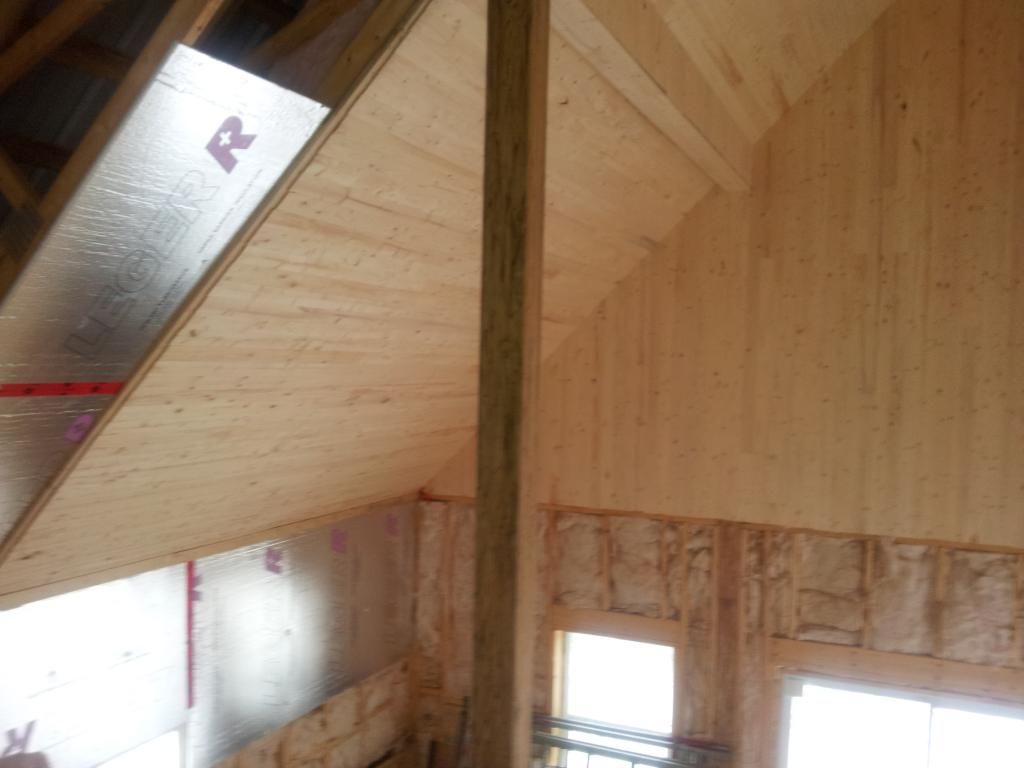
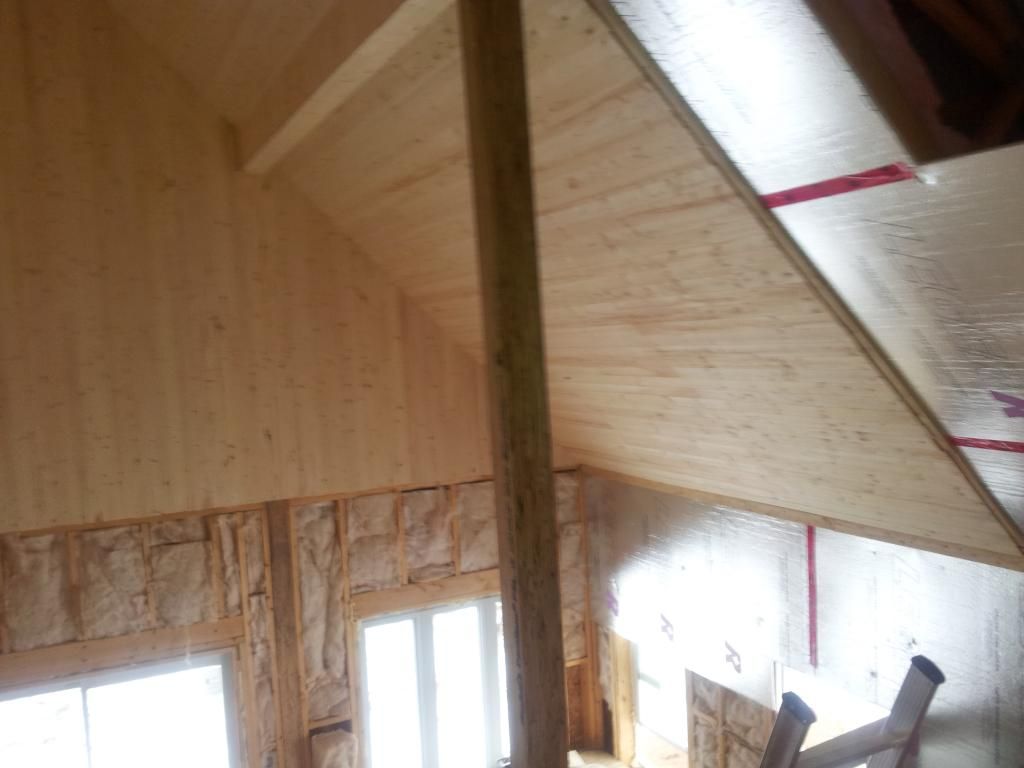
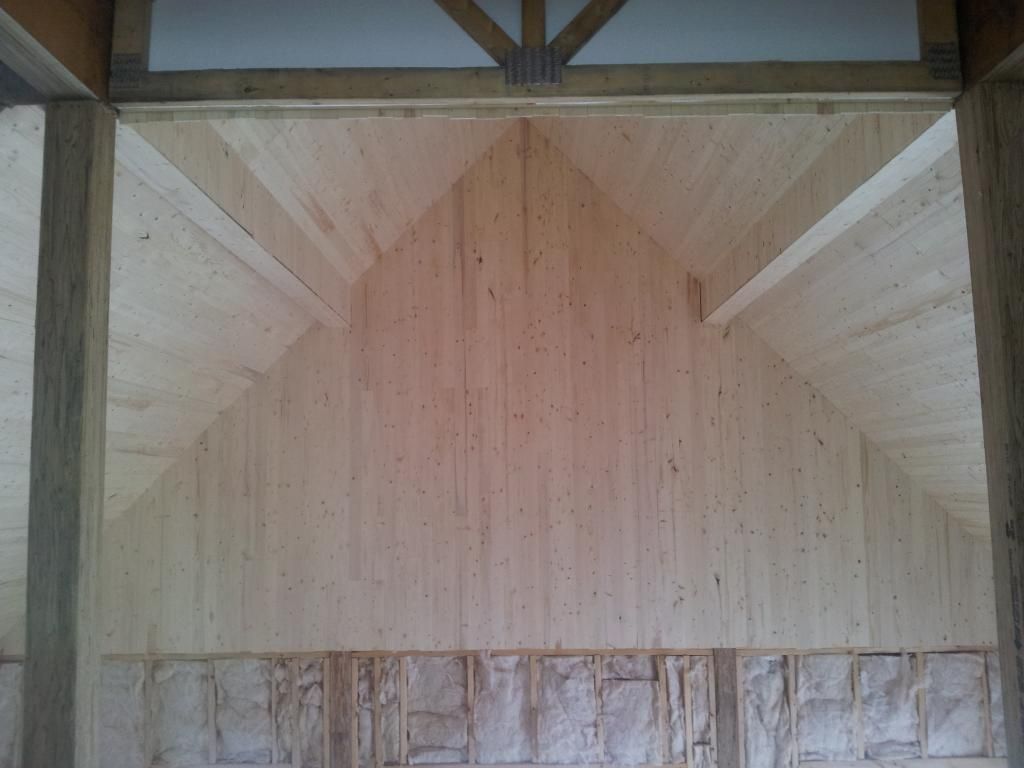
From the inside you can see the underside of the roof.
|
|
Nimitz
Member
|
# Posted: 17 Mar 2014 18:27
Reply
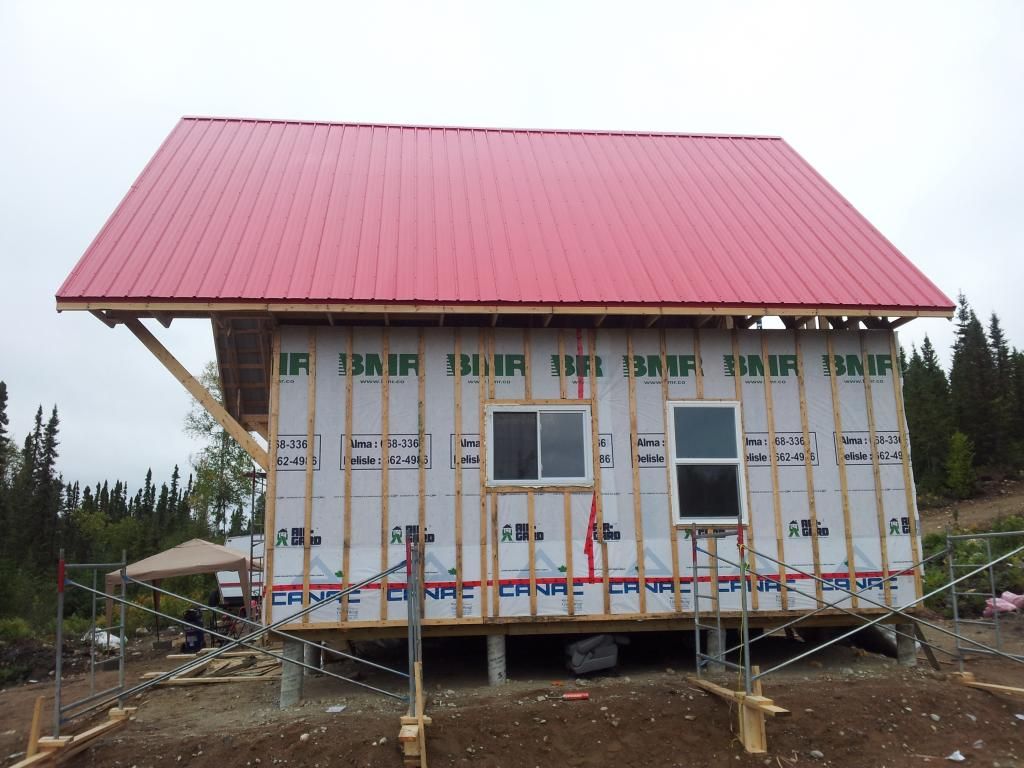
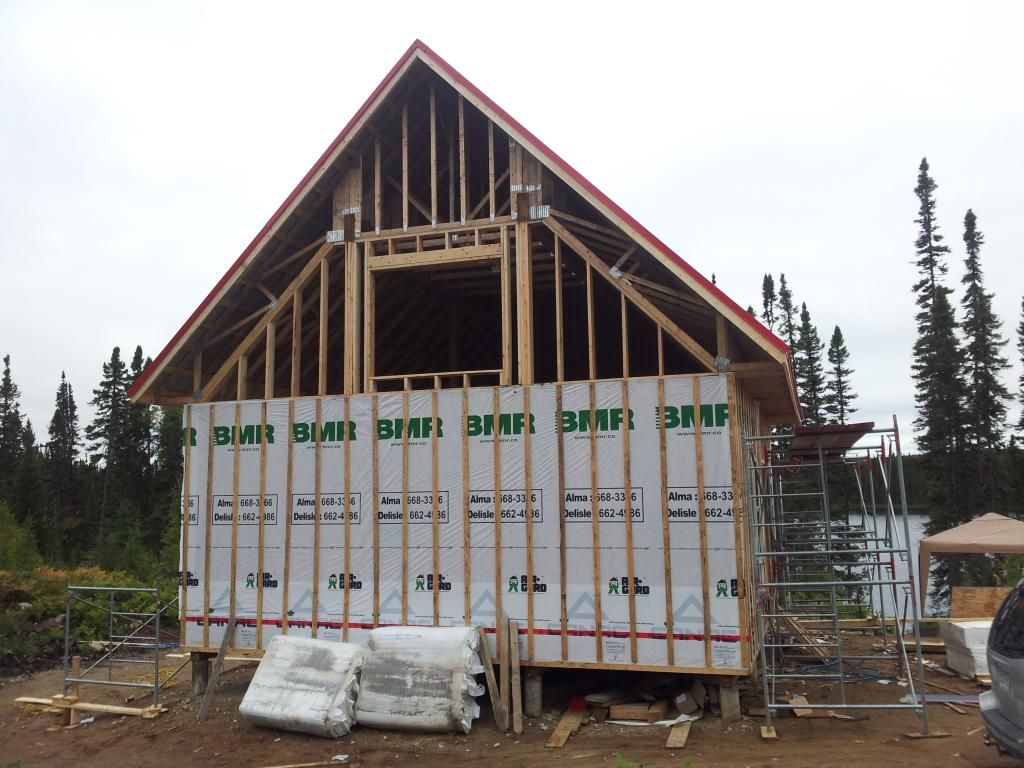
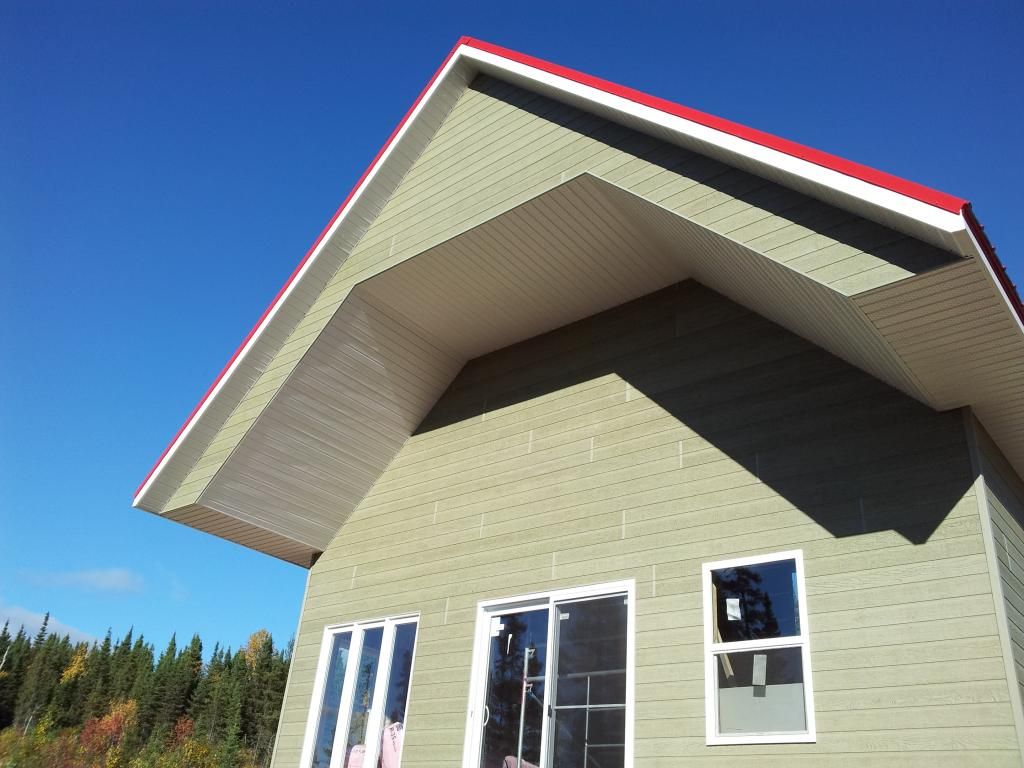
We then did the outside in CanExel. I had the metal roof and the CanExel shipped at the same time since both suppliers did not deliver. The shipping company sent one guy to deliver the load even if I told them it would need two and they sent the guy with no way to unload a truck in the middle of the woods so we had to manually unload the charge. At least the bed tilted so it was a little easier.
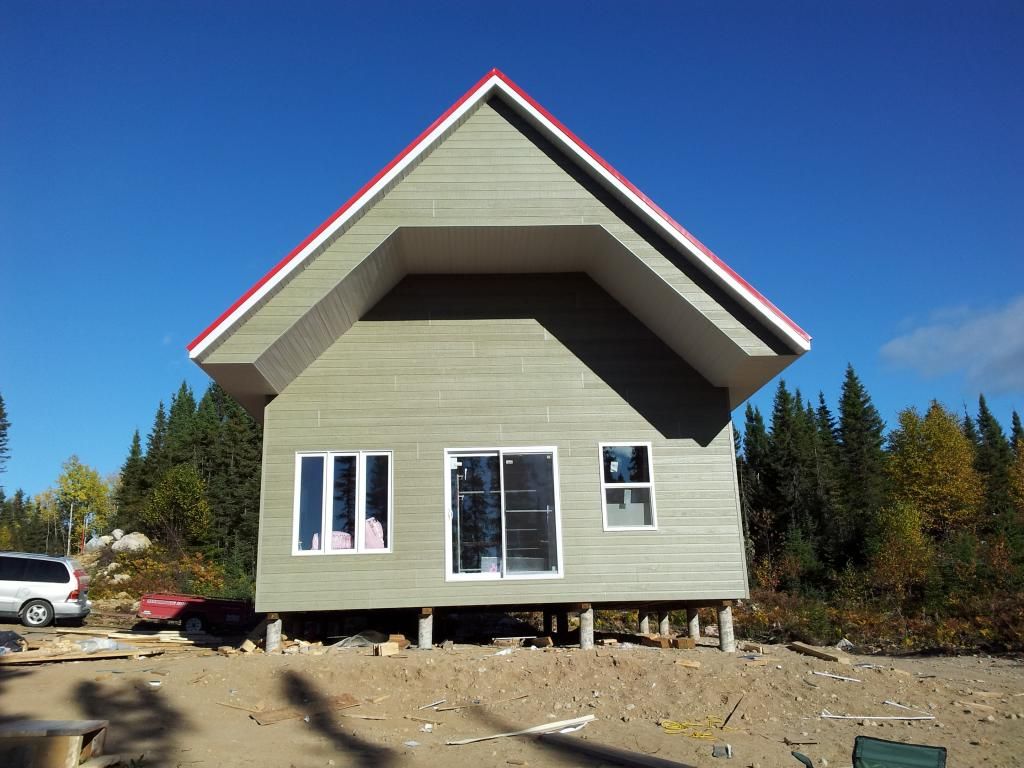
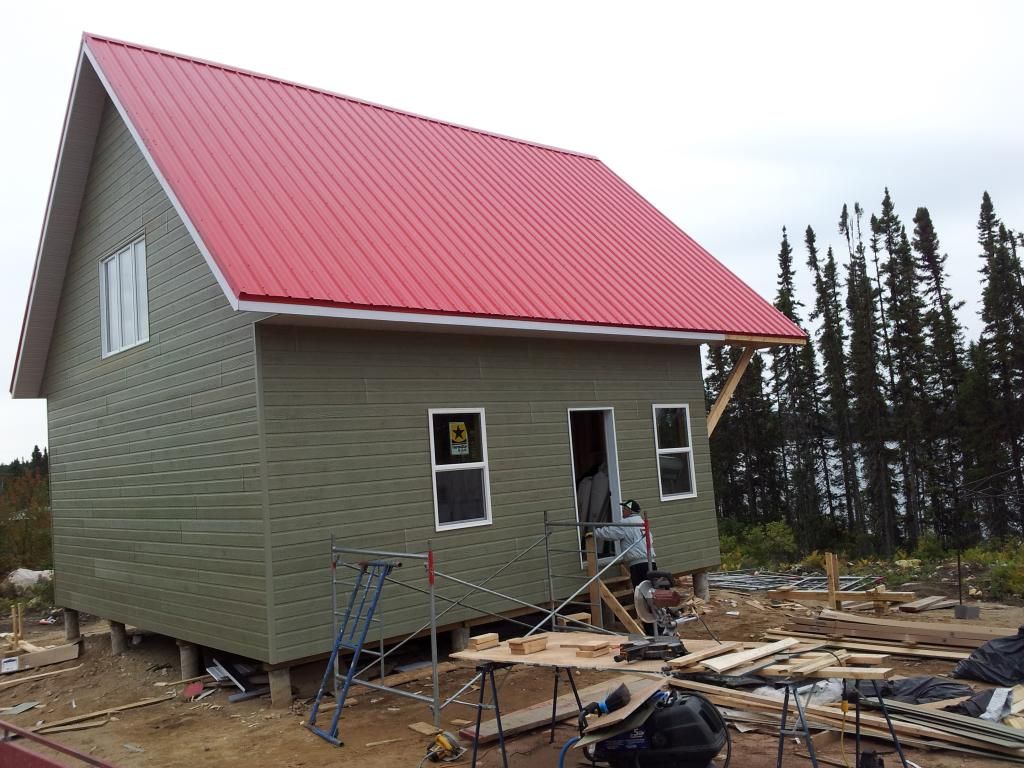
This is the back of the cabin I did not get a window for the bathroom in time(opps I forgot to order one) so we will be putting one in this year.
As you can see I extend the roof just over six feet from the front of the cabin. This is in case I want to expand later on.
|
|
Nimitz
Member
|
# Posted: 17 Mar 2014 18:27
Reply
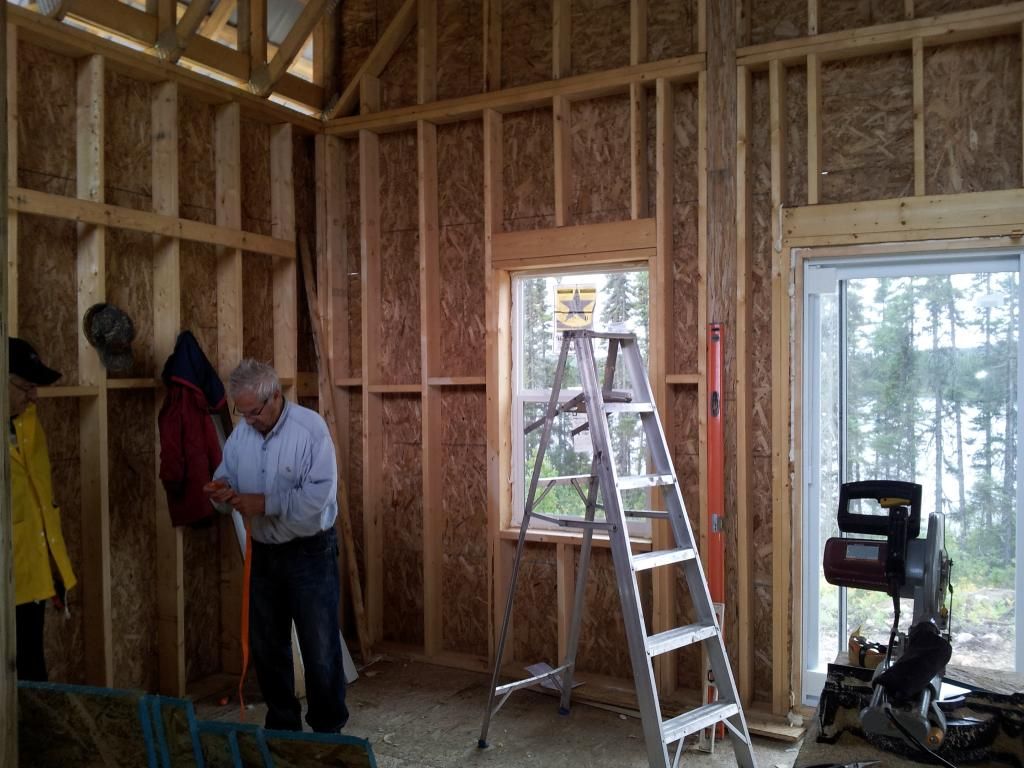
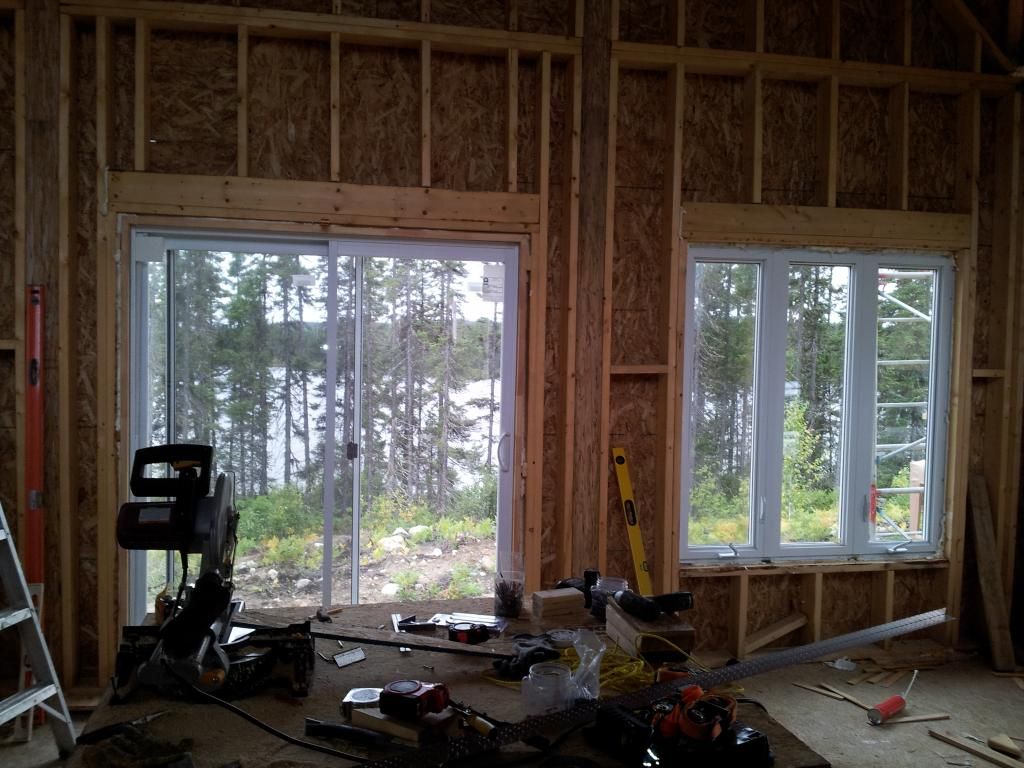
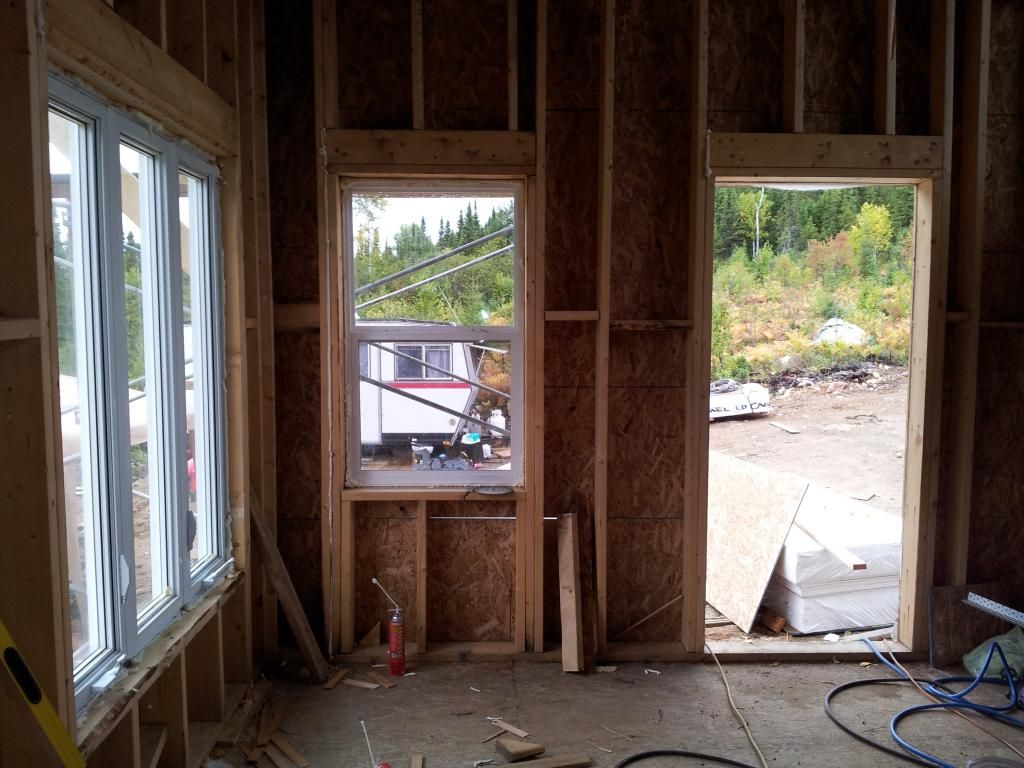
I will be working on the inside this year, it is a little messy but here are the photos.
This is the right bed room, the kitchen will be in this corner.
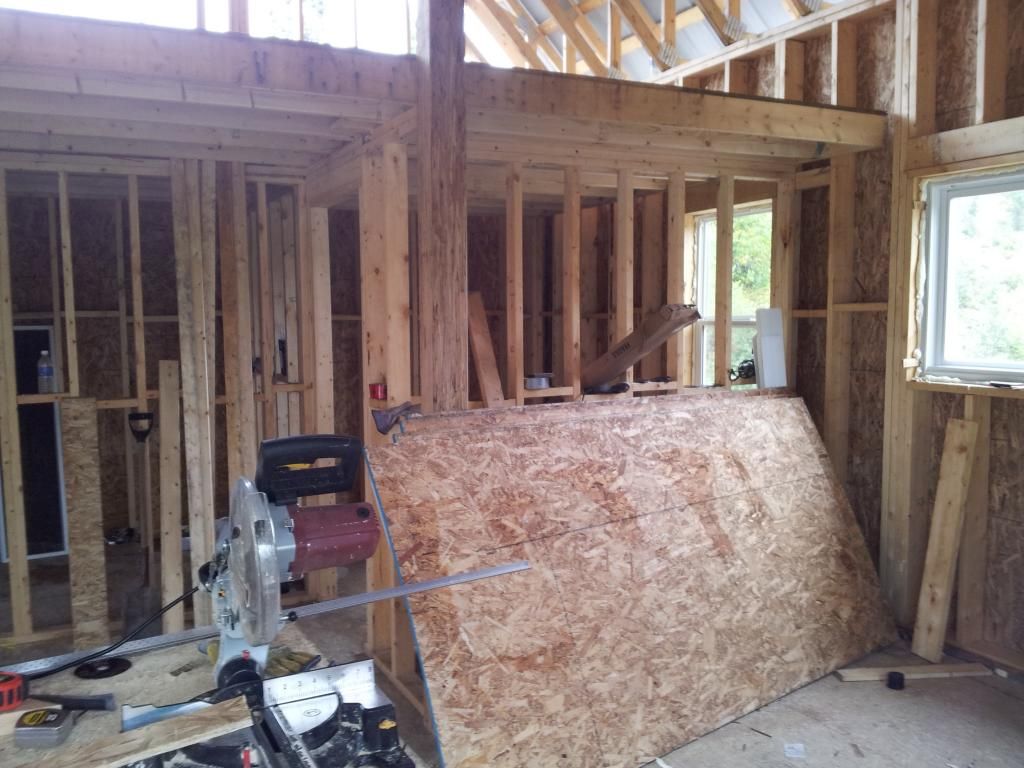
This is the left bed room, you can see that the bathroom will be in the middle of both rooms.
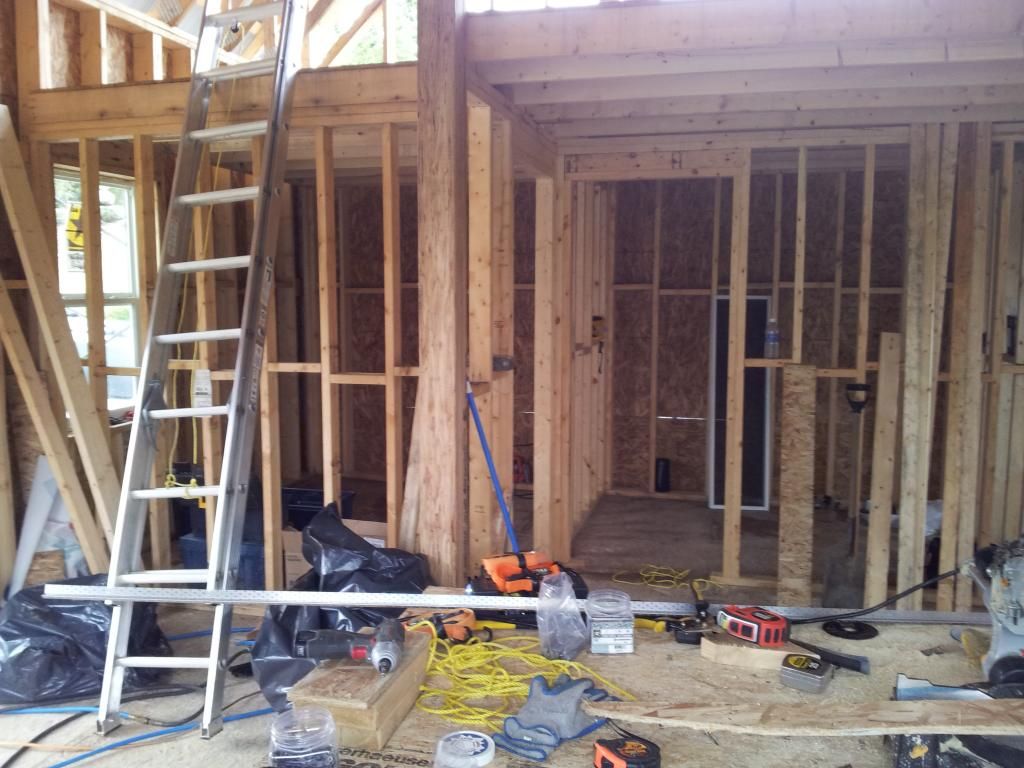
The wood stove will be in the corner where my dad is standing.
Clutter view of the lake
and this will be the main entrance.
|
|
Nimitz
Member
|
# Posted: 17 Mar 2014 18:29
Reply
Just before the end of the season I stared on the ceiling. It is in pine and also very time consuming to install each little piece. I ran out of good weather as it had started to snow the last two weeks I went up. I was not able to treat or stain before I closed up for the winter but I think it should be ok.
|
|
Ontario lakeside
Member
|
# Posted: 17 Mar 2014 21:23 - Edited by: Ontario lakeside
Reply
fantastic. I like the roof overhang. Keep up the good work!
Where did you get the siding from?
|
|
KSalzwedel
Member
|
# Posted: 18 Mar 2014 00:26
Reply
Love the siding. With that overhang you won't need to worry as much about wasps hanging a nest, that view is gorgeous, and in 99 years you should get your money's worth from the lease.
|
|
|
|
