|
| Author |
Message |
Ominous Ann
Member
|
# Posted: 6 Jan 2023 02:30am
Reply
Hi all, I'm a lifelong builder Canadian/American and about to retire. I'd like to retire to Nova Scotia, love that place. So I thought I'd design something and see how the preliminary stages go, make some decisions from there.
Oceanfront
No property yet
Nothing set in stone
I'm thinking about building on a slab if local codes allow it and deliveries are available. A perimeter wall foundation would be ideal but that's a lot of excavating. Geodetic foundation is a possibility, lots of options.
Stick framed, super insulated double exterior walls.
Air source heat exchanger
Off grid solar and wind
Wood stove
Composting toilet
Every trick I can think of to avoid excavating.
1.5 stories
16 x24 basic footprint.
Gotta check some local codes but advice is always welcome as I've not build in Nova before
Cheers and nice to be here
|
|
BRADISH
Member
|
# Posted: 6 Jan 2023 03:52am
Reply
Out of curiosity - why the hesitancy towards excavation?
While it's great to look for ideas, and even have a general plan in mind, I think building for the terrain/area is incredibly important. I'd probably want to hone in on some specific land options before I'd get too married to any particular floorplan.
Just my two cents.
|
|
Nate R
Member
|
# Posted: 6 Jan 2023 08:34am
Reply
Advice: If you haven't already, read the "Pretty Good House" book that recently came out. After reading it this past week, I think it lays out pretty well things you should think about in a design.
Curious what kind of R level you're thinking for the double stud walls? If going that far on the walls, what do you think your ceiling or foundation insulation would look like? Windows?
I'm thinking about the ROI....have to you looked at heat loss calcs and how much would be slab vs windows vs ceiling, etc? Wondering if the time, effort, money etc would be better spent elsewhere vs double stud.
-Nate
|
|
gcrank1
Member
|
# Posted: 6 Jan 2023 10:02am
Reply
Steve_S should chime in anytime, his build may interest you, it is Waayy effective and was mostly diy.
Imo, forget about small scale wind elec, it is a time and money pit with likely no roi. And do you really want the visual 'effect' of a super high pole with guywires or a tower on you property?
Incorporate passive solar into your design and orientation of the structure right off.
|
|
Ominous Ann
Member
|
# Posted: 6 Jan 2023 11:09am
Reply
Excavation is expensive. Saves a fortune the more you can avoid.
I'm flexible on foundations, A slab or maybe a geodetic foundation depending on the terrain 
The design I have in mind would work on a variety of sloped but I'd still prefer something reasonably flat.
Cheers
|
|
Ominous Ann
Member
|
# Posted: 6 Jan 2023 11:19am
Reply
Nate 
Typically super insulated is considered about twice the normal insulation. I'm thinking of maybe 50% more.
Windows I have down, I had a shop for years where I specialized in historic restoration of windows. Did some pretty complex stuff over the years  and I have an account at a plant that makes insulated glass so I kinda have an in on glass. and I have an account at a plant that makes insulated glass so I kinda have an in on glass.
Slabs are terrible for heat loss but  haven't committed to anything yet. haven't committed to anything yet.
|
|
Ominous Ann
Member
|
# Posted: 6 Jan 2023 11:29am
Reply
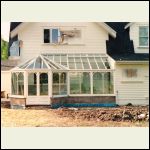
Probably one of my biggest single pieces. This conservatory was imported from England. It was made out of sitka spruce and didn't meet code. So I rebuilt it out of laminated white oak. Met snow load just find then 
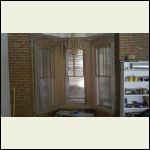
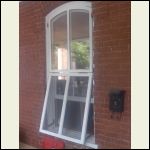
The bay window was a complete rebuild including brickwork. The outside had to be restored but the inside was outside of historic dept jurisdiction so we decided to laminate it with 1/4" hardwood all in the original design. I also made custom historic reproduction storms for it.
I've done my share of windows Nate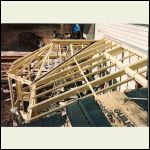
sc00c39bc9.JPG
| 
conservaotory_copy.J.jpg
| 
10513345_88020584200.jpg
| 
10556265_88020377867.jpg
|
|
|
Ominous Ann
Member
|
# Posted: 6 Jan 2023 11:42am - Edited by: Ominous Ann
Reply
Nate
A note on foundations.
One of the cheapest foundations that's also one of the most flexible is a geodetic/triodetic foundation.
The general idea is, anything is cheaper than digging a hole and pouring concrete.
It's also possible to make DIY a geodetic foundation. I don't think I would but it doesn't look all that hard.
That and I do have some interesting tools 
Crank
I'd likely go with a couple VAWT systems for wind, cheap easy and low profile. I've lived in an all solar home before and just hate having to run a generator. Which did happen more than once.
|
|
|
Steve_S
Member
|
# Posted: 6 Jan 2023 12:52pm
Reply
For us up here in Canada an FPSF (Frost protected Slab Foundation) is the way to go. This keeps the slab warm & dry and acts as a temperature regulator which is quite effective in summer.
I'm near Algonquin Park Ontario, have Radiant Heat within the slab which was provided by The Radiant Company out of Vermont which was designed & assembled by them and shipped semi-assembled and quite affordable. Noe that they only used the highest quality products available.
My home has High levels of insulation and is designed for efficiency. 2x6 24oc Advanced Framing with 5.25" this HPS-II Foam between studs, ceilings (Catheral) have 7.5" of PolyISO Foam. The Slab is insulated with 4" Thick HD-XPS Floam underneath & up the sides with 24" Perimeter Wings all around to prevent frost creep under the slab (See Attachment). The slab is on Prepped Ground as this is an "unmolested" protected forest so the Build Area was excavated to 8' and back filled & packed down with a 30-Ton machine (Soil is a Sandy Loam on top of granite bedrock) with a lot of Glacial Erratic Boulders.
The outside of my home is finished with Live Edge White Cedar installed in a Rainscreen Fashion providing 1.5" free flow airspace between siding & actual shell walls.The walls vent into the soffit which uses the roof's (Cool Roof System) natural convection to pull the ait up and vent it from the Ridge vents.
My Cool Roof install provides a 2" airspace between the tin & the actual roof and designed so that the airflow from soffit to peak is uninterrupted and uses teh convection provided by the sun to passively vent the air.
By Using Rain-Screen siding installation + the cool roof tied in via the soffits, it provides an excellent thermal break which prevents the external temps from drawing out heat or pushing heat in during summer. My Loft is never more than 2C warmer than it is 6" from the floor regardless of exterior temps (we get to 40C here in summer) and is never cooler than 6" above the floor in winter. During 40C Heat Waves the house has never been above 27C and I gave away my AC as it's pointless and this is with doors & windows open as well...
* In Winter I keep the house @ 25C, the radiant heating system runs a max of 3 hours per day when it is -30C temps outside to keep the temp constant.
** In summer the slab cools to 15-17C and stays there and because of that it regulates the inside temps and due to the Thermal Breaks afforded by the roof & siding systems, no heat is transferred into the house.
BTW: I am 100% Offgrid, solar powered, rural & remote within a mixed forest (mostly evergreens).
ALSO ATTACHED are 2 PDF's describing the cool roof system (one of the best explanations) * Site & business gone, the owner died from covid a couple of years ago. NB Cool Roof systems are within the CMHC Codes as is RainScreen Siding and the FPSF Foundations.
Last note regarding my build... The windows & Doors are installed within insulated Baily Boxes to go through the walls. The walls are 10" Thick from inside of the drywall to the finished exterior outer planks, so the baily boxes accommodate that quite nicely and provide me with 6" deep sills and by being insulated as well it seriously cuts thermal exchange.
SEE ATTACHED BR Window Image as an example of the finished (almost) result. Cove Mouldings not installed in image
Hope it helps, Good Luck.
|
|
Steve_S
Member
|
# Posted: 6 Jan 2023 01:01pm
Reply
Quoting: gcrank1 Steve_S should chime in anytime, his build may interest you, it is Waayy effective and was mostly diy.
My build is 99.5% DYI.
Only external contractors/help was for:
- Excavation of build pad & driveway, including rock/gravel backfill and compaction. Soil is Sandy Loam over Banded Granit bedrock.
- Slab Foundation forming & Concrete pour & finishing.
- Finishing the metal roof after the rafters were in place because I fell off 16' of scaffolding and had back injuries, so they did the sheathing, wrapping/strapping & installation of the tin (10:12 pitch roof)
|
|
Ominous Ann
Member
|
# Posted: 6 Jan 2023 01:17pm
Reply
Way to be Steve
That's the kinda detail I was looking for.
Hmmm I like the foundation you describe except for all the digging. I'd go as shallow as possible on the ground prep, we'll see what a soils report says when I find my dirt 
10" is prefect, I was thinking a rough frame of 8" + finish which ends up in the same ballpark.
Love the graphic of the foundation system. Thanks.
|
|
Steve_S
Member
|
# Posted: 6 Jan 2023 01:31pm - Edited by: Steve_S
Reply
The soil and what's underneath it determines what level of prep you have to do to support what your building. Sandy Loam is not good for weight but marvelous for drainage. I did not want any chance of issues popping up and also my land is a set of glacial cut "shelves" as I am on top of a ridge over the valley below I build on one step below the highest point.
The excavation was not overly costly... about 7K with building pad, 50x50 parking+ pad & the 400' driveway and if I recall about 20 TriAxle Loads of rock/gravel & Pit run. They used a CAT dl325 Excavator (big assed machine) to do the digging and to relocate the erratics and to compress the fill which they did in layers so it is very seriously compacted.
I also use a Grey Water System (Sinks, shower/bath and urinal + urine diverter from toilet). Toilet is a dry sawdust compost toilet, so no septic or blackwater filth.
You can also find me @ https://diysolarforum.com/ where I am also Steve_S where I have posted several docs, manuals, guide etc for Solar Systems Tech, battery building and a lot more. NB: I am very picky about who I help there now as too many stoopids have abused my nature so I backed off and became very "selective".
More on my build here: https://www.small-cabin.com/forum/6_5643_0.html
* It's not complete to the end because "stuff happened" and I got frustrated posting and being dumped on by stoopids but there is a lot of info in that long thread.
|
|
Ominous Ann
Member
|
# Posted: 6 Jan 2023 01:52pm
Reply
LOL you gotta remember I'm a po wildlife biologist these days.
I'm going all out on the dirt and then putting the house together on a shoestring. One of my best options is the geodetic foundation which allows for spectacular ventilation even with a skirt and  self adjusts for shifting soils. Or can be if I buy that particular option. It's not that hard to just check the torch on each screw jack tho so self adjusts for shifting soils. Or can be if I buy that particular option. It's not that hard to just check the torch on each screw jack tho so  , that and it'll help keep me fit LOL , that and it'll help keep me fit LOL
My take is any disturbance of the soil is detrimental to the sight. I can preserve the environment best with techniques that don't require any heavy equipment. And it's cheaper.
There's nothing in a geodetic foundation I can't carry by hand.
Your grey water system would be interesting to see. Once again dependent on a soils report but, I've no idea what Nova required for that system so 
Again I appreciate the detail.
|
|
gcrank1
Member
|
# Posted: 6 Jan 2023 08:57pm
Reply
Ive just finished reading all 5 pages of your build, Steve; don't believe Ive seen it before. Great Stuff!
Almost got me thinking Id be ahead of the game if my prev owner designed and built shack would burn down and I could start over, lol.
Or maybe I should just start on the new cabin and eventually turn the existing one into to 'shed'......
A person could do Faarrr worse than follow in your footsteps.
|
|
Ominous Ann
Member
|
# Posted: 7 Jan 2023 01:25pm
Reply
Steve's thread is awesome I read the whole thing too.
Really liked the grey water system. I'll def be using that general plan. Small distribution tank and 100' of perforated pipe with cover in a gravel bed. I can do that with a ditch witch and very little disturbance to the site.
Oh and I forgot to post a photo of a geodetic foundation. It's basically a scaffolding and some screw jacks but a little more beefy. Costs about $10,000 depending on the size. Mine at <500' will cost maybe $6500. If I go that route
|
|
gcrank1
Member
|
# Posted: 7 Jan 2023 04:16pm
Reply
Fwiw, Ive been interested in small scale wind plants early '80. I certainly dont know everything about them, maybe at best only a little, but Ive read about the different types and products and accounts through the years of real world results. My conclusion thus far is that I dont recall anyone saying they got anywhere near the output they anticipated. Iirc the output ratings are at wind speeds/turbine speeds not often achieved near earth for any length of time except in storms and they werent near high enough unless they were on some high altitude very exposed location. Maintenance is tough, they are mechanically intensive. Folks who have 'done it' would like to have it work, and they are reluctant to give up on it because they put so much into it, but eventually most do.
Cheap they arent and if they are cheap they are junk.
Too much work and expense for little to no real meaningful output; ie, a hole to throw money and time into when there is sooo much else to do at an offgrid place.
So Ive given up on the concept.
What always does work is:
A tight, efficient build, incorporate passive solar and mass to your advantage, min./conserve elec as much as is practical and possible and live conscientiously and smart.
|
|
Ominous Ann
Member
|
# Posted: 7 Jan 2023 05:06pm
Reply
Lazard is likely the worlds leading economics and investment analytics org out there. So when they report on the value of wind and it's bottom line, I just can't set that aside for the few folks who tried to DIY a system and had if fail.
Wind is the other third of the trifecta, solar, geothermal and wind. I can't imagine a small cabin needing all three so I'm just thinking wind and solar. One of the two will most likely always be working.
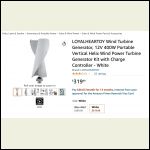
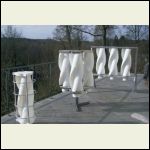
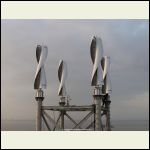
The VAWT types are cheap, easy and install fast without a mast. Rooftop works, storage shed roof, anywhere they're not an eye sore with a clear shot a the wind. I'm a fan of redundancy so although it's less efficient, two or three smaller units IMHO is better than one big eyesore.
And there's a ton of variations on the theme for various configurations. At a couple hundred bucks each, it's a pretty easy decision.
Screen_Shot_202301.png
| 
Screen_Shot_202301.png
| 
headerimage.jpg
| 
23LlOOPXGmhyWYo8IRGq.jpg
|
|
|
Ominous Ann
Member
|
# Posted: 7 Jan 2023 07:41pm
Reply
Almost forgot the levelized unsubsidized analysis of energy costs per source by Lazard.
IMHO spending less on a diversified system is better than spending more on a single source system with less consistency.
|
|
gcrank1
Member
|
# Posted: 7 Jan 2023 08:39pm
Reply
Good luck if you go that way. Please keep us updated on the results 
|
|
Aklogcabin
Member
|
# Posted: 8 Jan 2023 11:32am
Reply
Welcome Ominous Ann. To the forum and cabin life. My beautiful wife n me built a 16x24, 3 sided log cabin. On 20 acres of remote land. We homesteaded ,did 10' walls with 2 floors. Top porch has a little deck, great for morning coffee. Really nice to have. the extra space. With the wood heat, a few coleman lanterns, couple 12v car batteries for led lights. 2500w duel fuel generator to charge the batteries every couple days. We may use 50 gallons of gasoline per year. We freight it in during winter. For us it's perfect.
My beautiful wife is handicapped n can't walk much. So I installed an Incinolet incinerator toilet. Gets -25 n colder often. We will also install a honey bucket next to the Incinolet with outside access. And use an outside incinerator to burn. Similar to what remote biologists use. Your probably familiar. Non burnables get hauled out. Very efficient for the choices I have. We happen to be building a new home. I've done a ton of insulating research. After discussing my thoughts with a technician that specializes in building energy efficient homes. With 40 some years experience building all around AK.
Ended up with this. Frost protected shallow foundation, what works best for hydronic heating. Best value. Used the plans from the University of AK, cold weather research center. Our inspector informed us for our location i need perimeter foundation. Code is 18" deep x20" wide. I did 20" x 24" wide, 4 rows of 5/8" rebar. 12" permeable compacted gravel, D-1, 2 layers of r-10 pinkboard for r-20 under slab. 4" cement in the field. 6x6 sheets of wire mesh. 4"× 20" pinkboard around outside perimeter. , 2" pinkboard extending 4' for wings to protect against frost creep.
The hydronic tubing is stapled to the foam before the pour. I put ours 8" on center. 4" oc over the outer perimeter foundation. Toyo boiler will heat the water also. We will Install a solar hot water bank on the roof for in the summer. Back up heat will be a Kuma classic fuel oil drip stove in the living room n generator.
Walls get interesting. 1/2" cdx plywood over 2x6 studs, 16"oc. 5-1/2" rockwool fire n sound insulation r-20. 6 mil. visqueen vapor barrier. Black acustic caulk sealing all corners. Standard build around here. Extra care to insure no air leaks.
2" pinkboard over the vapor barrier. 1x3 lathe installed in 5 horizontal rows, top, bottom 3 in middle. Then 1x4s installed 16" oc installed vertically on the studs. Then chanel created will hold the electrical n water, utility needs. Sheetrock.
The lid will have 20"-22" of blown in cellulose insulation, near r-65-70. Cold attic, metal roof. House has 6' overhang on sides. Keeps drip line away from the house. The overhang is open inside allows the mix air for the cold climate attic and will create an even air flow to the ridge vent. 150-1 fresh air mix venting. We will collect water with gutters n water our garden. Terraced beds. Automatic water system. We make our own composted rabbit furtalizer, 4 meat rabbits that can produce 300 pounds of meat, hormone n steroid free.
Rainwall is tyvex that is over cdx. 1x4 vertical nailners, fiber cement siding.
This is our home and I have access to heavy equipment. We cleared n excavated. Septic n water lines. 128' water well. Great water. All utilities burried. Saved a lot as was blessed to learn these skills after a few years of ojt. Saves money, we try to do everything. And I enjoy it. Teaching our kids.
Kinda long in the tooth but there is always questions about foundation n insulation. Hopefully this helps some folks.
This should be a very energy efficient home. Beautiful wife has already purchased new energy efficient appliances after much research on quality.
Now all I have to do is finish it, oofda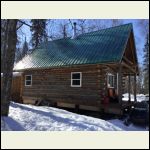
West side
| 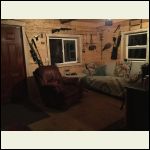
Living room
| 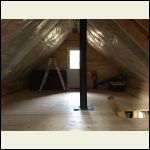
Upstairs
| 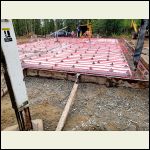
Foundation
|
|
|
Ominous Ann
Member
|
# Posted: 8 Jan 2023 03:18pm
Reply
D logs are easy to put together  I've always liked those. I've always liked those.
|
|
NovaDC
Member
|
# Posted: 25 Jan 2023 03:38pm
Reply
I see this thread is a couple of weeks old now, but I've just joined so thought I would reply anyway seeing as we are here in NS.
Just let me know if you have any questions on areas and some permit stuff - we are just going through all that at the moment.
For us, we were advised to go with helical screw piles as the soil where were are has a lot of clay. Probably not the cheapest but I hear good things - not much excavation required and no concrete.
|
|
medic149
Member
|
# Posted: 1 Sep 2023 06:25pm
Reply
Steve_S
Hi Steve,
I am installing a grey water system currently and would like to diver uring from our Nature's Head toilet into the grey water system. My one concern is and odor that may come back up the pipe from the grey water system to the toilet. Have you had that issue at all?
I was going to put a regular P trap under the kitchen sink to prevent back odor as well, but didn't think a P trap for the urine would be a good idea.
Thanks!
Andy
|
|
Brettny
Member
|
# Posted: 2 Sep 2023 03:20pm
Reply
I have a P trap after my urine diverter on my composting toilet. I dont get much smell. I do dump some water down there after a weekend.
|
|
Steve_S
Member
|
# Posted: 2 Sep 2023 04:00pm - Edited by: Steve_S
Reply
My setup is as follows:
1x Urinal which has a conventional P-Trap with a bottom drain plug. A screen is required and even so there can be mineral buildup that needs to be cleared, hence the plug. * With regular maintenance & cleaning never an issue.
WePee Urine Diverter which is part of my sawdust composting toilet is connected to a HepVo Waterless P-Trap https://hepvo.com/
We-Pee: https://we-pee.com/
* These work, made of hard plastic BUT they are not that durable and can crack easily, especially if frozen. Even over tightening the hose clamp can crack them easily.
The kitchen, bathroom sinks have regular P-Traps. The shower/Tub also uses a HepVo Waterless trap due to clearance. All of that runs into a 1-1/2" ABS pipe which goes outside to a Filter Box prior to going to a 50Gal DryTrank via 3" pipe.
I am now replacing the Sawdust Toilet setup with a Sparette Tiny Waterless Toilet with Diverter that will use my existing plumbing & air vent. These are far more FEMALE FRIENDLY resulting in less oopsies.
HepVo Waterless P-Trap LESSONS LEARNED !
These are amazingly good, no doubt about it BUT there is a gotcha if using these with any Urine Diverter, you MUST flush 2 cups of Hot Water down the P-Trap once a week to prevent Uric Scale which is built up from the Calcium & Proteins - Its NASTY when it get's thick & hard.
Aso if using a Urinal, a couple of drops of dish soap once a week into the P-Trap after flushing it, and letting it sit overnight also works a treat to keep buildup from happening.
Some of the few things rarely chatted about in forums.. people and icky subjects,,, giggle giggle
|
|
Brettny
Member
|
# Posted: 3 Sep 2023 07:46am
Reply
I also have a wepee diverter. I built mine to drop into a 1.5in pvc trap. It's not physically connected to anything.
|
|
Ellercamy
Member
|
# Posted: 21 Mar 2024 08:38am
Reply
Nate,
When we talk about "super insulation," it generally refers to doubling the standard insulation levels. However, I'm contemplating aiming for an increase of about 50% more than usual. Regarding windows, that's an area I'm quite comfortable with. I owned a shop for many years, focusing on the historic restoration of windows, and I've tackled some complex projects during that time. Additionally, I have connections at a plant that manufactures insulated glass, which gives me a bit of an advantage when it comes to sourcing materials.
As for slabs, I'm aware they can significantly contribute to heat loss. I haven't made a final decision on that front yet.
|
|
|

