|
| Author |
Message |
willywilly2020
Member
|
# Posted: 4 Jan 2021 03:30pm
Reply
Greetings friends. Somber news from the north cascades. I've rent a hole in my chimney flashing due to heavy snowload followed by heavy rain.
Details:
my stove pipe sits about 4ft below the peak of my roof (cantilevered shed roof). Foolishly, I didn't put supports or diverter in before winter.
In the past week, there's been about 4 ft of snow (probably 6 total since beginning of winter), followed by heavy rain. Right before I was about the leave the cabin, the snow pulled the pipe askew and tore a hole on the high side of my pipe flashing on my metal roof.
I got my booty up there, removed the dragging snow and all the snow from above/around the pipe. Righted the stove pipe to be vertical again, and wrapped the hole in plastic best I could.
I know I need to get something in soon to (1) make sure my chimney doesn't tear off and (2) make sure I don't have any leaks this winter. Would also LOVE to use my woodstove.
Does anyone have any advice for how to repair my flashing/install diverter in the snow? Mostly concerned with trying to repair the flashing in the wet/cold winter and making sure I don't leave holes in my roof.
Lastly, it's a 5 hr drive and a 2hr cross country ski in to the cabin. Can haul anything in with my sled, but keep that in mind!
Thanks y'all. Sorry I didn't take any pictures, too concerned with keeping myself from falling off the roof.
|
|
zorro
Member
|
# Posted: 4 Jan 2021 04:14pm
Reply
I cant quite picture the damage in my head - but i have used this stuff before and it works pretty well
not sure if it will be subject to any levels of heat at the flashing point;
https://www.flexsealproducts.com/product/flex-paste/?gclid=EAIaIQobChMIodyb95iD7gIVEb 7ACh1H6QMQEAAYASAAEgLjB_D_BwE
Flex Seal Paste
|
|
willywilly2020
Member
|
# Posted: 4 Jan 2021 07:01pm
Reply
Alas, the flashing is not sealable (jagged, 4x4in rent on the high side). Question I have is do I just install another flashing on top of it, or take it off first
|
|
Brettny
Member
|
# Posted: 4 Jan 2021 07:04pm
Reply
Get a new section of metal roofing that will go below the rip. S cut it like a U around the chimney flashing and overlap the lower piece. Put a new roof boot around the chimney and use Henry roof flashing cement (the gray stuff). It comes in a cawlk tube.
Your chimney should be supported by brackets and not the flashing or roof metal. Did the supports break?
|
|
Brettny
Member
|
# Posted: 4 Jan 2021 07:08pm
Reply
I should note that metal studs are cheap and can touch your chimney. There pretty easy to work with with just a set of tin snips.
|
|
willywilly2020
Member
|
# Posted: 6 Jan 2021 07:24pm
Reply
Cool, thanks all. Headed back out this weekend with a cricket, supports, and some heavy duty tape. Going to patch the flashing in the snow, and replace in the spring/summer when it's dry.
|
|
toyota_mdt_tech
Member
|
# Posted: 7 Jan 2021 08:06am - Edited by: toyota_mdt_tech
Reply
You can add a cleat, also known as snow jacks that will keep the snow from sliding around the stove pipe. I had a pro install mine and he makes these metal sliding braces out of the bigger EMT pipe. He flattens one end on 2 pipes, one pipe slides into the other, then drills a hole and welds on large but and then supports chimney from top of pipe to near to of roof, the sliding pipe adjust to length and he locks it with the bolt.
I asked him if the snow could damage the pipe and he said he has never had one fail, this was done quite some time ago, still holding strong.
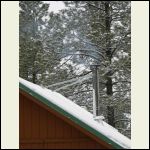
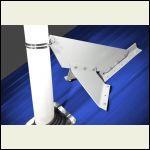
My roof is steep, so I dont get too deep of a snowbuilt up, but a metal gusset made from AL metal, sharpened and turned on its side, then attached to pipe and roof will act as a knife and cut the sliding snow just ahead of the pipe. I have a picture below, this one is shown on a vent, same principal, but for pipe. Can secure on pipe with a metal band, dont drill a hole in the pipe.
Cleats will hold snow up there, be nice to have it slide away. So there is 3 options.
Pipe and gussets
| 
Snow splitter
|  |  |
|
|
Brettny
Member
|
# Posted: 7 Jan 2021 08:30am
Reply
The pipe and gusset is usualy called a roof support and needed when your pipe is higher than 3ft off the roof. It dosnt help with keeping it on the roof, just supports anything sticking out. The snow splitter sounds like what he needs.
Our plan is to put the chimney near the peak on our cabin. Avoiding both of these.
|
|
|
toyota_mdt_tech
Member
|
# Posted: 7 Jan 2021 03:52pm
Reply
Quoting: Brettny The pipe and gusset is usualy called a roof support and needed when your pipe is higher than 3ft off the roof.
Actually, it does. I just posted a picture of mine, never missed a beat. I asked the installer if that would do it, he said he has never lost a pipe with this. I do not have the snow slicer, just the support pipe. Its been 10 yrs and I get deep snows. The support pipe is extrementy heavy pipe. I said EMT, but this is not the thinwall, this is the stuff that looks like water pipe, threaded on ends etc. He cuts the threaded part off and mashed in press.
|
|
Brettny
Member
|
# Posted: 7 Jan 2021 04:55pm
Reply
You dont have a bracket at the roof rafter level?
|
|
toyota_mdt_tech
Member
|
# Posted: 7 Jan 2021 05:17pm - Edited by: toyota_mdt_tech
Reply
Quoting: Brettny You dont have a bracket at the roof rafter level?
Not sure exactly what you mean.
No bracket on roof, just the 2 braces. I think that was what you asked?
If so, yes, I didnt think it was enough either, that is why I questioned the installer, he was the owner of the biz and been in biz for years in big snow country.
After doing research, seeing crickets, wedges etc. In fact, I even bought one of the slicers. He said I wont need it and said he has never seen his system fail.
I went with it and so far, all solid. No dent in pipe, the flashing or skirt as I call it at the base of the pipe (little ring shown in picture with some snow on it), you can see snow has pushed it down on the upside, but its a full circle and hasn't moved. Pipe itself is perfect.
|
|
snobdds
Member
|
# Posted: 7 Jan 2021 06:26pm
Reply
Is the flashing the silicone boot or some sort of metal?
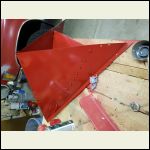
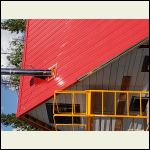
I made this snow diverter and we too get over 15 feet of snow a winter. I had to over build it to make sure I never had to do this job again.
20180821_175521.jpg
| 
20180826_125229.jpg
|  |  |
|
|
toyota_mdt_tech
Member
|
# Posted: 7 Jan 2021 09:48pm
Reply
Quoting: snobdds Is the flashing the silicone boot or some sort of metal?
I have the typical boot, its metal looking, formable to contour the roof profile. Maybe silicone where is meets the pipe. I do have a collar or flashing over the pipe just above the boot. Its sealed in place. So when water runs down pipe, it his this collar or skirt and runs it outward away from pipe seal. The collar or skirt is the part holding the snow outward at the base of the pipe on the low side of the roof. Wish i had a picture of it with no snow.
snobdds, I have seen many homes around my cabin that uses roofing made into a wedge, calls them crickets.
|
|
Brettny
Member
|
# Posted: 8 Jan 2021 08:05am
Reply
Quoting: toyota_mdt_tech Not sure exactly what you mean. No bracket on roof, just the 2 braces. I think that was what you asked? If so, yes, I didnt think it was enough either, that is why I questioned the installer, he was the owner of the biz and been in biz for years in big snow country. After doing research, seeing crickets, wedges etc. In fact, I even bought one of the slicers. He said I wont need it and said he has never seen his system fail. I went with it and so far, all solid. No dent in pipe, the flashing or skirt as I call it at the base of the pipe (little ring shown in picture with some snow on it), you can see snow has pushed it down on the upside, but its a full circle and hasn't moved. Pipe itself is perfect.
Some bracket like this. Or some cathedral ceiling supports also serve the same function. If you dont have one of these the whole chimney may be just supported by the stove.
|
|
toyota_mdt_tech
Member
|
# Posted: 8 Jan 2021 08:24am - Edited by: toyota_mdt_tech
Reply
Quoting: Brettny Some bracket like this. Or some cathedral ceiling supports also serve the same function. If you dont have one of these the whole chimney may be just supported by the stove.
No, its supported above, I have a thing they installed called a support box. I can remove my pipe from stove to ceiling and the chimney from ceiling up stays put. Support box is at ceiling, but from there to top is that special pipe, stainless, double wall etc.
|
|
willywilly2020
Member
|
# Posted: 11 Jan 2021 01:27pm
Reply
Update: small woman skied into a cabin with a snow splitter, roof supports, and new flashing boot in tow (discovered the damage was worse than I expected and couldn't patch with duct tape). I'm sure I was a sight.
Installing better supports: easy as pie
Installing snow splitter: ended up not doing this, I was not pleased with the splitter when I opened the package at the cabin. It was both wildly heavy gauge and poorly engineered (imo). Plus it would have a difficult install on gauged metal roofing. I got this one: https://www.northlineexpress.com/6-duratech-snow-splitter-6dt-sp-7095.html?utm_source =googlepepla&utm_medium=adwords&id=&gclid=CjwKCAiAi_D_BRApEiwASslbJwSdLnY3BECSgrGS6cG H__oYRlLhBxBzOiU3d-I1_XLhkk_jTT_EdBoC0GEQAvD_BwE
Installing the new flashing boot: this took a minute. The new boot was a slightly different footprint (didn't have the same one in stock) and so I didn't want to take out the old one and leave my screw holes (albeit plugged with metal flashing caulk) exposed, and I didn't think I could reasonably line up all the screws. So, I did the following: (1) used tin snips to cut off the damaged portion of the metal boot (this was everything except the flat plate), (2) used tin snips to cut the plate/footprint of the new metal boot down to be just inside the screws of the old plate (3) used 1.5" screws and A+ flashing caulk to screw it in through the previous plate/flashing and into the roof.
Generally, I feel pleased with how it turned out and comfortable I'm in a good place for now. I'm getting a snow brace/custom cricket fabricated by a sheet metal shop so I can get exactly what I want. And in the spring I'll pop back up there and make sure that metal caulk is doing alright after setting in the cold.
Sorry, didn't take any photos - too busy trying not to fall off the roof or drop any tools. I'll snap some next time I can see it under the snow!
|
|
gcrank1
Member
|
# Posted: 11 Jan 2021 01:49pm
Reply
You make it sound sorta easy/not so bad....but Im sure it was quite a job especially in the winter on a roof.
As me Great G-Mom used to say,"you got gumption'!
|
|
|

