|
| Author |
Message |
Grizzlyman
Member
|
# Posted: 7 Jun 2023 10:40am - Edited by: Grizzlyman
Reply
Place is coming along nicely. Almost entirely done with the cabin. See kitchen below. dimensions of kitchen are 10X11 and bedroom next to it are 10X11 as well.
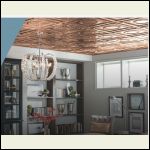
W hadn't originally planned it, but were thinking of doing a nail-up tin ceiling in the kitchen and bedroom- Probably copper or shiny bronze. Anyone work with these before? Tiles are 24"X 24" tin.
I did a little research on installation. Nails are recommended every 6" around perimeter. and it looks like there are two recommended options:
1. Plywood over ceiling joists, then nail to plywood.
2. Furring strips every 6" over joists.
I don't really feel like hauling 10 sheets of 1/2" plywood across lake and up the stairs to the cabin. and of course installation on ceiling would be a pain as well.
I had also finished the trim around the top of the walls already, so covering a 1/2" of that would look a little off.
Furring strips seem like an inferior option and would lose the space as well...
I thought of a 3rd installation method that doesn't lose any ceiling space.
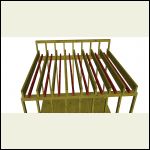
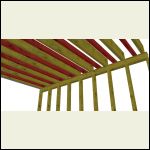
I would install 2X4s in between in the current joists. This means I'll have every 8" on center for the tiles. I would use 12' 2X4's so I could support right on the top plate of the load bearing middle wall. See photo below- Red in photo would be the 2X4's I would insert. I would block them horizontally as well against the existing joists.
This would force my nails to be every 8" instead of 6" on the tile perimeter- which is the only problem I'd see... That and possibly some waviness from the joists & 2X4's not being perfectly flush...ostensibly plywood would help smooth that out.
Whaddya think? Is option 3 a good option? Or do I need to bite the bullet with plywood.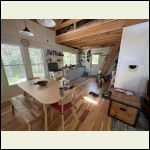
AF6D8C85FF8849338.jpeg
| 
ceiling_tile.png
| 
Kitchen_w_2x4.png
| 
kitcheninside.png
|
|
|
pabear89
Member
|
# Posted: 7 Jun 2023 12:12pm - Edited by: pabear89
Reply
For ease of installing the tin work, I would do the work hauling up plywood for the ceiling base. no worries on where your going to be nailing the tin up.
p.s. You could use 1/4 in plywood for lighter weight to carry up to cabin.
|
|
ICC
Member
|
# Posted: 7 Jun 2023 03:03pm
Reply
I would be concerned with the alignment of the unsupported edgesb during and after installation.
Not sure if 1/4" would be a good base to nail to.
|
|
Grizzlyman
Member
|
# Posted: 7 Jun 2023 10:32pm
Reply
ICC
Was thinking the same thing about the edges…. But also wonder that if furring strips work- I think this would be the same thing. Only difference would be 4 nails on the unsupported side vs 5. Never worked with it so I don’t know.
|
|
ICC
Member
|
# Posted: 7 Jun 2023 11:01pm
Reply
Quoting: Grizzlyman Never worked with it
Same here....
|
|
Brettny
Member
|
# Posted: 8 Jun 2023 06:09am
Reply
Dont they make stick up pannels like this? I believe there used as kitchen back splashes alot. Some are plastic I believe but you wouldnt know looking at them.
|
|
Grizzlyman
Member
|
# Posted: 8 Jun 2023 07:34am
Reply
I believe the stick up are plastic… but that would definitely require plywood or maybe drywall… a sheet of some sort.
|
|
gcrank1
Member
|
# Posted: 8 Jun 2023 07:57am
Reply
Think they might work well (and be far cheaper than the stamped metal) on 1/4" luan underlayment up top.
|
|
|
Cedar Fever
Member
|
# Posted: 8 Jun 2023 01:39pm
Reply
This is a cool idea for a cabin.
|
|
Grizzlyman
Member
|
# Posted: 30 Mar 2025 01:56pm - Edited by: Grizzlyman
Reply
Hey all. Been a while since this thread but I’m moving forward with this. Covering the kitchen and bedroom ceiling with copper tin. I was concerned about giving mice a place to live in the ceiling with a concealed space but we have had very little mouse activity in 4-5 years of having the cabin- so not too concerned.
I’m going to go the plywood/osb route- probably osb. Should make the tin that much easier to install. Not Generally a fan of osb but for this it should be good. 3/8 would be ideal but I don’t believe that’s a thing they make- probably have to be 1/2 (or 7/16 I guess).
I’ll post some progress as it’s getting done. We still have 2-3 weeks until ice-out before the cabin is accessible. This will be my project 1st thing this spring.
See picture- do you think it would make sense to wrap the ceiling tin to the front of the loft floor joists as well? As you can see that’s just an exposed joist which will look out of place once the ceiling is in place. The other option would be just to paint it white to match the wall.
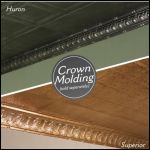
And also do you think the crown molding should be added? Right now I have a board/batten on the walls so the 1/2” from the osb will partially obscure the horizontal top batten as is. The other option is to take the top horizontal top Batten off, cut the verticals battens shorter in place with Probably an oscillating tool and then put the horizontal piece back in. That will be tough to get tight gaps between the horizontal and vertical pieces. But if using crown moulding I will have to cut the vertical battens either way to get it snug to the wall- that might look a little odd with the 3/8” thick vertical battens butted up to the horizontal crown molding.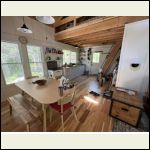
IMG_8341.jpeg
| 
IMG_8343.jpeg
|  |  |
|
|
Brettny
Member
|
# Posted: 31 Mar 2025 07:07am
Reply
A few years ago I was attaching vinyl siding to 7/16 OSB and not trying to hit the studs with the roof nails. A few pieces later I had to remove one and could pull it out with my fingers. So I'm not sure if OSB is the correct backing for something like your putting up if your not going to hit studs or glue it down.
|
|
Grizzlyman
Member
|
# Posted: 31 Mar 2025 11:13am - Edited by: Grizzlyman
Reply
Brettny
Good call.
Actually after doing some more research since I posted this I think I settled on 3/8 plywood. Should save some weight carrying up the bluff and should be much easier to get nails going with a thin trim nail - I think Plywood will be easier to nail into.
|
|
gcrank1
Member
|
# Posted: 31 Mar 2025 03:33pm
Reply
+1 on that
Ime the density of the 'wafer board' is inconsistent due to hard/soft chips and the glue to bind. Then there are voids too, but even cheaper (affordable) plywood can have those.
Fwiw, I had good luck with the luan 'underlayment' as a base for a number of projects.
|
|
Brettny
Member
|
# Posted: 1 Apr 2025 05:40am
Reply
I wouldnt hesitate to use luan for this either. I have it at the bottom of my floor joists only cabin, its weather protected and painted with behr deck over. My cabin dont have a skirt.
|
|
Grizzlyman
Member
|
# Posted: 11 May 2025 05:31pm - Edited by: Grizzlyman
Reply
Well I went for it and started this project. I was up at the cabin for the first time this year. The ice just went off the lake on Tuesday.
Goal was to get the ceiling done.
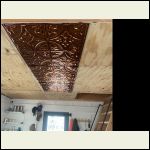
Went fairly well once I figured it out. Unfortunately I did not order enough tiles- I don’t know what I was thinking but I only ordered about half of what I needed. I will have to wait about 3 weeks now for the rest on special order but looks good thus far.
ThePlywood went up fairly quickly.
Nailing the tiles was more difficult than anticipated.
The tiles were thicker than I anticipated and harder to pierce- the nails should have been sharper frankly. It was difficult enough holding them up and lining them up only to have the nail not bounce out. That plus the 3/8 plywood made nailing kind of a b. The 3/8 just wasn’t thick enough to hold its own between the joists so it would give quite a bit when trying to drive the small nail through the tile and the nail would bounce of. I did end up needing to pre drill holes in the softer spaces between joists.
1/2 plywood may have been better, but that would have just been that much heavier and harder to put on the ceiling.
That plus standing on a step stool nailing a small nail above your head while holding a tile up all day made it a bit of a pain
I figured it out finally after about 5 tiles. I used a thin piece of plywood as a holder to hold up one end of the 2x2 tile. I put it diagonally across the far corner of the tile and slid the tile in. This made it much easier to line the tiles up and hold in place. Once I figured that out it was steady progress.
It only took about 3 hours to nail up 30 tiles. Now that I have the process down, once I get the rest of the tiles I will just fill them in when I can.
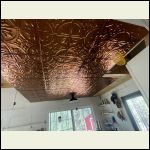
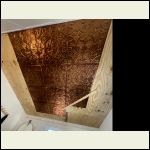
Kitchen and bedroom ceiling below.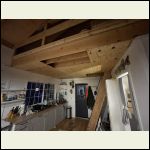
IMG_8737.jpeg
| 
IMG_8751.jpeg
| 
IMG_8760.jpeg
| 
IMG_8759.jpeg
|
|
|
Nobadays
Member
|
# Posted: 11 May 2025 09:51pm
Reply
Nice!
|
|
gcrank1
Member
|
# Posted: 12 May 2025 07:38am
Reply
Lookin pretty 'up town' 
|
|
paulz
Member
|
# Posted: 12 May 2025 09:04am - Edited by: paulz
Reply
Looking good. What is the make up of the tiles exactly? Will they corrode?
|
|
Grizzlyman
Member
|
# Posted: 12 May 2025 09:36am
Reply
paulz
29 gauge tin plated steel. Will they corrode? Idk. Probably at some point- but they’re interior and not going to get wet so I don’t think anytime in the near future.
|
|
paulz
Member
|
# Posted: 12 May 2025 10:05am
Reply
Ok, no clear coating or anything like that. Actually at my old cabin a bit of tarnish might look ok, match the rest of the dump. 
|
|
Grizzlyman
Member
|
# Posted: 22 Jun 2025 08:31pm - Edited by: Grizzlyman
Reply
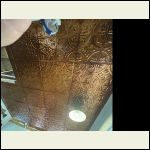
Finally got my order in and finished up the ceiling this weekend. Took about another 3-4 hours to finish the rest up. Like with anything cutting and fitting the edges took the most time.
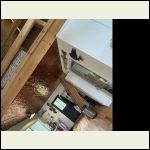
VERY happy with the result. Still need to trim the edges. Am going to use a 1/4”or so square piece of shoe moulding painted white to match the walls. I’ll use a white square corner moulding to do around the hole by the ladder and the exposed edge where the ceiling ends by the edge of the loft.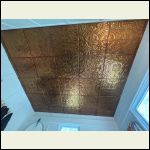
IMG_9259.jpeg
| 
IMG_9260.jpeg
| 
IMG_9262.jpeg
|  |
|
|
paulz
Member
|
# Posted: 23 Jun 2025 10:38am
Reply
Wow, nicely done!
|
|
jsahara24
Member
|
# Posted: 23 Jun 2025 12:34pm
Reply
Very nice!
|
|
Grizzlyman
Member
|
# Posted: 5 Jul 2025 09:51am
Reply
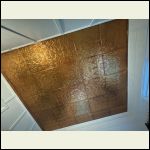
I’ll wrap a bow on this. White trim done. I love it against the walls, and the edge of the loft-but I don’t love the trim around the loft opening. I Don’t know why… it looks out of place or off to me for some reason- but it’s going to stay that way- haha- I ain’t changing it! lol.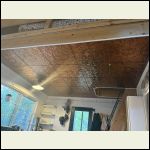
IMG_9316.jpeg
| 
IMG_9314.jpeg
|  |  |
|
|
|

