|
| Author |
Message |
toyota_mdt_tech
Member
|
# Posted: 22 Jul 2011 04:20pm
Reply
OK, easy on the floor, bang it down to the floor sheating. But as for top, I understand if its going opposite direction as the ceiling joist, but if its going the same direction as the ceiling joist and you need it supported and its between the 16" span. Do you just install blocking between the joist flush at the bottom and attatch the wall to the blocking?
|
|
MtnDon
Member
|
# Posted: 22 Jul 2011 06:22pm
Reply
You answered your question. 
|
|
toyota_mdt_tech
Member
|
# Posted: 22 Jul 2011 07:23pm
Reply
Getting pretty good, aint i Don! :D
At work, we hired an out of work framer. I just found out today what he did prior. Man, I have been grilling him. He answered my staggered floor joist question too.
|
|
Borrego
Member
|
# Posted: 22 Jul 2011 09:38pm
Reply
Darn, you won't need us any more then :-(
|
|
toyota_mdt_tech
Member
|
# Posted: 23 Jul 2011 12:28am
Reply
No way would I bail on you guys. As soon as the economy picks up (when our fearless leaded loses re-election) he will be back building homes and gone, but you guys I know will still be here. :D
|
|
Erins#1Mom
|
# Posted: 23 Jul 2011 09:05am
Reply
toyman,
pictures?
|
|
toyota_mdt_tech
Member
|
# Posted: 23 Jul 2011 04:06pm - Edited by: toyota_mdt_tech
Reply
Quoting: Erins#1Mom toyman, pictures?
Erins Mon, I dont have pictures of my next project, as its not been started. I do have pictures of the cabin (will be my final home eventually) and I did already build a smaller cabin, I have posted pictures of it already. I will post pictures of my next project, I have modified the original floor plan, ie removing some interior stud walls, moved the door, extended the porch and probably stretch it to 32 feet instead of 30 feet (I like multiples of 4 and 8 feet) and I moved the fridge in the corner, made for a longer counter space and added another window in the kitchen. Give me your input. I will post another reply after this one with my current project which is about fully completed except flooring. (going slate tile)
Peniac.
| 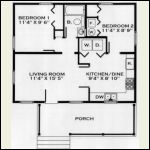
Original floor plan
| 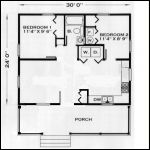
My modified floor plan
|  |
|
|
toyota_mdt_tech
Member
|
# Posted: 23 Jul 2011 04:12pm - Edited by: toyota_mdt_tech
Reply
Quoting: Erins#1Mom toyman, pictures?
This is what I just finished. Started it in 08, finished it this May. I still have flooring and a kitchen sink to do. There is no plumbing in it now, so I wont add the sink till later. I bought the plans from the same place as my next project. Along the way, I have purchased every nail gun one would need, ie framing, siding, fencing/pallet, finish, brad nailer, crown stapler, roofing nailer plus a pancake compressor and it runs on my little Honda 2000 generator. I would never tackle a cabin without full air nailers. Picked up some lazer squares, lazer levels, I have used this as an excuse to by loads of tools. Just makes life so much easier. I have enough gear to go into business as a building contractor now. :D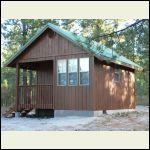
Cabin (16X18, 236 sq feet plus porch)
| 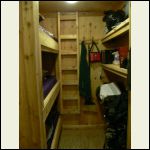
Bunkroom
| 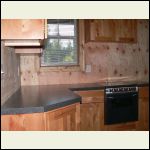
Kitchen
| 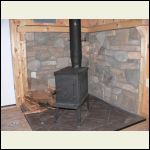
Woodstove/stone work
|
|
|
|
Borrego
Member
|
# Posted: 23 Jul 2011 06:22pm
Reply
Quoting: toyota_mdt_tech Do you just install blocking between the joist flush at the bottom and attatch the wall to the blocking?
And of course, nail pieces of 2x6 on top of the top plate (after you stand the wall up) between your blocking for drywall backing....
|
|
toyota_mdt_tech
Member
|
# Posted: 23 Jul 2011 06:28pm
Reply
Quoting: Borrego And of course, nail pieces of 2x6 on top of the top plate (after you stand the wall up) between your blocking for drywall backing....
And corners where stud walls meet other stud walls...
|
|
Borrego
Member
|
# Posted: 23 Jul 2011 09:24pm
Reply
Quoting: toyota_mdt_tech And corners where stud walls meet other stud walls...
If ya frame the corners right, it'll be there already...
http://thegreensulators.com/b_california.php
|
|
PlicketyCat
Member
|
# Posted: 23 Jul 2011 10:43pm
Reply
Unless you're talking about your exterior gable end walls, any interior walls running with the joists but inside the joist bay can either be attached to blocking like you say... or only attached to the plates in the side walls via the end stud. Depends on how long the wall is, but I haven't had any issues with overly floppy interior walls when the assembly is nailed well to the floor and the side wall.
Of course, I normally just avoid these problems altogether by lining my interior walls up with the joists in my designs:)
|
|
PlicketyCat
Member
|
# Posted: 23 Jul 2011 10:57pm
Reply
Looking at the plans you posted, I'd venture to say that the only load bearing interior wall is the one between the bedrooms and the LR/Kitchen... any other walls that fall between the joists funky can be moved or removed as necessary to make construction easier. 16" oc the most you're going to gain or lose putting a wall inside a joist bay is 14". If you're really that tight on space somewhere, you can always turn the studs sideways and make your wall 1.5" deep instead of 3.5" if there aren't any pipes in that wall and you don't need to run electrics across the stud bays in that section.
|
|
toyota_mdt_tech
Member
|
# Posted: 24 Jul 2011 12:44pm
Reply
Quoting: PlicketyCat Of course, I normally just avoid these problems altogether by lining my interior walls up with the joists in my designs:)
It may be that way already. I have the plans, but havent looked at them that close as of yet. And I may and will make adjustments along that way as I build. I 'm still about 3 yrs out on a start date. I use white out and pencil in corrections before submitting them to the county.
|
|
PlicketyCat
Member
|
# Posted: 24 Jul 2011 04:35pm
Reply
They might be, but I did notice that some of the bought plans I looked at had some really weird things that would make construction a pain. Like a designer did the floor plan and they just had an architect/engineer draw up plans behind it without questioning/challenging the design decision. So many of those plans do not aim for maximum materials use and construction efficiency. Walls and doors and windows in awkward places, non-standard dimensions that make sheet goods a pain to work with... that sort of thing.
On one of my projects, I took my plans and blueprints to Kinko's and had them make several copies. Then I put plastic overlays on top so I could trace elements with markers and make multiple adjustments or different scenarios, using masking tape to cover "deletions". Once everything got finalized, I just took the appropriate overlays back in and had them copy off the paper versions for the permit office. Something like that might help you if you expect to make a lot of changes to a hardcopy set of plans so you don't end up with inches of whiteout and erasure holes ;)
|
|
toyota_mdt_tech
Member
|
# Posted: 26 Jul 2011 12:39am
Reply
You are right. They lay them out in a way there is lots of wasted wood. I did make lots of adjustments along the way on my first one and I think they overdesign them to meet codes in all areas, ie heavier snow loads etc. . I may extend the house out instead of all porch, maybe extend the kitchen and then only half the porch. But then I wonder about my longer ceiling rafters? Maybe either go bigger for the longer span, or a header above the opening into the extension, but it would make for a low area. I have plenty of time to tweak. This will be my permanent residence when I retire.
|
|
PlicketyCat
Member
|
# Posted: 26 Jul 2011 12:50am
Reply
You might change your load bearing and heating/cooling capacity extending your roof out with longer rafters, but if you only had an 8-10' opening in that wall from the kitchen out to a dining room/sun room setup you wouldn't necessarily need deeper rafters or a huge header over the gap. French doors or a fold-away glass wall would work great to make any necessary header disappear into the door frame and you could close the room off when you weren't using it while still getting lots of light.
|
|
|

