| << . 1 . 2 . |
| Author |
Message |
stickbowcrafter
Member
|
# Posted: 5 Apr 2014 07:38am
Reply
Good points Don. As said it is a learning experience so I did the rest of the rafters with the correct gussets. I'm going to sure up the one in the pic. No sense taking any chances. There are no permits needed for an ag building but there is no reason to be cutting corners in my haste to get it done.
-Brian
|
|
stickbowcrafter
Member
|
# Posted: 5 Apr 2014 09:33am
Reply
Thanks for the advice everyone. I put the proper gussets on and used nails instead of screws. As cheap as these things are to build, I'm gonna build a few extra and make it 16" on center instead of 24".

-Brian
|
|
Don_P
Member
|
# Posted: 5 Apr 2014 01:16pm
Reply
More details as you're fine tuning. As Mt Don said, watch your grain direction, the peak gusset has the correct grain orientation for max strength. Continuing on the max strength for the effort line, if the bottom of the gusset continues on till it hits the outside edge of the rafter, forming a full triangle rather than being clipped off, and if you get more nails in that extension, you've picked up some more strength. Many nails well patterned is a good thing, if they fully penetrate both plies and are clinched the nail is in double shear and locked, it picks up about 25% more capacity (now you know where the term "dead as a doornail" comes from, clinching the doornails through the Z battens)
|
|
MtnDon
Member
|
# Posted: 5 Apr 2014 03:27pm
Reply
Here's a link from the City of Whitehorse. It does not have a date but appears reasonably recent. Considering the units of measurement 80's or later I'd guess. Nice nail pattern on last page along with charts and other diagrams.
http://www.city.whitehorse.yk.ca/modules/showdocument.aspx?documentid=578
The number of nails may look like overkill but it's all a part of spreading out the loads over a larger area, making each point load smaller. Note the Whitehorse document makes no mention of glue at all (as glue use in the field is beyond the control of the engineer who did the calculations.
|
|
stickbowcrafter
Member
|
# Posted: 6 Apr 2014 09:34am
Reply
Great info & advice, thanks. Any installation tips? I've installed a lot of pre-engineered trusses over the years but never rafters like this. Assuming the same steps are involved but any tips would be appreciated.
-Brian
|
|
OwenChristensen
Member
|
# Posted: 6 Apr 2014 10:12pm
Reply
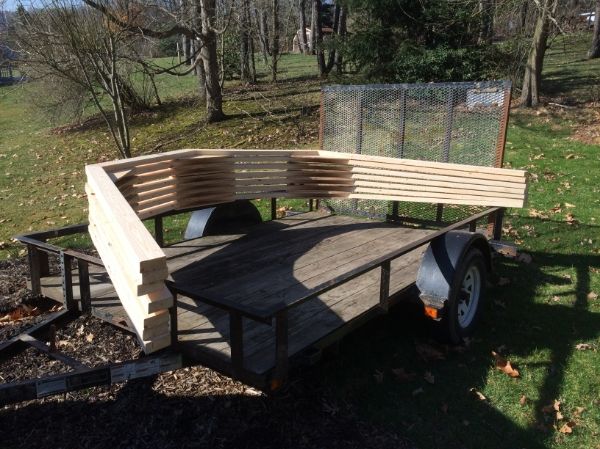
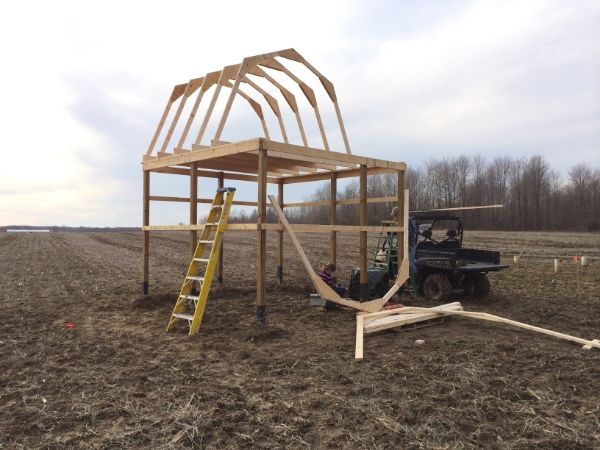
Here's some more pics.
|
|
stickbowcrafter
Member
|
# Posted: 7 Apr 2014 09:03pm
Reply
Thanks, things went pretty smooth yesterday.


-Brian
|
|
OwenChristensen
Member
|
# Posted: 7 Apr 2014 10:05pm
Reply
Ha ha Brian, you forgot to nip the floor joist corners off ahead of time. LOL. no big deal. It looks good. It must be a little shaky though. I always side my wall before I raise them. Much stiffer. Have fun!
Owen
|
|
|
stickbowcrafter
Member
|
# Posted: 8 Apr 2014 05:12am
Reply
Ha ha, hey I asked for installation tips. It's a pole building so it's pretty sturdy as is but yeah, siding the walls will really lock it together. I figured the overhang bump outs on the end would drop over the floor joist corners, that's why I left them. Oh well, thanks for the advice and input, was a great learning experience.
-Brian
|
|
old_smokey
Member
|
# Posted: 23 Jan 2024 05:36pm
Reply
razmichael
|
|
razmichael
Member
|
# Posted: 23 Jan 2024 05:49pm
Reply
Yes?
|
|
| << . 1 . 2 . |
