|
| Author |
Message |
rmak
Member
|
# Posted: 2 Apr 2014 07:00pm - Edited by: rmak
Reply
Hi folks! Back with another question. I will be starting to install my log cabin siding (8" lap joint).
I'm hoping to screw it on over the cabin walls using 3" stainless steel screws.
My big concern is the existing wall is not perfect. It's T & G treated
2 X 6 that has shrunk and warped a little over the years. I have been straightening where I can, but I know there might be gaps putting new over old, particularly on the west side where it gets the weather.
Should I caulk the top seam of every piece of new siding? I don't know if water might get behind the new siding and maybe eventually rot it out from behind.
I could also waterproof the backs of the siding before installing as well if that makes sense.
A buddy of mine who put some on a building where he works says just slap it on and it will be fine.
Thanks again in advance
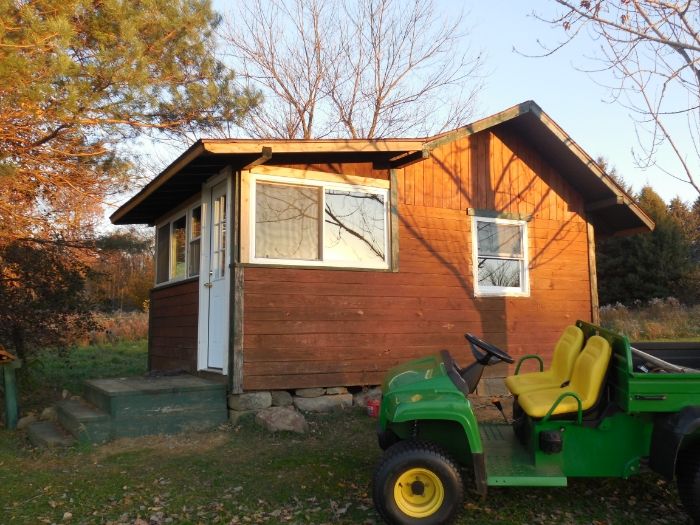
I'll add a photo of the cabin as is for reference.
|
|
MtnDon
Member
|
# Posted: 2 Apr 2014 08:58pm
Reply
Is this 2x material milled to look like logs? That is what I'm thinking.
I believe that attempting to install new siding over existing siding that is presenting an uneven surface may cause problems. If the surface is uneven I doubt that anyone can achieve a smooth water resistant installation of the new siding. I suppose the surface could be leveled with vertical furring strips shimmed to present a level application surface much like what is done with ceilings for drywall applications when there are issues with ceiling joist heights/levels. ???
It may be best to remove the old siding and install new building felt or house wrap. That could also make it easier to complete the installation around the windows and doors as well as ensure having a good weather resistive barrier on the walls under the siding.
If it was me I would probably remove the old siding, in part to verify that there was no water damage hidden, in part to ensure a smooth wall to apply the new stuff to. But then I'm the guy who knocked the old stucco off his house (tons of it) for the reasons above; level the surface and checking the integrity of the sheathing, as well as install foamboard insulation. Note; I had to repair some small areas of water damaged sheathing under the old stucco and building felt layer.
As for caulk on the horizontal lap joints, I don't think so. No proof to point to, but if there is a way for water to get behind the siding water will find a way. Caulk is not a permanent water proofing. That (water) BTW is one reason some install horizontal lap siding over vertical furring strips 16" OC. It provides a drainage plane for the water that will at some point get past the weather proofing.
|
|
bldginsp
Member
|
# Posted: 2 Apr 2014 10:49pm
Reply
Also, if there is not plywood under the present siding, removing it gives the opportunity to sheath with ply or osb, which will greatly strengthen the building and increase longevity.
|
|
rmak
Member
|
# Posted: 2 Apr 2014 10:49pm
Reply
Thanks, MtDon.
When I was in the planning stages I did find this series of project photos about using siding like mine on a shed. They didn't do anything to prepare the old siding.
Not arguing that it's right, just trying to get your and other's opinion.
http://www.merrimacloghomes.com/project_shed_inprog.htm
|
|
MtnDon
Member
|
# Posted: 3 Apr 2014 12:10am
Reply
The info on the website indicated they use a T&G joint between horizontal courses. Installed with the tongue up and water intruding from the face will run to the exterior. Is that the same way the siding you are planning on is made?
It probably won't work for this remodel, but a very nice method Don_P has used for securing this type of siding is to use screws from the backside, from the inside face of the wall sheathing into the back side of the milled 2x siding. Easy to use lots of screws, tightly secure the siding and with all fasteners hidden and away from the wet side of the wall.
To me it does seem like with the amount of effort in installing the new materials, not to mention the labor, it might be wise to remove the old to verify the condition of what is under the old siding and have a chance at correcting any deficiencies. But, that is just the way I look at things. That makes for more work right now, but might make a difference down the road. And there might not be any issues found under the old skin. We don't know at this point.
G/L
|
|
Don_P
Member
|
# Posted: 3 Apr 2014 07:54am
Reply
Sorry gotta get outta the house, some quick thoughts.
I do like to finish all sides prior to installing, a dip/finishing tray make of plywood caulked to a 2xframe to make a trough saves finish and lets you work sloppy, then a couple of sticks over the trough for a quick drip out and brush down before removing to a drying rack of 2x's on horses works well. Have a brush and small can at the cut bench and finish freshly cut ends prior to install... this is where rot often begins, wicking in end grain.
A power planer can help level the wall, set nails and hog the wall surface flat. Cover with tarpaper lapped shingle fashion to form a drainage plane. Retrim windows and doors, flash over the gable window trim, get the flashing worked under the paper on the upper leg.
Cute building 
|
|
rmak
Member
|
# Posted: 3 Apr 2014 11:23am
Reply
MtnDon, My siding is lap siding (I believe it's called.) There's a tongue on one edge and a notch on the other to fit over the tongue. I was going to run with the tongue on the top and maybe seal/calk it before placing the next piece of siding over it.
I doubt if I can remove the existing siding. I built the cabin around 18 years ago and used spiral nails. That's when I was a lot younger and stronger. A wrist fracture and arthritis makes nailing and prying difficult. That's why I'm using screws for the new siding. I'm at the stage, unfortunately, when I just can't deal with that kind of work. I used one heck of a lot of nails back then!
I like the idea of furring the cabin on 16" centers and attaching the new siding that way. I'm thinking the heat from the cabin might draw cold in the bottom of the space and help dry the back of the new siding pieces and keep them from rotting.
Don-P,
I like your idea and I will try to paint all sides before the install. I'm using a one step stain/water repellent for decks and siding, which is expensive. I may look for something cheaper for the backs, and I'm open to suggestions.
I don't have power at the cabin yet, so power planer is out, maybe. I could use a generator and rent a planer and then use the tar paper technique you suggest.
Man, I'm glad I posted this question. Some great helpful ideas. Much appreciated.
|
|
MtnDon
Member
|
# Posted: 3 Apr 2014 02:08pm
Reply
Tar paper (building felt), then vertical furring strips and then the new siding makes what is called a rain screen wall. Screen at the top and bottom openings keeps insects out. I've used folded fiberglass screen and there are products made special for the job.
|
|
|
razmichael
Member
|
# Posted: 3 Apr 2014 05:02pm
Reply
There was a small thread on rain screens here Rain screens. I put my siding up last summer using a rain screen (although not enough space for British Columbia building code but I'm not in BC). For the insects I used the ridge venting material you buy in rolls. The thread describes what material I used for the bug block. The process certainly added a day or two to the siding process but I like to think it was worth it. Another link to how to do rain shields at Rain Shileds Green Buildings
|
|
rmak
Member
|
# Posted: 3 Apr 2014 06:05pm
Reply
So screen over roof vent material top and bottom, or folded screen material alone. Furring over tar paper. Correct?
I'm a little unclear about windows. bug screen there too, or flashing?
|
|
razmichael
Member
|
# Posted: 3 Apr 2014 06:43pm
Reply
Take a look at the cor-avent site to get some installation ideas
cor-a-vent. For DIY you will see it done with just bug screen folded over the top of the furring strips and pulled tight. The shortcoming of this is that there will generally remain enough of a potential gap for bugs to work in easily. With a product like cor-a-vent or the much cheaper ridge vent stuff i used, this will be compressed under the siding making a tighter fit. I ended the furring strips a couple of inches before the bottom. (with the bug net hanging down). I then lightly stapled the venting material strip along the bottom below the furring strip and pulled the bug net up and stapled it down.
If you are really doing this as a rain-screen then you are assuming that some water will get in and you are providing a path for it to come out and air circulation. This will dictate where you need a bug screen - water out - no bugs in (above windows for example). Here is another link Rain Screen. For a small cabin it is not too much extra work but it does add to the time and effort. I took some short cuts by keeping the space to the minimum (3/8 furring strips) which would not pass code in BC but, from my research, was okay for basic protection in my area. I looked though my photos but cannot find anything that really shows up well (black material on black tar paper).
|
|
|
