| << . 1 . 2 . |
| Author |
Message |
rockies
Member
|
# Posted: 13 Oct 2015 07:35pm
Reply
Pantry
|
|
rockies
Member
|
# Posted: 13 Oct 2015 07:38pm
Reply
Some pics appear dark because of the light rendering decisions in the software program.
|
|
rockies
Member
|
# Posted: 15 Oct 2015 08:25pm
Reply
It's a cabin for Creeky!
What if ? ...........the only part of the cabin to get built for now is the small kitchen/bathroom part and the pantry/dinette area?
Then I would take Creeky's suggestion about the bathroom and flip it so that the bathroom opens into the pantry, which would now function as the entry/mudroom. The plumbing can still be put into the mudroom for a second sink and washer later on, but for right now the space would have a bench and coat hooks and a small cabinet for papers, keys, etc.
Some day, when the living room is added, the bathroom could be flipped back with the tub and sink vanity changing places and the room opening out to the living space. Or it might just stay the same way as drawn.
I guess the point is that if you build in the plumbing and openings now, you can change the plan later without too much trouble as you add on.
|
|
Rowjr
Member
|
# Posted: 17 Oct 2015 01:56pm
Reply
Pretty neat idea
|
|
creeky
Member
|
# Posted: 17 Oct 2015 04:59pm
Reply
that's a real nice layout. i like that you can come in and go to the facilities without tracking dirt through the whole house. oddly enough. when I reno'd the main washroom in my last house the builder/owner had set up the plumbing for the bathtub and the sink on both sides of the room.
and the nook will be the most used part of the house. that will be really nice. I might lose the window on the south side of the nook so that i could have a full bench back. for me it would make the nook a bit more intimate too. I'd also lose that door. save the heat loss and framing/extra $$. Put a nice window there.
a deck would be a priority for me. off the west wall is it? be surprised how much time you spend out there. (i have 500 sq ft of living space and almost 300 sq ft of deck. chairs, lounges, dining table, bbq, summer kitchen, tents for temporary bedrooms, dance floor ... many uses)
after moving the kitchen into my studio with a full size sink, stove, and fridge after the travel trailer and it's pint sized appliances. oh ya. probably the detail I like the most.
now to start planning the build. there's a really good post on building science now that details the perfect wall a bit better. dang I lost the link. hang on a sec. okay there it is. it details all the flashing etc bits and structure you need. really amazing. and it's circa 2014 so a bit better with the new materials. hope that helps.
personally I would do the exterior foam sheets but use roxul in the walls/ceiling. saves a tonne of money over his spray foam insulation interior and you're not giving up that much R value. As well. I have found my all foam insulation to be quite transparent to sound. which. good (listen to the wildlife) and bad (tin roof timpani).
nice work Rockies. and you're right. I would build this in a heartbeat. I always figured 6-800 sq ft would be my happy spot. and once you add the living room; you're there.
|
|
rockies
Member
|
# Posted: 17 Oct 2015 06:12pm
Reply
Well, thank you Creeky. The living room will look like the previous drawings I've posted, but I did do another version with a small livingroom and no Murphy bed. I'll post that plan soon.
As "Plan B" looks now the 18 inch deep low cabinets next to the west door are deep enough to function as built-in seating with storage drawers below. This could be a semi living room for now and give you a place to stretch out.
The kitchen has deeper than average cabinets because most appliances are 30 inches deep and I'd like the front edges to all line up. People always want more counter space in a kitchen, but they rarely think of making the cabinets deeper for extra room.
I plan on using 10 1/2" SIPs for the cathedral ceilings and the floor system. These areas are very hard to insulate any other way and the SIP panels are insulation, vapor barrier and structure all in one. No air channels or vents needed either. There will be normal 2x6 stud walls 16 inch on center with 2 inches of rigid foam on the outside and roxul on the inside. The roof will be covered in galvalume standing seam metal roofing and the exterior walls will be covered in Hardi-board. I want the exterior to be as fire proof as possible.
I'm always tinkering with plans, and I guess this one has been a way to explore options and show how a small cabin can grow in a variety of ways as your needs change over time.
|
|
rockies
Member
|
# Posted: 18 Oct 2015 05:52pm
Reply
Here's "Option B" with a living room. I made the cabin 1 foot narrower at 15 feet rather than the previous 15 feet. Didn't really need the extra foot, but when I went to lay out the ceiling beams I discovered that lengthening the pantry by 6 inches meant that all the beams are equally spaced across the ceiling.
This is the sort of small detail that drives me nuts. If the distances between beams are all equal across the ceiling except for the last one you'll notice it for the rest of your life. Same thing with window and door placement. If one is off center your eye will go to it every time.
I also played around with the cabinets a bit, organizing them so that they look better and are more functional. The ladder to the loft will go up against the wall in front of the north window in the living room.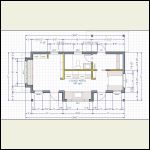
Layout Plan
| 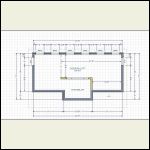
Loft Plan
| 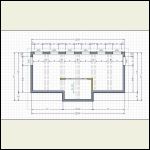
Beam Plan
|  |
|
|
rockies
Member
|
# Posted: 21 Oct 2015 07:46pm - Edited by: rockies
Reply
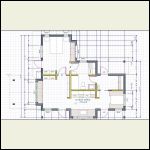
Woo-hoo! A final decision on the plan. After 45 revisions it's finally done.
By adding the laundry area to the north side of the bathroom now, I will have a natural access point through the west laundry wall into a future bedroom. No walking through the entire cabin from the bedroom to get to the bathroom off the mudroom. Also no need to add a master ensuite or move plumbing in the bathroom later.
Now on to the sections and elevations.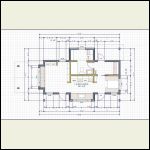
Layout Plan
| 
Future Bedroom Plan
|  |  |
|
|
|
rockies
Member
|
# Posted: 22 Oct 2015 08:17pm
Reply
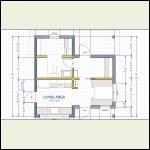
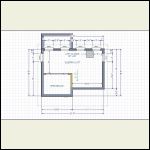
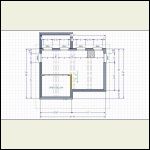
Here's the first module.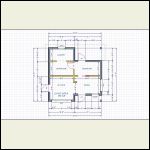
Floor Plan
| 
Layout Plan
| 
Loft Plan
| 
Ceiling Beam Plan
|
|
|
rockies
Member
|
# Posted: 23 Oct 2015 07:27pm
Reply
Well! I finally got the "deck" feature to work on my software (or maybe I finally knuckled under and looked up how to use it in the "help" section).
In any case, I get to see how the cabin will look with the deck attached. I plan to have the excavating for all the piers done at the same time so I won't have to bring them back for any future additions. In the meantime, the piers for the future living room on the west side of the cabin will be used to support a deck. The deck to the south will always be a deck.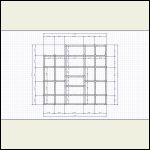
Cabin and Deck Foundation Beams
| 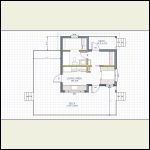
Deck Plan
|  |  |
|
|
rockies
Member
|
# Posted: 23 Oct 2015 07:28pm
Reply
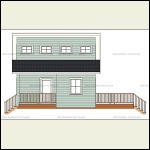
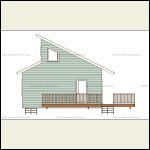
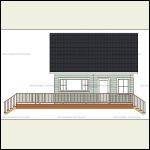
The deck elevations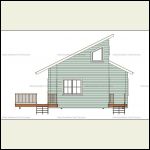
East Elev
| 
North Elev
| 
West Elev
| 
South Elev
|
|
|
creeky
Member
|
# Posted: 24 Oct 2015 04:16pm
Reply

|
|
rockies
Member
|
# Posted: 24 Oct 2015 06:51pm - Edited by: rockies
Reply
I realized later that the "Cabin and Deck Foundation Beams" picture looked confusing. All of the grey lines are beams that will be 8" wide by 12" thick to support the floors, and the circles are the piers.
Here is a better pic that shows the outline of the first module in light blue and the later living room addition in dark blue. The remaining deck area is uncolored.
|
|
rockies
Member
|
# Posted: 8 Nov 2015 07:32pm
Reply
Good heavens! My post isn't on the main page anymore! lol
After talking with the manufacturer of the "Katrina Space Saving Staircase" they informed me that a building inspector would never approve an alternating tread staircase up to a sleeping loft. They wouldn't even approve a spiral staircase!
However, one forum I found on "Canadian Building Codes" suggested that "if there was an exterior stair that conformed to code servicing the loft then the interior stair wouldn't need to". I'm checking on that.
Another temporary solution is to have the bedroom space on the main floor and call the loft "storage" for the inspectors. Later on I could add in the space saver staircase (I'd still have the exterior stair too).
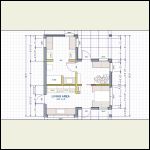
So after a bit of plan revision I came up with this. The downstairs bathroom has been divided so that I can access the rear room and use it as a bunkroom (with a four foot kitchen cabinet installed that I will use as a dresser now but later on it will have a laundry sink). The tub and toilet are in a separate space for privacy and the sink is open to the mudroom. The mudroom has the bedroom closets in it, although one could be used for coat and boot storage too.
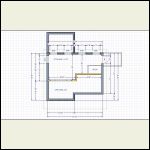
When the stairs are added later the bathroom walls could be cut back and the three rooms opened up for more light and also to create a laundry space (the mudroom closets would move in here).
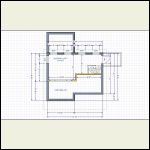
In the loft plan I show a small deck off the east door (There will be an exterior staircase attached to it. I just drew it this size for a visual representation of where it will go - it's not really designed yet).
As long as I design the framing for the bathroom walls properly, I can cut them back or move them without too much damage later on. Who knew finding a proper staircase to meet code could be so hard?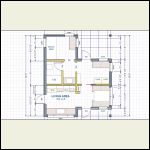
Main Floor Bedroom
| 
Bedroom Becomes Laundry and Closet
| 
Storage Loft
| 
Future Bedroom with Staircase
|
|
|
| << . 1 . 2 . |

