| << . 1 . 2 . 3 . 4 . >> |
| Author |
Message |
Anonymous
|
# Posted: 30 Sep 2011 06:45pm
Reply
love your cabin have any picks of the inside....
Thanks Chad
|
|
davestreck
Member
|
# Posted: 30 Sep 2011 07:21pm
Reply
Chad,
Inside is still unfinished, just bare studs and rough subfloor. I haven't even put the flooring down in the loft yet. We're still sleeping on cots and storing our stuff in duffel bags. Doesn't look like much yet.
Dave
|
|
davestreck
Member
|
# Posted: 1 Oct 2011 10:45am
Reply
Quoting: CabinBuilder "stumps - by hand" - that's hard work! (I usually resort to just cutting the tree at the ground level)
I second that. Chopping and digging out stumps is backbreaking work. I've got 5 or 6 to do next year and am not looking forward to it.
|
|
Mark2011
Member
|
# Posted: 28 Oct 2011 10:34am
Reply
Hey,
Cabin looks great. I really like the ceder siding. Do you have any interior pictures?
Can I ask you a question about your wood stove piping, Im doing the same connection from inside to outside with the insulated piping outside. How high does it have to go? does it have to go past the top of the top of roof?
|
|
Mark2011
Member
|
# Posted: 28 Oct 2011 10:35am
Reply
Any help would be greatly appreciated
|
|
davestreck
Member
|
# Posted: 30 Oct 2011 02:14pm - Edited by: davestreck
Reply
Quoting: Mark2011 How high does it have to go? does it have to go past the top of the top of roof?
Off the top of my head I think the rule is that the top of the pipe must be three vertical feet above the height of the peak if its within 10 horizontal feet of the peak. Don't quote me on that. Also, I'm not sure what that means if the pipe is farther than ten horizontal feet from the peak. I'll try to dig out the installation instructions and post a more educated response later.
Since my cabin is pretty well beyond the range of any effective code enforcement, and since my steel roof is basically fireproof, I'm planning on adding two 3-foot sections above the thimble and calling that good.
|
|
davestreck
Member
|
# Posted: 30 Oct 2011 02:22pm
Reply
Here you go, copied from the installation manual:
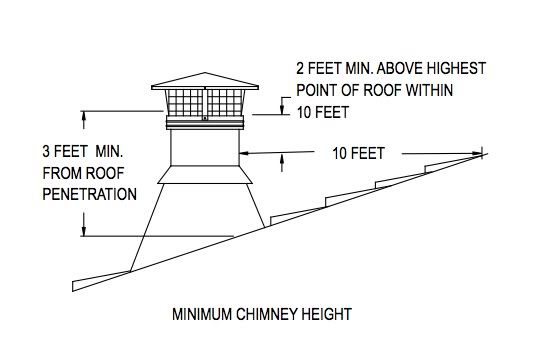
As you can see, I had it a bit wrong in my first reply.
|
|
davestreck
Member
|
# Posted: 6 Sep 2012 09:58pm - Edited by: davestreck
Reply
Hello all,
We just got back from our annual 2 week trip to the cabin, and I thought I'd post a few pics.
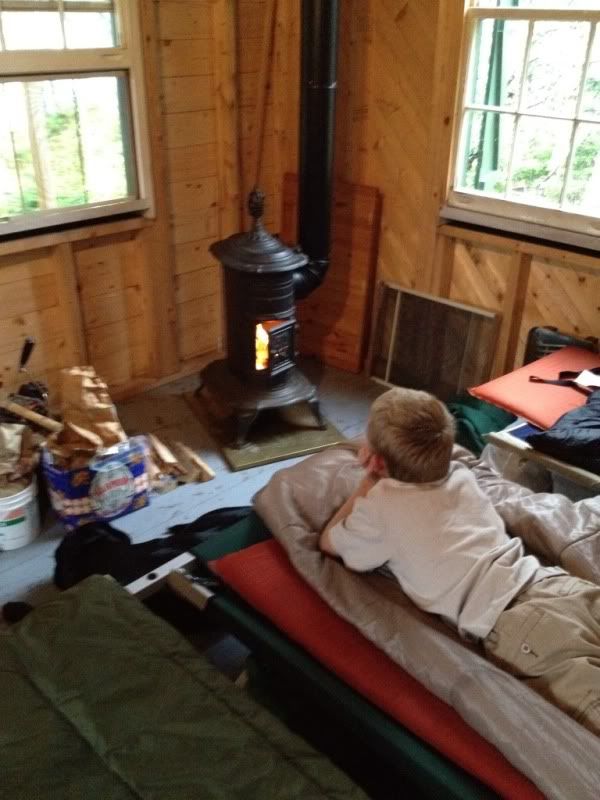
Wood stove installed, just in time for a blustery, rainy day. What a difference! We spent the day warm, dry and snug, reading and playing games.
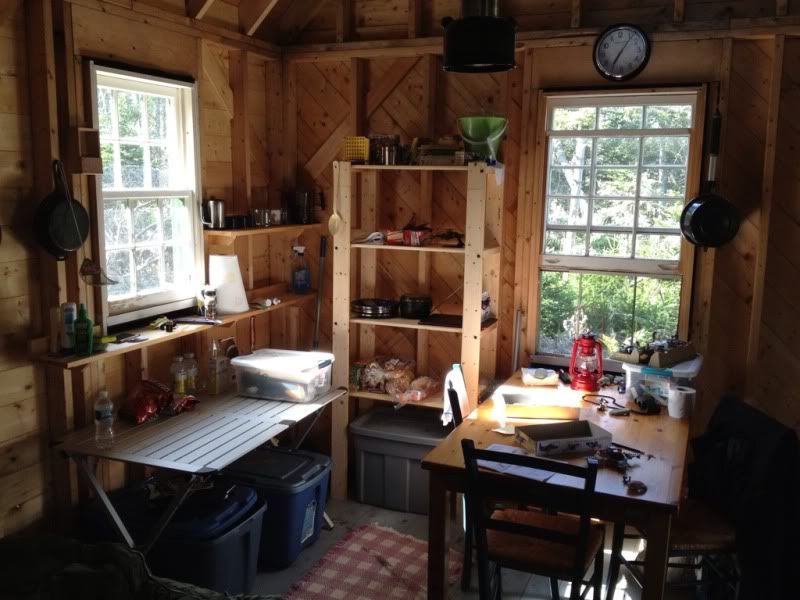
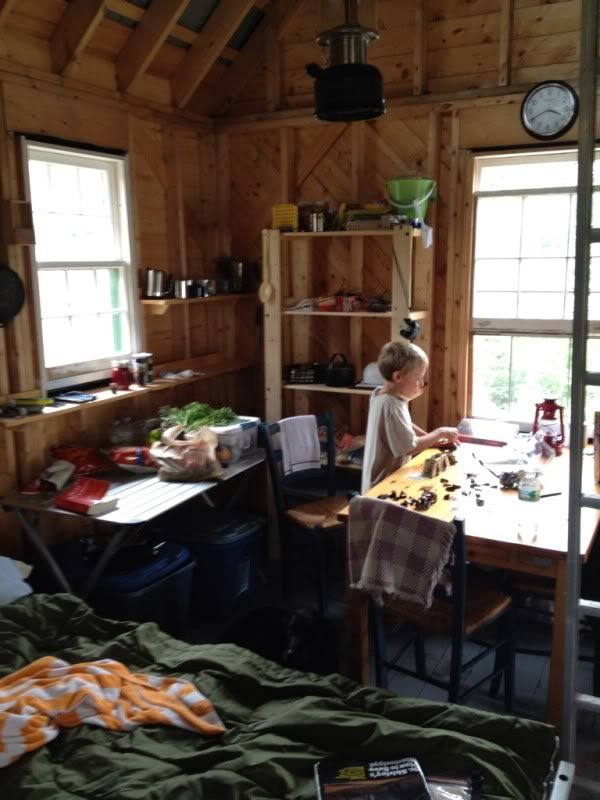
Kitchen area starting to come together. This will eventually be replaced with "real" cabinets and countertops, but we're getting a good feel for what sort of workflow fits the space.
Loft floor installed. Cheap 1x6 T&G spruce, the same as we used to sheathe the walls. Had to cull more boards to avoid bad knots, pitch pockets, bark inclusions etc, but I still like it better than plywood. This has become my son's favorite part of the cabin.
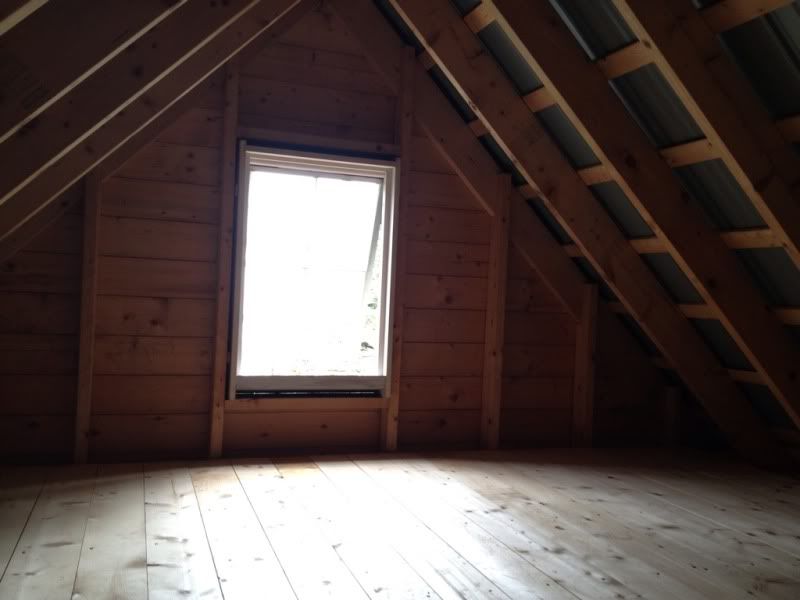
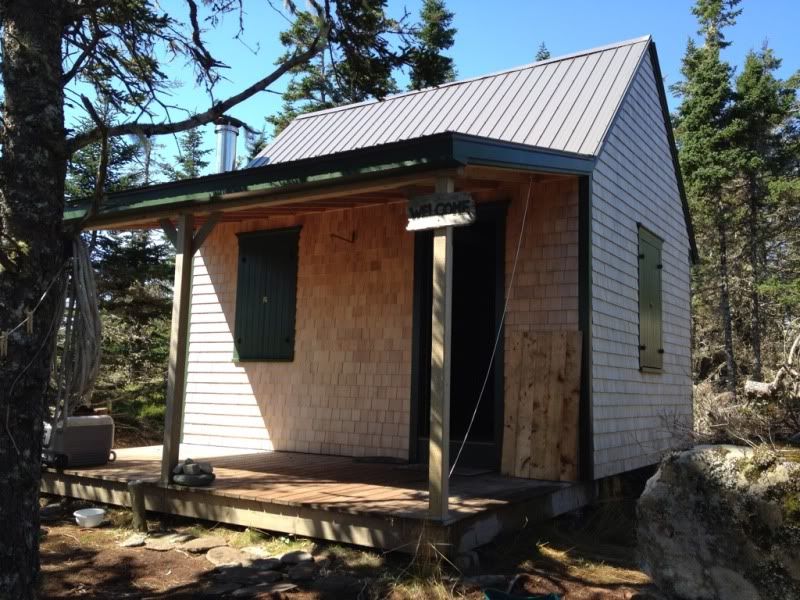
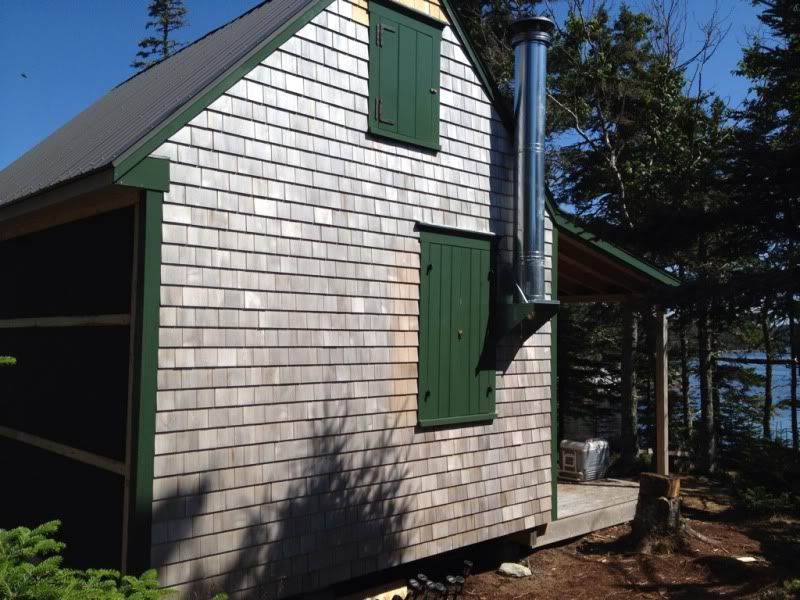
Built a shutter for the loft window, finished the last few rows of cedar shingles at the peak, and installed the chimney. The chimney height is a little short, even with a steel roof, so I will add another 3 foot section next year.
The rear wall is still only half-shingled. I'll be adding a 6x8 shed-roofed addition to that wall next year. Tar paper will protect the sheathing until then.
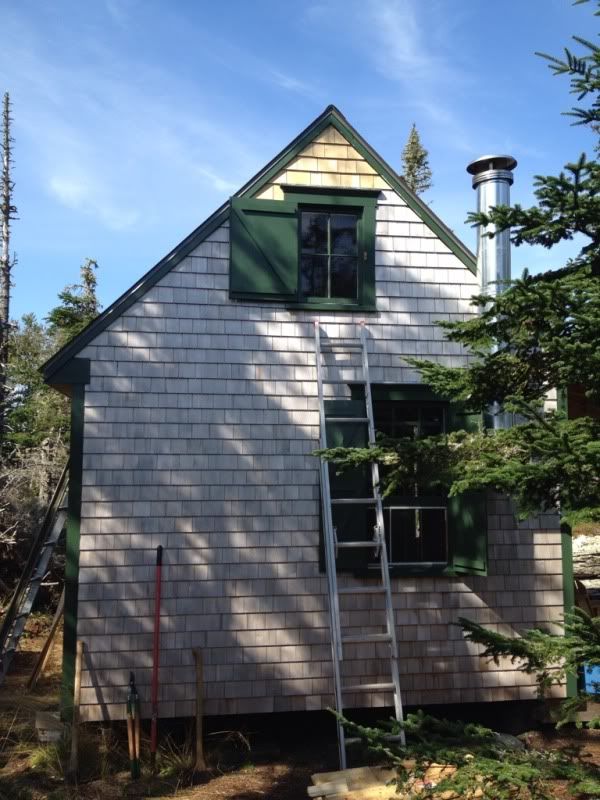
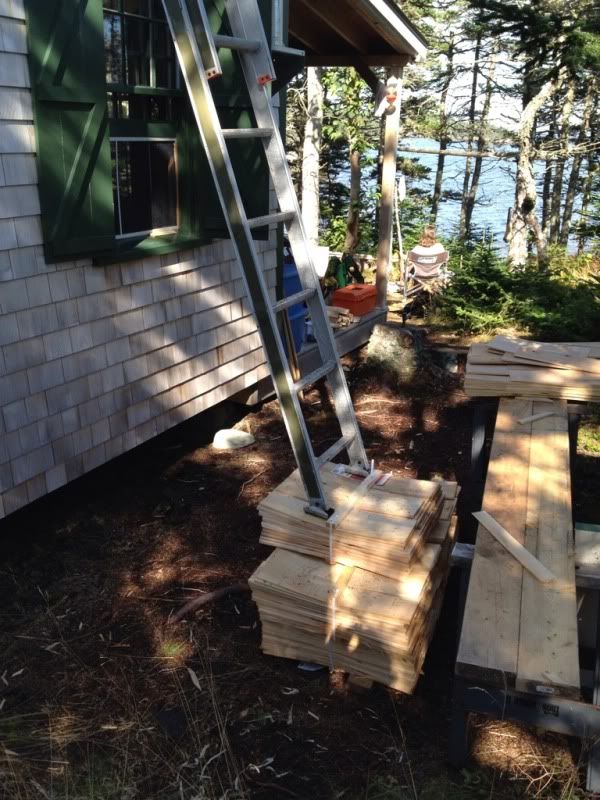
Non OSHA-approved ladder extension. Unfortunately some friendly locals swiped my big ladder over the winter (along with 2 camp chairs and a really nice folding table) so I was without another option. All's well that ends well.
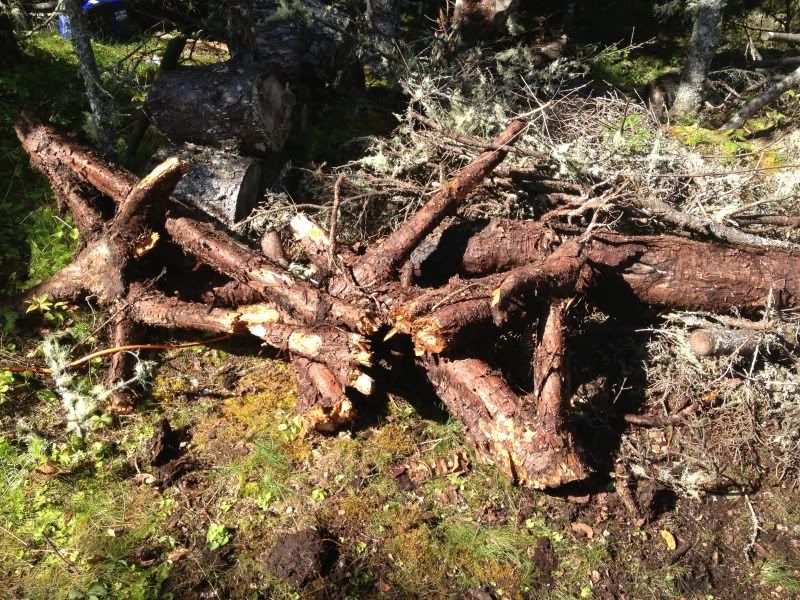
Worst job of the trip. This spruce stump was directly where I need to place a foundation block for the addition. Six major taproots and only an axe, a shovel, and a comealong to get it out. That was a tough day.

Finally out.

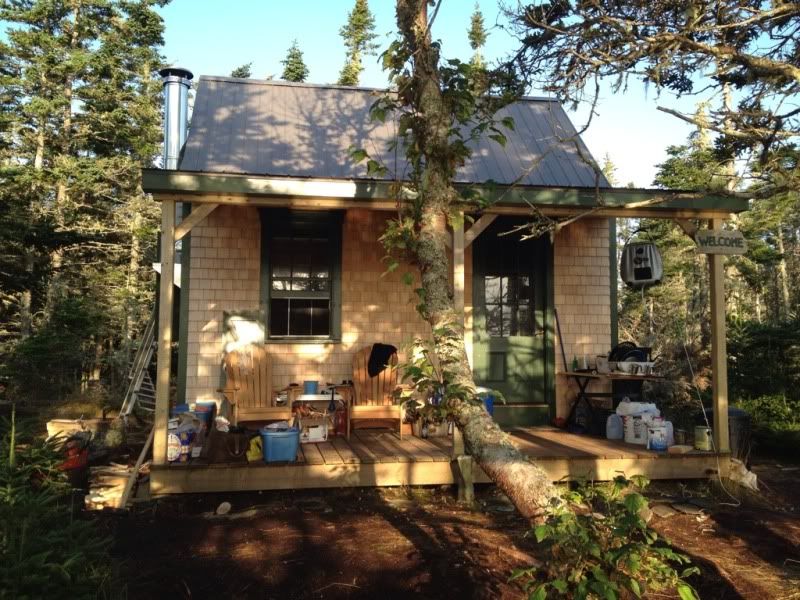
Typically chaotic. We do 90% of our living outdoors during good weather.
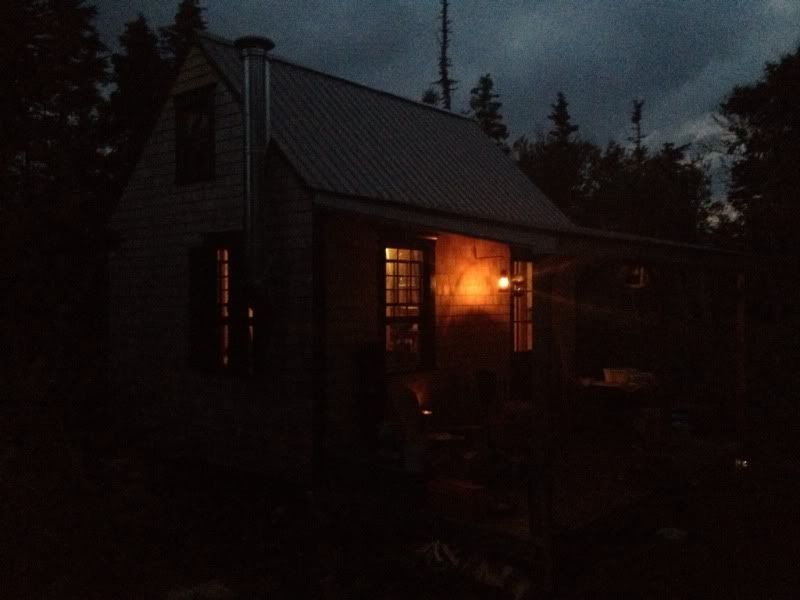
Cabin at night.
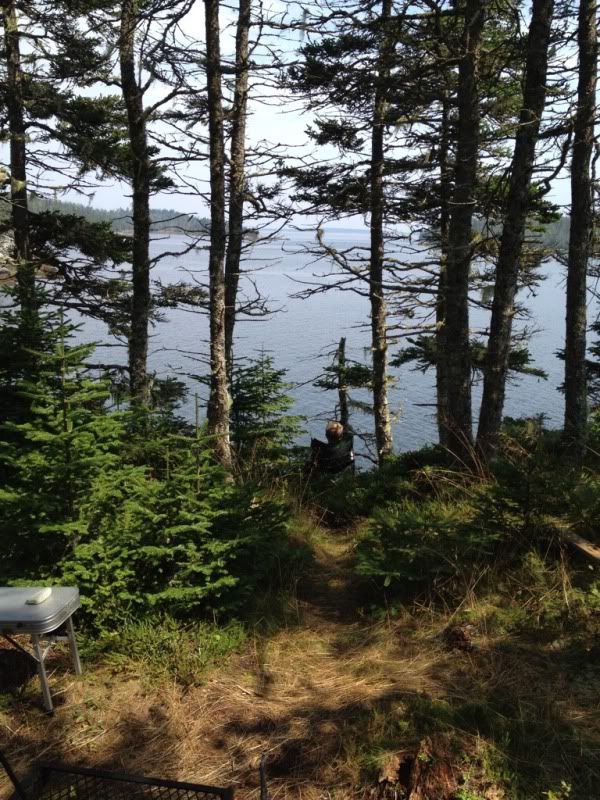
My son waiting for the dolphins to show up. They never did, unfortunately. Hopefully next time.
The key to keeping a 7 year old happy on a rainy day? Legos.
Buttoned up for another long winter.

|
|
|
Anonymous
|
# Posted: 8 Sep 2012 12:00am
Reply
Very Nice!
|
|
Anonymous
|
# Posted: 8 Sep 2012 08:45pm
Reply
Why would you want to do it any other way!!??!! Absolutely awespme pixs and story. Love it... keep it up and post more pixs... I need to get some more ideas. Wow... just awesome!!!!
|
|
tcmatt
Member
|
# Posted: 9 Sep 2012 01:31pm
Reply
great place! I love the shutters, i wish I would have thought of that. It may not be too late. I just posted some pics of my project under "my 12x16". Where did you find the bracket that went under the stove pipe outside? Did you find that was sufficient to hold up your stack?
thanks
matt
|
|
davestreck
Member
|
# Posted: 9 Sep 2012 02:55pm - Edited by: davestreck
Reply
Matt,
I like your place, and the picture window is clutch. I regret not having put in more windows in our cabin. It can get pretty dim in there on a cloudy day.
The chimney components came from Northern Tool: http://www.northerntool.com/shop/tools/product_200316637_200316637
The bracket is lagged into wall studs and hangs from steel straps also lagged in. You could probably stand on it without it flexing.
The shutter hinges are from VanDykes: http://www.vandykes.com/acme-lull-porter-shutter-hinges-fasteners/p/204919/
They're designed to use the shutter's own weight to keep it open or closed. They work like a charm, but since they're raw cast iron they will rust if they aren't painted.
|
|
trollbridge
Member
|
# Posted: 9 Sep 2012 03:15pm
Reply
Great pictures! I love your cute little stove...nice to have heat when you need it! Sorry to hear your ladder was swiped but so glad you finished your ladder work in one piece with no mishaps...my husband wasn't so lucky when he took his fall off his ladder and landed on an ill placed stump!! Too bad you have to close up for the winter. Would you ever be able to use your cabin during the winter? I know you only have water access.
|
|
davestreck
Member
|
# Posted: 9 Sep 2012 05:10pm
Reply
Quoting: trollbridge my husband wasn't so lucky when he took his fall off his ladder and landed on an ill placed stump!!
Ouch!
Luckily for me, all the high ladder work is done for now.
Quoting: trollbridge Would you ever be able to use your cabin during the winter?
I doubt we'd do the 14 hour drive in winter. We planned the place as a 3-season getaway. Since my wife is a teacher, we have to plan our trips to coincide with her school's schedule. What I'd really like to do is longer duration trips during the summer, like a month or more. Once we get a few bugs worked out (refrigeration, water supply, etc) those types of trips will be in our future.
|
|
Anonymous
|
# Posted: 8 Nov 2012 04:57pm
Reply
Whoo hoo!! More Nova Scotia!! Your place is great, and I LOVE the Eastern Shore!
I have to ask..where did you get your little stove??
I want one like that and have been having a TERRIBLE time finding one!!
|
|
davestreck
Member
|
# Posted: 8 Nov 2012 06:48pm
Reply
Quoting: Anonymous I have to ask..where did you get your little stove??
Antique Stove Hospital, in Little Compton RI, just a half hour or so from where I live. Super nice guy, and he has an amazing collection of stoves. I think he said mine is from the late 19th century. He took it out of an attic and doesn't believe it had ever been used. The nicest feature about it from my perspective is its weight. Since the firebox is sheet iron the whole thing only weighs 50 pounds or so.
|
|
oldbuddy
|
# Posted: 10 Nov 2012 09:45am
Reply
I think your cabin is gorgeous! I love the planksiding and flooring. The colors you chose are very pretty. I also like your shutters a lot.
You may want to consider two things in the future that we learned after the initial building process:
Add a window or two to your present cabin. We had to because it was just too dark with only four windows. Maybe if our inside walls had all been painted white it wouldn't have been so bad but since it is still unfinished, we are looking at the "paperside" of insulation. Just too dark. We added a 26X38 window and what a difference it made. There was a certain amount of demolition and new construction, but in all, it only took a couple hours to add the new window.
Secondly..if you're adding on think long and hard about making it "bigger" than you're planning. It didn't take me long to find out 12X16 wasn't big enough for all 9 in our entire family (children and grandchildren included). We added on an 8X16 off one side and probably in a year or so, we will add on to the opposite side with a similar size room. The new room makes a hugh difference already and for now it looks as though the loft will only be used for storage in the winter months. It just gets too hot to even think about sleeping up there.
Maybe this doesn't suit your plans but it's just something to consider.As a side note....our front porch was originally going to be 8X12 but after we found a rock boulder about as big as my truck just beneath the soil, we decided to make the porch 10X12, bypassing the rock and actually making a more "useable" porch. Funny how that trial and error stuff works, huh? Anyway.....you have a beautiful cabin!
Old Old Buddy
|
|
Bevis
Member
|
# Posted: 10 Nov 2012 10:49am
Reply
Quoting: davestreck Non OSHA-approved ladder extension
Suprised the OSHA Nazis didn't come out an pound you for doing that...
|
|
davestreck
Member
|
# Posted: 15 Nov 2012 09:47pm - Edited by: davestreck
Reply
Quoting: oldbuddy Add a window or two to your present cabin
Yeah, I've been thinking about that. Specifically, I considered adding a second window to the east facing wall (the one under the porch overhang) to bring more morning light into the cabin. The problem is, big expanses of glass don't fit the old-fashioned style I prefer, and they make buttoning up the cabin for the winter more complicated. Plus big windows are expensive, and we're poor. We're going to live with the current fenestration (I love that word!) for now and see how it goes.
Quoting: oldbuddy if you're adding on think long and hard about making it "bigger" than you're planning
The "addition" I'm planning on building isn't intended to add to the living space. Its simply an attached storage room to allow us to keep more gear at the cabin. When we first started building on the island, we planned to build a cabin closer to the cove where we anchor the boat, so we built our storage shed there, intending it to be adjacent to our future cabin. But then we discovered the current site on the cliff and changed our plan. So now we store most of our gear at the old shed and have to haul it to the cabin at the start of every trip. I'm thinking that once the addition is complete the old shed will become my workshop/boat shed.
Once we have grandkids (now there's a thought!) we may have to bust out a wall or two and expand. Or build a bigger cabin on another site on the island. Since our son is only 7, we have a few years to prepare for that!
|
|
John Boy
|
# Posted: 10 Jan 2013 05:56pm
Reply
Where could one acquire the plans to this cabin?
|
|
davestreck
Member
|
# Posted: 12 Jan 2013 08:55pm - Edited by: davestreck
Reply
Quoting: John Boy Where could one acquire the plans to this cabin?
Sorry, I didn't purchase plans for this design, I just made it up. Using any good framing book (I like "The Graphic Guide to Frame Construction") you should be able to draw it yourself. Also, building the cabin "virtually" in Google SketchUp helped me to visualize how all the elements (framing, sheathing, trim, etc) fit together, which helped minimize problems down the line.
Good luck!
|
|
ps94515
Member
|
# Posted: 2 Feb 2013 03:35pm
Reply
hey dave, you're not in the philly area by any chance, are you? paul
|
|
davestreck
Member
|
# Posted: 3 Feb 2013 08:52pm
Reply
Quoting: ps94515 you're not in the philly area by any chance, are you?
No. SE Mass.
|
|
Anonymous
|
# Posted: 14 Feb 2013 05:25am
Reply
I have thought of building a 12x16 cabin in Scotia as well... or out east for a few years. Is the 215 sf under still apply?(or even larger?)without a permit. I am also aware to try and build a loft. If you keep any outside decks at least an inch from your property; it doesnt count as an overall sq footage. Sounds funny, but if you build any "tree forts" so to speak; (of larger sizes); that doesnt count at all . Davestruck... did your deck count in overall ftg.? Can anyone confirm my any of my questions? Congrats Dave and family and enjoy! Thanks
|
|
nscampgirl
Member
|
# Posted: 14 Feb 2013 05:48pm
Reply
RE :Where did you find your stove?
Dang...I'm jealous!! I was really hoping you'd say somewhere here
in Nova Scotia!! I'll just have to keep looking!!!
|
|
davestreck
Member
|
# Posted: 29 Aug 2013 06:54pm - Edited by: davestreck
Reply
Hi all,
We just got back from a great 2 week stay at our cabin, and I thought I'd post pics for anyone who is interested.
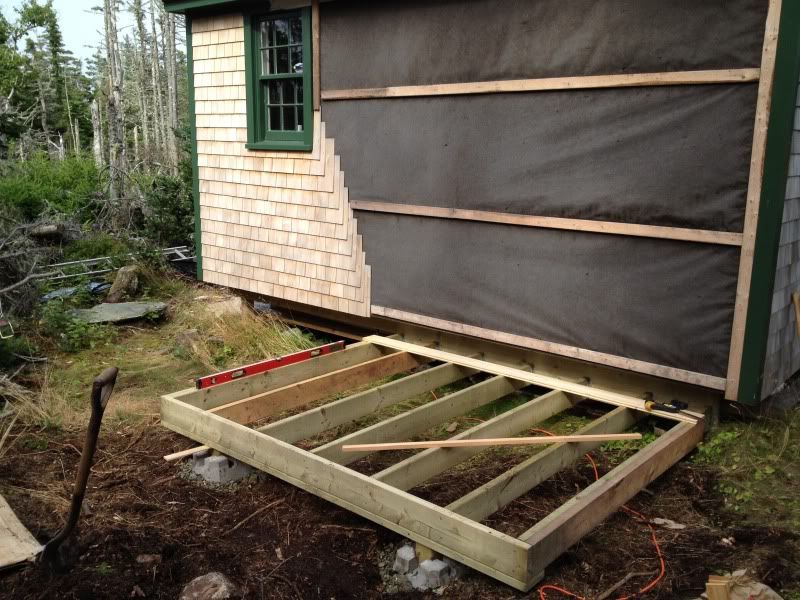
This year's project was to build a small shed addition to the cabin for storing tools and gear. I drew up a simple 6x8 to be attached to the back wall, then had to finish digging out the remaining roots from the spruce stump I took out last year. I've come to the conclusion that spruces are like icebergs: more exists below the surface than above.
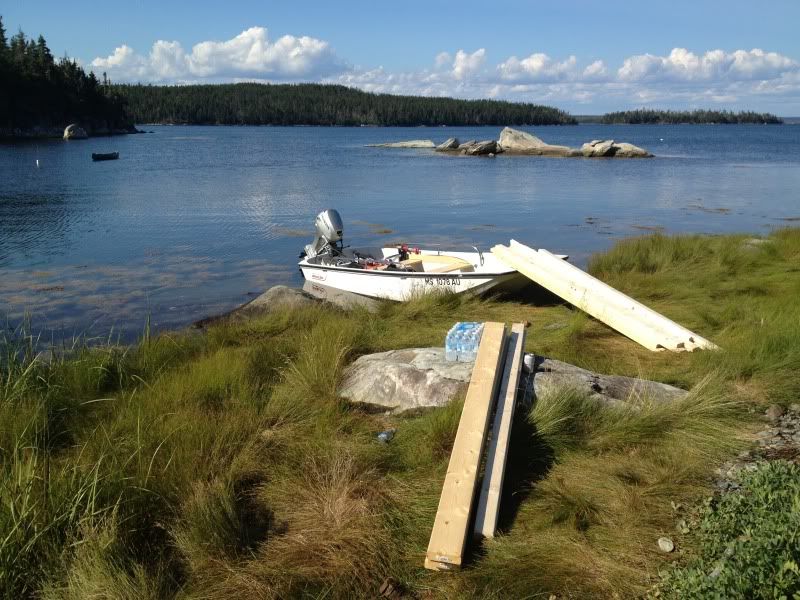
Once again, our little Boston Whaler did a great job serving as a landing craft:
Floor framing was pretty straightforward. I bolted a ledger to the cabin frame and supported the other side on deck blocks resting on bedrock. The walls were framed in 2x4s and sheathed in 1x6 T&G spruce, like the rest of the cabin.
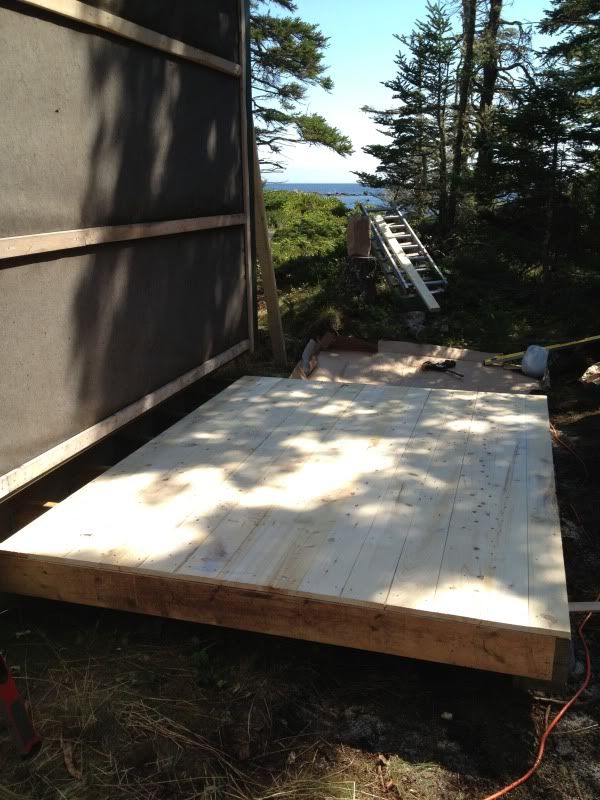
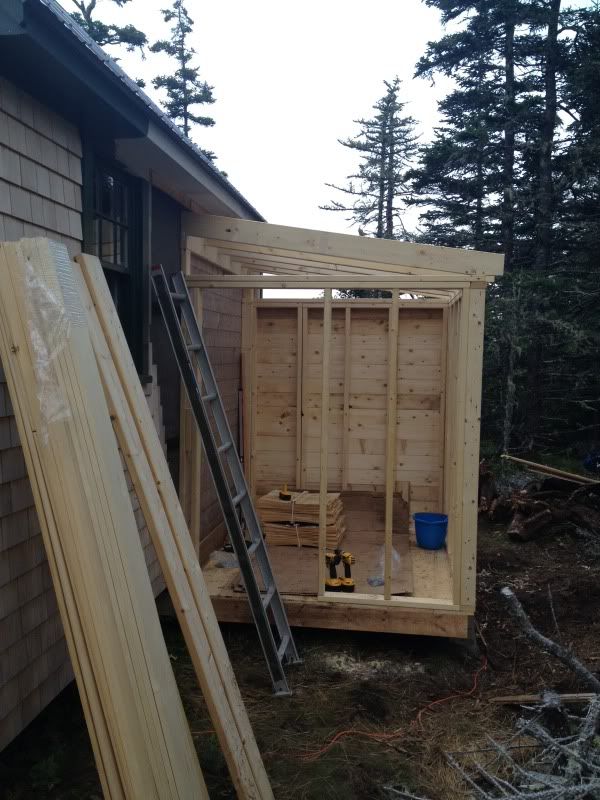
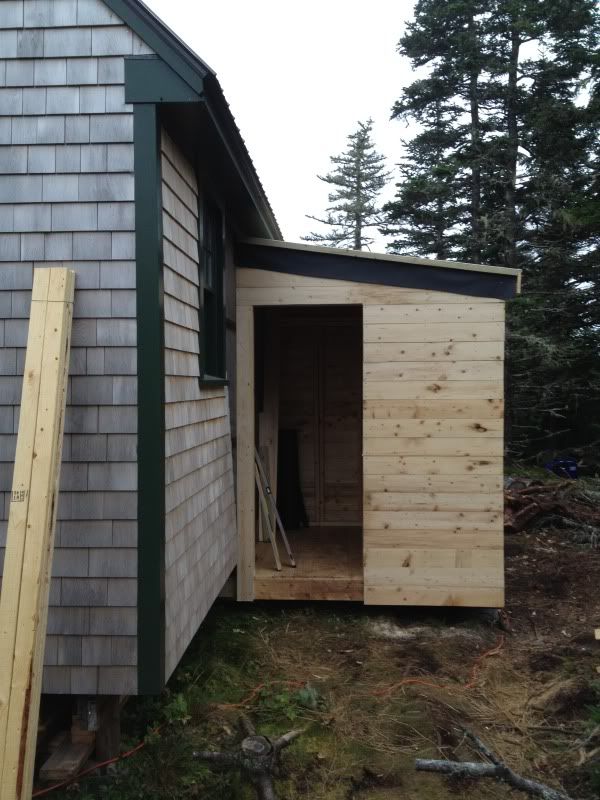
I ran out of time and was unable to get the cedar shingles up, but I might try to sneak in a short trip back up to the island in September to get that taken care of.
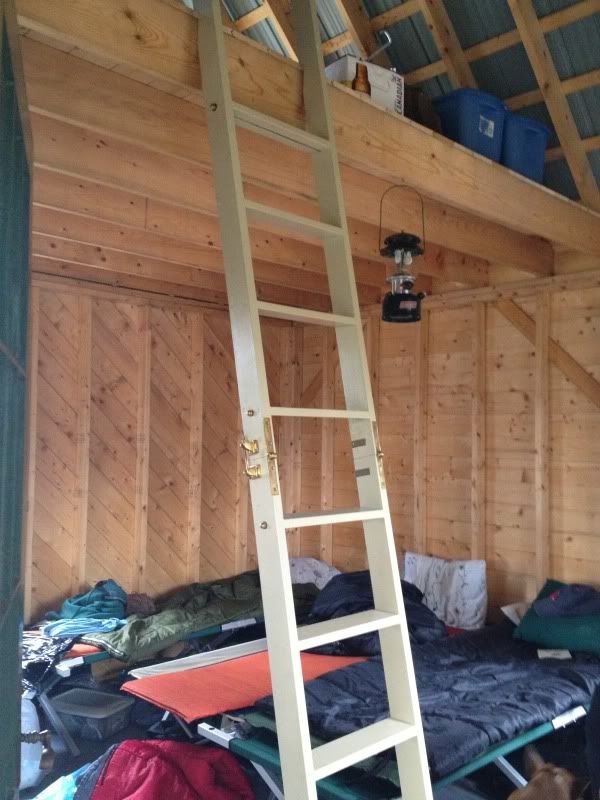
Other projects included installing the folding loft ladder, assembling the new IKEA bunk bed frame (a huge hit with my son), and just generally enjoying the great weather we had.
Loft ladder:
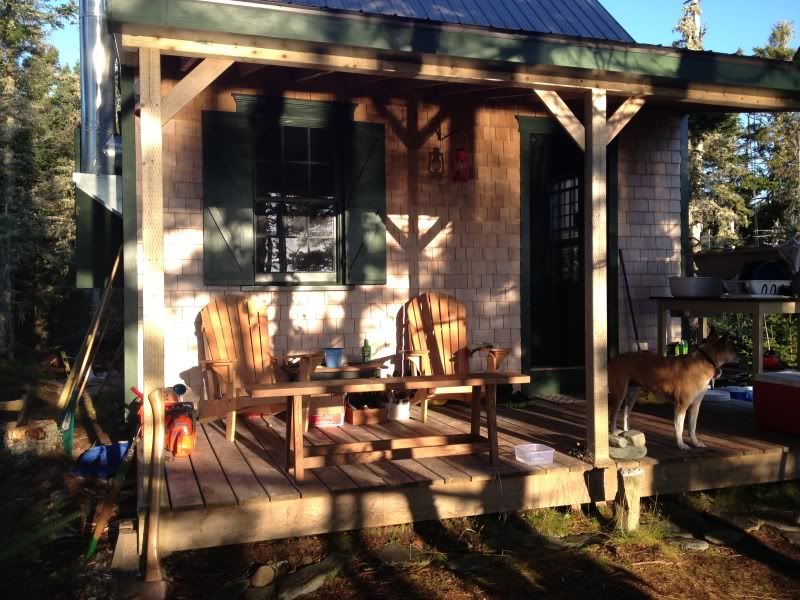
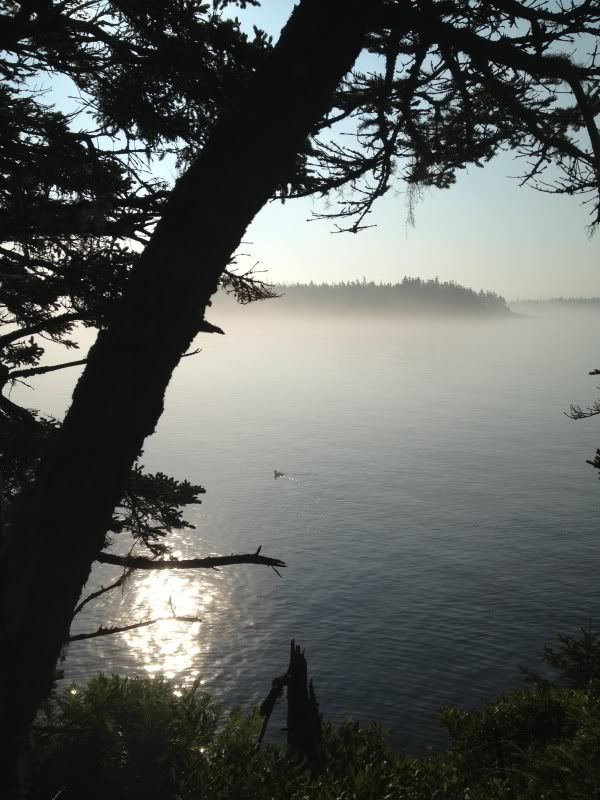
Morning on the porch:
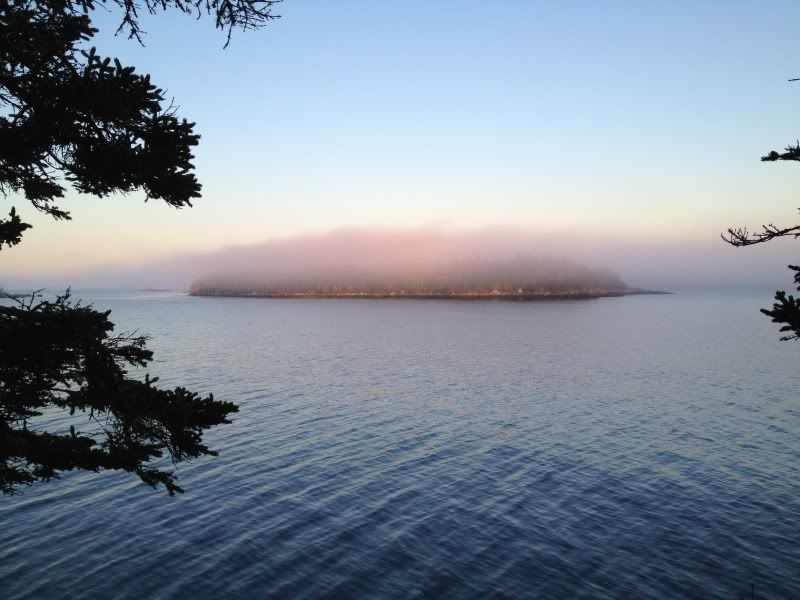
Evening fog rolling over a neighboring island:
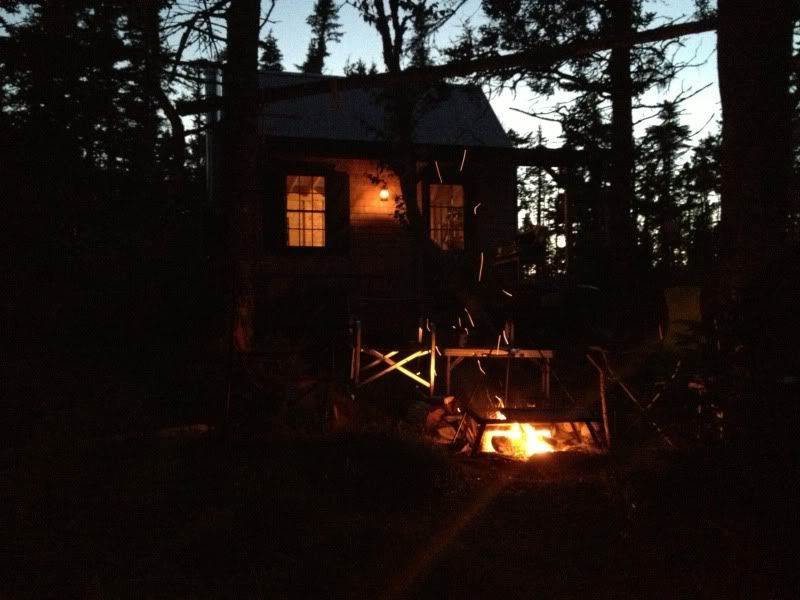
Dinnertime campfire:
Misty morning:
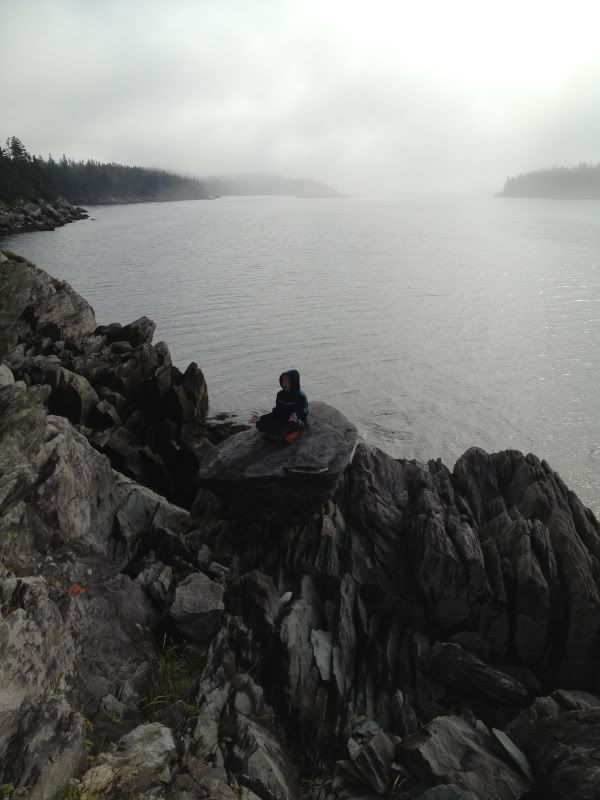
My son's new favorite hangout:
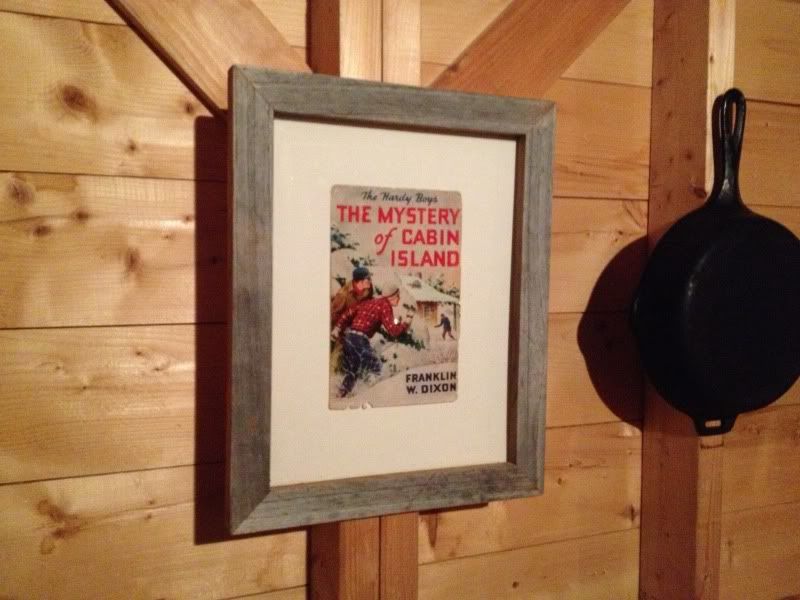
We also tried out a few new pieces of kit, including a new portable freezer/fridge, a composting sawdust toilet, and my brand new Yamaha 1000W generator. Everything worked great. The outdoor kitchen I built was a big hit with my wife. And my son, who is a huge Hardy Boys fan, loved this:
All in all, a great trip. My only regret is how infrequently we are able to get up there. Now I spend the next 50 weeks planning for 2014!
|
|
hattie
Member
|
# Posted: 29 Aug 2013 09:23pm
Reply
Breathtakingly beautiful!!! WOW!!!!!
|
|
Oilerfan
Member
|
# Posted: 30 Aug 2013 11:06am
Reply
Amazing place. I think almost everyone on this forum would trade you straight across for their piece of paradise!! Your family will enjoy your cabin for a very long time.
We are 75% done our 12x16. It is a lot of hard work but man does it feel good to sit back at the end of the day to admire what you have accomplished. We are wiring and installing the wood stove this weekend...can't wait.
|
|
davestreck
Member
|
# Posted: 16 Mar 2014 06:22pm - Edited by: davestreck
Reply
The solar setup is starting to take shape. I want to have the whole system up and running for a few months here at home so I can work out any bugs before disassembling it and carting it up to the cabin.
Our electrical requirements are minimal. The largest load will be our compact 12v fridge/freezer. The manufacturer claims it can be run off of 85 watts of solar. Other than that, 12v LED lights and cellphone/laptop/walkie-talkie charging is all we need. I have a small Yamaha generator for running power tools, and for topping off the batteries if need be.
The system is designed around 2 panels: a 30w panel for keeping the batteries topped off during the 11 months of the year that we aren't there, and a 100w panel that will be added to the system during our stays at the cabin, and put away when we're gone. Because we are using 2 different sized panels, the system requires 2 charge controllers, but other than that is pretty straightforward.
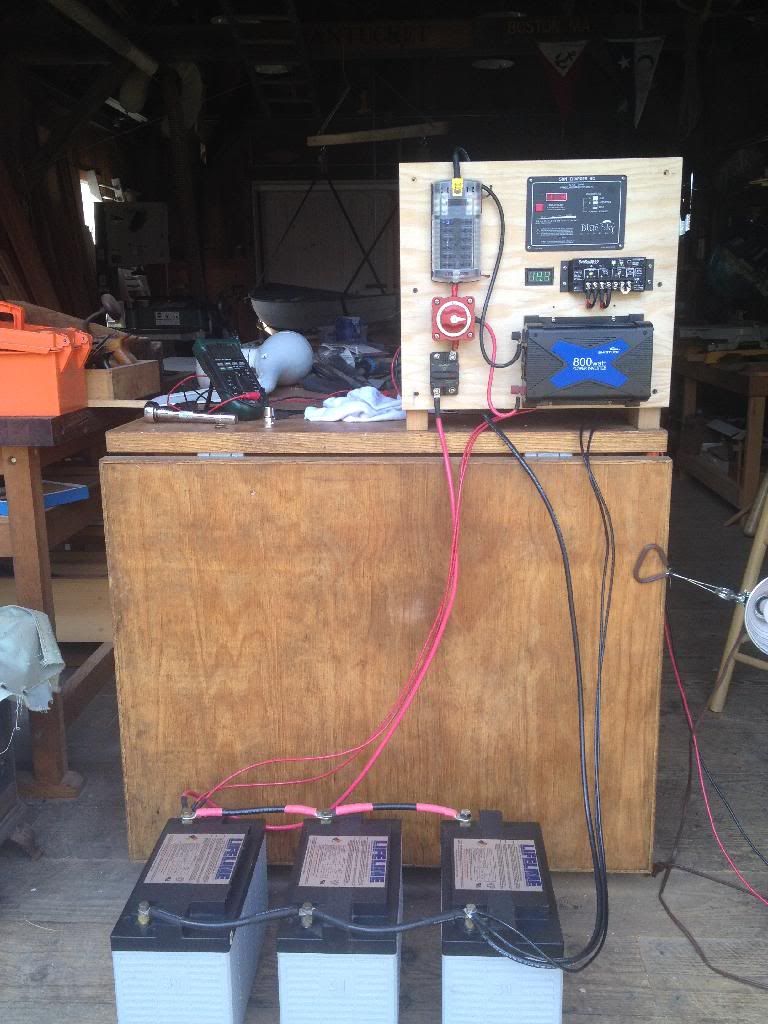

Most of the components are from marine-supply manufacturers, since I work at a boatyard and can get the stuff at wholesale cost. The batteries are (almost) new 105Ah 12v AGMs that I got for free from a boat owner who was swapping them out for larger models.
The 2 solar charge controllers are each individually wired to the batteries. They run independently of each other and each can run either in tandem or solo (or so I hope; what little info I have found online seems to confirm this)
The DC power from the battery bank runs through a 60A marine breaker to a battery shutoff. I plan to leave this in the off position whenever we are gone. Turning on the switch powers up both the El Cheapo 800w inverter and the DC distribution panel, which uses standard automotive fuses. All the 12v cabin circuits will be wired to the panel, while the inverter will feed a single 120v AC outlet in the cabin. Turning on the battery switch also activates the digital volt meter, which I added to provide a quick visual clue to tell me when the cabin wiring is energized (and because it was only $5 and looks cool)
The whole system is now up and running in my barn, and I plan to spend the next few weeks making sure its running well and doing what I need it to do. Next step is to hook up the fridge and confirm that the system can handle it. Then, when we're getting ready to head back up north this summer, we shouldn't have any surprises.
I know (or at least I suspect) that this system will not pass muster with Canadian electrical code. But I believe it is safe and appropriate for a cabin that only gets a few weeks of use a year, and I know that the building inspector won't be visiting anytime soon.
Ideas, comments and criticisms are welcome.
|
|
CabinBuilder
Admin
|
# Posted: 17 Mar 2014 09:26am
Reply
Amazing place you have, davestreck.
Sure you and your family will enjoy it!
|
|
| << . 1 . 2 . 3 . 4 . >> |
