| . 1 . 2 . 3 . >> |
| Author |
Message |
knock
Member
|
# Posted: 18 May 2013 08:47pm
Reply
I have enjoyed looking at all of the other projects that individuals have posted, I thought I would share my own.
In Sept 2012 my wife and I bought a 1/2 acre lakefront lot in a lake community. It was a wood lot with no improvements, until I got started.
The first project was to get a spot cleared out for a cabin and a driveway down to it. This was a little outside my comfort zone, so I hired a guy. Hopefully this is the only thing I will have to hire out.
I was pretty satisfied with the work done.
|
|
knock
Member
|
# Posted: 18 May 2013 08:55pm
Reply
The future site of the cabin.
Pic 2
|
|
hattie
Member
|
# Posted: 18 May 2013 08:58pm
Reply
Looks like a very beautiful spot. Keep the photos coming as you progress!!!! How many other houses are on your lake?
|
|
knock
Member
|
# Posted: 18 May 2013 09:12pm
Reply
I had most the winter to decide the layout, size and placement of the cabin. My main limiting factors were the size of the spot that I had leveled, a few trees that are currently leaning way to much and the limitations that the subdivision has on cabins.
I decided on a 16x20 with a gable style roof. The first floor of the cabin will be on large open room. The "loft" upstairs will be two separate rooms of @ 9x14 each. Shed dormers on the 10/12 pitched roof will add some much needed headroom.
Here were my attempts at using sketchup.
Facing Lake
Facing Driveway
Facing Road
Facing away from driveway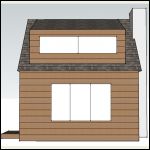
Facing Lake
| 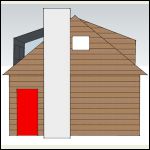
Facing Driveway
| 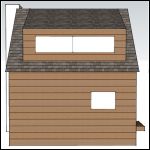
Facing Road
| 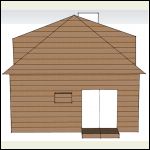
Facing away from driveway
|
|
|
knock
Member
|
# Posted: 18 May 2013 09:17pm
Reply
hattie - There is only one other cabin on this 9 acre lake. There are only 5 lots that are on the lake. I have been told that the opposite side of the lake has caves with endangered bats, so no building on that side. I hope it is true so I can continue to have such a great natural view.
I was able to see the one other cabin during the winter, but now with the spring growth it has disappeared.
|
|
darz5150
Member
|
# Posted: 18 May 2013 11:12pm - Edited by: darz5150
Reply
I am not sure if you can get 2 rooms in your loft 9 x 14 if the first floor is 16 x 20. I suppose you could cantilever your floor joists. I suppose you could cantilever your floor joists.
|
|
darz5150
Member
|
# Posted: 18 May 2013 11:18pm
Reply
hello knock, your site looks very nice.
You might want to consider building your cabin in a traditional 2 story fashion (standard stick frame) with pre cut studs, and then topping it off, with off the shelf pre fab roof trusses. That will save you a lot of extra work building a dormer style roof. You can buy the roof trusses at any lumber yard pretty cheap.( standard garage trusses) that will reduce your chance of leaks because you won't have to add step flashing on the sides of the dormer when doing your shingles. It will also give you the option of putting windows on all sides. You could also build a second story deck facing the lake if you put a sliding door or even a walk thru door up there. Good luck with your project.
|
|
hattie
Member
|
# Posted: 18 May 2013 11:36pm
Reply
Quoting: knock hattie - There is only one other cabin on this 9 acre lake. There are only 5 lots that are on the lake. I have been told that the opposite side of the lake has caves with endangered bats, so no building on that side. I hope it is true so I can continue to have such a great natural view.
Sounds beautiful and perfect. Congratulations on such a great find!!!
|
|
|
OwenChristensen
Member
|
# Posted: 19 May 2013 06:45am
Reply
Nice , You'll have fun. Put a couple more windows in. Good luck and keep us posted.
|
|
knock
Member
|
# Posted: 19 May 2013 10:24am - Edited by: knock
Reply
Darz - I will take a tape measure to the finished room sizes, but I am pretty sure I can get pretty close to that size. A portion of room will have pretty steep sloping ceilings.
With a foot print of 16x20, I could get two rooms of 16x10 minus wall thicknesses. The shed dormer walls will be plumb with the walls on the first floor. I won't have stairs, but more of a ladder so I loose some square footage upstairs for the ladder opening.
I also thought about getting room in attic trusses also for the build. Since the site is so steep I cannot get anything delivered down to the site of the cabin. (it is so steep bobcats would be on two wheels when coming up the driveway). Getting a crane in for the trusses would also be pretty tricky.
Since I will be doing all of the work by myself though it may be easier to not move a truss by myself. If worse comes to worse, I have some buddies who will help, but this is something I really want to do solo.
Thanks for the comments.
|
|
knock
Member
|
# Posted: 19 May 2013 10:44am
Reply
The cabin arrived on May 11th (at least in compact form). An expensive pile of wood.
|
|
cabingal3
Member
|
# Posted: 19 May 2013 12:35pm
Reply
knock.really pretty site for yur cabin.
i always get excited when a see a truck load of lumber.good for u...we wil sure enjoy seeing your progress.
|
|
Ryan
Member
|
# Posted: 19 May 2013 01:15pm
Reply
maybe some nice sliding or folding doors facing the lake to a nice deck? not sure if this works with the slope, ect, is there a site plan?
|
|
knock
Member
|
# Posted: 19 May 2013 08:04pm
Reply
With the depth of the cabin and size of the terrace it wasn't really feasible to have doors or a deck between the cabin and the lake. I wanted to try that, but the depth of the cabin just became impractical.
Here is another elevation that has some more details.
|
|
trollbridge
Member
|
# Posted: 19 May 2013 08:59pm
Reply
Welcome! Looks like you found yourself a real gem! It will be fun watching your cabin go up. Have loads of fun!
|
|
knock
Member
|
# Posted: 20 May 2013 09:50pm
Reply
In late April and early May I started on the support system for the cabin. I though about different ideas: a full footing with stem wall, a slab on grade or a series of piers.
In the end, the scope of work and cost where significant factors. I really wanted to do it myself, so the full footing was out of the question.
I ended up going with two rows of piers (5 piers in each row). Each pier is 12" diameter that was belled out to 16" at the bottom. The piers were spaces 4.5' O.C. Each pier is 30" deep (frost depth around here). It took around 40 - 80lbs bags of quickcrete to fill up the holes. Took me around 12 hours to dig and fill all 10 holes by myself. The first 3.5 took 6 hours, and so did the last 6.5 (I got smarter with mixing the concrete). piers, piers 2
On top of each row of piers will be a beam consisting of 2 - 2x10 PT. There are no vertical posts, the beams will rest directly on the piers with wet set brackets. I attempted to level all of the top of the sonotubes in efforts to reduce the need for shimming. Turns out that I didn't take enough time leveling out the tubes. beams
I set up a trailcam in efforts to capture my build step by step. I am having difficulty finding the perfect distance from the structure to the camera to get a wide enough view, but still having the camera go off with motion.
|
|
knock
Member
|
# Posted: 21 May 2013 10:25pm
Reply
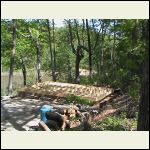
Two weekends ago when the lumber was delivered I started installing the floor joists. They are 2x10 spaced 16" O.C. spanning 14' between the two PT beams. Joists, Joists 2
I installed the joists and a couple rows of blocking. Fortunately I remembered about the bump out for the fireplace before I installed insulation or subfloor. I just had to make a couple cuts to the rim board and add a couple joists.
The blocking was set 2 inches down to support the rigid insulation board. Since the cabin is set on piers, I was concerned that critters may get into the insulation below the floor. I decided to go with 2" insulation board. I know that it won't provide that much R-value (only 10), but since I won't be living there I though it was an acceptable tradeoff and definitely better than nothing.
I then installed 3/4 T&G subfloor over the joists and insulation. After I had 1/2 of the platform covered I realized that the joints were not lining up with the joists. I probably should have run the subfloor perpendicular to the joists instead of parallel, but removing a couple hundred nails was not feasible at that point, so I pushed onward. Hopefully it will not have a significant negative impact.
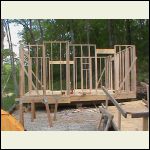
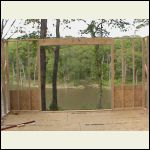
The next day I started raising the walls. Since I was working alone, I made all of the wall sections less than 6' wide. This allowed me to lift, nail and plumb the walls. I started in the corners and moved to the middle. I got all the walls and the headers up in about 7 hours.
I was surprised by how flimsy the walls were at the midpoint. Wall sheathing, a double top plate and the joist supporting the loft should tighten things up.
I was pretty happy with being able to insulate to floor, install the subfloor and get the walls up in two days. Man was I sore on Monday.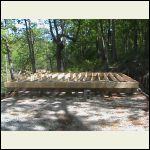
Joists
| 
Joists 2
| 
walls
| 
headers
|
|
|
knock
Member
|
# Posted: 2 Jun 2013 11:55am
Reply
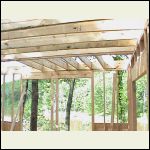
I was able to sneak down for one more day of framing. Just completed the framing above the headers, the interior walls for the bathroom and started installing the second floor joists.
I wanted to create a place to store firewood inside. So I built shelf to set the fireplace on so I can store some firewood under it.
I changed the direction of the floor joists to allow for a ladder opening to the second story. (Window and Joist) I am trying to figure out if 2 - 2x10's bolted together will serve as an appropriate beam spanning 16' and carrying half of the 68" span from the beam to the exterior wall or if I need to triple it up before putting on the 2nd floor sheathing.
The building is getting tall and still has about 10' to go to the beam supporting the roof. (From above).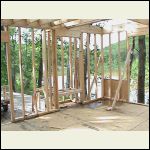
Fireplace
| 
Window and Joist
| 
From above
|  |
|
|
Morch
Member
|
# Posted: 17 Jun 2013 12:57pm
Reply
Keep up the good work and solid descriptions. I want to build a cabin similair to yours so its a great help. Thanks
|
|
Oilerfan
Member
|
# Posted: 17 Jun 2013 02:05pm
Reply
I designed my own 12x16 and it is virtually identical to yours! I am going out this weekend to install the beams, joists, insulation, flooring, etc. Not sure I will get to the walls until the July long weekend.
Your build is looking good. Good luck the rest of the way. I have a thread that I will update after the weekend on mine.
|
|
knock
Member
|
# Posted: 14 Jul 2013 01:02pm
Reply
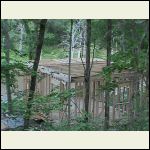
I have been able to sneak down on a few weekends to get some more work done.
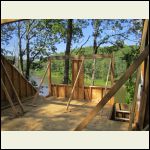
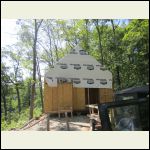
While I was enjoying doing everything myself, I decided that it would be easier to put the sheathing and house wrap on the gable walls prior to lifting them, instead of on a 20' ladder. I had a couple buddies help lift the gable walls and ridge beam.
I was able to get the shed dormer walls up by myself.
I hope to get the roof framed and covered by the end of August.
|
|
knock
Member
|
# Posted: 14 Jul 2013 01:03pm - Edited by: knock
Reply
more pics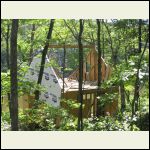
gable walls
| 
dormer
| 
house wrap
|  |
|
|
Kudzu
Member
|
# Posted: 14 Jul 2013 03:19pm
Reply
Looking great, keep the pics coming.
|
|
ErinsMom
Member
|
# Posted: 14 Jul 2013 04:56pm
Reply
I'm impressed with the amount of work you have done on your own. Can't wait to see more.
|
|
knock
Member
|
# Posted: 4 Aug 2013 10:18pm - Edited by: knock
Reply
I was able to start getting the rafters installed this past weekend. I am really dreading putting on the roof sheathing. I may be able to install some from working on a ladder on the second floor, I won't be so lucky for the shingles.
I still have a couple more rafters to install in the middle and the rafters for the gable overhang.
|
|
knock
Member
|
# Posted: 4 Aug 2013 10:21pm
Reply
rafters
rafters 2
|
|
knock
Member
|
# Posted: 11 Aug 2013 10:20pm
Reply
Well I got one more day of work accomplished. I am still working on the framing details for the rafters that overhang the wall (12" overhang required by the subdivision).
Everything is going okay but a little slow.
I am curious how others would frame the 12" roof overhang that extends off of a shed dormer and rests on the steeper roof. I looked for details online but did not find much help.
I decided to rest it on the roof sheathing (actually on top of the tar paper) and will flash it. If anyone has any suggestions I am very open to any (I have not installed them yet).
Thanks for help in advance.
|
|
knock
Member
|
# Posted: 15 Sep 2013 01:58pm
Reply
I have had about 3 more work days on the project since my last post.
I tried trenching in the electrical service myself, but due to the soil conditions (and hours of frustration) I had to sub the job out. The sub didn't do it as detailed as I would, but got it to pass inspection (good ole boy network).
The roof sheathing has been installed. I had my mind up to go with 19/32 for the roof sheathing, but the lowes I went to didn't carry it so settled for something thinner (I was glad I did after hoisting it up two stories).
I have almost all of the wall sheathing done (except for the shed dormers). I had the chance to get it done last night, but ran out of time, so I just put up a strip along the roof surface so the roofers can do their flashing.
Hopefully the roofer will be by this week and I will be one step closer to being dried in.
Starting to consider subbing out the siding job also so I can focus on working on the inside, which I enjoy more.
|
|
knock
Member
|
# Posted: 6 Oct 2013 09:25pm
Reply
Well, I worked my tail off (in the dark) to get the sheathing done, just to have my roofer now tell me that my job was 3-4 weeks out. Two weeks ago he told me that I was my job was 2 weeks out.... During our discussion he asked if I had asked any other contractors about doing the job (major clue that this job was not a priority).
So I scrambled around and found another crew to put on the roof. Costed a little more, but it got done pretty timely.
With the roof on I finished installing the sheathing and started adding more house wrap. I have 3 sides wrapped and hope to get the last one wrapped (and the chimney) next weekend and start putting in the windows.
|
|
knock
Member
|
# Posted: 24 Oct 2013 10:29pm
Reply
Most of the wrap is on and the windows are starting to go it.
I got a pretty good deal on the windows so I didn't mind hauling them 60+ miles down to my place (when there were closer places to get windows). I got all 9 windows down there without any being damaged. So far I have 3 windows and a sliding glass door in. I hope to get the other 5 in this weekend.
I thought making the rough openings a little larger than needed would make it easier to put them in and getting them square. It did not because the flanges were not large enough so I had to fur in the openings.
|
|
| . 1 . 2 . 3 . >> |

