| . 1 . 2 . 3 . 4 . >> |
| Author |
Message |
1300_stainless
Member
|
# Posted: 2 Sep 2014 07:38pm - Edited by: 1300_stainless
Reply
So I'm finally getting around to posting pictures and details of my project. Warning, the following is a bit long winded.
Without going into too much detail my life can get, and usually is, pretty hectic. I struggle with anxiety on an almost daily basis. The plan for this "camp" revolves around my belief that sometimes for myself less really is more. I needed a place to go to escape everyday stress, relax, and collect my thoughts. Somewhere that things are simple, and close to the outdoors/nature. It was also something I wanted to do for self-growth and a learning experience. (I have very little carpentry knowledge and have avoided projects like this because they intimidated me). This May I took the plunge.
My budget for this project is very limited. It's been funded by an income tax rebate, selling a few things, and cutting my spending where I can. I'm trying my best to do a little with a lot whenever possible. For example instead of buying trim for the door lip I ripped left over lumber on a table saw. Not as pretty but that's $10-$20 for something else. I've been saving the spending of cash for things I feel are a more important investment. Like choosing the extra expense of assembling the camp with screws, for durability and to make future repairs and modifications easier.
For location I chose a spot that always seems to make me feel better. It's situated in the woods on my family's property, far enough away from my home to be quiet but close enough to be convenient. It's reachable by foot or ATV. Trails are not quite wide enough for a ½ ton truck, but I feel that keeps it more private. A small brook runs just a short distance from where I am set up and can be heard babbling most of the year (quiets down when the water level drops in summer). You can almost always hear birds chirping, or squirrels chattering. It's shaded, but the sun still peaks through the trees. It wasn't the most practical location for the construction part, but well suited for my desired end result, as it's one of my favorite places to be. Pictured below is a layout I did after deciding on my location.

For the structure I chose a 10x10 shed "kit" from a local lumber yard. I chose this size as I felt that it was small enough to keep things simple but large enough to be comfortable with what I planned to have inside. I chose the kit option for several reasons. First it was simple for a novice like me. Pre-assembled trusses are raised on top of 3 skids and the entire structure is built around that framework. Also the kit was a great value. The price included everything but the roofing and hardware, and it is all durable plank and lumber, no OSB or the like. I have an old truck camper that will provide windows, interior appliances, etc. Here is how it arrived, trusses and a stack of intimidating lumber. Some assembly required.

Up to this point I have done most of the work myself, working on the weekends and learning as I progress. I've had to ask for help with some of the jobs that require extra hands like raising the trusses, planking the roof, and installing the eve trim. My supplies are hauled in using a tractor and an old logging trailer my grandfather had built years ago, that I returned to serviceable condition. Power tools are run by a small generator. Below is a photo of the Trusses ready to be hauled in.

I've been photographing my progress at the end of each day and will be making an album to keep at the camp when finished. I'll share some on this post as well.
The ground was quite uneven so I used cement blocks, rock and lots of shovel work so the skids sat level

Trusses raised and braced

Blocking in place, floor laid and roof planked

Doors and windows framed

Walls are done with board and baton. I wrapped the framework in felt paper before the boards went on to provide a wind and moisture barrier.


Was able to get an hour in here and there in the evenings to coat the floor. One coat of stain and 5 of clear floor finish. Protecting it with a trap and working in slippers during the interior construction. Top bunk is complete and the folding camper style dining booth/bunk has been started.


It's coming along but there is still lots to do. It is at least inhabitable now. I've stayed in it 2 nights already! I'm hoping to pick away at the booth/bunk set up in the coming evenings. Also ordered my metal roofing this morning. This is just a snippet of all the photos I've taken, there are too many to share them all. I'll update with more as things progress.
|
|
LoonWhisperer
Member
|
# Posted: 2 Sep 2014 08:45pm - Edited by: LoonWhisperer
Reply
Coming along very nicely. Congrats! As a fellow 10x10er I can totally relate to what you are working with and the limited budget.
We inherited the cabin when we bought the land but it needed some TLC. My last few visits I have been mostly working on optimizing what little space there is with a folding table and chairs, drawers and lots of hooks lol.
Here are a few pics of our humble little set up. Best of luck and be sure to add more pics as you move along.
cabin1.gif
| 
cabin4.gif
| 
cabin2.gif
| 
cabin3.gif
|
|
|
1300_stainless
Member
|
# Posted: 3 Sep 2014 09:37am - Edited by: 1300_stainless
Reply
Mainiac, holes were dug, a few inches of gravel laid in, blocks on top, leveled, back filled around them with gravel. Then skids went on the blocks. Best way I could think to do it aside from a mini excavator that would have cost more than the entire build.
Loon, looks good. Thanks.
Are all my photos showing up? I keep having to refresh the page to view them today.
|
|
Wilbour
Member
|
# Posted: 3 Sep 2014 09:56am
Reply
Quoting: LoonWhisperer We inherited the cabin when we bought the land but it needed some TLC. My last few visits I have been mostly working on optimizing what little space there is with a folding table and chairs, drawers and lots of hooks lol.
We bought a run down 10 x 16 shack and are slowly making it into a resting/sleeping cabin. The only thing left standing from the original is the framing, and even then one wall was mostly redesigned for the installation of two windows on the sides where there was one in the middle.
I found a used folding table like yours and a couple folding chairs as well. I also have a couple hanging chairs that can be rolled up when not used. The idea is to keep most of the floor space available for storage when we are not around and more room for cots overnight
|
|
Anna
Moderator
|
# Posted: 3 Sep 2014 10:53am
Reply
great pictures Stainless!
|
|
1300_stainless
Member
|
# Posted: 26 Sep 2014 07:33am
Reply
Crazy busy this last little bit. Haven't been able to progress as quickly as I would have liked on the camp. Was able to accomplish a little bit of notable work though, by picking away an hour here and there.
Was able to finish up the camper style booth/bed.


My Nu-Way stove arrived as well. I've started picking away at the components to install it.

My roofing came in, and sat in the store a week and a half until I went in to see why I hadn't heard from them. Unfortunately after unwrapping it I found the ridge cap was beat to snot, so more waiting until the roof can be finished. With the help of my friend we were able to get the sheeting installed last weekend. I just chucked the tarp back on top until it can be finished. Here is my buddy sweeping the sheeting before the tarp goes back on.

Next comes the "kitchenette" counter and the Nu-Way stove for heat.
|
|
LoonWhisperer
Member
|
# Posted: 26 Sep 2014 11:29am
Reply
Coming along nicely!
Love that bed/booth idea!! Our layout is very similar. Was it hard to build?
|
|
1300_stainless
Member
|
# Posted: 26 Sep 2014 12:44pm
Reply
Loon, it wasn't too bad. The hardware came from a truck camper. The table was set up first and then the seats were built to match the height of the table when it was swung down and held level.
|
|
|
redlandfd
Member
|
# Posted: 28 Sep 2014 10:30am
Reply
looks great, you did well for a "novice". kind got right to the point of a small cabin...building a small, do-it yourself, private get a way, for fun and peace of mind. great job
|
|
1300_stainless
Member
|
# Posted: 6 Oct 2014 09:24am - Edited by: 1300_stainless
Reply
redlandfd, thanks!
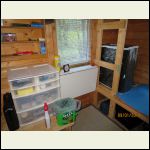
Here is the kitchenette. Not quite finished, but usable at the moment. Will eventually have the left side of the frame covered and a large curtain over the front to provide storage underneath with easy access. Sorry about the picture quality, it was a dark day.

Managed to install the heater vent before the rain got too heavy on Saturday. The pipe that goes inside is 3". I cut a 6" hole in the wall. The dryer duct is sealed to a sheet metal flashing, the flashing attached and sealed to cement board and the cement board is sealed and attached to the wall.

|
|
Julie2Oregon
Member
|
# Posted: 7 Oct 2014 01:08am
Reply
It looks great! You've done a wonderful job!!! The kitchen looks good! I'm especially interested in your 3-burner propane stovetop. Is it set into the countertop and, if so, how did you do it? What are you doing for water?
|
|
1300_stainless
Member
|
# Posted: 7 Oct 2014 06:52am
Reply
Thanks! The 3 burner is set into the counter top. I can't take much credit. The counter top and appliances mounted in it came out of a truck camper. All I really did was clean, refurbish and remount all the components. The stove gear is all mounted in a tin box with a lip that sits down into a hole in the counter, then the top surface sits on top of the counter and is secured to the box with 2 screws.
For now I will just be bringing a container of water, sitting it under the counter and using the RV hand pump to draw it into the sink. I left the standard tap set just because there would have been holes in the counter top if I removed it.
|
|
cabingal3
Member
|
# Posted: 7 Oct 2014 08:09pm
Reply
your place is so greatly cute and nice.i love it all.
enjoyed seeing all this.
|
|
SandyR
Member
|
# Posted: 7 Oct 2014 08:53pm
Reply
I totally agree that sometimes less is more. Good for you for making something for yourself to feel good in! I have anxiety too and understand what it can feel like. Looks great!
|
|
1300_stainless
Member
|
# Posted: 8 Oct 2014 07:13am
Reply
Thanks guys! It's turning out to be a great get away already. I've stayed several times (with various friends/family) and me and my GF have gone in a few evenings just to eat a meal in the peace and quiet.
|
|
1300_stainless
Member
|
# Posted: 17 Oct 2014 07:25am - Edited by: 1300_stainless
Reply
Progress was made over the last weekend. It was Thanksgiving weekend here in the north and I took Friday off to give me a 4 day mini vacation. Also, me and the missus stayed in the "camp" Thursday, Friday, Saturday and Sunday night! It was cool at times but we had lots of blankets to keep us cozy.

With the help of a friend we were able to install the ridge cap and FINALLY finish the roof. Looks much nicer without the tarp draped over it.


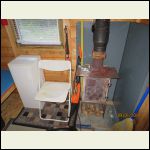
Was also able to install the heating stove and exhaust. As well as a small shelf and a ton of little odds and ends I had been putting off until more important tasks were completed. Here is a bit of a 360 view, from one side of the door circling to the other, of how things are currently.
"Kitchenette"

The corner we usually dump our gear

Booth/Bunk

Heating stove

Next step is to plumb the propane so the cook stove and heat stove can share the same tank. Copper lines are something new to me so I'm taking my time. Most of what I am doing I have to do over at least once, if not 2 or 3 times before it suits me. It's difficult flaring a pipe when you're laying upside down and the like.
One thing I will say is that this "camp" has been worth every second of time, and every dime I've put in. I love waking up, boiling water, making a coffee. Then enjoying it outside while I listen to the brook and all the squirrels, birds and other wildlife as they wake up.
|
|
Wilbour
Member
|
# Posted: 17 Oct 2014 09:28am
Reply
Waking up with Folgers in your cup. You said it.
|
|
Pookie129
Member
|
# Posted: 18 Oct 2014 07:03am
Reply
Looks great 
|
|
neb
Member
|
# Posted: 19 Oct 2014 12:05am
Reply
Looks very nice!!! You must have that 10x10 pretty full.
|
|
1300_stainless
Member
|
# Posted: 19 Oct 2014 07:01am
Reply
Thanks guys!
It's funny you should say that, for some reason to me it feels very roomy for a 10x10 space! I have everything I need in there to spend a few days and there is still room to move without feeling cramped. I put a lot of thought into using the space as efficiently as possible and it was worth the effort.
I do plan on a small outdoor storage space in the future to hold a few lawn chairs and the like. This way if the weather gets sour they don't have to take up "living" space in the 10x10.
|
|
Gotta Gettaway
Member
|
# Posted: 20 Oct 2014 12:08am
Reply
Looks great. Very nice little build.
|
|
1300_stainless
Member
|
# Posted: 29 Oct 2014 07:45am
Reply
Not much picture worth progress lately.
Was able to do a few odds inside. Hung up a coat rack, got some storage totes for under the seats.
I was able to gear up a nice space saving way to access the top bunk. Used salvaged "holy crap" handles from a Geo metro and an old folding truck step. Zero $ job but it works quite well!
I'd really like to get some Pentox on the exterior but the weather has been very wet and damp. 
I was lucky enough to see this big guy on a supply run between the camp and house!

|
|
LoonWhisperer
Member
|
# Posted: 29 Oct 2014 01:03pm
Reply
Good to see things are moving along. Somehow your 10 x 10 looks expansive compared to our wee 8 x 8 lol. Definitely hear ya when it comes to being creative about the use of space.
That is an awesome pic! Any plans to put up trail cams (if you haven't already)? We just setup two.
Cheers!
|
|
Flying Wrench
Member
|
# Posted: 29 Oct 2014 07:30pm
Reply
I like it a lot! How easy is it to get in and out of the booth?
|
|
1300_stainless
Member
|
# Posted: 29 Oct 2014 07:38pm
Reply
Loon, someday I'd like to have trail cams down the road. I don't own one at them moment and the cash would be better spent on some insulation haha.
Wrench, the booth isn't too bad. A little more leg space would have been ideal, but the heights are based on what would work with the hardware I had from the truck camper table.
|
|
1300_stainless
Member
|
# Posted: 23 Nov 2014 02:43pm
Reply
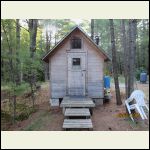
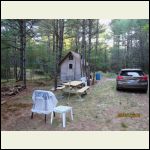
Was able to get a coat of Pentox slapped on the outside a few weeks ago. Been super busy lately but I'm doing my best to sneak to the 10x10 when I can.


Here's my view stretched out in the booth relaxing a few weekends ago.

|
|
NhLiving
Member
|
# Posted: 23 Nov 2014 08:05pm
Reply
Little by little, I wish i could sneak away to mine just about every day I'm not there, its become a bit of a problem. Your cabin looks great though, looks nice and secluded and cozy. The stain looks good to, keep it up.
|
|
1300_stainless
Member
|
# Posted: 11 Dec 2014 09:18am - Edited by: 1300_stainless
Reply
Did a little decorating for the holidays. Going to stock up on propane and hoping to sneak away and spend some time in the woods over the next few weeks.


|
|
Purplerules
Member
|
# Posted: 14 Dec 2014 09:10am
Reply
Your camp looks like the perfect retreat from the rat race. You have done a fantastic job with the layout. I see many years of de-stressing for you there.
And the Christmas decorations was a nice touch.  Keep on enjoying and posting any new progress. I Like reading of your journey. Keep on enjoying and posting any new progress. I Like reading of your journey.
|
|
sparky1
Member
|
# Posted: 14 Dec 2014 10:46am
Reply
Great Job.thanks for all the pictures & write up.
sparky1.
|
|
| . 1 . 2 . 3 . 4 . >> |

