| . 1 . 2 . >> |
| Author |
Message |
pash
Member
|
# Posted: 7 Sep 2015 09:37am
Reply
I have lurked on this site for years and finally bought a booklet from Stoney, and convinced dad that he needed another building to house our growing fleet of tractors and atv's. We also no longer have enough sleeping space when all the family gets together with the rate all the grandkids are popping out. So we figured we would kill both these birds with the build.
A few things I am trying different and since I have the experience and tools to fix them if they dont work I figured I would give them a go and post them here. Using posts instead of a slab, Ratchet straps instead of clamps and Timberloks on the corners to make it easier to build the corners. Ill let you know how those go or if i abandon them as the build progresses.
Here are a few pics from the first weekend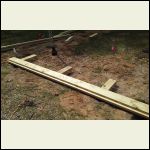
how i made the posts
| 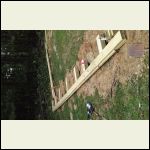
posts
| 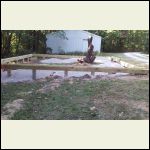
the first run
| 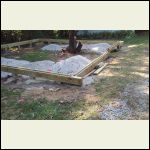
the first run
|
|
|
Bevis
Member
|
# Posted: 8 Sep 2015 09:45pm
Reply
The post have the raised "lip" to fit the groove on the bottom?
Good Start.
|
|
pash
Member
|
# Posted: 8 Sep 2015 11:50pm - Edited by: pash
Reply
yes on the groove, 36" deep holes, frost line is 18. 6000lbs of concrete around those posts, i also made my splice 4ft deep on the groove board. those 24' logs were hard to move though. A tractor and timberjack were my friends.
|
|
pash
Member
|
# Posted: 5 Oct 2015 04:24pm
Reply
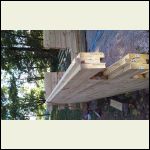
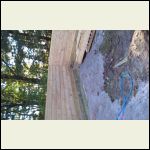
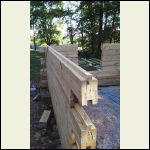
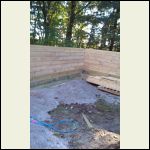
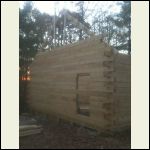
Spent saturday and sunday working on the cabin, at this point i have 2 weekends in it, about 70 man hours total in it. Timberlocks work awesome. At this point I am really pleased.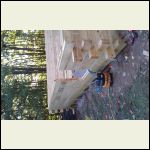
cabin.jpg
| 
cabin1.jpg
| 
cabin2.jpg
|  |
|
|
pash
Member
|
# Posted: 5 Oct 2015 04:26pm
Reply
sorry about the photos, i cant figure out how to rotate them
|
|
Cisco
Member
|
# Posted: 7 Oct 2015 09:37am
Reply
Great start on the cabin.
Your Photos are too big. Open them in Microsoft paint. Resize them to about 80% and save. Then relink them here. They should stay upright. If not make them even smaller and try again
|
|
pash
Member
|
# Posted: 7 Oct 2015 11:35am
Reply
Thanks for that Cisco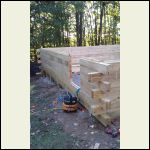
cabin.jpg
| 
cabin1.jpg
| 
cabin2.jpg
|  |
|
|
Thelar
Member
|
# Posted: 9 Oct 2015 01:23pm
Reply
Wow, it looks great. Just curious, how will you install a floor?
|
|
|
pash
Member
|
# Posted: 9 Oct 2015 02:51pm
Reply
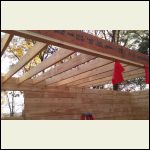
currently the plan is to store tractors and atv's downstairs so gravel only. For the loft I am using a double LVL 9/1/2in lumber as a beam and running 2x8's to the wall notching the wall to accept them. This way I can keep a clear span downstairs. If i did want to put a floor in, i would just put 2 beams in the floor and run 2x8's across on the first run. this would only cost me 8 inches, and im making the downstairs 9ft tall, so it would be easily doable in the future. I may put a deck on one side to access the loft so I can completely close off the downstairs and use it as a workshop, without loosing space for stairs.
|
|
Don_P
Member
|
# Posted: 9 Oct 2015 03:28pm - Edited by: Don_P
Reply
Joist hangers on the walls would do it as well, each "log" is essentially a built up girder.
A double 2x10 lvl supporting a loft? I've got a double 14"LVL spanning 23' supporting an 8' shed roof entry to my barn. With a 1' overhang the beam is supporting 4' (half the roof span+1' overhang... 5' of roof x 23' of length. It is juicy to walk on, I wouldn't use it for a loft.
|
|
pash
Member
|
# Posted: 9 Oct 2015 03:39pm
Reply
I can put a post if i feel its too juicy, i was going to put some 45's on it to shorten the span it is holding. i also am tying it into the truss i am building for it. So im not really that worried about it. Since I have a post as a last option.
|
|
Rowjr
Member
|
# Posted: 14 Oct 2015 02:30pm
Reply
nice work
|
|
pash
Member
|
# Posted: 27 Oct 2015 11:07am
Reply
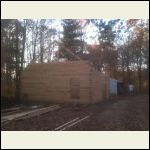
Spent 3 more days at the farm this weekend. Very pleased with the progress.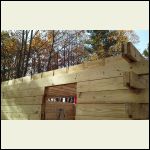
loft_outside.jpg
| 
loft_inside.jpg
| 
cabin_day_7a.jpg
| 
cabin_day_7b.jpg
|
|
|
pash
Member
|
# Posted: 10 Nov 2015 04:13pm
Reply
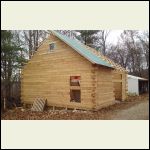
spent another weekend working on it, till i got rained out. Far enough along that I have learned plenty.
Don_P the double LVL is fine, i tied it into a truss and jumped around, doesn't move a bit. but i wouldnt do it if it wasn't tied in, it takes the span down to about 16'.
I learned I should have put the loft in the whole way and floored it before moving on, it would have make the roof go so much smoother, and lifting a log 15' off of the ground isnt fun, much easier to build them on the loft. still pleased with how it works though.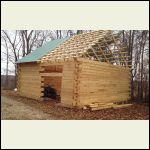
partial_roof.jpg
| 
partial_roof_1.jpg
|  |  |
|
|
Rowjr
Member
|
# Posted: 10 Nov 2015 05:28pm
Reply
Very cool !
|
|
Sheeterdan
Member
|
# Posted: 15 Jul 2016 11:51am
Reply
Hey any pics of finished build
|
|
pash
Member
|
# Posted: 18 Jul 2016 03:49pm
Reply
I had some on a phone i broke, Im actually going this weekend to paint the outside, ill take a few pics for you and post it.
|
|
roy k
Member
|
# Posted: 3 Aug 2016 07:51pm
Reply
pash
|
|
sparky30_06
Member
|
# Posted: 4 Aug 2016 08:01am
Reply
Now I'm interested in this construction and booklet from Stoney. So the wall appear to be laminated 1x6??? are they glued and clamped? seems fairly strong to a certain wall height.
|
|
Jabberwocky
Member
|
# Posted: 4 Aug 2016 09:03am
Reply
sparky30_06
2x6 or 2x8 I think Sparky.
|
|
Nirky
Member
|
# Posted: 4 Aug 2016 09:25pm
Reply
And nailed. Here's his original thread.
|
|
Rickkrus
Member
|
# Posted: 5 Aug 2016 09:33am
Reply
What are you using for chinking?
|
|
Lecormier
Member
|
# Posted: 13 Jan 2017 11:33pm
Reply
Beautiful Pash!
|
|
GIF1972
Member
|
# Posted: 21 Nov 2017 11:13pm
Reply
Do u have a material list and cost estimate
|
|
pash
Member
|
# Posted: 22 Nov 2017 03:48pm
Reply
I got most of it from Menards with 11% cash back. Think it was right at 8k. As far as a material list. Feel like it was about 500 2x8x12's and 6 gallons of glue, 80 timberlocks and 40k nails (however much 8 boxes is).
|
|
GIF1972
Member
|
# Posted: 26 Nov 2017 10:41am
Reply
Did you ever make a foundation plans or a construction plan manual. I really would like to build this. I would purchase the manual if I have too
|
|
pash
Member
|
# Posted: 26 Nov 2017 02:19pm - Edited by: pash
Reply
Stoney made a manual, I bought it. Look back through some of the links in this thread and you will probably find it.
|
|
44him2
Member
|
# Posted: 19 Dec 2017 10:17pm
Reply
Love the looks of your cabin--the thread says that you used nails and glue but in the pics the nails do not show up as much as they did in Stoney's pics--same 1 ft apart nail pattern? Also I followed the threads looking for the manual but only found the bay reference and could not find it there.
My email is daleandjennifer@sbcglobal.net if you could point me in the right direction. or send me a PDF of what you have.
Dale
|
|
pash
Member
|
# Posted: 19 Dec 2017 10:33pm
Reply
Nails, idk I nailed the hell out of it. 1ft sounds good. His email was braker1@bellsouth.net
|
|
drb777
Member
|
# Posted: 20 Dec 2017 01:52pm
Reply
PASH, do you expect significant vertical expansion and shrinkage in this type of log wall construction?
Do you plan on leaving a gap above windows/doors to allow for same?
|
|
| . 1 . 2 . >> |

