| . 1 . 2 . >> |
| Author |
Message |
Skip
Member
|
# Posted: 26 Dec 2010 01:49pm - Edited by: Skip
Reply
This is a hunting cabin that two friends and I built in the Columbia Basin of Eastern Washington. It is 12' X 16" with a 10/12 roof pitch.
It has a loft over half of the inside space, 12V RV lighting, and propane heating (a Big Buddy heater).
Total cost of materials so far is $4,600, which includes full insulation as well as composite decking on 3 sides.
December 2010: We are now in the process of adding a solar system and battery bank.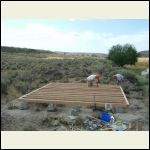
Building the foundation, start date 8/28/09.
| 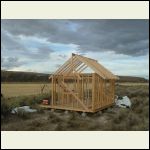
Completion of the stud framing September 2009.
| 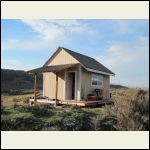
Addition of deck roof September 2010.
| 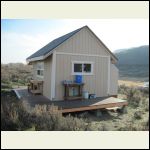
Addition of back deck October 2010.
|
|
|
Skip
Member
|
# Posted: 26 Dec 2010 03:13pm - Edited by: Skip
Reply
More pictures, this time of the interior.
Note that the cabin is fully insulated. We put 3/8" plywood over the studs and insulation, which allows us to place hangers, shelves, hooks, etc. wherever we'd like. (We refer to it as "redneck sheetrock".) The flooring is vinyl.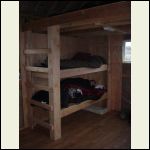
Bunkbed with ladder to the loft.
| 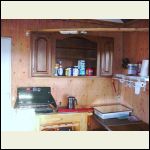
The inside kitchen area (we do most cooking outside on the grill).
| 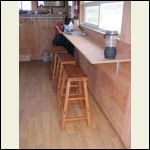
Our "dining counter" - with a view!
|  |
|
|
Rob_O
|
# Posted: 26 Dec 2010 07:35pm
Reply
Great looking cabin and a great view
|
|
fasenuff
Member
|
# Posted: 27 Dec 2010 12:47pm
Reply
Looks good Skip! Does that heater keep it warm enough?
|
|
Skip
Member
|
# Posted: 27 Dec 2010 01:21pm - Edited by: Skip
Reply
Fasenuff: Thanks!
Yes - the Big Buddy heater keeps it nicely warm. It has 3 settings: low at 4,000, medium at 9,000 and high at 18,000 BTUs/hr.
At about 32 degrees F outside temp: On the high setting, it takes about an hour to get the cabin warmed-up to the mid 60's. Then we can maintain a temp around 68 degrees F indefinitely on the low setting.
If the outside temp is in the teens, then the medium setting will do it.
* * *WARNING: It's a non-vented propane heater. Despite it being rated for indoor use, it still consumes oxygen and produces carbon monoxide. As I'm sure you know, carbon monoxide can kill you.
It's equipped with a low-oxygen shut-off pilot safety, as well as a tip-over auto shut-off. Despite that, I still like to leave a window cracked open. Although fully insulated, the cabin is by no means 100% air-tight, either.
I also have a smoke and carbon monoxide detector, which I test at the beginning of each stay.
I will often get the cabin up to about 70 degrees, then turn the heater off for the night (including shutting off the propane tank, which is located outside the cabin). On a 35 degree night, the cabin is at about 55 degrees in the morning.
From the manual:
"This is an unvented gas-fired portable heater. It uses air (oxygen) from the area in which it is used. Combustion by-products produced when using this product contain carbon monoxide.
Adequate combustion and ventilation air must be provided."
Here's the company website, and specific info on this heater. I'd recommend downloading the operating instructions pdf.
http://www.mrheater.com/product.aspx?catid=41&id=116
BE SAFE !!!
|
|
Skip
Member
|
# Posted: 27 Dec 2010 01:35pm
Reply
Also check out the following thread on non-vented propane heaters:
http://www.small-cabin.com/forum/3_377_0.html
|
|
fasenuff
Member
|
# Posted: 27 Dec 2010 02:04pm
Reply
Thanks! I saw your post there after I posted here. Thanks for the info. I have been thinking of one for supplimental heat. I had the Buddy heater and it did well for a smaller area. I am aware of the hazards and would not be using it overnight but only in the evening on really cold days.
|
|
MikeOnBike
Member
|
# Posted: 27 Dec 2010 04:51pm
Reply
Skip,
Very nice! You can do a lot more with your extra space. We were afraid to build bigger than our 10x12 because if it was too comfortable we might never build the bigger cabin.
The loft window is critical for us. It adds much needed ventilation during the hot summer. We can catch the canyon breeze and keep the loft from overheating.
Our 80 acres is surrounded by BLM ground. BLM actually sees the junipers as a nuisance because they are growing into the mahogany stands and killing them because they can steal the water from the mahogany.
|
|
|
Skip
Member
|
# Posted: 1 Jan 2011 04:14pm
Reply
Mr. Heater Big Buddy update: Just spent a night at the cabin where it was 11 degrees F at 9pm and 3 degrees F at 6am. After getting the cabin up to 68 degrees F with the heater on high, we turned it down to the medium setting for the night. At 6am, the cabin was at 55 F. Not bad! And that was with a bit of a breeze during the night, which reportedly made the chill factor temp down to -6 F.
|
|
Skip
Member
|
# Posted: 1 Jan 2011 04:33pm - Edited by: Skip
Reply
INSTALLED A SOLAR ELECTRIC SYSTEM ON 12/30/10.
- One 80W/17.4V/4.3A solar panel (www.ul-solar.com)
- 10A solar charge controller
- Two 12V deep cycle batteries
- About $350 U.S. total with wiring and hardware
Our main usage of electricity is interior lighting using 12V RV lighting fixtures. We will eventually add an inverter for small 110V needs (recharging power tools, etc.).
Note that we mounted the solar panel on a board with hooks, which will allow us to adjust the angle of the panel as desired (we can prop-out the bottom of the mounting board as needed).
For the winter months, we have the panel placed vertically as shown. We're far enough North that this will work fine in the winter, and we'll eliminate the possibility of snow build-up. This was suggested by a friend who works with the Air Force Survival School in Washington State, which places their wilderness camp solar panels in the same way.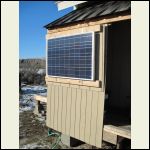
Solar panel mounted on South-facing exterior wall.
| 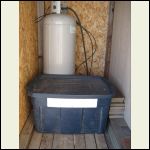
Home-made insulated & vented battery box. This is an outside shed with ample ventilation.
| 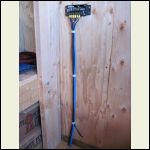
Inside cabin wiring with the solar charge controller.
| 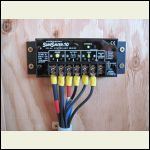
Close-up of the solar charge controller.
|
|
|
Kramer
Member
|
# Posted: 1 Jan 2011 05:33pm
Reply
What does the inside of the battery box look like?
|
|
Skip
Member
|
# Posted: 1 Jan 2011 05:42pm - Edited by: Skip
Reply
Kramer: It's pretty high-tech! 1" polystyrene insulation foam cut to fit. It's got a double-thickness on the bottom, and a 1" piece that completely covers the batteries (with a gap to allow for ventilation). The white panel you see on the front of the box (previous photo) is a screened vent.
.
|
|
RonnyQuest
|
# Posted: 2 Jan 2011 10:40am
Reply
That is Sweeeeeeeeeeeet! Nice work! That's a great idea to hang the solar panel on boards and hooks. Pure genius!
|
|
TomChum
Member
|
# Posted: 12 Jan 2011 01:24am
Reply
Could angle up to the sun about 30 degrees for winter, no snow will stick and you will get about 15% more power
|
|
Skip
Member
|
# Posted: 12 Jan 2011 10:06am
Reply
Thanks for the tip, Tom! We'll have to give that a try.
|
|
MikeOnBike
Member
|
# Posted: 29 Jul 2011 07:05pm
Reply
Skip,
We really liked your paneling. I picked up 3/8 ply for about $11 a sheet. It's a little warped but it lays flat when screwed to the wall.
http://www.small-cabin.com/forum/6_617_0.html
We also like your larger size so our next shed is going to be a bit bigger.
http://www.small-cabin.com/forum/6_659_0.html
|
|
smitty
Member
|
# Posted: 29 Jul 2011 11:59pm
Reply
Nice build.. What do you all hunt out there? That might sound like a silly question, but never been to Washington..
|
|
Skip
Member
|
# Posted: 31 Jul 2011 05:10pm
Reply
Hi Smitty: ducks, geese, pheasants, quail, and mule deer.
|
|
Skip
Member
|
# Posted: 31 Jul 2011 05:50pm
Reply
Update: April 2011. Added voltage meters to monitor a) the solar panel output (left) and b) the battery bank voltage (right). Finished the last section of deck, so we now have a full wrap-around. Also added stairs to the deck outside, and Masonite ceiling panels inside.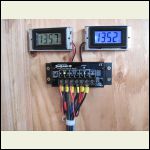
Addition of solar system voltage meters
| 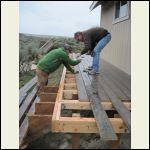
Finishing last section of deck
| 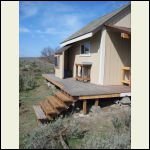
New stairs for deck
| 
Ceiling panels
|
|
|
Skip
Member
|
# Posted: 31 Jul 2011 05:52pm
Reply
July 31 update: Exterior painting nearly complete. We used paint left-over from painting my house. Fortunately, my wife chose a paint color that's complimentary to sage brush!
|
|
Skip
Member
|
# Posted: 25 Mar 2013 09:47pm - Edited by: Skip
Reply
Fall/Winter 2012 update: We added a used RV stove/oven, a second 80W solar panel, and a new battery bank. The batteries are two Cat 8D batteries (190 amp hours each). We also added a small countertop to match what was used for the top of the stove cabinet.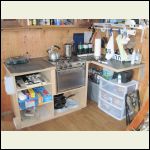
RV Stove + Oven
| 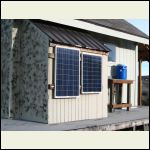
Second Solar Panel
| 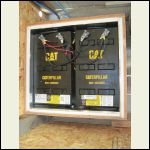
New Battery Bank
|  |
|
|
Skip
Member
|
# Posted: 26 Jul 2014 02:39pm
Reply
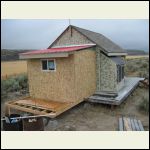
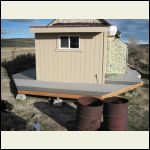
Fall 2013 update: Built a 8' X10' "bunkhouse" addition, which allowed us to free up some living room space. We also extended the deck to maintain our full wrap-around. This took us from 192 up to 272 sq. ft.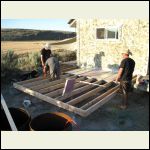
Extending the cabin floor.
| 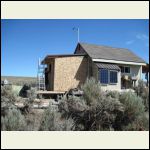
Framed with sheathing & metal roof.
| 
Window in, deck next.
| 
Done! Note the Tailgater satellite dish!
|
|
|
Skip
Member
|
# Posted: 26 Jul 2014 02:53pm
Reply
We also upgraded our heating from a "Big Buddy" heater to an Empire DV 215-7SG 15,000 BTU direct vent wall heater (with thermostat). As the description implies, air for combustion is brought in from the outside and exhaust gas is vented outside.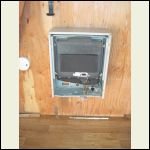
Wall heater installed (cover off).
| 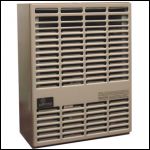
What it looks like with the cover on.
|  |  |
|
|
Skip
Member
|
# Posted: 25 Feb 2018 08:46am - Edited by: Skip
Reply
November 2015: After finishing the deck expansion and painting the addition.
|
|
Skip
Member
|
# Posted: 25 Feb 2018 08:48am - Edited by: Skip
Reply
A sunny day January 2016.
|
|
Skip
Member
|
# Posted: 25 Feb 2018 08:53am - Edited by: Skip
Reply
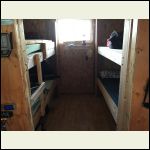
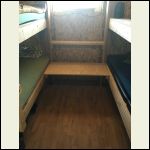
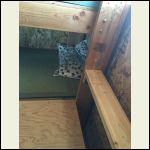
Built bunks in the addition, made with 2x6's and 3/4" plywood to eliminate flex.
Also built a bedside table that doubles as a step up to the upper bunk. Works great, with plenty of "landing-room" for sliding off the top bunk in the dark. Plywood for the "table" was reinforced underneath with 2X4's running cross-ways.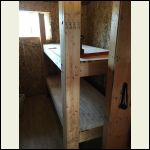
IMG_1687.JPG
| 
IMG_1693.JPG
| 
IMG_2017.JPG
| 
IMG_2019.JPG
|
|
|
Skip
Member
|
# Posted: 25 Feb 2018 09:17am - Edited by: Skip
Reply
Some additional views of the wrap-around deck. It's quite a patchwork, with at least 4 different types/colors of composite decking! Craigslist and friends with decking project remnants were quite helpful.
|
|
Mike 870
Member
|
# Posted: 25 Feb 2018 10:23am
Reply
Love it, has that whimsical evolution brought about by use and necessity. The way a cabin should be.
|
|
KabinKat
Member
|
# Posted: 25 Feb 2018 02:28pm
Reply
Awesome!!!
Thanks for the updates! This is easily one of my favorite cabins here!
Great work!!!
|
|
ChuckDynasty
Member
|
# Posted: 25 Feb 2018 02:47pm
Reply
Nice to see an update.
|
|
| . 1 . 2 . >> |

