|
| Author |
Message |
kmobrien
Member
|
# Posted: 26 Jun 2019 01:42pm - Edited by: kmobrien
Reply
Hi all,
I think I've posted all of one message to the forums, some years back, and I wanted to update everyone on the cabin we've now (mostly!) finished building in rural Vermont.
We ended up going with a Jamaica Cottage Shop pre-cut kit, and then heavily built it out. We started with a 16x20 "Vermont Cottage A", and added two large (4x4) windows on the front of the cottage, studded out the timber-framed walls, added both rigid foam and spray foam insulation to the walls and spray foam to the ceiling, fully insulated the floor, added a mud/snow grate on the entrance, and as of this year have a 400W Goal Zero solar setup.
Building this was a -ton- of work. I have a bit of woodworking experience, and a small shop in my basement, but otherwise I'd no background or experience working on this kind of thing. My wife and I spent almost every weekend in 2015 and 2016 on the primary construction, and then much of 2017 and 2018 doing the finish details. We have a few projects left, but we're nearly complete, so it seemed like a good time to share our work.
In 2014, we purchased approximately 10.5 acres in a small town in rural Vermont, roughly an hour away from Montpelier. We'd saved for a few years, and with a windfall from the sale of my wife's condo (pre-dating our marriage in 2011), we had enough of a nest egg socked away to purchase the land in cash. That made a huge difference; we ended up taking a small loan for the primary construction, but owning the property free and clear meant that we weren't under pressure to establish a structure under any particular timeline. We opted for Jamaica Cottage Shop in part because we wanted to support the local VT economy, and in part because we liked the "simplicity" that a pre-cut kit would offer, while still affording us a sense of self-sufficiency and DIY culture.
Our cabin is built on the lee-side of a hill, out of sight from the dirt road that runs along our property, and ringed by an old stone wall dating back to the 19th century that marked the grazing fields for the farm that once stood here.
In our first year of owning the land, we spent many weekends doing the initial clearing for what would become our cabin site. We knew there were some trees and growth that would exceed our skill, but this is all tertiary-growth former farmland, so most of the forest here is still relatively small. I purchased my first chainsaw and some safety equipment, and with my patient wife's help, we managed to do quite a bit of work.
We ultimately contracted a local tree company to take down what I did not feel comfortable doing myself due to size, and then hired out a escavator to lay down an 18x22' compacted gravel pad to serve as the foundation for the cabin itself. We also dropped an 8x10' pad of similar construction for our "outhouse", a 6x8 shed with a composting toilet, sink, and the eventual home for our shower once we dig a well.
The build began when we took delivery from JCS; they dropped off an enormous amount of wood, but in doing so, damaged quite a bit of it. We had broken windows, warped plywood, and stacks of various dimensional lumber that clearly slipped as they were being dropped in our upper field, which is 1/10th of a mile or so from our build site. This was also our introduction to our incredibly kind neighbors, who helped us move the 8x8 skids on their farm tractor, and who checked in on us regularly in that first season to ensure that the flatlanders had yet to kill themselves.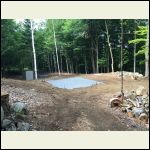
Our little forest clearing! 18" compacted gravel beds, upon which we set 8x8 skids on solid blocks.
| 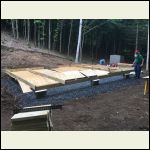
Building the deck for the cabin; the plywood was totally warped upon delivery...
| 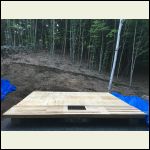
Completed deck, with the snow-mud grate!
| 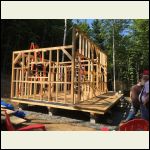
Framing out the cabin, to support insulation later
|
|
|
kmobrien
Member
|
# Posted: 26 Jun 2019 02:03pm
Reply
Once the primary frame was in place, we began scrambling to finish the shell before the winter snows came in, which is usually within the first week or so of October in the mountains of VT.
One of our intended goals is to be able to use this cabin in any season, and winters here can be very cold, so we've taken great care to make the structure as weather-tight as possible. We wrapped the entire structure in Tyvek, and used a bit of extra weather sheathing to keep the worst of the rain off of our tools and bedding once we had the rafters up. We were incredibly grateful for help from some of our friends from MA when doing the rafters; for whatever reason, the JCS kit had mis-cut most of the bird mouths on the rafters, and we had to manually re-cut each one for the porch overhang.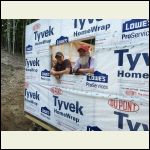
Adding Tyvek to the house; not easy given that it seemed to rain every day during out first summer!
| 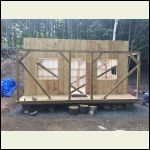
Building the primary load-bearing wall.
| 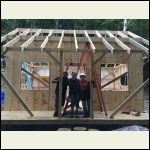
Rafters, with a little help from our friends
| 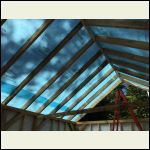
Tyvek as an interim roof, to keep the tools (and us!) dry
|
|
|
kmobrien
Member
|
# Posted: 26 Jun 2019 02:10pm
Reply
I really, really hate roofing. I don't mind heights, but something about working on rooftops sets my teeth on edge.
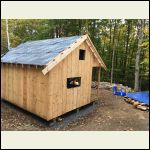
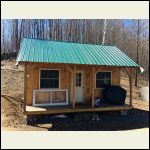
That said, I'm proud of the work done here. The roof on our cabin consists of 1" solid wood pine sheathing, with synthetic roof wrapping and a metal roof on top of it. My hope is that it outlasts me!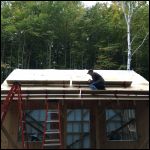
Cladding the roof in solid pine
| 
Synthetic wrap in place
| 
The metal roof on!
|  |
|
|
kmobrien
Member
|
# Posted: 26 Jun 2019 02:29pm - Edited by: kmobrien
Reply
With the roof and walls in place, the next order of business was to begin insulating, then wire the cabin for electrical service (e.g., solar!), and then finish the insulation.
We were so busy at this point that I sadly didn't take many pictures of this stage of the build, but our approach here began by cutting and installing 2.5" rigid foam in between each of the studs we'd added to the walls. We lucked out and managed to get enough foam for both the outhouse and the cabin for under $1,000, and cutting and cobbling the 4x8' sheets wasn't too terrible once we got going.
My wife researched, purchased, and ran the romex for the electrical service while I worked on the foam. We don't intend to put the cabin on the grid, but we did want the option to install a transfer switch in the future, or ideally to integrate our solar setup into the cabin's breaker box; at worst, we figured we'd have done the work and left the option open, even if we never ended up using it.
Once the foam sheets and wires were in place, I began looking for spray foam installers willing to come and do the work. We chatted with at least a half dozen folks, and had someone lined up for the job -- and on the Friday when he was supposed to arrive, he called and cancelled. Both desperate (given how late in the year it was) and frustrated, I scrambled and purchased a two-part DIY spray foam kit, and had it rushed to our place in MA. That weekend, we drove up, I donned a bunny suit and a respirator, and with a propane heater helping bring the interior temperature into range, I managed to insulate the primary structure in about a day.
My wife and our dogs stuck around until dusk, and then headed for a "local" motel (about an hour away), as the foam wasn't cured or safe to be around yet. Working by LED lantern was tough, and at one point my goggles were sufficiently foam-covered that I bumped into a 12' ladder and knocked a 4-D cell battery lantern onto my head. I still have a small dent from the experience.
The next morning, using a couple of supermarket-grade kitchen knives, we began trimming the overspray back. We also began work on the loft at this point, and I began installing the interior shiplap cladding to the walls.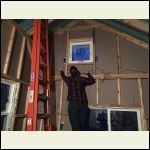
Running romex through the walls
| 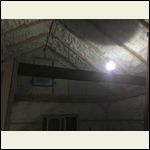
Spray foaming at night
| 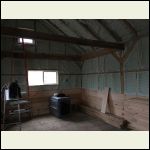
Trimmed foam
|  |
|
|
cluttonfred
Member
|
# Posted: 26 Jun 2019 02:41pm
Reply
Thanks so much for sharing your story, I look forward to hearing more. I have lived in Vermont twice in my life, once down in Brattleboro and once way up in St. Johnsbury, so I got a chuckle out of "our incredibly kind neighbors...who checked in on us regularly in that first season to ensure that the flatlanders had yet to kill themselves." Are you planning to use your cabin year around? If so, more power to you, I would not have a separate outhouse in the Vermont winter if I could avoid it! 
|
|
kmobrien
Member
|
# Posted: 26 Jun 2019 02:48pm - Edited by: kmobrien
Reply
Adding the interior walls was a long, slow, and often painful process, but completing it really began to make the cabin feel like home. Once we had them up, I also covered the plywood floor with wide-plank pine that we'd purchased from a woodworker up in the Northeast Kingdom the year before, and stained and sealed it.
Two years of weekend foot traffic hadn't done too much damage to the plywood, but it was a relief to have something more durable on top. I had a few marks stray onto the walls, but all were well below where the baseboard trim would eventually go, as you can see.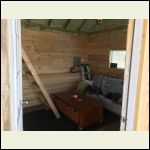
The dogs were not terribly helpful.
| 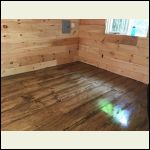
New floor!
|  |  |
|
|
kmobrien
Member
|
# Posted: 26 Jun 2019 02:53pm
Reply
Quoting: cluttonfred Are you planning to use your cabin year around? If so, more power to you, I would not have a separate outhouse in the Vermont winter if I could avoid it!
Thanks!
We do plan to use it year-round. I don't mind walking the 20-30' to the outhouse, but my wife has suggested that a bathroom extension may make sense. It's something we're considering; we already plan to add a bedroom onto the first floor at some point. 
|
|
kmobrien
Member
|
# Posted: 26 Jun 2019 03:03pm - Edited by: kmobrien
Reply
Once the floor was complete, we moved on to the exterior. First order of business in the spring of 2017 was to stain the cabin's exterior walls, and install the battens; we wanted something that would blend nicely into the woods, and went with Australian Timber Oil for the primary finish on the exterior.
With two coats of timber oil in place, we then stained the battens and installed them, along with the exterior trim. Finally, we stained the deck, posts, and trim in two shades of green, emphasizing the forest color scheme while adding some visual interest. We also bought a pair of Adirondack chairs from a local (blind!) woodworker, and hauled up and stained a picnic table so that we could eat outside on nice nights.
That same summer, I began debarking some of the larger rounds from the black locust we'd cut when we cleared the land, and put in a small firepit in front of the house. This was the first time we began to feel that we could "relax" at the cabin -- hosting friends, sitting around the fire with a beer or whiskey, and enjoying being in the woods. While there were still numerous things to do, the cabin was dried in, the interior construction was fundamentally finished, and we had some basic furnishings and amenities in place. It had taken a few years, but it felt good.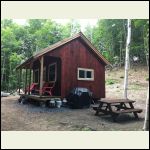
Staining the siding
| 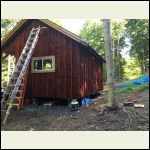
Adding the battens
| 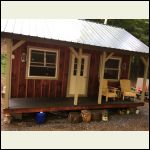
Deck and posts stained
| 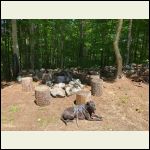
The firepit!
|
|
|
|
kmobrien
Member
|
# Posted: 26 Jun 2019 03:24pm - Edited by: kmobrien
Reply
Last update for a bit. 2018 was spent adding infrastructure: solar panels went onto the roof, we added a Goal Zero 1400 setup for electricity, and I bought an old 1950s kitchen sink setup for the interior.
Much of our furniture was either free on Craigslist or purchased at minimal cost; the next major work we're doing will be to replace the existing living room with a more comfortable sofa, smaller coffee and side table, and add a few amenities -- an 80" pull-down projection screen, battery-powered 720p projector, and a record player are all going up this weekend in the truck.
While I'd hoped to finish the ceiling myself, a torn rotator cuff precluded doing so, and I paid a carpenter to stain and install the ceiling boards beyond what I'd managed to do pre-injury in 2017.
By the fall, in addition to upgrading the furnishings, I'm hoping to shellac the interior walls to match the ceiling, build a stone hearth, and have a small stove in place. I'm leaning towards a Cubic Grizzly, given the minimal clearances it requires when paired with shielding (2.5"!); the right-hand side of the house is where we're thinking of building a 10x10' first floor bedroom, leaving the loft available for occasional weekend guests.
Not certain yet, but the larger stoves I'd been looking at - even a Morso 1410 - seem like they would cook us out of a 240 square foot cabin. Thoughts and experiences welcome, of course!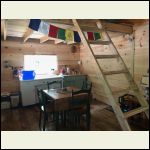
Kitchen as of 2018
| 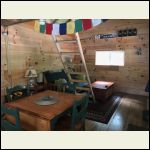
Living room as of 2018
| 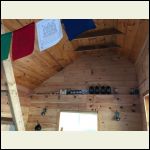
Finished ceiling!
| 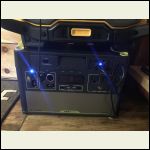
Love the Yeti
|
|
|
fiftyfifty
Member
|
# Posted: 26 Jun 2019 08:32pm - Edited by: fiftyfifty
Reply
Here's my experience with stoves. We use our cabin down to -20F (this is not counting wind chill):
Main cabin is 16x24 with a loft. Ceiling is spray foam (2x6 rafters), walls are fiberglass (2x4 studs). We have a Jotul 602 and I wish we had gone a little bigger. It takes the cabin a long time to get up to temp, and then you have to feed it a couple of times at least at night.
Guest cabin is 10x16 with a loft. The entire building is spray foamed. The Grizzly is convenient because it is wall mounted so no loss of floor space, but the fire box is tiny and not easy to use. No way would I use it for a bigger building in our climate.
p.s. love your build! congrats!
|
|
mojo
Member
|
# Posted: 27 Jun 2019 10:00am
Reply
Awesome....I'm currently building a 16x30' Jamaica cabin in NH. Battens still need to go up but otherwise she's weather tight.
Curious how much a PIA the spray foam was? It looks like you did it yourselves? I'm weighing the options of DIY vs. just contracting it out.
|
|
kmobrien
Member
|
# Posted: 27 Jun 2019 02:16pm
Reply
Quoting: mojo Curious how much a PIA the spray foam was? It looks like you did it yourselves? I'm weighing the options of DIY vs. just contracting it out.
Aside from nearly knocking myself out with that lantern, the actual job was very easy. It'd be significantly easier in warmer weather, as the foam needs to be applied in a room that's 65F or higher, which is a challenge in November, in VT, on a mountain. I used Spray It Green's DIY kits; I'd advise strongly that you buy a few extra nozzle kits, as they're only usable during application, and if you pause for more than a few minutes you have to swap them out.
Otherwise, it's *utterly* simple. Connect the hoses, aim the gun, and have at it. You'll likely have overspray as things expand, and you'll need to cut/trim back, but it's not hard at all once the foam is cured. No way I'd pay someone having had the experience of installing it myself and seeing how much simpler and cheaper it really was.
|
|
NorthRick
Member
|
# Posted: 27 Jun 2019 04:02pm
Reply
Nice build. Thanks for sharing.
|
|
mojo
Member
|
# Posted: 28 Jun 2019 09:36am
Reply
Quoting: kmobrien Aside from nearly knocking myself out with that lantern, the actual job was very easy. It'd be significantly easier in warmer weather, as the foam needs to be applied in a room that's 65F or higher, which is a challenge in November, in VT, on a mountain. I used Spray It Green's DIY kits; I'd advise strongly that you buy a few extra nozzle kits, as they're only usable during application, and if you pause for more than a few minutes you have to swap them out. Otherwise, it's *utterly* simple. Connect the hoses, aim the gun, and have at it. You'll likely have overspray as things expand, and you'll need to cut/trim back, but it's not hard at all once the foam is cured. No way I'd pay someone having had the experience of installing it myself and seeing how much simpler and cheaper it really was.
Thanks, good to know. I was researching Green's website just yesterday.
I'm going to kick myself for this when I eventually do it, but I really want to keep some rafter exposed on the inside for the "look", so I'm planning to tack some wood strips along either side of the rafters set a few inches deep, spray foam flush to those, and then cover with ship lap (or similar). It's going to be tedious as all hell, but I've got no timeline to get it done....
|
|
cluttonfred
Member
|
# Posted: 29 Jun 2019 07:08am
Reply
In that case, would it be less messy and probably less trouble to just use rigid foam there?
Quoting: mojo I'm going to kick myself for this when I eventually do it, but I really want to keep some rafter exposed on the inside for the "look", so I'm planning to tack some wood strips along either side of the rafters set a few inches deep, spray foam flush to those, and then cover with ship lap (or similar). It's going to be tedious as all hell, but I've got no timeline to get it done....
|
|
mojo
Member
|
# Posted: 1 Jul 2019 09:47am
Reply
I'm worried about not getting a proper seal if I go cut and cobble for the ceiling. I really don't want moisture to get trapped between the rigid and roof.
|
|
kmobrien
Member
|
# Posted: 1 Jul 2019 04:29pm
Reply
We opted to not install the rigid foam in the ceiling for this reason, and just went with spray foam there. With a DIY kit you can layer in a pretty significant amount; we had at least an inch in every rafter bay, and then I went over the edges a second time just to ensure that we wouldn’t run into any issues.
I don’t think moisture is apt to be a problem if you follow the same approach, all else (solid roof deck, moisture barrier membrane in place, single cathedral ceiling design) being equal. At the very least, we have seen no issues.
|
|
kmobrien
Member
|
# Posted: 2 Jul 2019 07:40am - Edited by: kmobrien
Reply
A few interior photos. Installing a propane range and solar fridge in two weeks!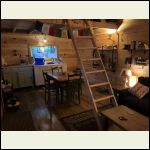
View across the cabin
| 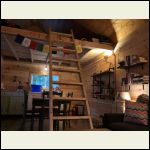
Ladder to the loft
| 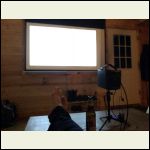
Off grid movie night!
|  |
|
|
mojo
Member
|
# Posted: 2 Jul 2019 09:34am
Reply
Quoting: kmobrien Once we had them up, I also covered the plywood floor with wide-plank pine that we'd purchased from a woodworker up in the Northeast Kingdom the year before, and stained and sealed it.
Looking great! Seeing your photos is like looking into the future for me.
You mind sharing who you got the flooring from, and what you paid? I'm just on the other side of the CT River from the NEK.
|
|
kmobrien
Member
|
# Posted: 2 Jul 2019 01:04pm
Reply
Quoting: mojo You mind sharing who you got the flooring from, and what you paid? I'm just on the other side of the CT River from the NEK.
I worked with Alex from A.S. Hudak Lumber (https://www.ashudaklumber.com/contact). He was awesome, easy to work with. Unfinished wide plank, with untrimmed edges, in 2016: $3.15/sqft.
|
|
Janemarie
Member
|
# Posted: 11 Nov 2019 10:48pm
Reply
You did such an amazing job. You must be so pleased with this. It is really beautiful. Love your prayer flags, too.
|
|
|

