|
| Author |
Message |
toyota_mdt_tech
Member
|
# Posted: 24 Apr 2011 13:17 - Edited by: toyota_mdt_tech
Reply
Ok, I installed my custom cabinets last week, built my counter top (formica and backsplash another weekend job)
Got the entire cabin trimmed out, woodstove pipe installed, stone work trimmed out, built bunks and pantry (both in the same room) plumbed in my gas oven/cooktop. Trimmed out attic and crawlspace doors, plus added a weather seal on them too.
Getting much closer to completion.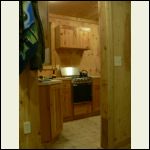
Looking through the kitchen from the main room
| 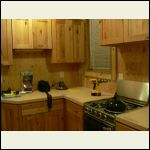
Kitchen cabinets
| 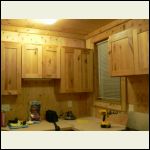
Wall cabinets
| 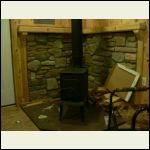
Woodstove installed and trimmed out
|
|
|
toyota_mdt_tech
Member
|
# Posted: 24 Apr 2011 13:20
Reply
A few more pictures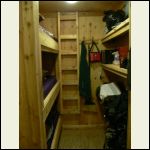
Bunks to the left, pantry storage on the right
| 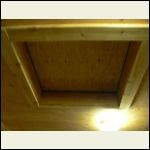
Trimmed out attic entrance
| 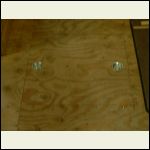
Crawlspace trimmed and weather strip sealed
| 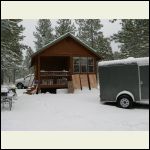
Hit with snow on the last morning...
|
|
|
toyota_mdt_tech
Member
|
# Posted: 24 Apr 2011 13:25 - Edited by: toyota_mdt_tech
Reply
Just a heads up for those not using air nailers. Stop, go out and get them. I bought the combo kit from Home Depot, made by Porter Cable, 6 gallon pancake compressor plus it came with 3 nailers, ie brad, crown stapler and a finish nailer. I then bought the framing nailer also a Porter Cable. The compressor runs off of my Honda EU2000i generator and starts it up at full pressure, even in "eco" mode (low idle) and it make the work rip by so fast and no more split wood or hammer dents on the finish.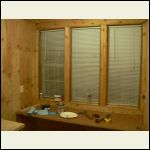
Dining counter. Will also get the same formica treatment.
|  |  |  |
|
|
bobrok
Member
|
# Posted: 24 Apr 2011 15:34
Reply
Wow, that is sweet work toyota_mdt_tech.
You would almost think you were in someone's "big" house from some of those photos.
Very nice. I like this a lot.
|
|
naturelover66
Member
|
# Posted: 24 Apr 2011 16:53
Reply
Beautiful !! Great work for sure.
|
|
hattie
Member
|
# Posted: 24 Apr 2011 23:47
Reply
There is so much I love about this project. The rocks behind the woodstove look great. The cabinets are fabulous! The bunks are a super efficient use of space. Keep the photos coming. Will the attic be usable space? What is the square footage? You should be really proud of this!!!
|
|
smitty
Member
|
# Posted: 25 Apr 2011 03:13
Reply
Love the bunks!
|
|
canadian girl
Member
|
# Posted: 25 Apr 2011 08:19
Reply
great job Toyota I love the interior :)
|
|
|
turkeyhunter
Member
|
# Posted: 25 Apr 2011 08:34
Reply
i really like the look of this project,looks awesome. A+
|
|
Erins#1Mom
|
# Posted: 25 Apr 2011 21:16
Reply
Looks very warm and inviting. I too am interested in the sq footage.
|
|
Borrego
Member
|
# Posted: 25 Apr 2011 22:24
Reply
Looks nice...... How are you gonna finish that plywood?
|
|
toyota_mdt_tech
Member
|
# Posted: 25 Apr 2011 22:26 - Edited by: toyota_mdt_tech
Reply
Quoting: hattie Will the attic be usable space? What is the square footage? You should be really proud of this!!!
The cabins footprint is only 16 feet wide, and 18 feet long. But its not a square, it has the covered porch. Inside square footage is 236 sq feet, add porch, its 288. As for upstairs, its all open and I did sheat the top side of the ceiling joist just to make it easier for me to build the roof (walk on a flat floor vs across 2X6's) but this cabin can be build with an upstairs. Its just a matter of peeling off the roof, building it with a steeper pitch and adding a pair of dormers on each side. I already ran a power wire (romex) cable up there. But I doubt I will ever add a fully functional upstairs, its just attic and plenty of storage that is getting heavy use.
Thanks everyone for the kind words. This is my first building project (that I permitted anyway. :D) and I did sublet out the foundation, metal roof and stove pipe install. Rest I did myself. I didnt build the cabinets either. But did design them. They are actually done in alder face, made to look old, had "worm holes" actually drilled into them, plus dings and dents added. You cant see it with the photos. Looks like it was made form old barn wood.
I will be back over for formica, just a weekend and will take updated photos and retake many. Light was poor, so shudder was slow and it made for some shaky looking photos. Plus the mess around the woodstove (during construction) etc. I have already went to Cabelas, about a 20 minute drive from my house and bought the complete dinner ware set in "Pin Cone" along with the matching silverware, towels, window treatments, pot holders, canisters and the rest. Nice clock for the wall, plus some throw rugs with wildlife on it. Cabin still is spendy. But at this stage, not going cheap now. :D
A few photos of the original floor plan, then the way I built it. Noticed I moved the stairs to the side, i was on a slight incline and plus the parking in the front or back, it made more sense to have the steps on the side. I moved the rear window more ot the center, and straightened out the wall between kitchen and bunkroom.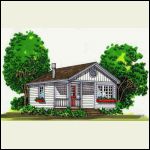
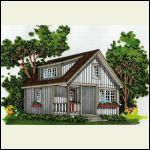
Mine, just a smidge steeper roof
| 
Same as mine, but upstars model.
| 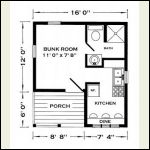
Original floor plan
| 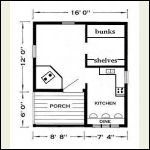
cabin_floorplan.jpg
|
|
|
toyota_mdt_tech
Member
|
# Posted: 25 Apr 2011 22:37
Reply
Quoting: Borrego Looks nice...... How are you gonna finish that plywood?
I wil bring a belt sander, sand off the labels and stamps, sand it smooth and then put a finish over it. I may let it age naturally for a while and darken. Then seal it in. I have seen plywood finished and it appears to look like knotty pine.
|
|
Gary O
Member
|
# Posted: 25 Apr 2011 23:19
Reply
Just awesome T-Tech
Just awesome
Thanks for the show
|
|
Gary O
Member
|
# Posted: 29 Apr 2011 20:27
Reply
Quoting: toyota_mdt_tech I wil bring a belt sander, sand off the labels and stamps
Geez T-tech, I just realized your walls are still the plywood you'd questioned using or covering at the outset. The knots sure blend in with your custom cabinets.
Knowing you, it wasn't a mistake.
Can't wait to see them after your process, but also admire your ability to take your time.
The evidence of your well thought out labor is a lesson for me.
Thanks for the show, man.
|
|
JH Fish
Member
|
# Posted: 29 Apr 2011 22:05
Reply
Outstanding work! I like your customizations. You really made nice use of the space. Those bunks are great - can you sit up in bed without hitting your head? I love the stove - what brand is it? (also, thanks for the plans you gave me on the other thread. We are considering them for our camp in Ontario.)
I will also second what you said on air driven tools. GET 'EM! I sanded the floors in my house and did some baseboard and shoe molding with hammer and nail set. I made a jig for pre-drilling all the shoe molding. What a chore! Then in a later addition I used air driven framing, finish, and brad guns as well as a senco collated drywall screw gun. Real time savers. Not only that, I ebayed the drywall gun and got 75% of what I paid for it.
Keep us updated!!
|
|
neb
Member
|
# Posted: 29 Apr 2011 22:09
Reply
Very nice.
|
|
toyota_mdt_tech
Member
|
# Posted: 29 Apr 2011 23:14
Reply
Quoting: JH Fish Outstanding work! I like your customizations. You really made nice use of the space. Those bunks are great - can you sit up in bed without hitting your head? I love the stove - what brand is it? (also, thanks for the plans you gave me on the other thread. We are considering them for our camp in Ontario.)
JH Fish, no setting up in the bunks. Its a full 8 foot ceiling. So the first bunk is 12" off the floor, then I put the them all spaced evenly, ie 28 inches of space each. Its roomy. I wanted to get 4 bunks, but was just too crowded. I have a nice little LED lamp on each one for reading or getting up to use the restroom etc.
The brand of woodstove is a Fjord. But that style/look is called a "trash burner". I bought it off of craigslist for $100. I was just looking for a small unit, this was perfect size. The hearth was pre made. A buddy and I did the stone work. Real easy if anyone wants a walk through.
|
|
toyota_mdt_tech
Member
|
# Posted: 23 May 2011 22:43 - Edited by: toyota_mdt_tech
Reply
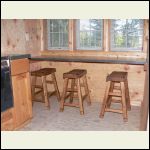
Ok, did the formica counter tops and dining counter top. Formica came is 4X8 sheets (this size can vary from 3X8, 4X8. I used 2 sheets, total cost was $150. Did it myself, but did have a pro explain it to me before I tackled it, plus lots of research online. I built the counter myself (wood part) plus the formica work. For those who think this is real hard, its not. It was a snap and an absolute blast. Anyway, photos above are flake (sawdust looking stuff, i ts the flattest stuff around and very critical, imperfections, bumps etc shows up real well with a shiny surface) board set but not covered yet, now they are covered. I'm winding down on this project. Now that I'm getting the hang of building, I'm almost done. I'm chomping at the bit to start another project, ie my final home. But I have about 5-7 before I need to start that project.
The 3 stools are the "saddleman" type and they are also in a stressed finished. They are new, but look 100 yrs old. Solid oak too.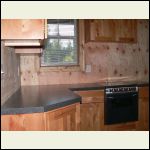
formica_001.jpg
| 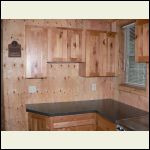
formica_003.jpg
| 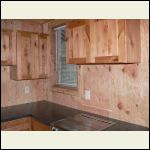
formica_004.jpg
| 
formica_002.jpg
|
|
|
|

