| . 1 . 2 . >> |
| Author |
Message |
Pyro
Member
|
# Posted: 3 Aug 2008 05:21pm - Edited by: Pyro
Reply
I posted some pics in the general discussion area, but that was before I saw this section.
Here are some of the tasks I've been working on over the last few years...
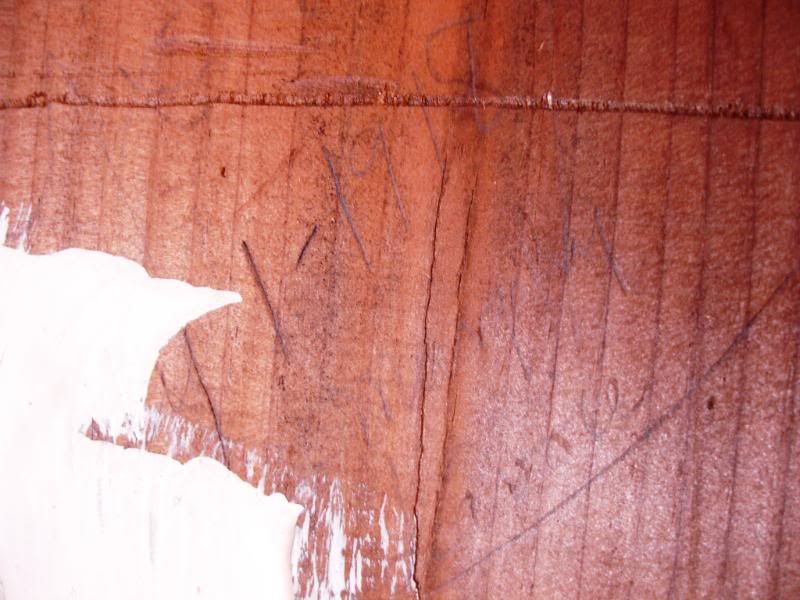
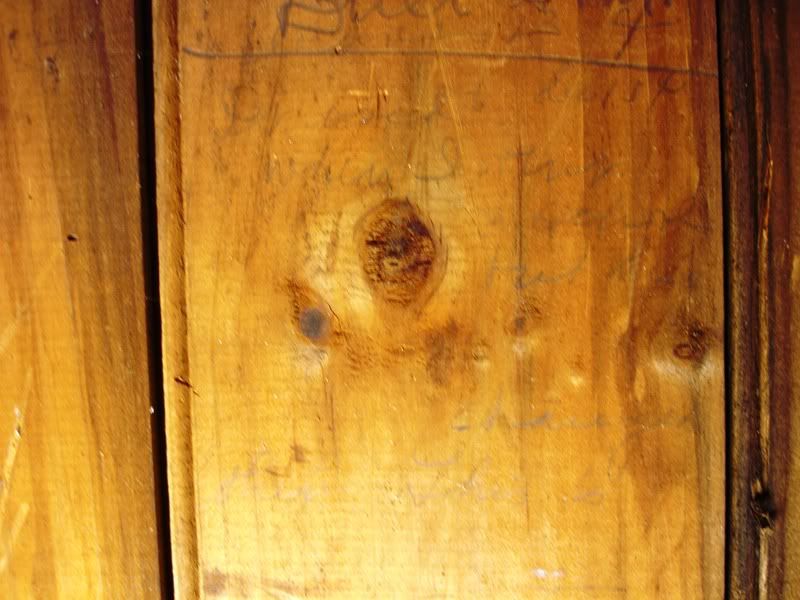
I was about to cover the walls, so I took photo's of all the writings on the camp wall. 4/1/1918 was the earliest date I could read, but some were even fainter than that one...
Here is where the date was written...
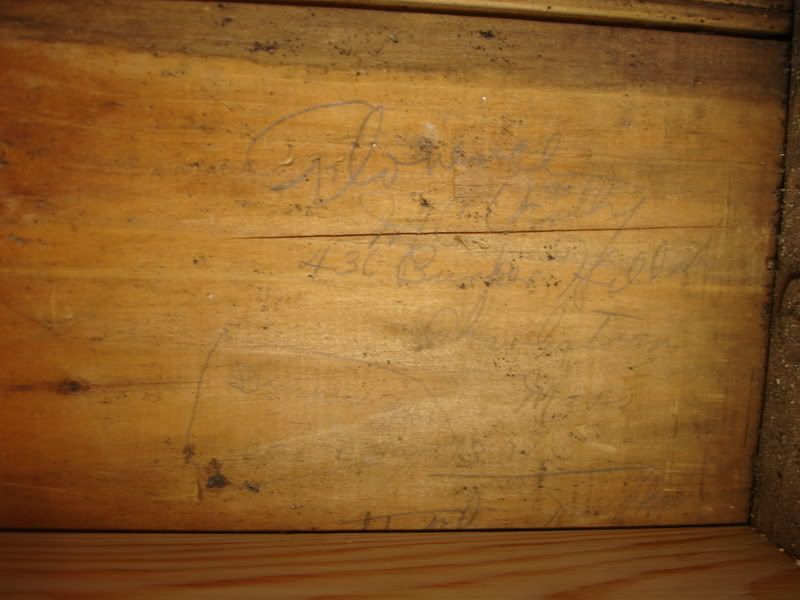
And some others...
Florence McCarthy Charlestown, MA.
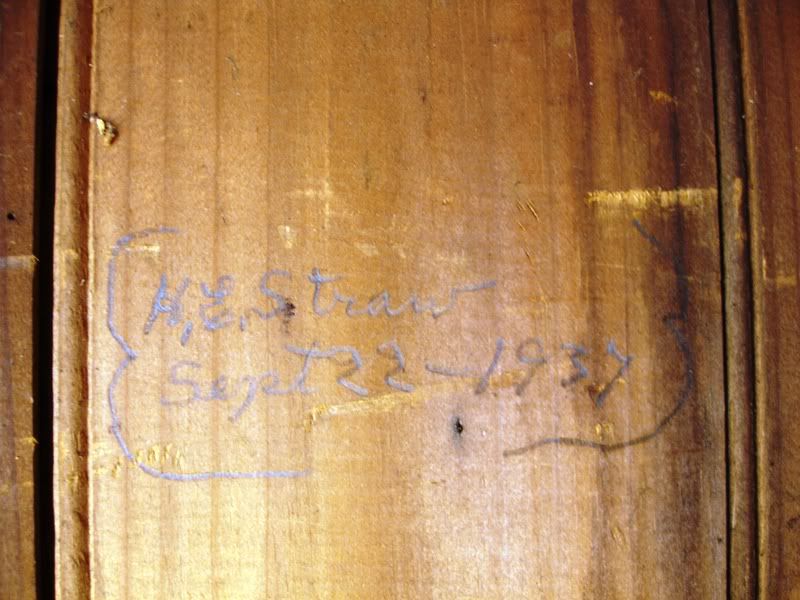
H.E. Straw from 1937
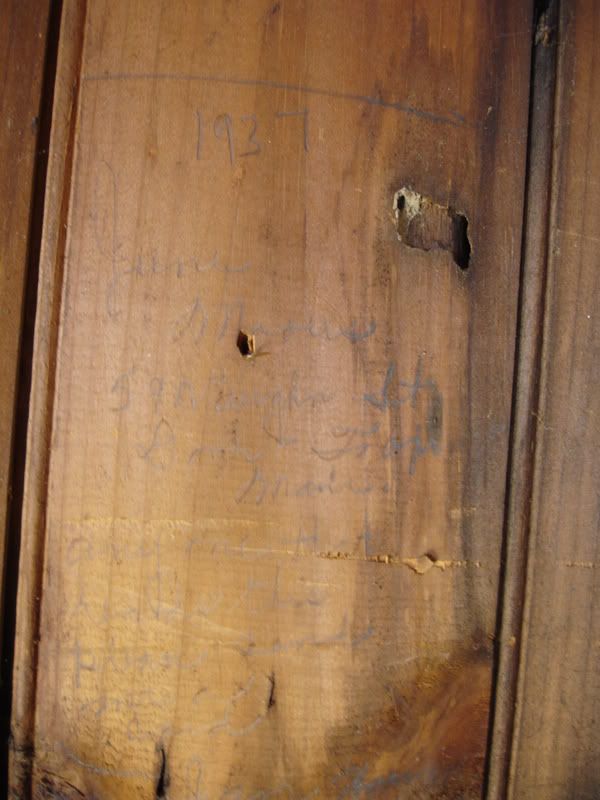
A faint note also from 1937...
A faint note from what looks like Dec, 1st 1954...
and an idiot's note written over an older note from 1948...
(It's just above the Dec 1 '54 note)
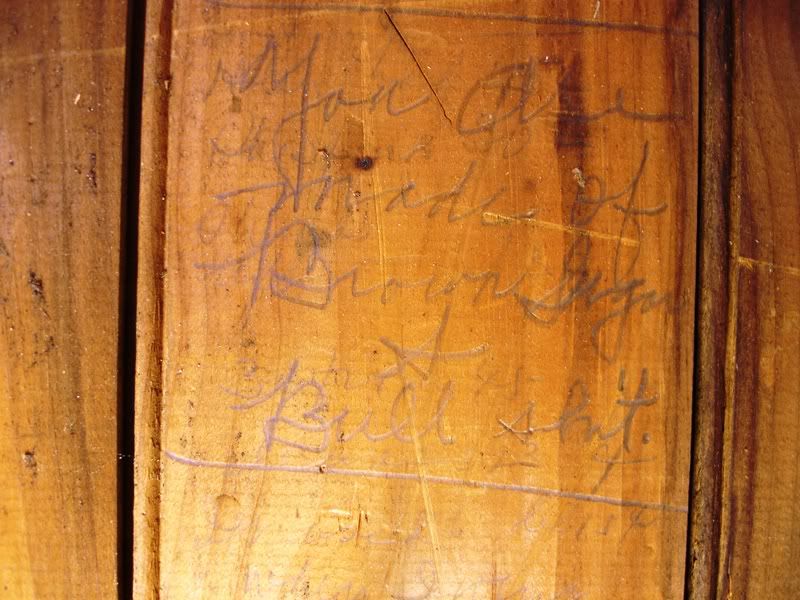
All of these notes were on this wall...
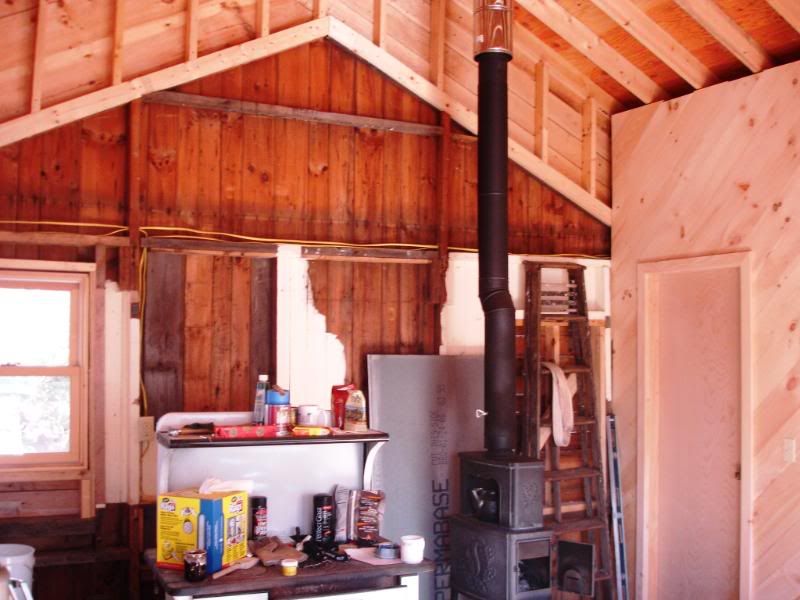
So I added my name along with my wife's. (She kept her Maiden Name)....
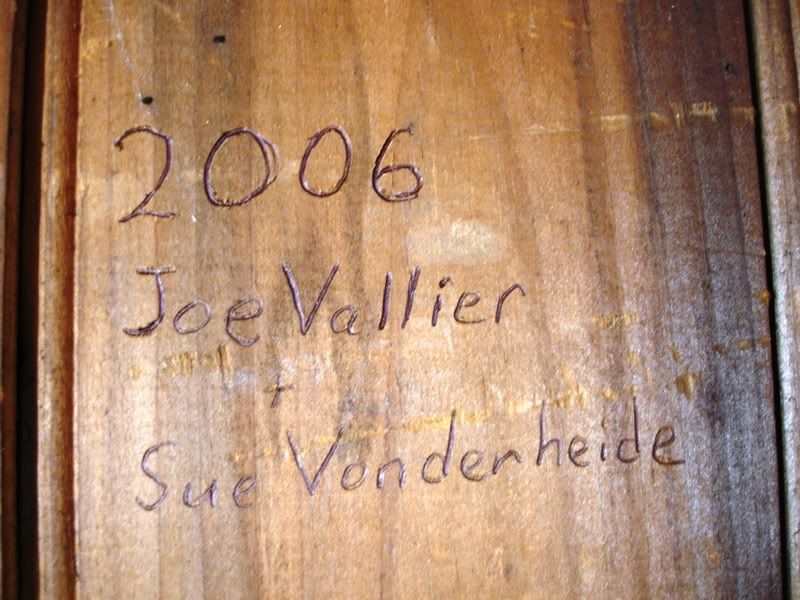
I then covered over the whole wall with Eastern White Pine.
I don't think we own this cabin, (The deed & tax collector tells us we do!) But actually, were are merely stewards of it during this time of it's history.....
Joe
|
|
Pyro
Member
|
# Posted: 4 Aug 2008 02:34pm
Reply
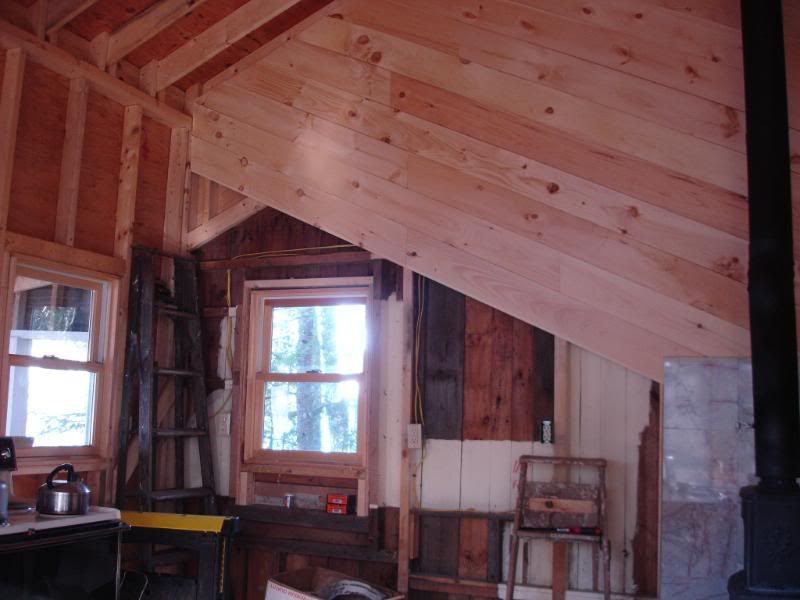
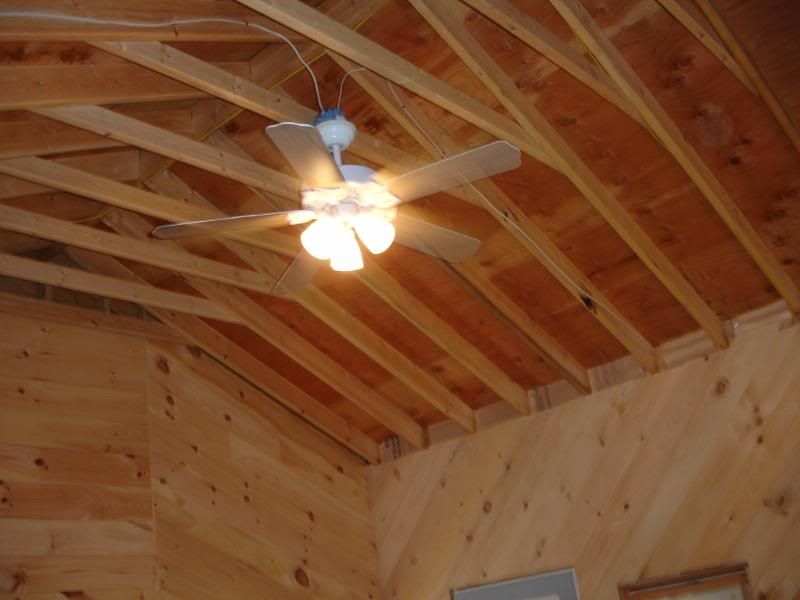
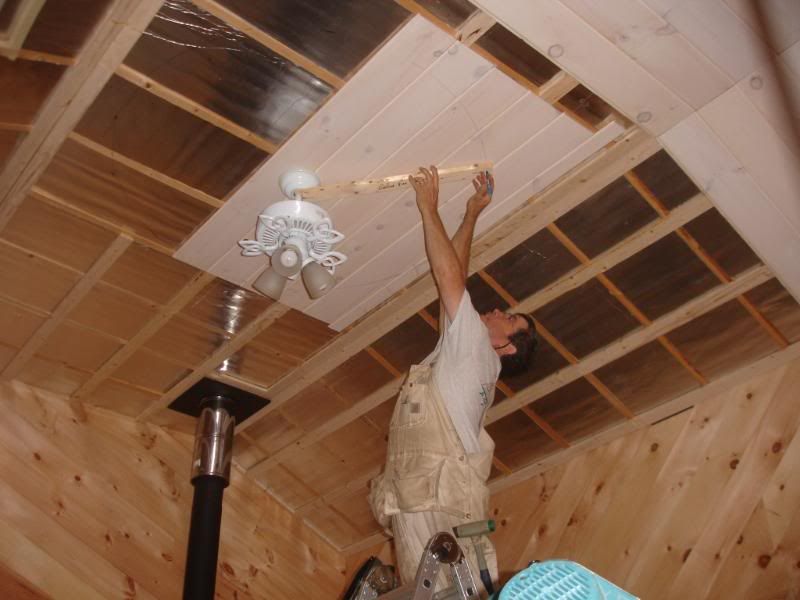
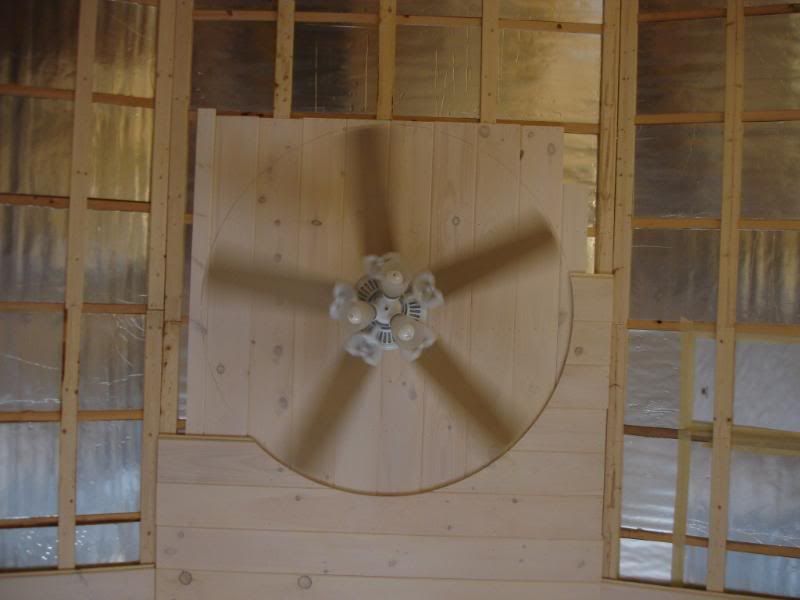
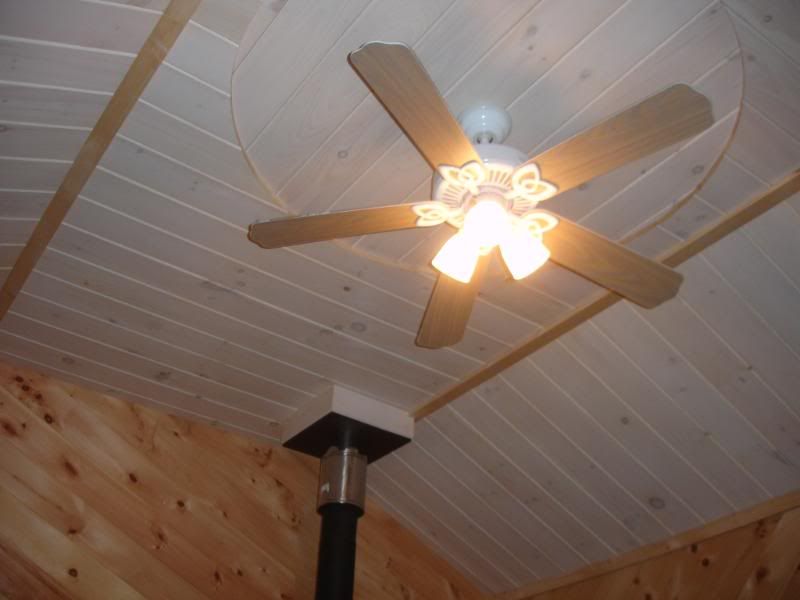
When it came time to finish off the ceiling, I insulated it with rigid foamboard & then placed strapping on the rafters & collar ties to run the pine the other direction. (Except for the area above the ceiling fan)
I pickle stained the ceiling wood before I installed it with Minwax waterbase stain & then finished it with non-yellowing (waterbased) polyurethane. Oil base finishes turn amber (yellow) much more than water base finishes do. I am planning to use oil base Polyurethane on the walls so they WILL amber up a bit with age.
I did this to the ceiling before I installed it to make it MUCH easier to get a different color up there w/o having stain drip back down on me as I applied it. I am in the process of doing the walls this year.

|
|
soundandfurycabin
Member
|
# Posted: 4 Aug 2008 11:49pm
Reply
That's a nice looking cabin. Why did you raise the roof?
|
|
Pyro
Member
|
# Posted: 5 Aug 2008 01:41pm
Reply
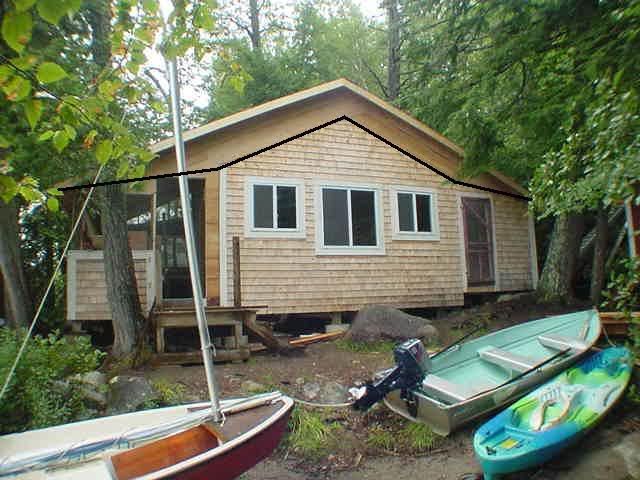
The ridge of the old roof was sagging like the back of an old draft horse. The gable ends were starting to fail too. Thre was no ridge pole holding the ridge in line either, so I knew I wanted to rip the whole roof off to re-frame it.
It once had a transition halfway from the ridge to the drip edge. (See black line in photo below) Snow would build up there in the winter & become quite heavy. So I raised the roof to create a single pitch from the ridge to the drip edge. It worked out quite well.
|
|
Pyro
Member
|
# Posted: 5 Aug 2008 06:36pm
Reply
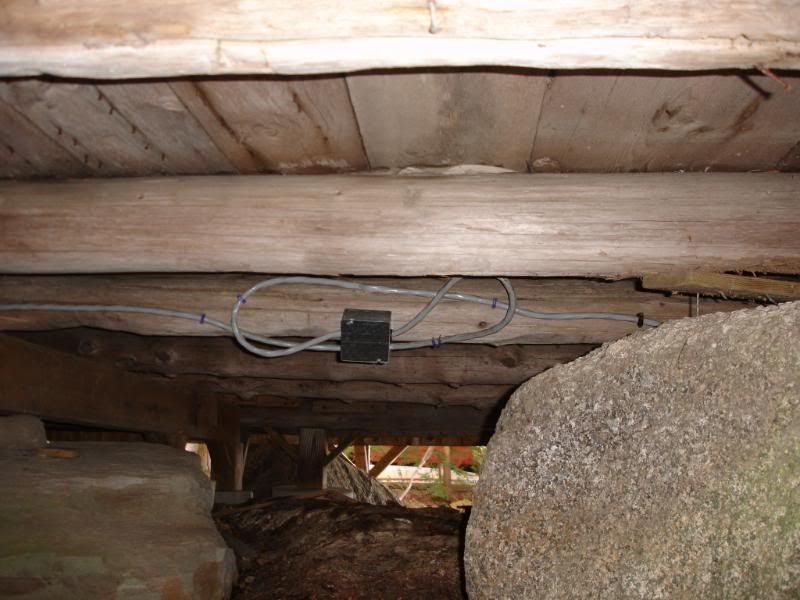
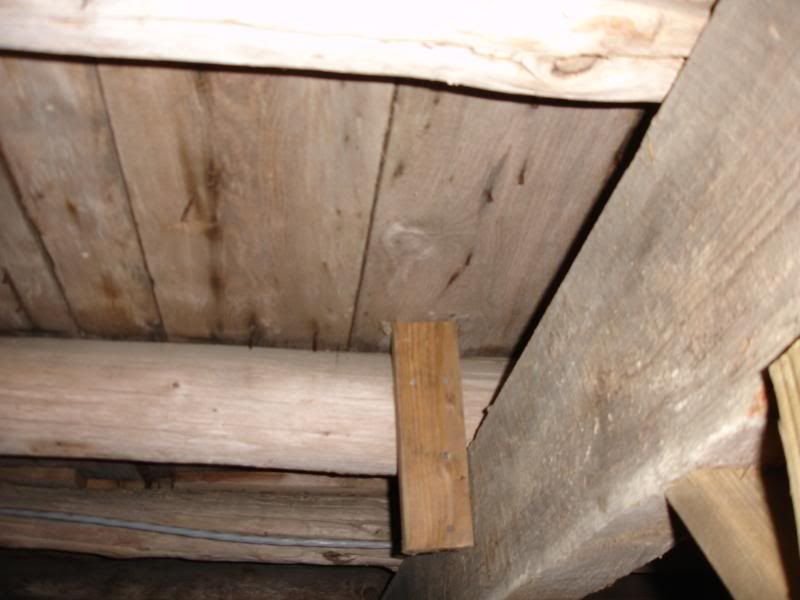
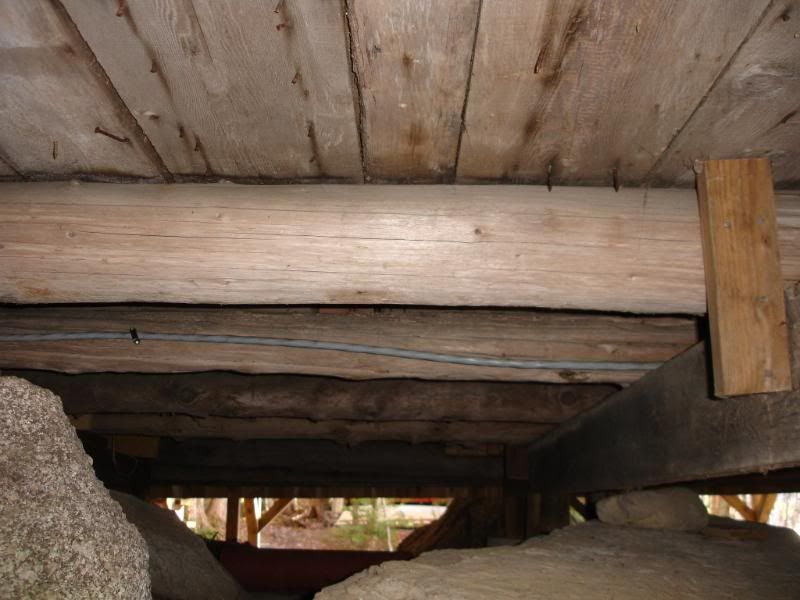
The original builder placed Cedar tree trunks on surrounding rocks. But that was a bit too low to my liking, so I rased the camp & supported beams across the width of the camp.
Doing this supported the camp as a whole quite a bit better. Frost heaves still happen, but all settles down properly when spring comes again.
|
|
Pyro
Member
|
# Posted: 19 Oct 2008 12:29pm - Edited by: Pyro
Reply
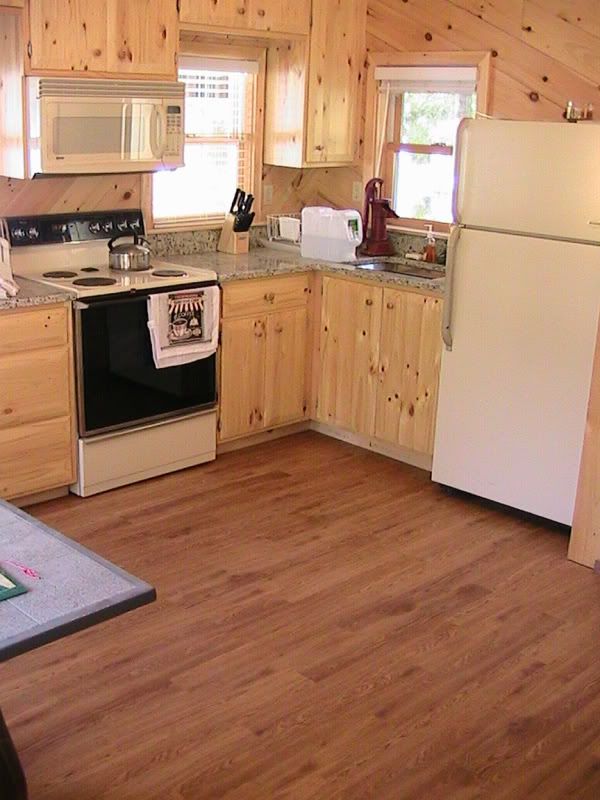
Here are the new cabinets I built this year. My wife was so happy to see them go up, she started putting stuff in them before I could get them finished!
I built them from scratch, but used the solid pine handy panels that Home Depot sells (all glued up edge to edge) for my cabinet sides and doors. That saved me a LOT of time.
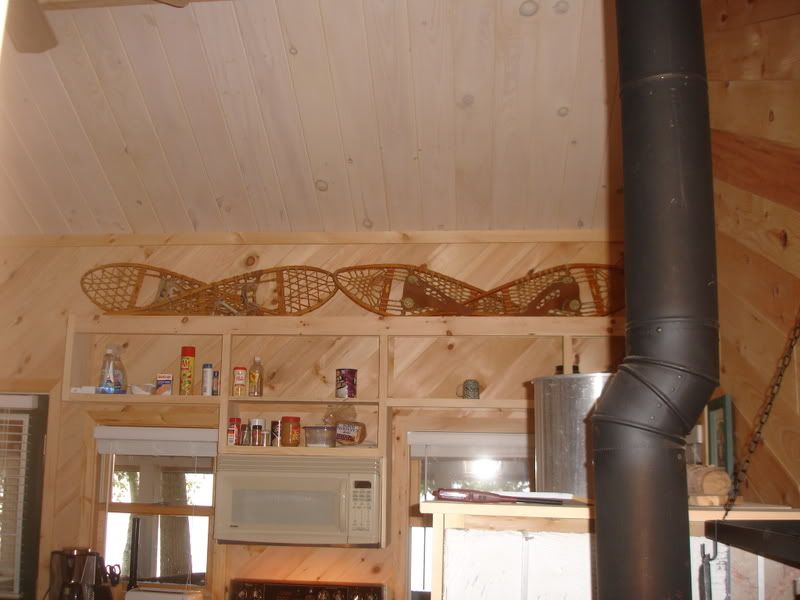
Here they are basically finished. I clear coated them w/ urethane. The family is playing "Hand & Foot". A card game that we only play at camp. It's a camp tradition that dates back 3 generations.
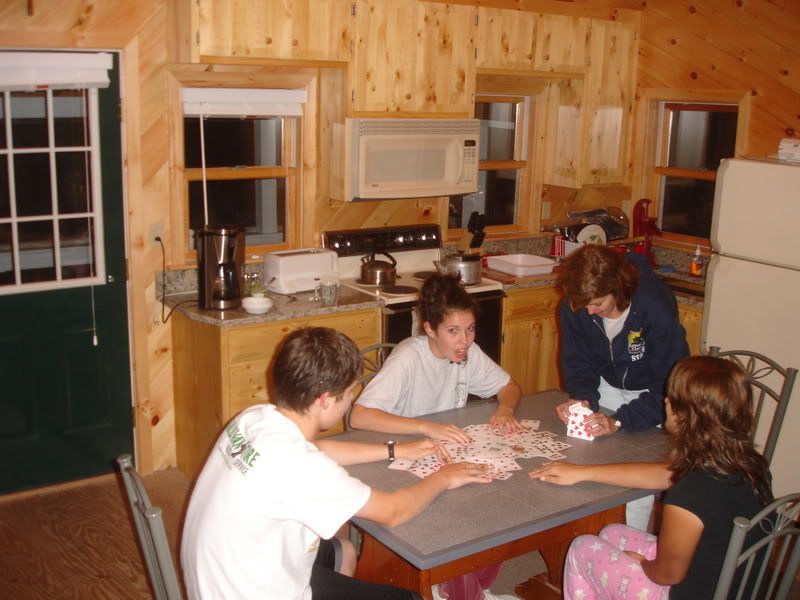
Here you can better see the Granite counters and the Hand pump at the sink. It draws up lake water for cooking and cleaning. Our drinking water comes from a well 100 feet away from the door of the camp. I had the counters made up for me by a friend, but installed them & attached the sink myself. (Heavy...ugh!) I didn't glue the joint so that the counter can move if the camp moves in the winter.
The snowshoes are used each winter, but become wall decorations in the summer. The Ship's wheel is from an old 32' wooden Cabin Cruiser I used to own.

|
|
CabinBuilder
Admin
|
# Posted: 19 Oct 2008 01:47pm
Reply
Great job!
I like your cabin interior work, especially diagonal wall boards. Was it much harder than horizontal board placement?
|
|
Pyro
Member
|
# Posted: 19 Oct 2008 09:43pm - Edited by: Pyro
Reply
Well, yes kind of but it wasn't too hard.
The window & door opening corners were the only real tough spots. The outlets cut outs were a bit different too.
If I just left it at a 45 degree angle everywhere it would have been much easier, but on the gable walls I wanted to match the starting board to the pitch of the roof. That was a much better outcome aesthetically, but I had to change my chop saw angle more times than I otherwise would have.
Thanks for the kind words about the work. I hope it gives others here some idea's that they can tweak into their own work and make it their own. I know I'm inspired with some of the other photo's members here have posted.
Joe
|
|
|
Pyro
Member
|
# Posted: 19 Oct 2008 10:19pm
Reply
BTW, Take a peak at the sugar bowl by the coffee maker. It is a camp relic that has been here in this camp for 70 years or so.
It's the old "Depression Glass" or as some call it, Vaseline Glass. I took a black light to it & it GLOWS super green from the uranium in it.
The aluminum Tea Pot on the stove is as old as the hills too.
Kinda neat having these and a few other things that remind us that we are merely the stewards of this place for the time being.
|
|
Pyro
Member
|
# Posted: 9 Jan 2009 11:49pm - Edited by: Pyro
Reply
Seasons.....
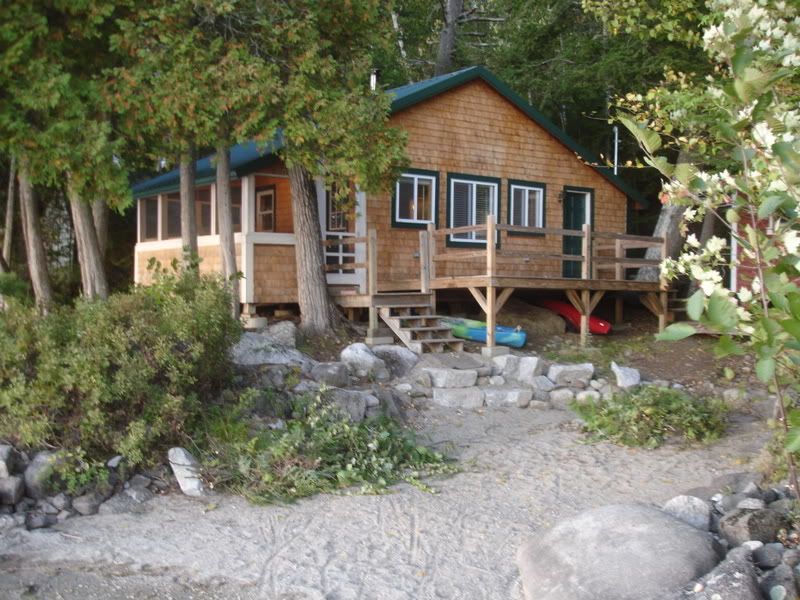
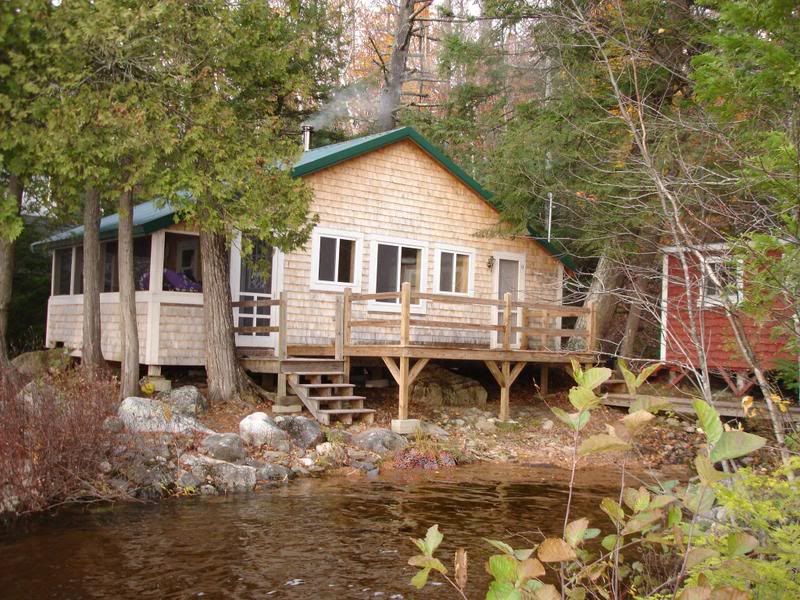
Summer...
Fall...
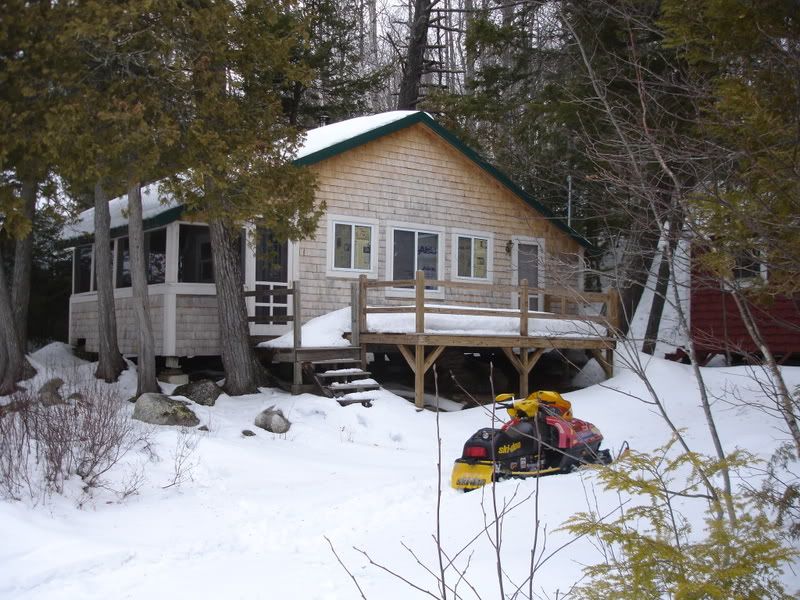
Winter...
|
|
gmcgreg
Member
|
# Posted: 15 Jan 2009 12:33am
Reply
I like Your cabin . raising the roof looks like it made the space much more comfortable. Great job and what a setting. Is it on a lake or tide water?
thanks Greg
|
|
Pyro
Member
|
# Posted: 15 Jan 2009 07:32am - Edited by: Pyro
Reply
Hi Greg,
The biggest difference with raising the roof was the small room feeling so much bigger. The floor plan of the room didn't get larger, but it feels like it did. So you're right in that it made a big difference to the comfort level inside.
It's on a not so well known, but large lake in Mid state Maine. The water can get high at times & several decades ago there used to be regular springtime floods that would make it inside the camp. It was only a fishing camp & it was all wood, open studs inside, no insulation, & no rugs. The water would just drain out with little to no damage.
A dam built about 20-30 years ago changed all that, but in very, very wet weather the water can still get as high as that bottom step.
The fall & summer pics above actually show the highest & the lowest it can get each year. When it's high, they just open the gates at the dam for a few days & it levels right out. Most often the waters edge is between the large rock on the right & the bushes on the left.
|
|
Jerry
Member
|
# Posted: 9 Mar 2009 06:45pm
Reply
Pyro - very nice cabin and location. It always amazes me that some states allow you to build so close to the water. Here in Minnesota where they allow nothing, the water to building setback rules are very strict. I have one cabin that was grandfathered in from the old days and it's about 80 or 90' from the water, but it's now considered a nonconforming structure, and anything you want to do like remodeling, additions, deck, etc, goes through a tough and expensive process to get a permit. My other cabin, one that I'm building, is 120' from the water, and I had to get a variance ($550) and attend a public hearing to get the permit.
In a picture of your cabin in the early remodeling stage the picture shows what looks like a wood cook stove. Do you use it? I have one very similar to yours, and in excellent condition, but because it's not UL approved my insurance agent says don't use it.
I like the way you raised your roof. How much did you add to the old height? What is the height of the finished ceiling? And how did raising the foundation go? I'm going to raise my cabin and strengthen the foundation before I do any roof work. Did you raise it all at once, and what size jacks did you use? Thanks for any information.
|
|
Pyro
Member
|
# Posted: 10 Mar 2009 11:14pm - Edited by: Pyro
Reply
Hi Jerry.
Thanks for the complement. It is a great location. Today we would NOT be able to build so close to the water line. There is a 50 foot setback that must be observed with new construction. That's still short compared to MN requirements. (I attended Bethel College in St Paul in the early 80's)
No, I gave that old Cookstove to a friend. It was a 40's vintage cookstove & took a very large safety footprint to keep it. Since we wanted to make the best use of such a small space, we decided to give it away & get the Morso Squirrel Stove you see in one of the shots. It has very tight clearances, & I actually engineered the wall between the fridge & the woodstove to vent from bottom to top. The stove side can get very hot, (cannot touch it) but with no wood studs & venting allowed, the fridge side never even gets warm.
Morse still makes that stove today, but with a glass door & an ash door.
http://www.morsoe.com/us/Products/Stoves/2B-Classic/2B-Classic/2B-Classic.htm
|
|
Pyro
Member
|
# Posted: 10 Mar 2009 11:21pm - Edited by: Pyro
Reply
Regarding the roof, we raised it 20" in the center. That changes the whole way to the drip edge because we didn't raise those walls.
We used old screw type jacks to raise the whole building. we raised it at various spots a little at a time. The whole camp can shift because it was stick built with no plywood originally. The barn boards would just shift as we raised it. Now I have some plywood in the walls & it makes it more rigid than it used to be. I don't know if that's a good thing for a camp that is only floating on cement pads.
Joe
|
|
Jerry
Member
|
# Posted: 11 Mar 2009 09:37am
Reply
Joe,
Another question if you don't mind. Did you insulate the ceiling above your foamboard? If not, is it warm enough as is? And did you vent the soffits, roof, ridge or what? I know what you mean about the safety footprint for the old wood cook stove. I acquired mine with dreams of getting up early on a cold morning, firing up the stove, putting a pot of coffee on, and crawling back into bed while I listen to it perk and smell the smell. But now I don't know if I'll be using that stove in that way. I might put it in a outbuilding I'm planning where I'll do canning, sausage making, etc. In the old days it was common to have a summer kitchen to keep the heat of a wood cook stove out of the living area. I dismantled a 100 year old dovetail log house five years ago that was built that way. Thanks again. P.S. - Seven inches of snow here last night - now cold and windy with -30 to -40 windchill for tonight. Winter's getting looooong.
|
|
Pyro
Member
|
# Posted: 11 Mar 2009 06:05pm
Reply
I remember one week when at school there where it hit -60, That was awfully cold.
The ceiling foamboard is 2" think. It leaves a space between the plywood roof & the foamboard for venting. Mice do not nest in Foamboard, so that's why we chose it. Also, Inch for inch, it's much higher R value then Fiberglas.
I've been there at below zero nights & it was warm & cozy inside. I think the worst weather day was a 20 mph wind coming off the lake at 20 degrees air temp. Again, inside was 100% fine. The Morso 2B classic woodstove is the only heat. It works well, and has a bigger firebox than a cookstove, so it burns over 8 hours using birch, maple, or oak. Ash burns a bit quicker & morning will find only red embers left even when the vent is shut tight. When we first arrive & it's 10 degrees inside as well as outside, we turn on the electric oven, propped open the door & start a fire. It's 50 degrees in about 25 minutes, but every piece of furniture is still 20 degrees. We shut off the oven when it's 65+ degrees & the woodstove is plenty of heat from there. It's about 70 to 75 degrees inside with that burning at 1\4 open vent. (4 hours burn time) 3 hours after we arrive, it's above 70 & the furniture is quite a bit warmer too.
I chose not to vent the roof on the Lake side porch, but it is vented on the other side. The lake side has the screen porch & it was just not going to look good. Since we don't live there & only visit 3 or 4 weekends each winter, moisture buildup isn't a problem. The ridge is vented & the stove pipe allows some venting.
Almost any flat top wood stove will allow for an old fashioned Percolator. Your coffee will get mighty strong if you leave it there though.
Joe
|
|
Pyro
Member
|
# Posted: 21 Apr 2009 09:07pm - Edited by: Pyro
Reply
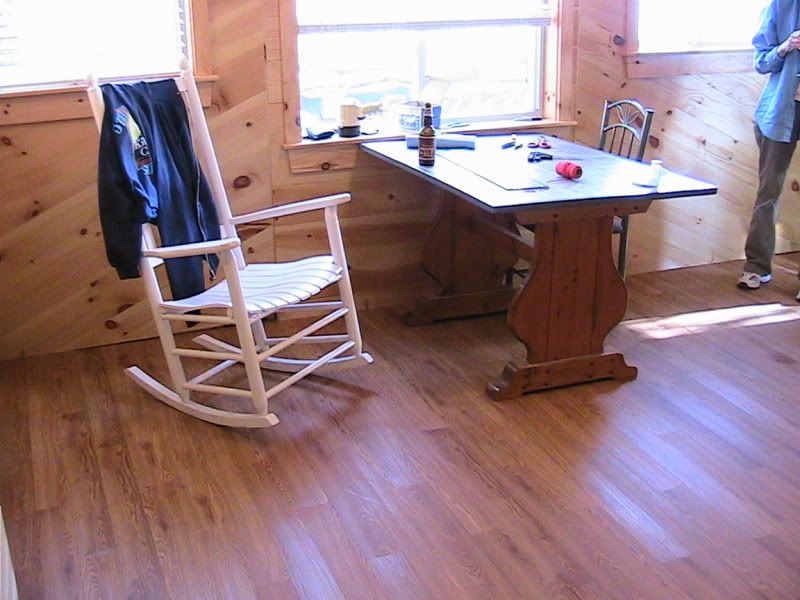
Well, for my birthday my wife bought me some materials to cover over the plywood floor. These are just the inexpensive Vinyl Wood Planks that are sold at Lowes. It was less than a buck a square foot to buy and about 10 hours to install. Looks better than I thought it would.
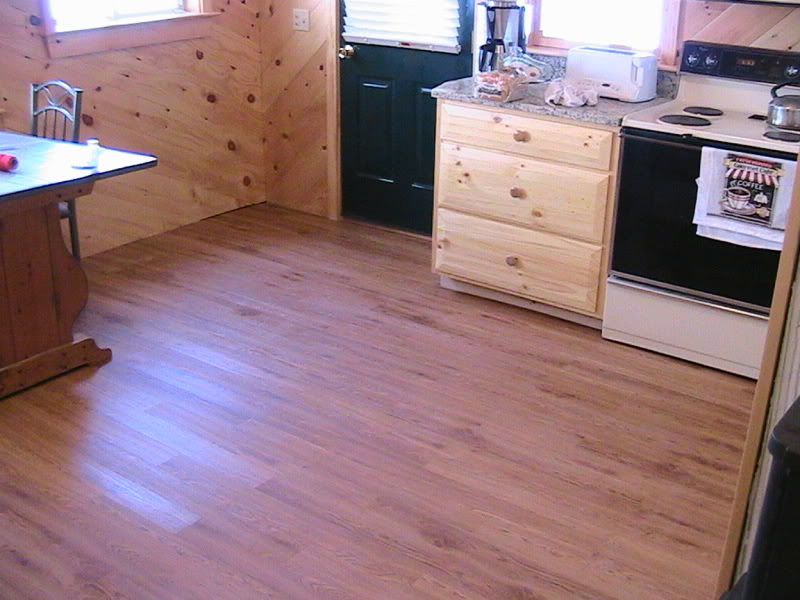
My reward when I finished? A cold ale while I sat in the rocking chair looking at the new floor.
|
|
CabinBuilder
Admin
|
# Posted: 22 Apr 2009 09:49am
Reply
I think I have exactly the same floor in the living room of my house, also from Home Depot... I believe it's a laminate.
Looks nice, especially at that price!
|
|
Pyro
Member
|
# Posted: 22 Apr 2009 02:48pm
Reply
I decided against Laminate because it was not good for a floor that 'moves" The frost heaves lift & reshape the floor every winter. This is a flexible Vinyl product, so it will follow the floor as it moves. I expect it will only have a 10 to 20 year life to it before I need to do something else. This is just basic peel & stick sheets that are 2mm thick by 4" wide by 36" long. It cuts w/ a utility knife, then bend it down to break it clean. It's actually pretty easy to work with & needs very few if any tools. I used the masons line there on the table to get it all started correctly. The only part that took time was cutting in & around the door openings.
It's found online at Lowes.
http://www.lowes.com/lowes/lkn?action=productDetail&productId=146950-84875-WD4012&det ail=&lpage=none
|
|
elkdiebymybow
Member
|
# Posted: 7 Jan 2010 11:13pm
Reply
Great looking project! Nice job with everything, I hope you enjoy it for another 100 years or more!
|
|
DLMcBeath
Member
|
# Posted: 7 Mar 2010 01:57pm
Reply
Pyro,
I need you help. I want to rebuild the ceiling in my cabin. I would like to convert it to a cathedral ceiling like you design. To do this I will nee to remove the ceiling joist and I'm afraid when I do that my walls may bow out. What did you do to prevent the possibilities of your walls form bowing out? I can use a collar ties to strengthen the roof. How did you tie in the rafters to the walls? Any advice you can give me would be appreciated.
Thanks,
David
|
|
Pyro
Member
|
# Posted: 7 Mar 2010 10:03pm
Reply
Hi David,
I'd love to be of assistance.
Just a few temporary braces nailed into the floor will support the walls while there is no other support. I'll work on getting some more work in progress pictures posted either tonight or tomorrow.
Joe
|
|
Pyro
Member
|
# Posted: 7 Mar 2010 10:49pm - Edited by: Pyro
Reply
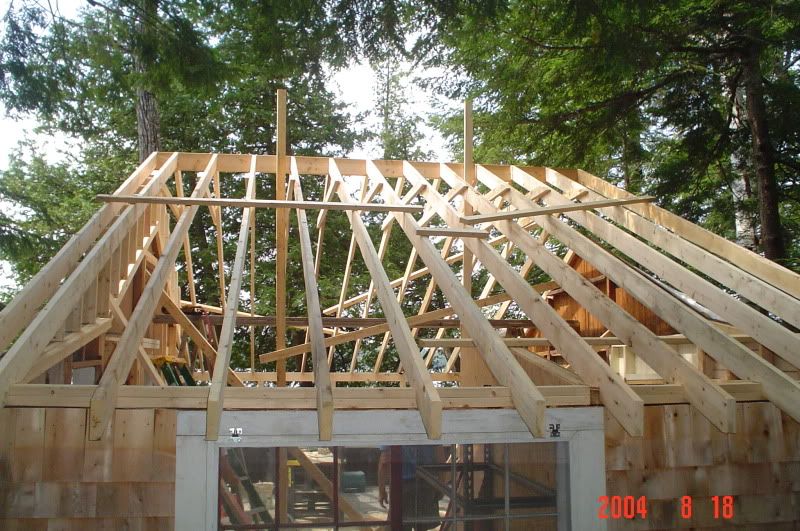
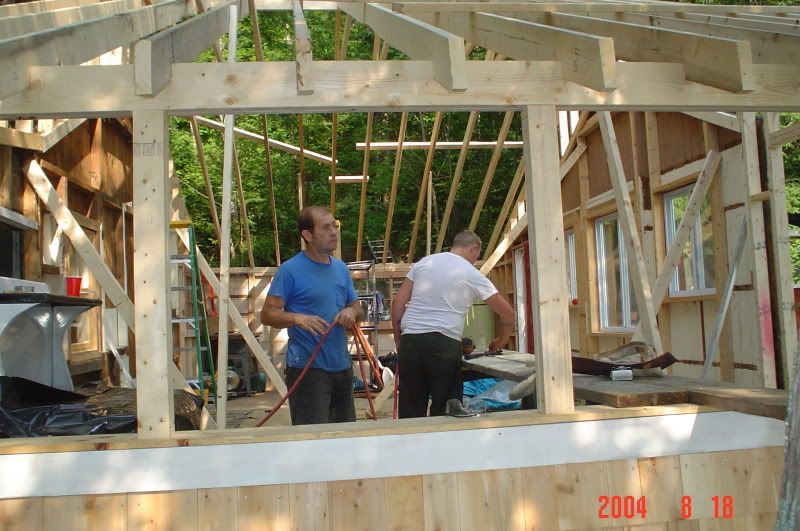
Here are a few pics of removing the roof without loosing the walls...
Where the braces crossed, they would be nailed as well. You can toenail the bottoms to the floor, or screw in a block of wood to the floor & nail the brace to that.
If a picture is worth a thousand words, then here are a few thousand words...
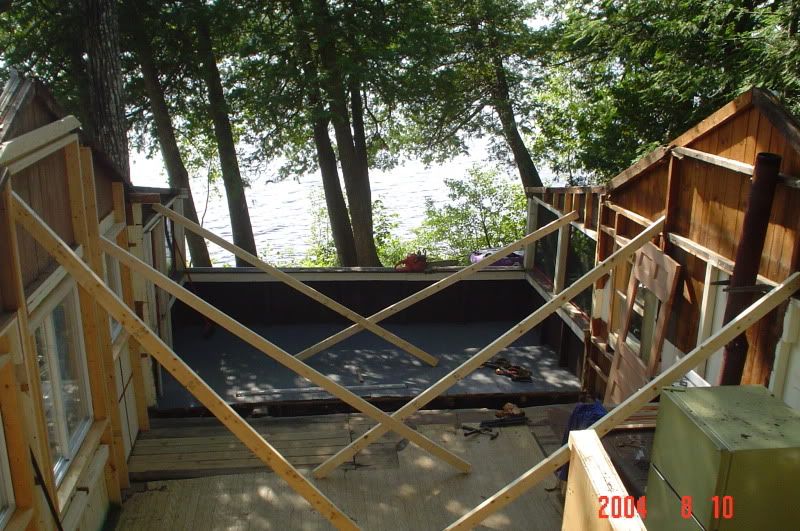
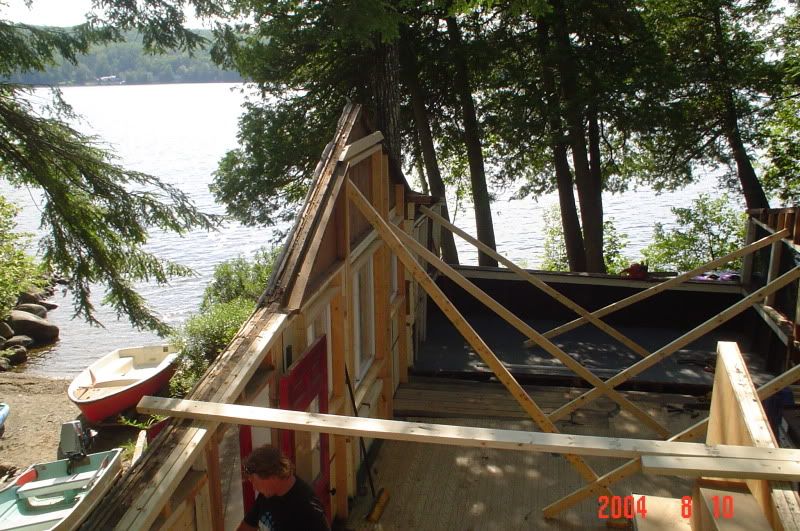
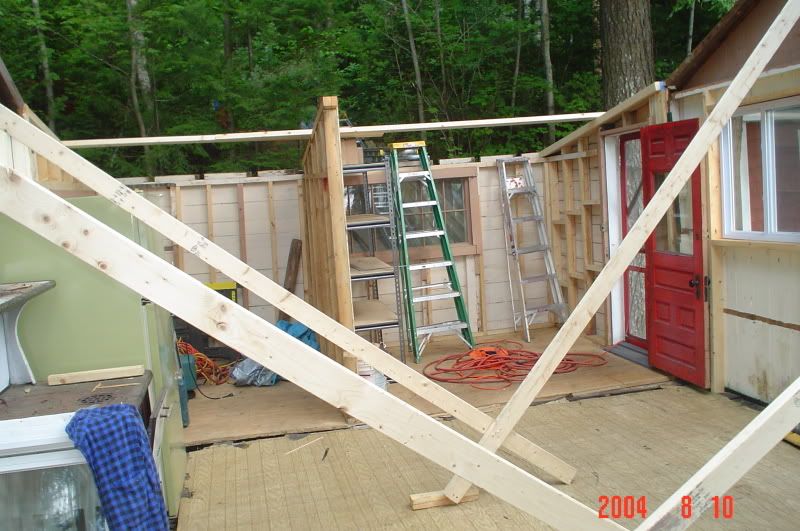
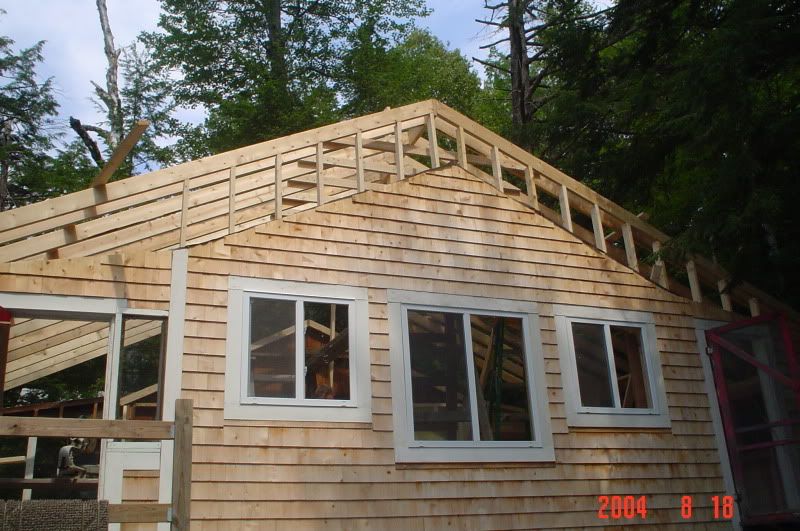
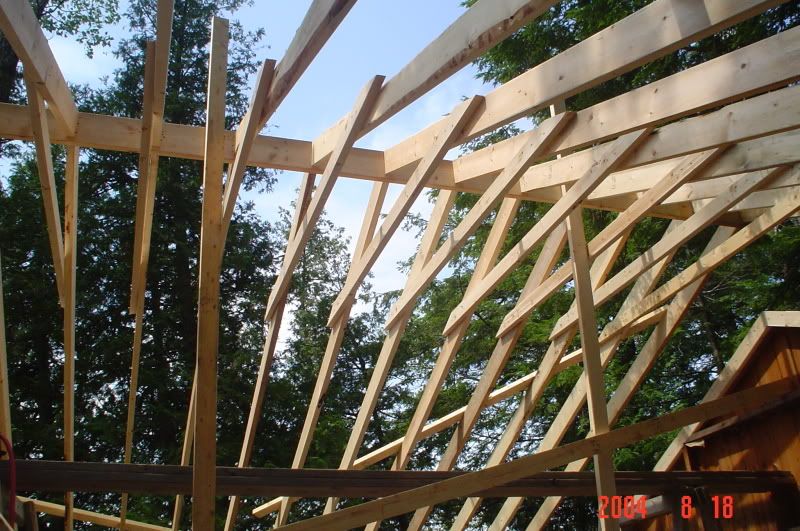
I hope these pictures tell you what you were asking about Dave.
|
|
DLMcBeath
Member
|
# Posted: 8 Mar 2010 06:06am
Reply
All I can say is WOW!
|
|
Pyro
Member
|
# Posted: 8 Mar 2010 07:22am
Reply
It was a pain to always be stepping over the braces in such a small area, so after the rafters were in place, we shortened the braces a little. The walls were still real wobbly though!
It wasn't until we built the two inside walls that the rigidity returned to the structure & the braces were removed.
|
|
DLMcBeath
Member
|
# Posted: 8 Mar 2010 07:46pm
Reply
Here's what I'm faced with.
IMG_0172.jpg
| 
IMG_0173.jpg
| 
IMG_0174.jpg
|  |
|
|
DLMcBeath
Member
|
# Posted: 8 Mar 2010 07:49pm
Reply
What I would like to do is take out everything but the rafters and put collar ties across the rafters. I would do this very very slowly, one rafter at a time.
|
|
Pyro
Member
|
# Posted: 8 Mar 2010 10:26pm
Reply
It looks like full timbers that are there for your ceiling height. Those alone will act like collar ties. Heck, it looks like they will support the walls even if you removed the whole roof.
Where is this cabin located?
|
|
DLMcBeath
Member
|
# Posted: 9 Mar 2010 12:53pm
Reply
West Virginia. I don't want to remove the entire roof. I want to build my ceiling like yours to give me more ceiling hight.
|
|
| . 1 . 2 . >> |
