| << . 1 . 2 . 3 . 4 . 5 . 6 . 7 . >> |
| Author |
Message |
unixfmike
Member
|
# Posted: 2 May 2009 05:40pm
Reply
More pics.
5. The suburban 8 feet from the front door in the rain (around 8:30am).
6. A stuffed armadillo at Bass Pro Shop in Oklahoma City.
7. My daughter shooting lazers at the Bass Pro Shop.
8. Deer in my hunting area as seen from the freeway. Archery only, no guns.
You know, the more I think about it, that laser range would be an awesome outdoor range for us to shoot some BB's at. That is a relatively simple project I can get carried away with and do it with scrap wood and leftover paints, and a few old items from around the house. The deer that are crossing through my hunting were taken as a snapshot from the freeway. I really wish my digital camera was better at long distance shots (like my gun), it was a decent young buck and his doe.
--MikeW
week_13_05.jpg
| 
week_13_06.jpg
| 
week_13_07.jpg
| 
week_13_08.jpg
|
|
|
Anonymous
|
# Posted: 5 May 2009 06:53pm
Reply
mike how are you planning to insulate the roof? I didn't see any collar ties? will you leave this as an exposed cathedral? how did you determine your ridge beam etc.... I am at this spot and would like to do the same as you pre build my gables and bring em out. the lumber yard is telling me i need a 400 dollar glu lam to clear span 20 feet. I was gonna post up in the middle of the gable and let them set the beam with a crane truck but if there is a better way I would like to talk to you more about it?
|
|
unixfmike
Member
|
# Posted: 5 May 2009 10:13pm
Reply
First off, I am no engineer nor do I profess to be one. I know what I have seen working because I have been in so many attics in new and old homes. I have also at some point been involved in new home custruction in thousands of homes in Southern California and Nevada. I took a lot of my retained knowledge and applied it somewhat to what I designed. I also used books and existing plans for building sheds as a point of reference. So, there is some method to my madness.
In 1991 I helped build a conventional stack roof that was a 4/12 pitch with a single 2"x10"x20' that spanned the full length of the room. The rafters were 2"x6" and those spanned 10 1/2 feet in between supported points (the ridge beam and wall). For this pitch, the 2"X6" was chosen as it was "over engineered to support an expected snow load in the desert". That is still standing with no complaints of damage to the wall, or soft spots in the roof. Not for this to be the sole basis of what you need, or what I did, but just one example of what an engineer and architect calculated to be the correct building material. This did pass city building department requirement for the engineering and building permits. This did pass through all phases of inspection too.
Having spent many cold agonizing days staring at ridge beams and rafters in attics while installing many different types of satelite or radio components, I remembered to look at what was working. The last house I rented here in Oklahoma had a 2"x8" for a ridge beam that was supported at 12 feet. It used 2"x4"x12's to span the width of the living room. I saw it first hand in the attic, and also walked on it. It was a firm roof for having been built in the 1960's.
When it came to calculating my ridge beam, I took into consideration the load it would be carrying, the pitch of the roof, and what I have used in the past that an engineer already figured out. I was going to use a 2"x6"x16' as that was all that was needed to get by in a little shed building book I found at the library. I opted for the 2"x8"x16' and it is also supported at 12'. I have a 12/12 roof pitch (which is a nightmare to walk on) but it sheds rain and should shed snow allowing it to not cary as much of a load (live load).
I am not sure of the exact formula used to calculate this, I just go by what I remember working. If you can not find a book that provides the formula, find plans with the same dimension or larger and roof style as yours. Use the material that requires. I know there are online calculators just for this too (to help college students cheat). Ultimately you might be able to call a local architect or a city planning department and get an answer without spending any money. If in doubt, go see an engineer or architect. Don't trust the salesman who wants to sell you a "20 times your money" solution. If I trusted the salesman, I'd be at $25,000 on my incomplete build. I'm still well under $4,000.
When it came to the insulation, I put insulation in between the rafters, and I intend to panel it in before too long. I know this isn't the modern way of doing it, but it seemed to work just fine in the last house that I rented, and that was built in the 1960's. During the last 2 rainstorms I was up there, 1 without insulation and 1 with, this made a difference. The first time without insulation was 45 degrees outside and 48 inside. This last time with partial insulation was 56 outside and 62 inside the loft. That was just from body heat and breathing.
When all else fails, ask yourself is this going to be a long term full time small residence, or an overglorified tool shed (like mine).
--MikeW
|
|
unixfmike
Member
|
# Posted: 6 May 2009 06:25pm
Reply
I have spent a little time looking online for an answer for you. Here is a link I have found.
http://answers.google.com/answers/threadview/id/749060.html
That was the easiest for me to understand. I found antoher that had about 7 charts that went into great detail with different types and grades of wood, sizes of lumber, and complex formulas that I cant make sense of.
--MikeW
|
|
unixfmike
Member
|
# Posted: 10 May 2009 04:55pm
Reply
Another weekend comes to a close and a little more work got done. I was finally able to check off the electrical from my list. Now I just need to get a few wall plates and I'm done.
8. DONE wire loft (1 hr)
9. DONE wire living room (1 hr)
10. DONE wire bathroom (1 hr)
I was also able to take care of some of the paneling and more insulation. Here are a few of the weekends pictures.
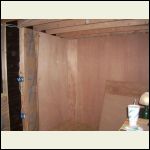
1. The shower wall is nailed in place.
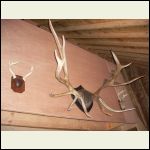
2. My 3 finished sets of antlers are hung (1 more set to mount).
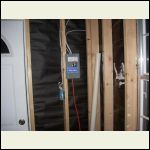
3. The electrical panel is closed (until I get the heavy cable for a generator).
4. A portion of the north wall, and the completed east wall.
--MikeW
P.S. More to come...
week_14_01.jpg
| 
week_14_02.jpg
| 
week_14_03.jpg
| 
week_14_04.jpg
|
|
|
unixfmike
Member
|
# Posted: 10 May 2009 05:07pm
Reply
5. The east wall is complete, insulated and paneled.
6. The west wall 75% complete.
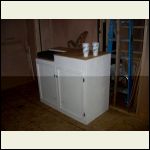
7. My complete cabinet with camp stove (want some instructions?)
--MikeW
...there will be more...
|
|
unixfmike
Member
|
# Posted: 10 May 2009 05:12pm
Reply
8. The paneling on the stairs is almost complete. The other piece is cut just not nailed on.
9. Antoher picture of my kitchen (keep it small, less to clean).
The sink is is here at my house, I have not put it in yet because I have not plumbed in the drains yet. I dont want the kids to start pouring stuff down it to drain on the floor.
--MikeW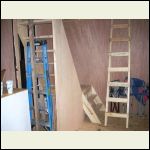
week_14_08.jpg
| 
week_14_09.jpg
|  |  |
|
|
unixfmike
Member
|
# Posted: 10 May 2009 05:42pm
Reply
I found Jiffy Pop! Ok, so I guess it might not be anything special to most. To me it is a big thing. It reminds me of the days before the radar box (microwave). Way back then we used stoves and hot air poppers to cook popcorn. You could use butter to pop your popcorn or oil. I remember the good days of hot popcorn straight of the stove in the biggest bowl the family owned. I also remember the days of going camping with my Grandma and Grandpa and having found Jiffy Pop at the local camping store. Back then the price was a lot lower, but it still was cooked on the campfire. I also remember Jiffy Pop when my Mom and Dad cooked it on the stove! My Aunt's and Uncles also cooked Jiffy Pop when I spent the night. It was so cool to have found the good stuff again. You don't know how many good memories a simple aluminum pan of Jiffy Pop brought back of my childhood. So here are a couple of pictures of me and Jiffy Pop, and passing that special treat on to my kids around a campfire. Thank you to my wife for being there to share in the fun and take the picture.
10. My 8 year old created a special mothers day gift without using a store.
11. I'm celebrating having found Jiffy Pop in the stores.
12. Mesmerizing use of Jiffy Pop.
--MikeW
week_14_10.jpg
| 
week_14_11.jpg
| 
week_14_12.jpg
|  |
|
|
|
CabinBuilder
Admin
|
# Posted: 11 May 2009 10:41am
Reply
Thanks for pictures and the story, unixfmike!
Your thread is very inspiring, as always.
|
|
Sandman 123
|
# Posted: 12 May 2009 04:34pm
Reply
Mike,
Is your Genset still working? If it is, take a Voltage Ohm Meter, (fluke) that is capable of reading Hertz. Turn up the RPMs using the idle stop screw until you get to 62 Hz. Hertz is directly proportional to engine speed.
|
|
unixfmike
Member
|
# Posted: 12 May 2009 05:55pm
Reply
Sandman, As far as the troubleshooting went, I did everything a generator mechanic recomended to me. I tested the 120v and 12v output before and after the coil taps, tested stator output, tested regulator input and output, and tested the diode and capacitor. The mechanic asked about engine RPM and power, and had me turn the idle screw up and down while checking voltage. They guy gave me a short checklist of things to test and after reviewing the results he said it was the stator. I called the importer to report the problem with the stator originally, and they told me if the diagnostics did not come from a local generator repair shop with repair estimate then I needed to find the store reciept and they would replace the generator.
After finding the reciept, and shipping them the generator they decided to replace the generator rather than the stator. They gave me an RMA number, and are in the process of replacing it at their cost. My replacement is in the process of being shipped back. It was supposed to leave Fullerton, CA, USA sometime yesterday.
--MikeW
|
|
unixfmike
Member
|
# Posted: 13 May 2009 10:16pm
Reply
I got the generator in today. It's a 2300W generator. New not rebuilt in the box.
--MikeW
|
|
bojom
|
# Posted: 17 May 2009 04:53pm
Reply
good work
|
|
unixfmike
Member
|
# Posted: 30 May 2009 06:11pm - Edited by: unixfmike
Reply
Hi again everyone. I was able to get up and do some work again. It is nice getting to start closing up the loose ends. My livingroom/kitchen is ready for paint and final trim. So is my entryway and my stairwell. All I have left to do is the bathroom and 1/2 the loft. I am so excited, I can't wait to go bust my butt up there and get even more done!
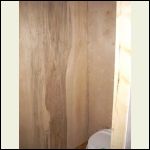
00. 1/2 of the bathroom is paneled in, and the shower is backed.
01. Another picture of the paneling by the toilet.
02. The shower is ready for some tile and a faucet.
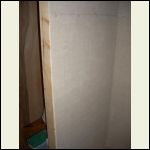
03. The paneling on the entryway is complete!
In picture 03 you'll notice I have a slight gap that tapers upwards. That is the difference in 2 degrees over 4 1/2 feet. Good thing the piece of trim material I will be using covers that up.
--MikeW
P.S. More to come!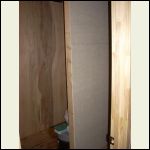
week_15_00.jpg
| 
week_15_01.jpg
| 
week_15_02.jpg
| 
week_15_03.jpg
|
|
|
unixfmike
Member
|
# Posted: 30 May 2009 06:16pm
Reply
...Some more pictures.
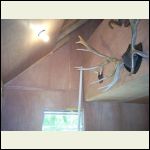
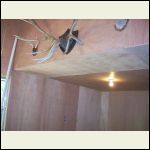
04. Another picture taken of the one inside roof panel that went on.
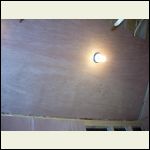
05. The ceiling in the kithcen/livingroom is complete! I might hang a fan in there.
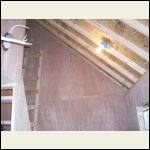
06. A lone shot of the light above the door.
07. The paneling at the stairwell is complete.
--MikeW
P.S. I think there is one more picture from this weekend?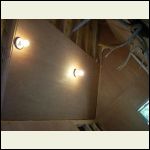
week_15_04.jpg
| 
week_15_05.jpg
| 
week_15_06.jpg
| 
week_15_07.jpg
|
|
|
unixfmike
Member
|
# Posted: 30 May 2009 06:17pm - Edited by: unixfmike
Reply
...The last picture.
08. This is the one panel that has been cut to fit for weeks now that has now been nailed on.
--MikeW
|
|
Steve T.
|
# Posted: 6 Jun 2009 08:26pm
Reply
Hi Mike, Thanks for posting this great ''how to''. I'm hoping to do a cabin the same size in the woods of Maine. You've given me more confidence. I'm mostly worried about doing the steep roof.
|
|
unixfmike
Member
|
# Posted: 10 Jun 2009 05:38pm
Reply
My roof is getting rained on yet again, and it is just tar paper. While theoretically it will hold up, and has in the past, I'm about ready to forget the idea of shingles. I am starting to think about just spening the 300 bucks and putting down the fiberglass or plasic roof.
--MikeW
|
|
unixfmike
Member
|
# Posted: 21 Jun 2009 12:14am
Reply
I wont be able to go up for a month. I have to go to school.
--MikeW
|
|
Anonymous
|
# Posted: 25 Jun 2009 03:15pm
Reply
I'm sure you have your hands full, but when you find time tell us about the components, cost and setup of the solar grid. How much will it be able to power?
|
|
unixfmike
Member
|
# Posted: 27 Jun 2009 05:29am
Reply
I don't have a solar grid yet. As of now I have a single garden tractor battery with a 400 watt inverter. That was able to power 3 60watt lights and my laptop for the better half of two days, along with my corded drill for about 20 minutes of actual run time. When I do put the solar system together, I will post a full list of components, costs, pictures of installation, and a bunch of details most people wouldn't normally care about.
--MikeW
|
|
unixfmike
Member
|
# Posted: 5 Jul 2009 01:13pm
Reply
Oh God I miss going to my cabin. I can't wait to finish school so I can go do some work and relax.
--MikeW
|
|
quietobserver
|
# Posted: 9 Jul 2009 09:04am
Reply
Here is info on solar as well as wind powered, electric power. I don't know if you have thought about it but maybe you could also harvest rain water for your shower and/or toilet. In that case maybe the plastic or a metal roof would do. I am in my research stages and saving cash. This thread is great! Thanks!
Brian
|
|
quietobserver
|
# Posted: 9 Jul 2009 09:04am
Reply
Sorry forgot to post.
http://www.efficientplanet.com
|
|
unixfmike
Member
|
# Posted: 22 Jul 2009 03:52pm
Reply
I finally graduated from my live in school. I should be able to get back up and do some more work this weekend.
--MikeW
|
|
unixfmike
Member
|
# Posted: 2 Aug 2009 12:06pm
Reply
I was able to get up again last night. I put in the shower base, and ran my drainage plumbing. I got 1/2 of my roof completed with PVC roofing. The main room is also painted. Unfortunately I had to leave because it started raining, and when it rains the trail gets too ugly to drive on safely. I'll have more pictures posted the next time I go up.
--MikeW
|
|
unixfmike
Member
|
# Posted: 8 Aug 2009 05:47pm
Reply
Pictures from last week's progress!!!
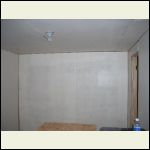
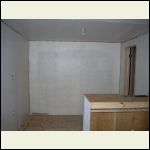
01. Moved the cabinet so it can be used as a bar too.
02. The almost completed paint job in the main room.
03. Same as above but I stepped back to the door.
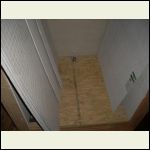
04. The shower base with drain installed. All I have left to do is put down the backer board, and then I can tile it!
More pictures to come.
--MikeW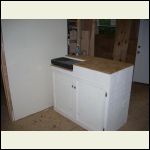
week_16_01.JPG
| 
week_16_02.JPG
| 
week_16_03.JPG
| 
week_16_04.JPG
|
|
|
unixfmike
Member
|
# Posted: 8 Aug 2009 05:50pm
Reply
05. Another view of the shower.
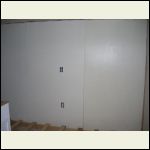
06. The north wall downstairs after completing the second coat of paint.
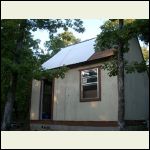
07. The PVC roofing panels are on. (That half is now finished)
--Mikew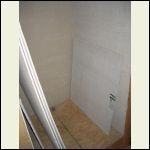
week_16_05.JPG
| 
week_16_06.JPG
| 
week_16_07.JPG
|  |
|
|
unixfmike
Member
|
# Posted: 8 Aug 2009 05:55pm
Reply
Now for this weeks pictures. I ended up using all the materials I have left for "next weekend". We all know how that goes too. I did all the little things that were adding up.
01. I added insulation to the west half of the roof. I only need 1 more package of batts to be complete.
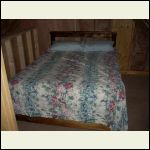
02. I built my bed frame this week. It does sit at a comfortable height. I might build one more too.
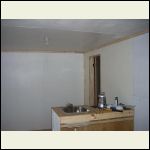
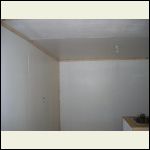
03. The second coat of paint looks nice. I also trimmed the room with 1"x2".
04. A View of the other side of the room.
--Mikew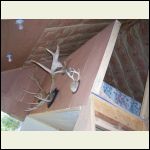
week_17_01.JPG
| 
week_17_02.JPG
| 
week_17_03.JPG
| 
week_17_04.JPG
|
|
|
unixfmike
Member
|
# Posted: 8 Aug 2009 05:57pm
Reply
05. The insulation in the bathroom is complete now.
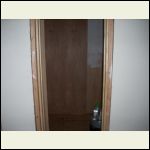
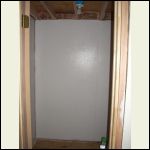
06. Most of the wall paneling is complete. I need 2 more panels.
07. I started painting the bathroom.
08. I finished painting everything that was paneled in.
--MikeW
week_17_05.JPG
| 
week_17_06.JPG
| 
week_17_07.JPG
| 
week_17_08.JPG
|
|
|
| << . 1 . 2 . 3 . 4 . 5 . 6 . 7 . >> |

