| << . 1 . 2 . 3 . 4 . 5 . >> |
| Author |
Message |
aktundra
Member
|
# Posted: 24 Aug 2016 01:54pm - Edited by: aktundra
Reply
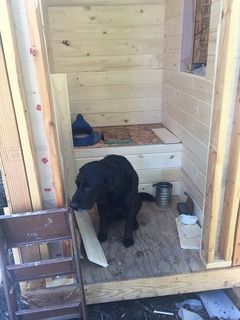
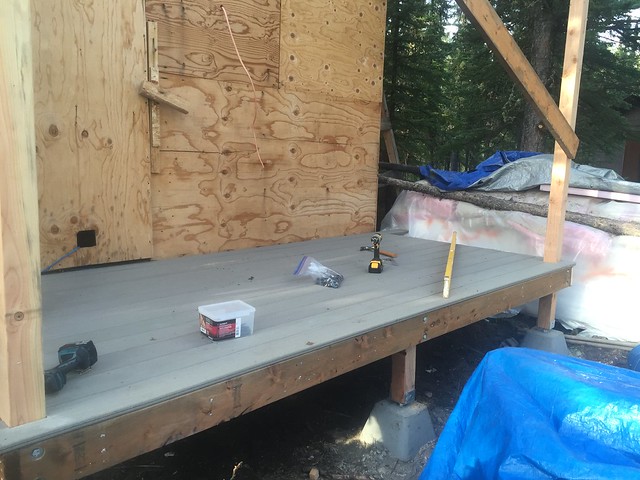
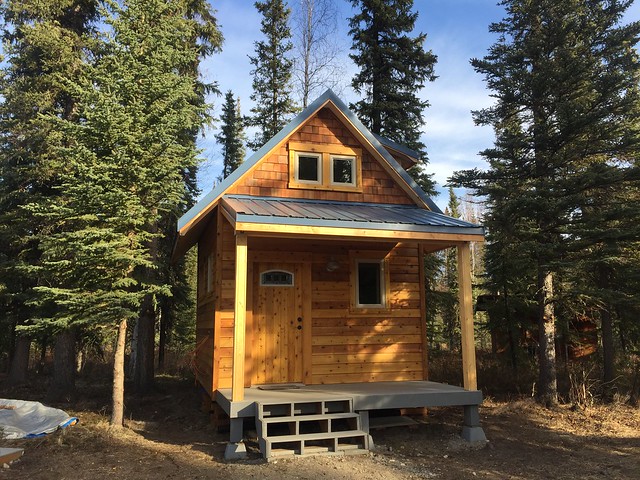
Well it takes a week being sick to update a year of progress. I paused the sauna project to build a new outhouse. I used mostly scraps, hence the OSB and plywood mix. I started the project much too late in September of last year as the ground has already started to freeze again.
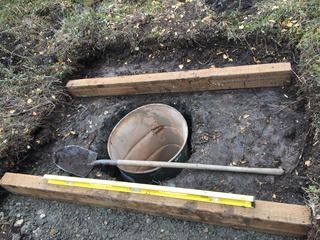
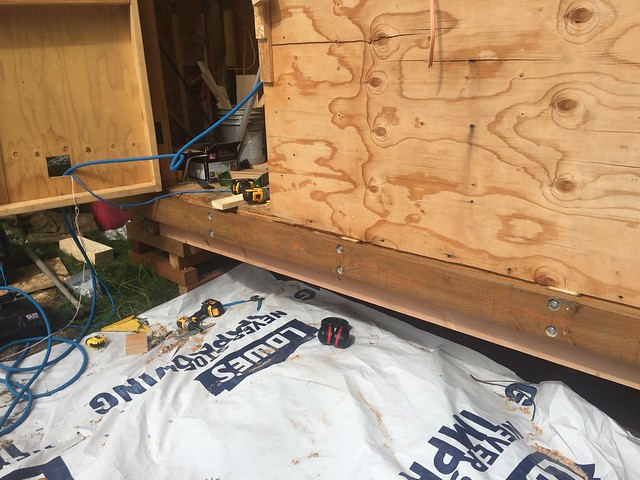
I built the outhouse on 4x6 skids for future moving.
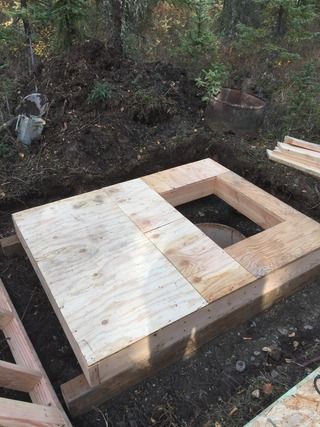
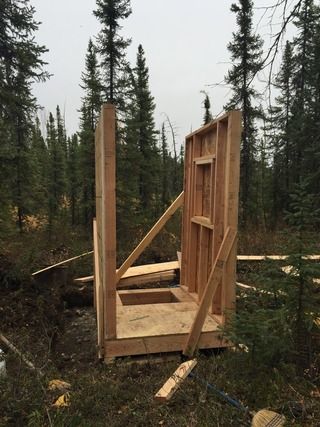
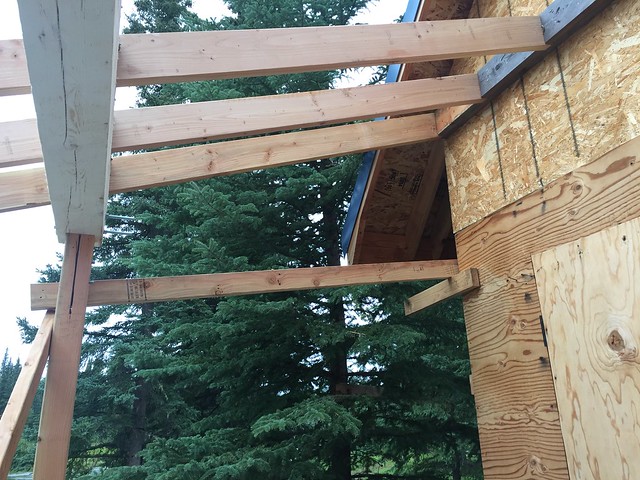
I built it pretty similar to the sauna as I wanted it to look the same. I did a ridge board with cathedral roof.
I started out with 2x4 rafters but somehow wasn't paying enough attention to my cuts, so I ended up with 2x6 rafters.
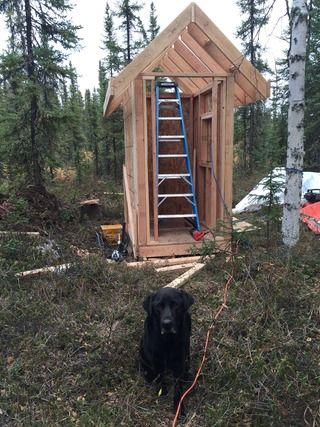
The outhouse is located on permafrost. Contrary to some internet rumors, you don't want to start a fire to melt it. You must keep chipping away at the frozen ground.
|
|
Steeny
Member
|
# Posted: 24 Aug 2016 02:09pm
Reply
Dick Proenneke would be proud. (You do know who that is, right?)
|
|
aktundra
Member
|
# Posted: 24 Aug 2016 02:17pm - Edited by: aktundra
Reply
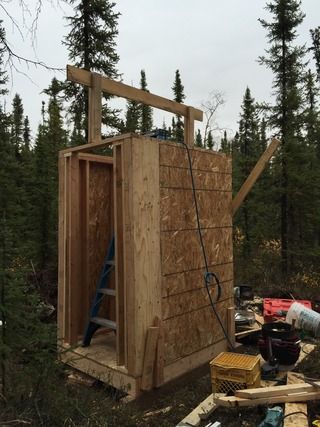
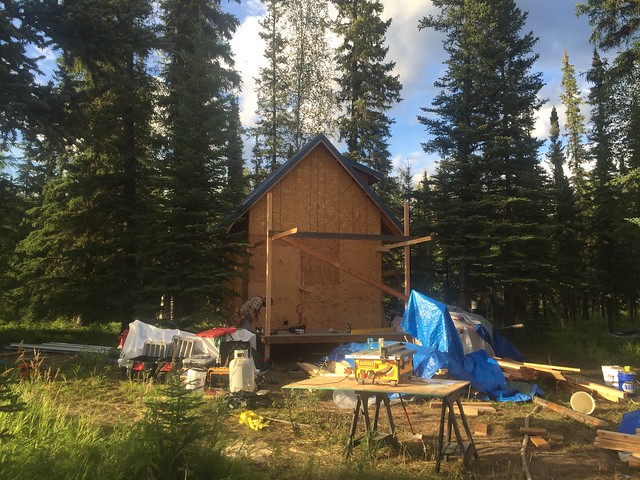
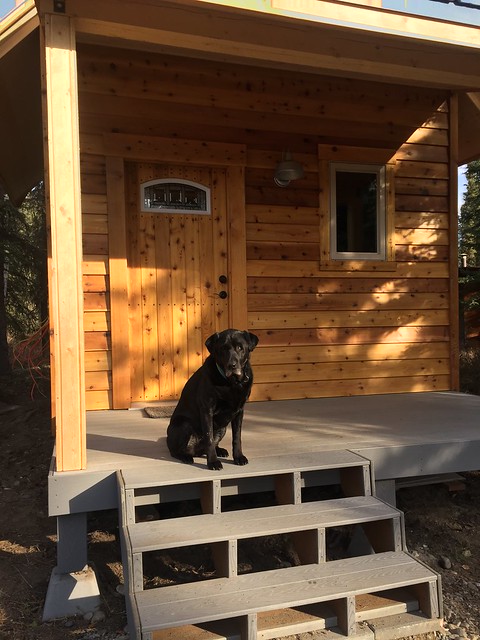
It took spring to make the outhouse usable. We had guests coming for summer to provide the motivation.
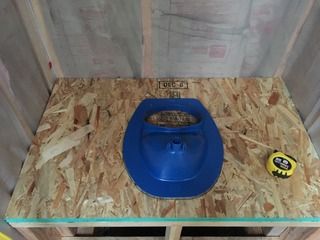
I used the Eco vita Privy 501 - for the seat. I wanted to make this outhouse work better than the others (well the others are OLD) so I did some reading about the urine diverters and was convinced. The Blue part of the kit is awesome, but I don't really like the seat. It's nice - really nice compared to most things but I'm not 100% convinced that the ecovita is best. I shouldn't have bought the toilet seat, since we usually end up needed blue foam as the seat in the winter. http://www.ecovita.net/privy501.html
I can provided other details about it, probably in another thread, but I'll hold out on the outhouse talk for now.
I've seen other homemade varieties. Actually I saw a paint saver can that would work really well at one of the big Box stores.
http://www.omick.net/composting_toilets/barrel_toilet_urine_diversion.htm

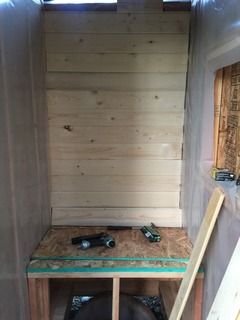
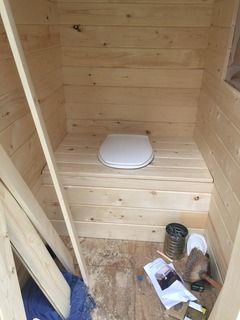
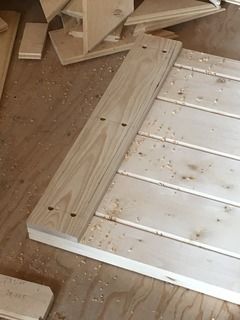
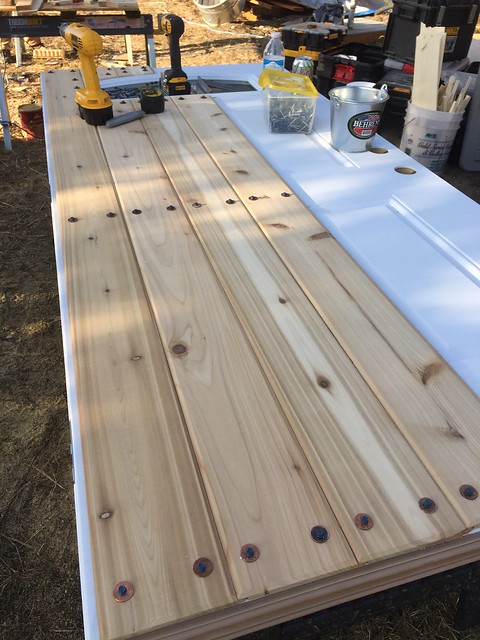
We built the door out of 1x6 Tongue and groove
We still need to put the roof on and siding, but here's where we got for now.

|
|
aktundra
Member
|
# Posted: 24 Aug 2016 03:08pm
Reply
Steeny - Yes I've read all the dick Proenneke books but I think I have a long ways to go!
|
|
aktundra
Member
|
# Posted: 24 Aug 2016 03:19pm - Edited by: aktundra
Reply
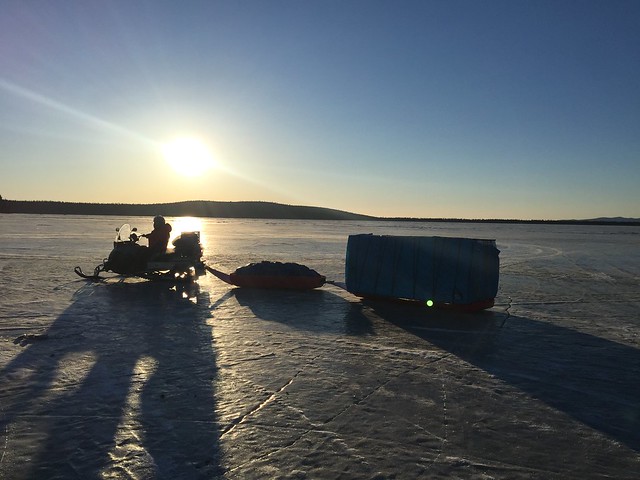
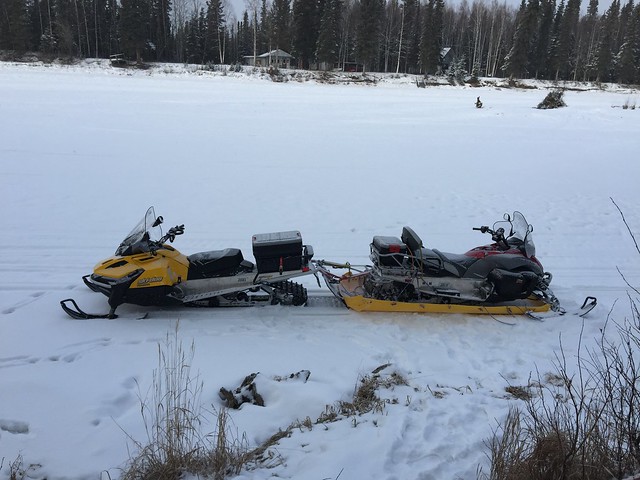
Last winter we hauled lots of material up. It's easier in the winter than the summer with the boat.
We hauled the tongue and groove, more 2x4s and 2x6s, the electrical, and the insulation.
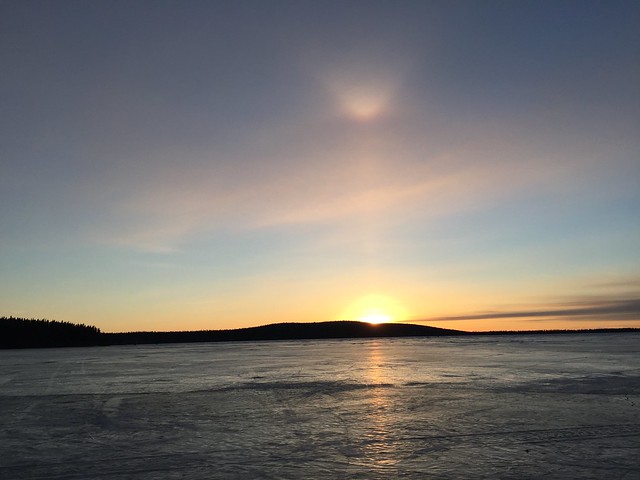
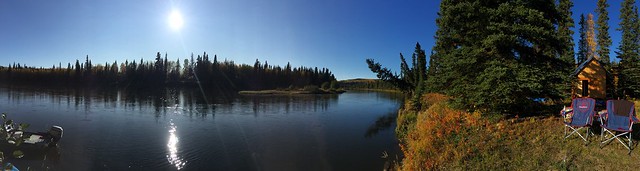
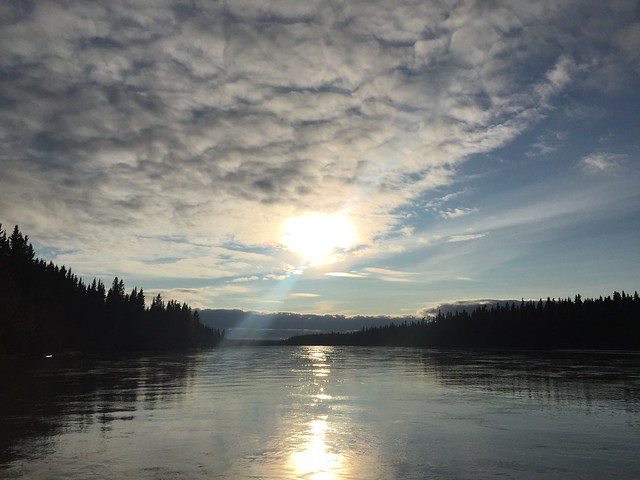
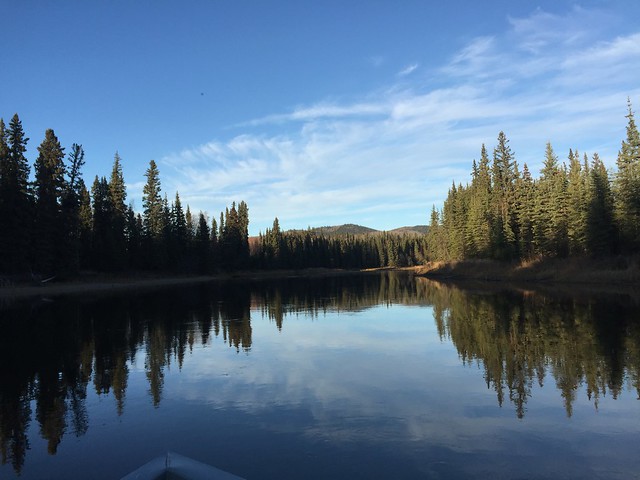
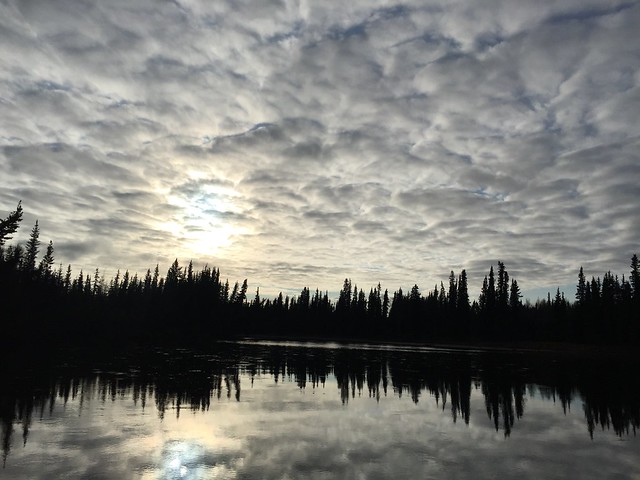
Spring is beautiful in Alaska - the sun is out long enough to warm the daytime. The days are blue and bright.
 IMG_3429 by M M IMG_3429 by M M
 IMG_0523 by M M IMG_0523 by M M
 IMG_3817 by M M IMG_3817 by M M
We took great care with the tongue and groove to not damage the 12' boards, especially the tongues.
 IMG_3819 by M M IMG_3819 by M M
Sometimes you have maintenance issues... Actually it's not an adventure if something doesn't go wrong.
 IMG_0635 by M M IMG_0635 by M M
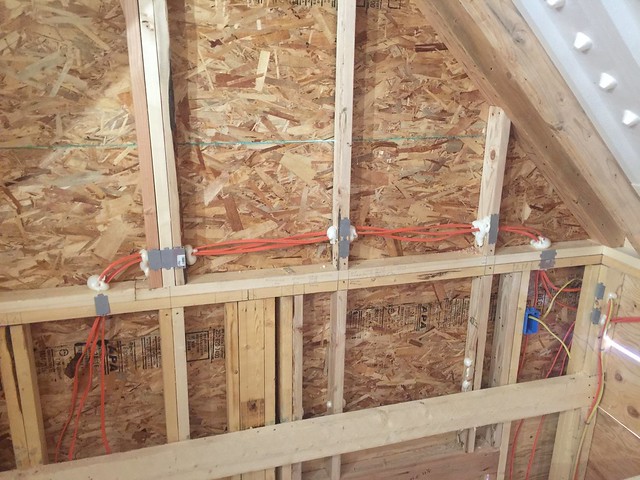
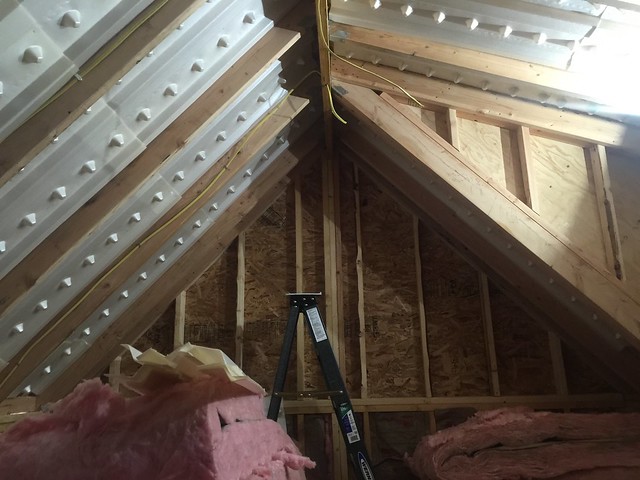
We wired the cabin, pulling 10 and 12 guage at -10F wasn't easy. I hadn't thought to fire up the big propane heater either. We then insulated, put vapor barrier up, and started on the panelling. The different angles of the loft made it so I couldnt figure a way not to need trim.
 IMG_3622 by M M IMG_3622 by M M
 IMG_3616 by M M IMG_3616 by M M
|
|
aktundra
Member
|
# Posted: 24 Aug 2016 03:53pm - Edited by: aktundra
Reply
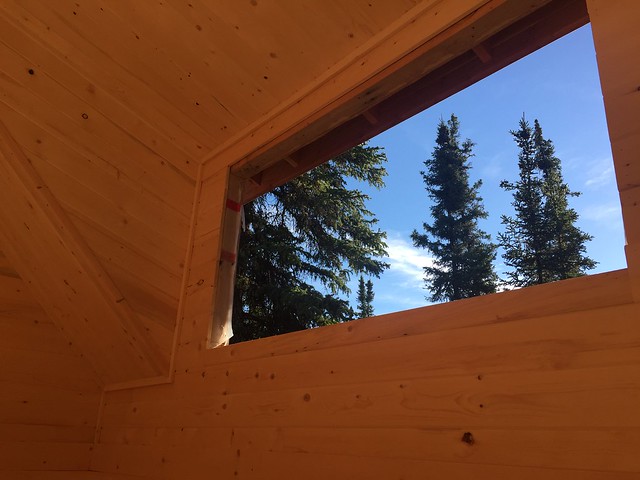
Spring we cut the window opening. I should have ordered windows sooner.
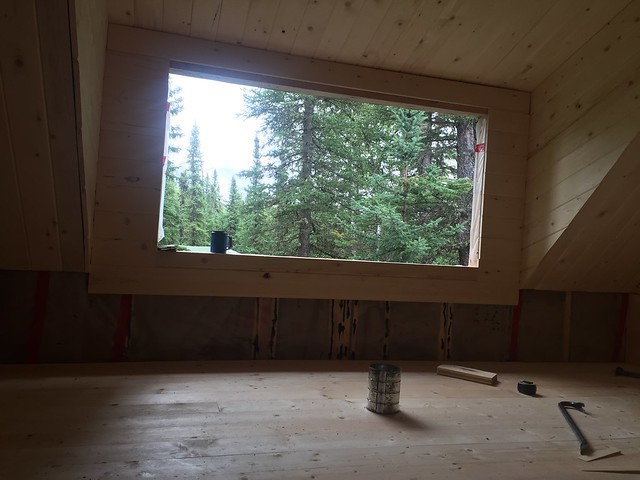 IMG_0212 by M M IMG_0212 by M M
 IMG_1292 by M M IMG_1292 by M M
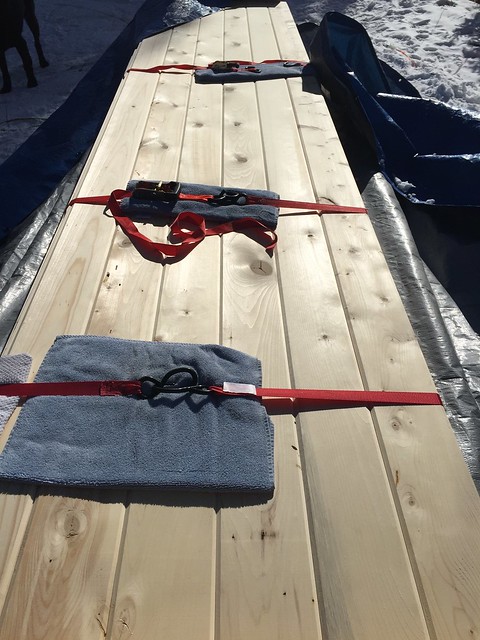
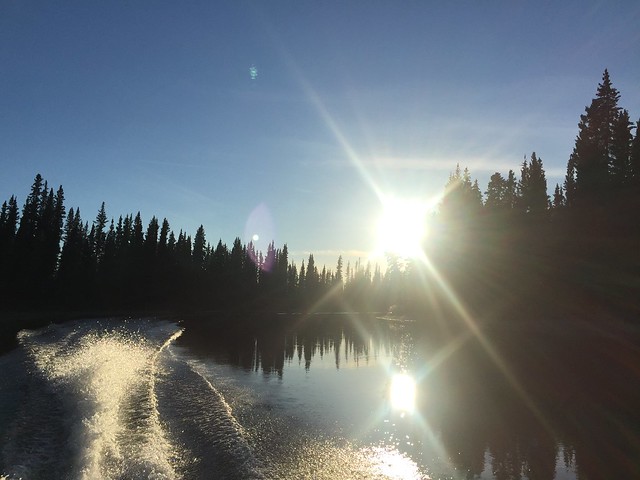
This summer we hauled more material up by boat. This is more work, since one snow machine can haul the amount of a boat, and we usually have 2-3 snowmachines travelling up. We hauled 10 boat loads so far with another 6 probably left to finish the sauna. Boat rides are more expensive than the snowmachine ride too. It is easier not strapping the load down, and we don't have difficulty getting up hills in the boat, so I guess it's a wash on which is easier.
People complain about the rain but the timing is perfect. Heavy boats get stuck on the shallows of the river. The extra foot of water provides adequate passage.
|
|
aktundra
Member
|
# Posted: 24 Aug 2016 03:54pm - Edited by: aktundra
Reply
|
|
aktundra
Member
|
# Posted: 24 Aug 2016 03:56pm - Edited by: aktundra
Reply
|
|
|
aktundra
Member
|
# Posted: 24 Aug 2016 03:58pm - Edited by: aktundra
Reply
I'm having issues posting now. It won't let me post any of my text I've written out.
|
|
aktundra
Member
|
# Posted: 24 Aug 2016 04:00pm - Edited by: aktundra
Reply
 IMG_0258 by M M IMG_0258 by M M
 IMG_0262 by M M IMG_0262 by M M
 IMG_0272 by M M IMG_0272 by M M
 IMG_0279 by M M IMG_0279 by M M
|
|
aktundra
Member
|
# Posted: 24 Aug 2016 04:07pm
Reply
 IMG_0360 by M M IMG_0360 by M M
 IMG_0372 by M M IMG_0372 by M M
 IMG_0374 by M M IMG_0374 by M M
 IMG_0381 by M M IMG_0381 by M M
 IMG_0609 by M M IMG_0609 by M M
 IMG_0616 by M M IMG_0616 by M M
|
|
aktundra
Member
|
# Posted: 24 Aug 2016 04:12pm
Reply
Back to the interior of the sauna...
 IMG_0670 by M M IMG_0670 by M M
Here are the "duckboards" or floorboards we built to go over the vinyl
 IMG_0653 by M M IMG_0653 by M M
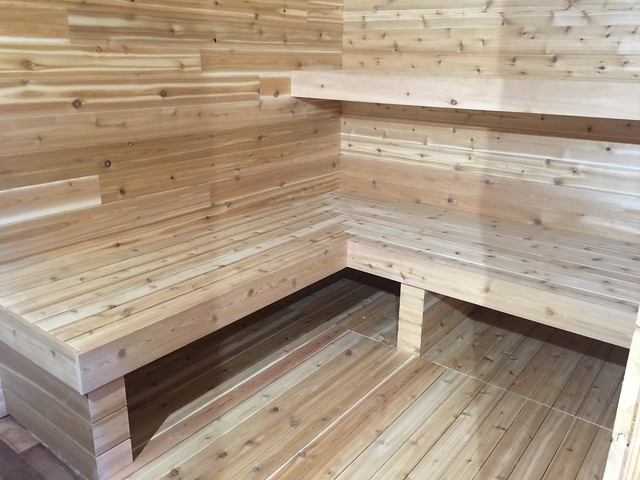 IMG_0677 by M M IMG_0677 by M M
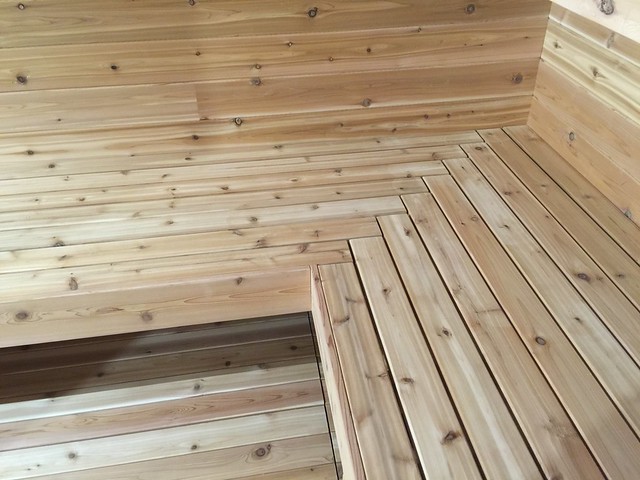 IMG_0680 by M M IMG_0680 by M M
The final part - the sauna stove - is on standby until I decide. Originally I thought the Baby Bear Stove I have would work (after I refinish it) but now I'm worried about heat output for the space.
I'm thinking about Kuuma wood stove, but the price of the stove (and accessories) and freight will be around $3,000. A bit more than I wanted to spend.
http://www.lamppakuuma.com/
|
|
aktundra
Member
|
# Posted: 24 Aug 2016 04:14pm
Reply
Back to trim work - tedious and the results aren't that noticeable (I like impact!)
 IMG_0912 by M M IMG_0912 by M M
 IMG_1289 by M M IMG_1289 by M M
|
|
aktundra
Member
|
# Posted: 24 Aug 2016 04:20pm - Edited by: aktundra
Reply
 IMG_1209 by M M IMG_1209 by M M
 IMG_1205 by M M IMG_1205 by M M
 IMG_1021 by M M IMG_1021 by M M
Well I wrote too much again and it won't let me post. But here is a normal faucet for the eccotemp L5 heater
|
|
aktundra
Member
|
# Posted: 24 Aug 2016 04:21pm - Edited by: aktundra
Reply
We also rigged up the faucet for the shower. I have the L5 eccotemp water heater and I wanted to see if I could make it work with normal faucets. I bought RV faucets but they are very "cheap."
|
|
aktundra
Member
|
# Posted: 24 Aug 2016 04:24pm - Edited by: aktundra
Reply
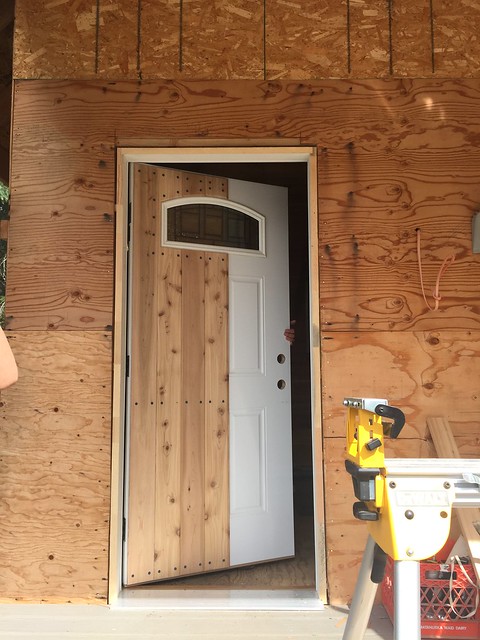
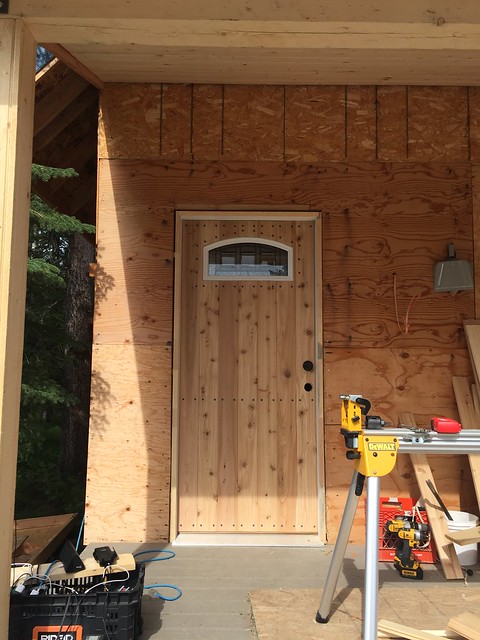
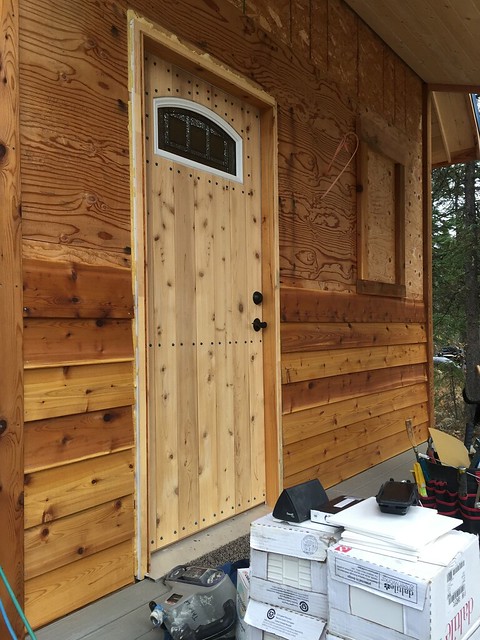
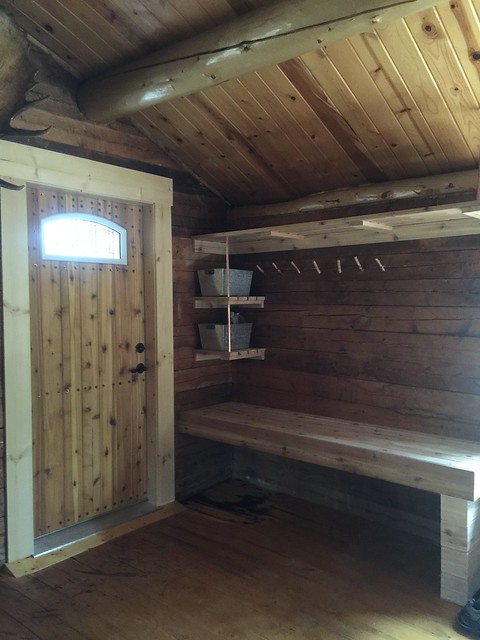
We also "churched" up the door. I hate store bought door on cabins, but was trying something new. My friend tried to convince me store bought doors have better seals / jams / etc.
 IMG_0956 by M M IMG_0956 by M M
 IMG_0958 by M M IMG_0958 by M M
 IMG_0964 by M M IMG_0964 by M M
|
|
aktundra
Member
|
# Posted: 24 Aug 2016 04:26pm
Reply
Last summer
 IMG_6991 by M M IMG_6991 by M M
|
|
LoonWhisperer
Member
|
# Posted: 24 Aug 2016 05:01pm
Reply
Wow! Truly outstanding work. And that view... drool 
|
|
Just
Member
|
# Posted: 24 Aug 2016 06:09pm
Reply
looks great, I think I can smell the wood.
|
|
NorthRick
Member
|
# Posted: 25 Aug 2016 12:23pm
Reply
"Churching" up the store bought door. Never thought of that. Looks really nice. The whole thing looks really nice in fact.
|
|
FishHog
Member
|
# Posted: 25 Aug 2016 02:57pm
Reply
Quoting: LoonWhisperer Wow! Truly outstanding work. And that view... drool
yeah.....that's what I was thinking.
|
|
aktundra
Member
|
# Posted: 14 Oct 2016 12:45pm - Edited by: aktundra
Reply
Kinda out of order now - but here's what I wrote before and couldn't post...
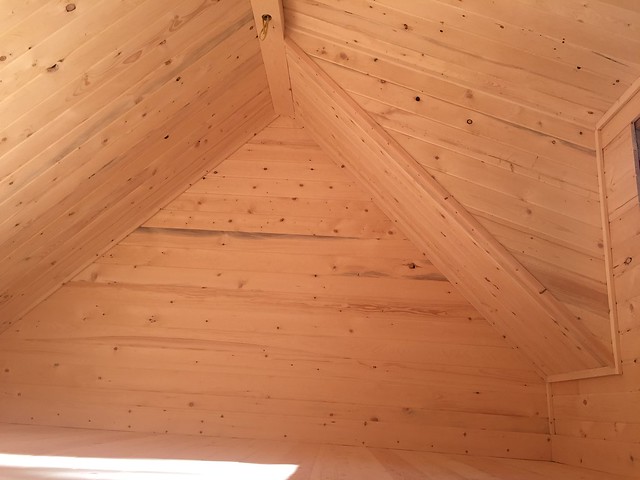
The 2x6 Tongue and groove was installed in a couple of hours. It really didn’t take much persuasion, but a chisel hammered and leveraged into the beams helped work into place. The vibrance of the spruce and the big 3x6 opening light up the space.
The 2x6 tongue and groove was screwed through the tongue . What a difference impact screw drivers make.
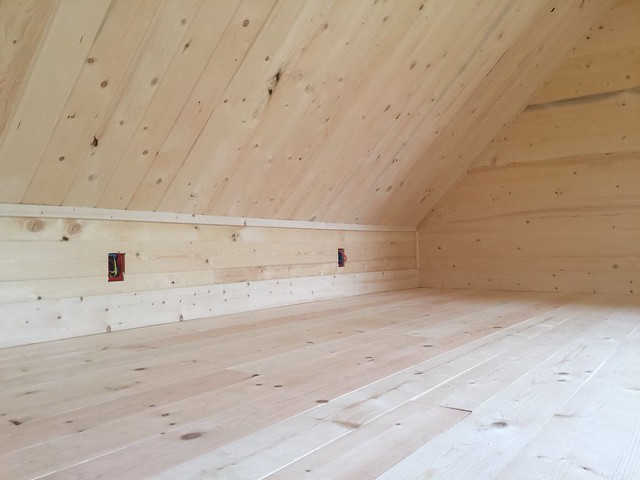
The loft could be finished, but we need windows. We could trim it out, but sometimes I like bigger impact projects. Trim is tedious but the results aren’t always visible. The 2x6 flooring of the loft is welcome relief from moving the plywood sheets around. Somewhere along the project I needed one of the sheets of “flooring†and was left with 5 sheets. We played the plywood shuffle many times.
The kids decided to build their own shelter from scraps... whatever keeps them having fun
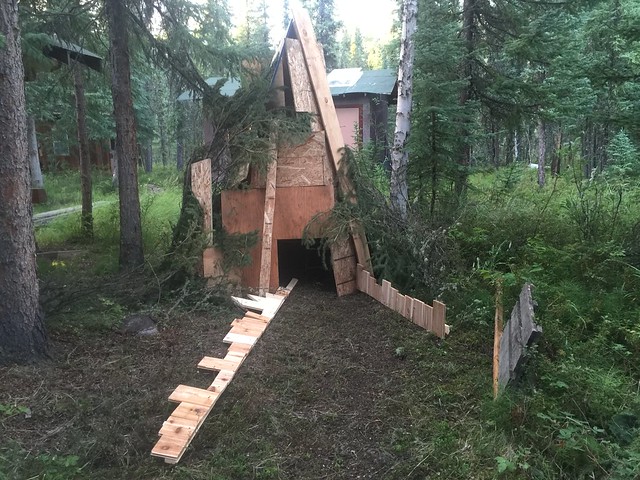 IMG_0295 by M M IMG_0295 by M M
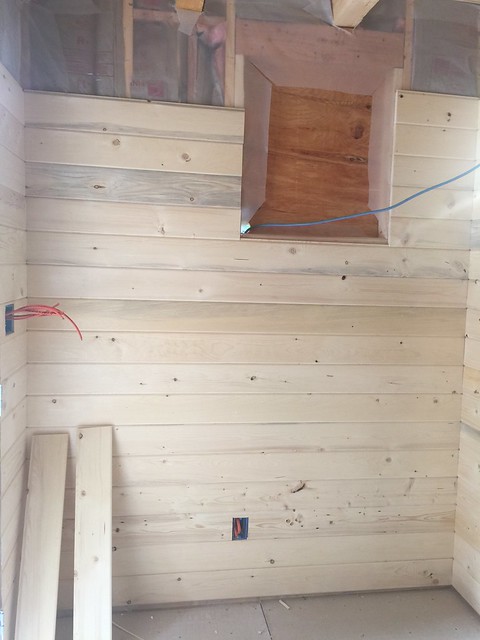
We moved downstairs to finish the sauna room. We finished the aluminum foil and taping of the future sauna and started on the tongue and groove. Since the flooring was still undecided, the tongue and groove cedar was started on board up. In this rectangle, it’s easy to start on the back wall and work around to hide the edges of paneling. We started at 7am and by 2pm we are finished paneling. Trim takes longer than I always think. Cuts are more precise and ends are smooth and sanded.
The sauna interior was redesigned again. The dormer addition really kinked up the original plans of wood stove placement. (But the dormer was so worth it). I really wanted the chimney to go up and not out the backwall. The last time (I hope) and the new stove placement is final. Each new phase of the build takes some time to regroup.
 IMG_0232 by M M IMG_0232 by M M
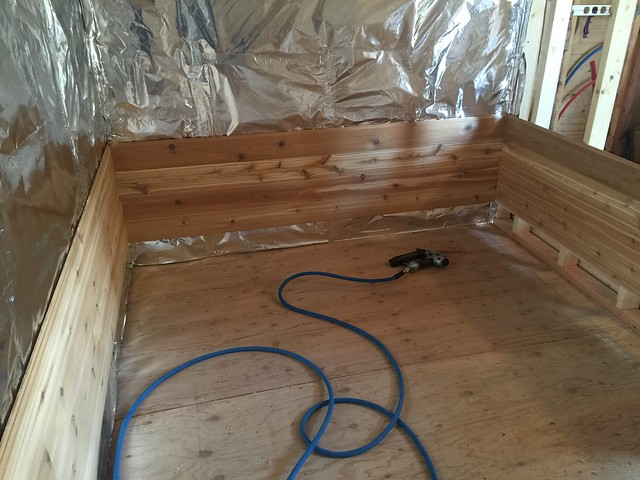
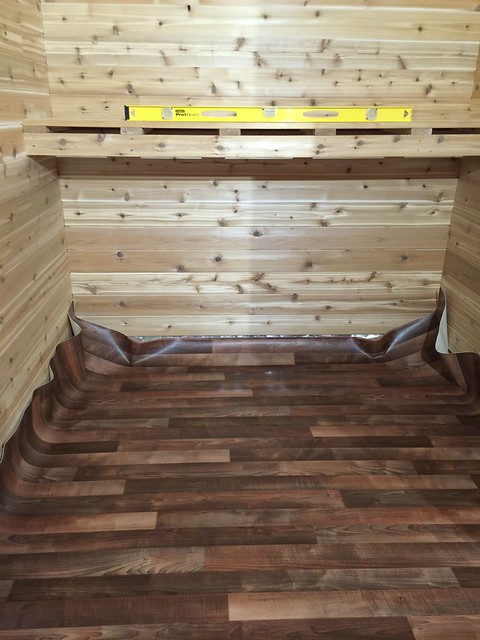
I didn't take as many progress pictures of the sauna. We had a hard time deciding the flooring. My main concerns being 1) water and floor rot 2) temperature extremes. We decided to put a piece of vinyl down (with no glue) as our waterproof layer and duckboards on top.
Here we are getting the vinyl into place. We secure it up the walls nail it in place with some roofing nails.
 IMG_0453 by M M IMG_0453 by M M
The next project was the sauna benches. We take time to decide sauna bench depth, height and construction. The goal is no exposed fastners and we build it like a deck. We stop at one bench – standing by on material and design ideas.
|
|
aktundra
Member
|
# Posted: 14 Oct 2016 12:50pm - Edited by: aktundra
Reply
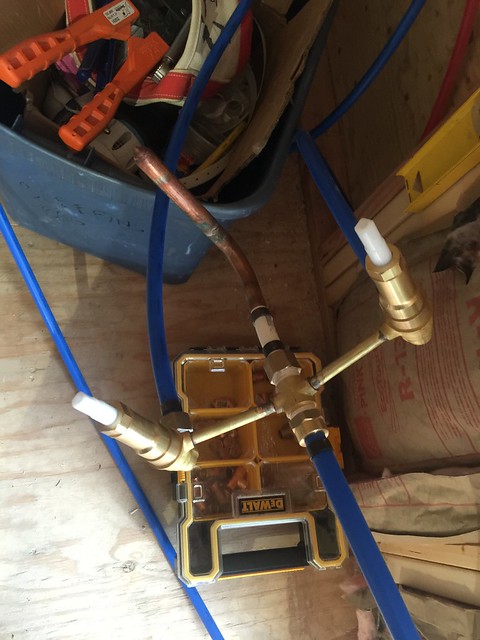
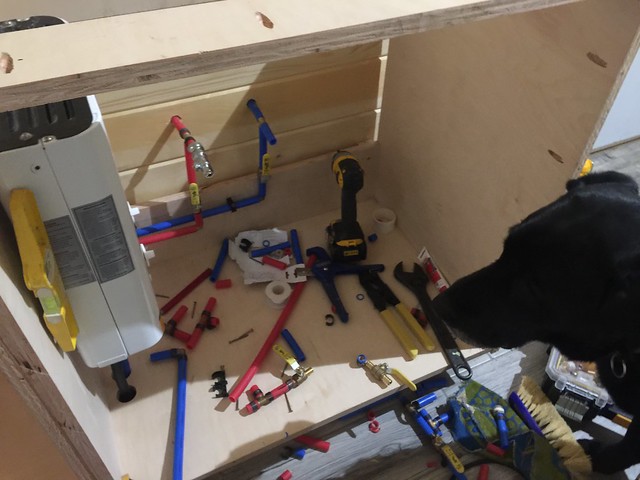
I removed the manifold for the water heater and water until we build the cabinet.
I also hate doing hard tasks, l dreaded attacking the electrical panel and plumbing. The plumbing was mostly done, but I needed to test it. We did a leak test hooked up to the compressor at 100psi and it held. Pex is great to work with.
We also rigged up the faucet for the shower. I have the L5 eccotemp water heater and I wanted to see if I could make it work with normal faucets. I bought RV faucets but they are very "cheap."
The eccotemp is a HOT water heater, so I plumbed a line for cold straight from the pump and wanted to see how well the mixing would work. It turned out great, but I bought a shower faucet set with individual hot/cold knobs just in case (wasn't necessary)
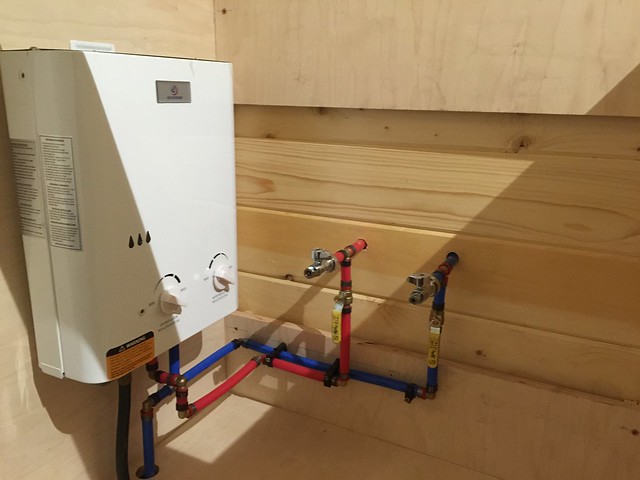
Here is the final plumbing of the water heater:
PEX makes it simple to design and redesign...
 IMG_3736 by M M IMG_3736 by M M
 IMG_3741 by M M IMG_3741 by M M
I really didn't want to find out about leaks later, so I pressure tested my system.
 IMG_3743 by M M IMG_3743 by M M
I left it hooked up which made it easy to check for leaks when I made changes.
|
|
aktundra
Member
|
# Posted: 14 Oct 2016 12:58pm
Reply
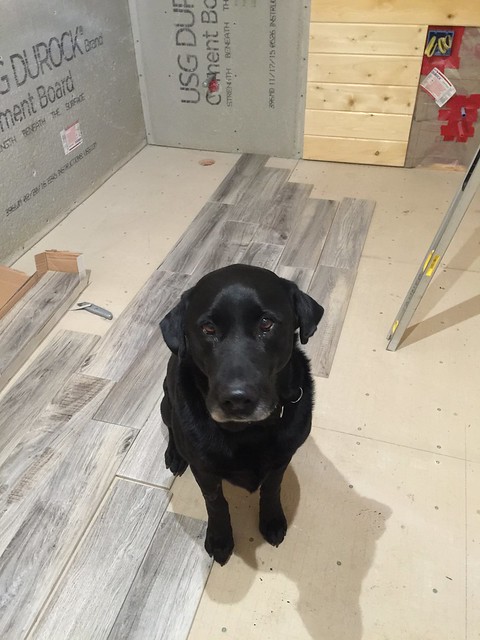
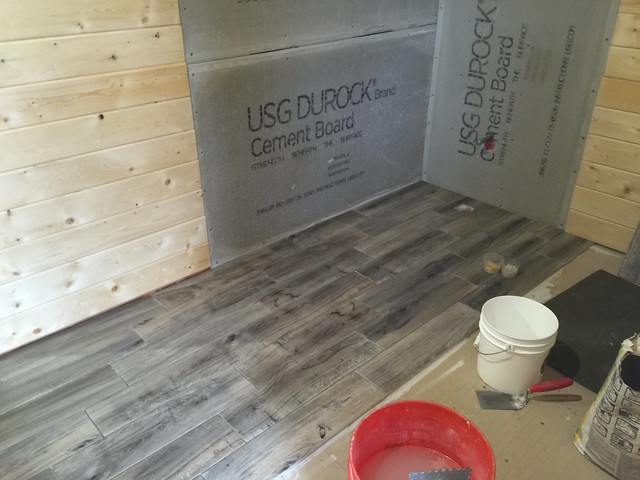
We decided to tile the bathroom. I really didn't want to haul a tile saw upriver, but eventually decided it would be the best option for the bathroom.
The tile is the wood look from Lowe's. I liked that it looked like driftwood and the colors of the T&G walls and gray floor work well together. I also wanted a color of tile and grout that would hide dirt.
 IMG_3452 by M M IMG_3452 by M M
 IMG_3462 by M M IMG_3462 by M M
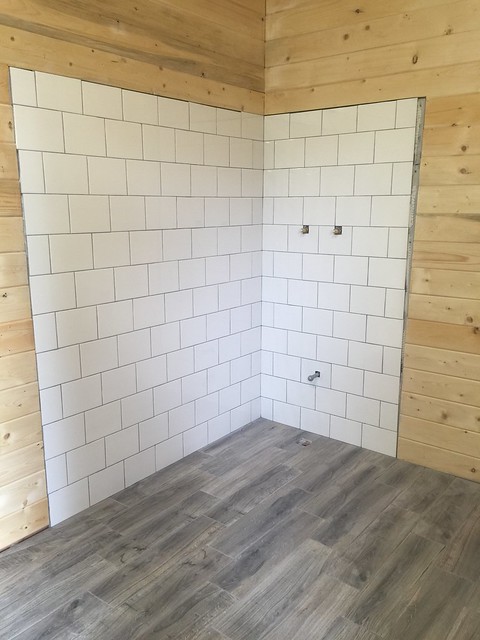 IMG_3657 by M M IMG_3657 by M M
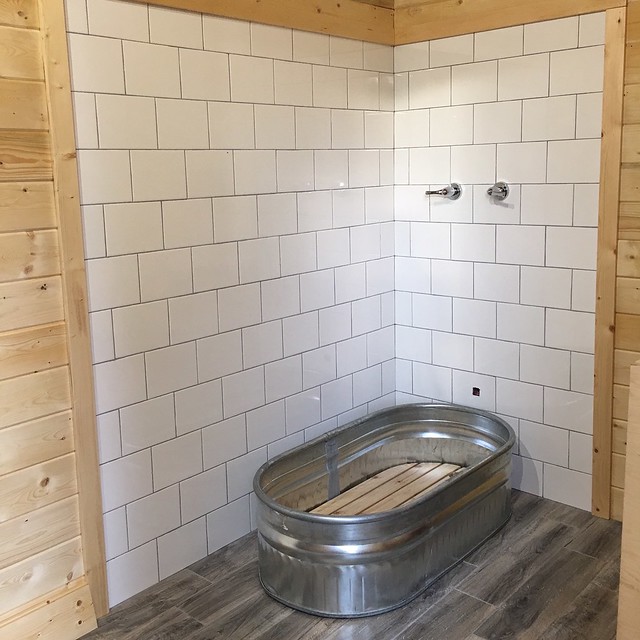 IMG_3839 by M M IMG_3839 by M M
|
|
aktundra
Member
|
# Posted: 14 Oct 2016 01:04pm
Reply
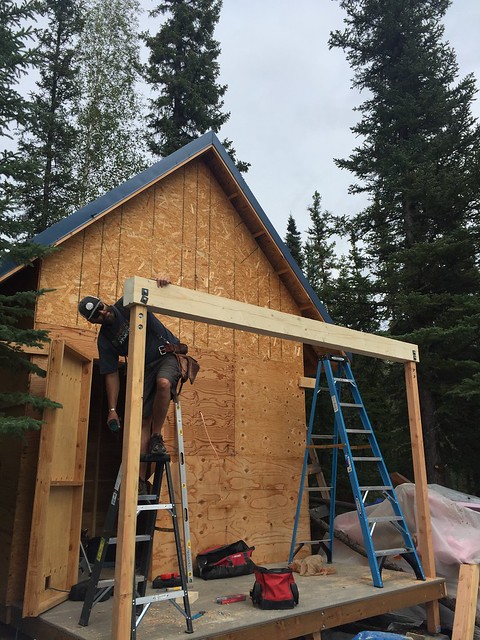
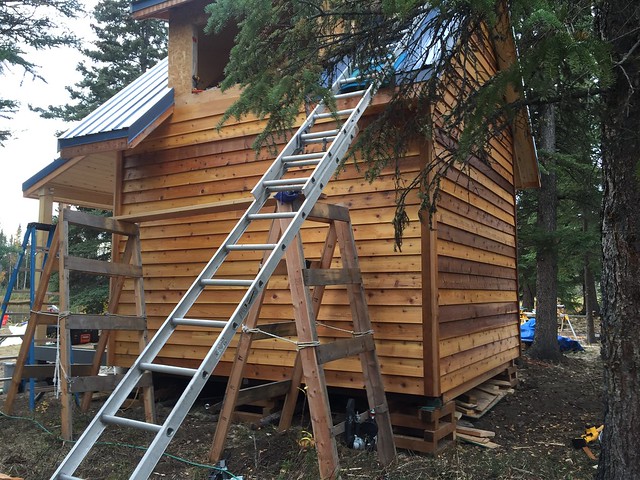
We started the siding on the back wall. In true Alaskan fashion, I really didn't want to start on the back wall, because who ever really sees it  but if I finished the front first the back would never get finished. but if I finished the front first the back would never get finished.
 IMG_3524 by M M, on Flickr IMG_3524 by M M, on Flickr
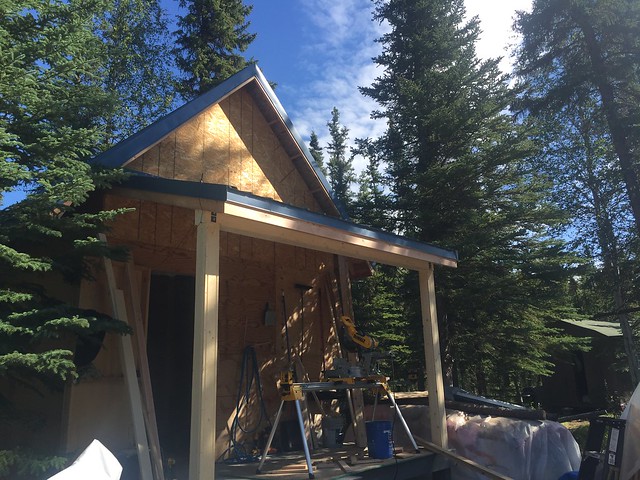
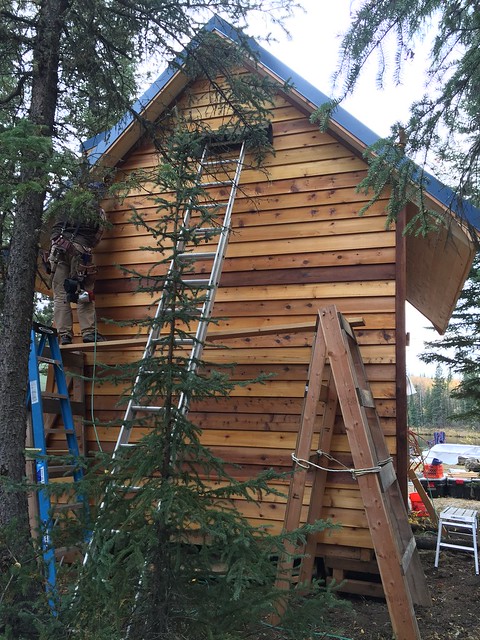
We decided on cedar siding, since I really wanted this place to be log. Cedar was as close as I'd come.
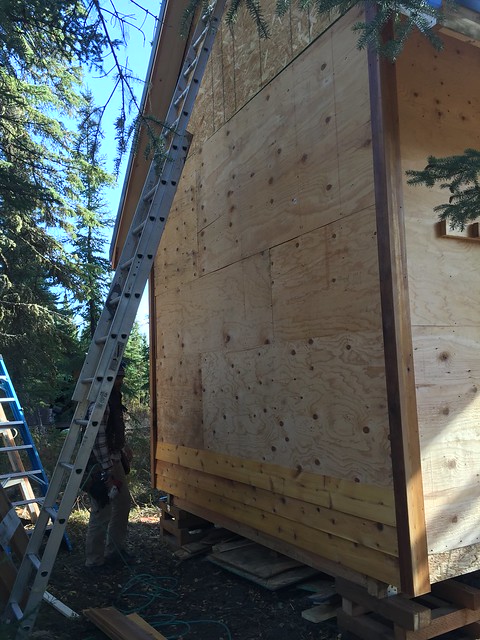 IMG_3474 by M M, on Flickr IMG_3474 by M M, on Flickr
Next time, I'm buying ladder jacks but we made the homemade scaffolding and extension ladder work.
 IMG_3482 by M M, on Flickr IMG_3482 by M M, on Flickr
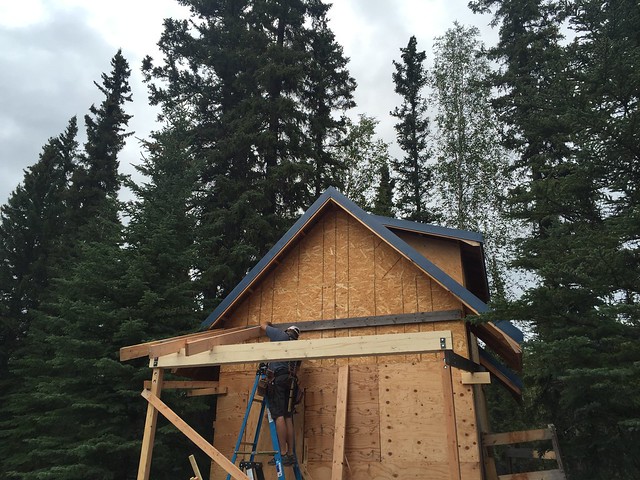
The dormer wall was the most tedious, as well as getting the corner boards built to fit just right. I really like just a easy wall.
 IMG_3503 by M M, on Flickr IMG_3503 by M M, on Flickr
The windows hadn't arrived yet, so we only could side up to the windows. Like any remote project, this had us bouncing between side jobs.
 IMG_3601 by M M, on Flickr IMG_3601 by M M, on Flickr
|
|
aktundra
Member
|
# Posted: 14 Oct 2016 01:07pm
Reply
 IMG_4089 by M M IMG_4089 by M M
I found some cool galvanized lights at Lowe's for both the sauna and outhouse.
Although I still need to hook up the electrical panel and solar stuff, I wanted the porch light on, so we wired it to a battery for the night.
 IMG_4294 by M M, on Flickr IMG_4294 by M M, on Flickr
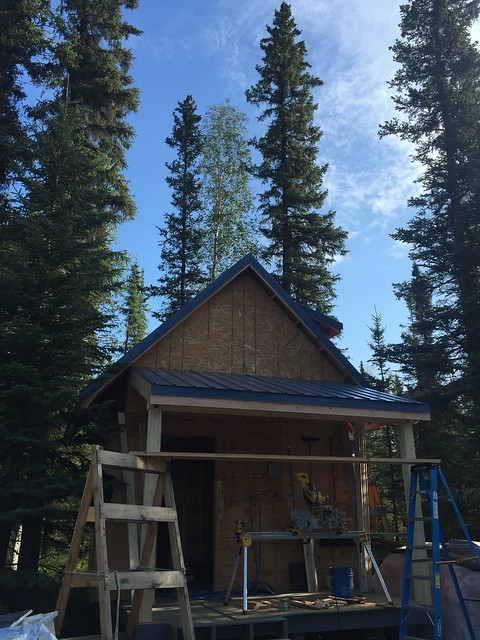
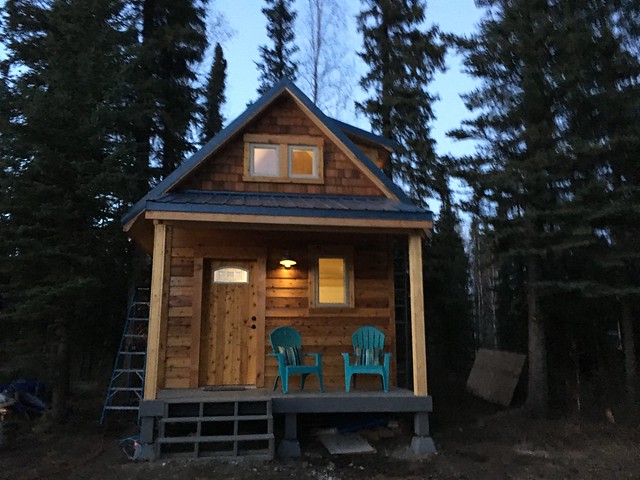
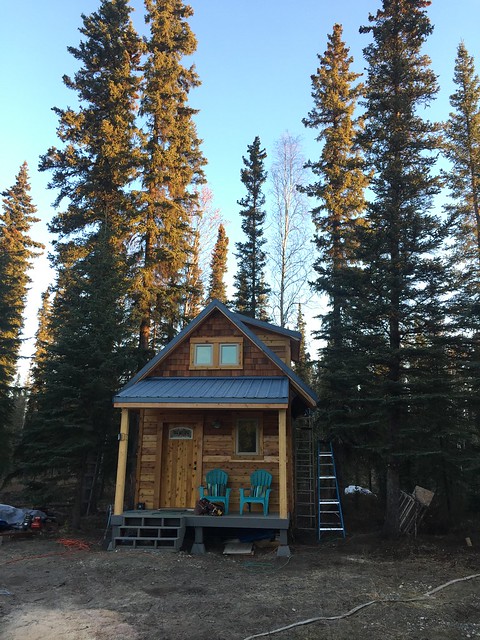
In the end, the sauna / cabin turned out just how I drew it!
 IMG_4451 by M M, on Flickr IMG_4451 by M M, on Flickr
 IMG_4479 by M M, on Flickr IMG_4479 by M M, on Flickr
 IMG_3790 by M M, on Flickr IMG_3790 by M M, on Flickr
We made our last trip out Oct 2, which is really amazing for Alaska. The boat is put away for winter, and now we wait for the river to freeze.
|
|
aktundra
Member
|
# Posted: 14 Oct 2016 01:10pm - Edited by: aktundra
Reply
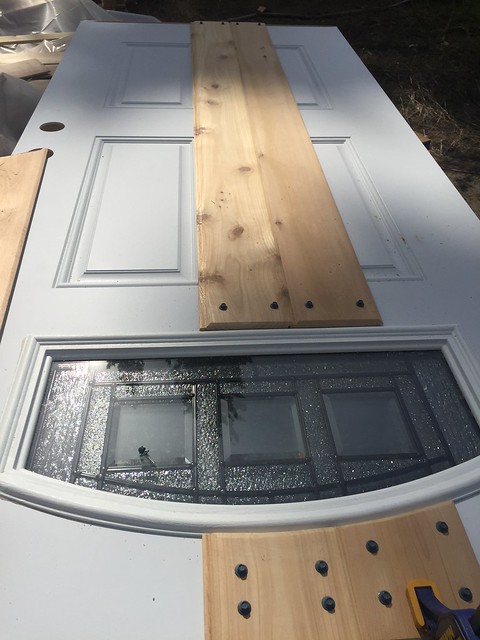
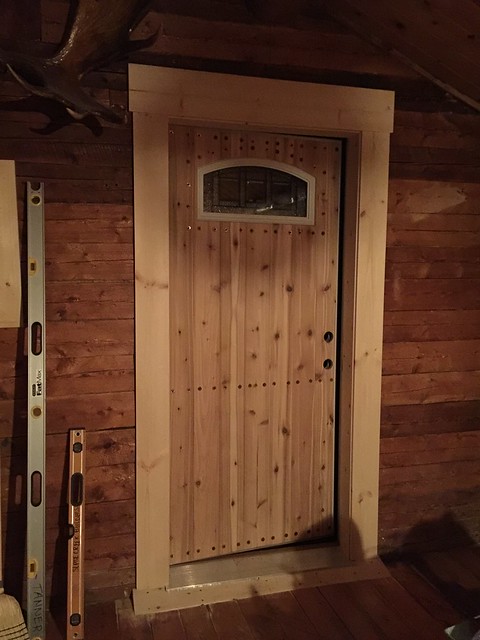
One of the side projects we worked on was a new cabin front door.
We built it just like the sauna door. We mounted it to swing out (bear door style).
On this door, we made penny washers. At first, we tried to use pennies with significant years to us, but eventually the 140 pennies needed it really didn't matter.
 IMG_3609 by M M, on Flickr IMG_3609 by M M, on Flickr
 IMG_3613 by M M, on Flickr IMG_3613 by M M, on Flickr
We also built a storage bench and glove rack for the main cabin. Coats/jackets/bibs/snowmachine helmets always clutter the cabin. This has been on the list for a couple years now.
 IMG_3756 by M M, on Flickr IMG_3756 by M M, on Flickr
|
|
aktundra
Member
|
# Posted: 14 Oct 2016 01:15pm
Reply
Alaska gets in your soul. There is a freedom to doing whatever you want.
Cabins are addicting. Work at the cabin doesn't seem like work. It's got a rhythm to it. Everyone is working together.
Now we wait for the river. But the projects, trips, work never ends. Now I work on town projects. I bought some acreage in town to build an airstrip. I've been cutting so many trees down, I figured I should build a 10x14 log cabin.
|
|
abby
Member
|
# Posted: 21 Oct 2016 03:11pm
Reply
it's all so wonderful. however, tell the kids I think they did an amazing job on their little cabin! how cool is that?!!
|
|
abby
Member
|
# Posted: 21 Oct 2016 03:18pm
Reply
my little 6 yr. old grandson made this frame from gathered sticks one day. he was so in to it, and he also made a fire pit with rocks. he asked me if I had any furniture I didn't want. I know, how cute was that? I am keeping this standing until next spring when he comes back. we shall make this come to life! you have to love little builders.
work at the cabin is truly never work for sure. you do beautiful work, and I love your photos.
|
|
| << . 1 . 2 . 3 . 4 . 5 . >> |
