| . 1 . 2 . 3 . >> |
| Author |
Message |
mattd
Member
|
# Posted: 3 Apr 2013 09:02pm - Edited by: mattd
Reply
Building a cabin on 80 acres. First step was to clear out a road. It's gotta be at least 500 feet and took a while but finally made it to the cabin spot that will over look the lake that will eventually be built. Now I can get materials on site.
Standing where the road enters the cabin spot looking to the left...

To the right....

And iPhone panorama view...

|
|
mattd
Member
|
# Posted: 3 Apr 2013 09:14pm - Edited by: mattd
Reply
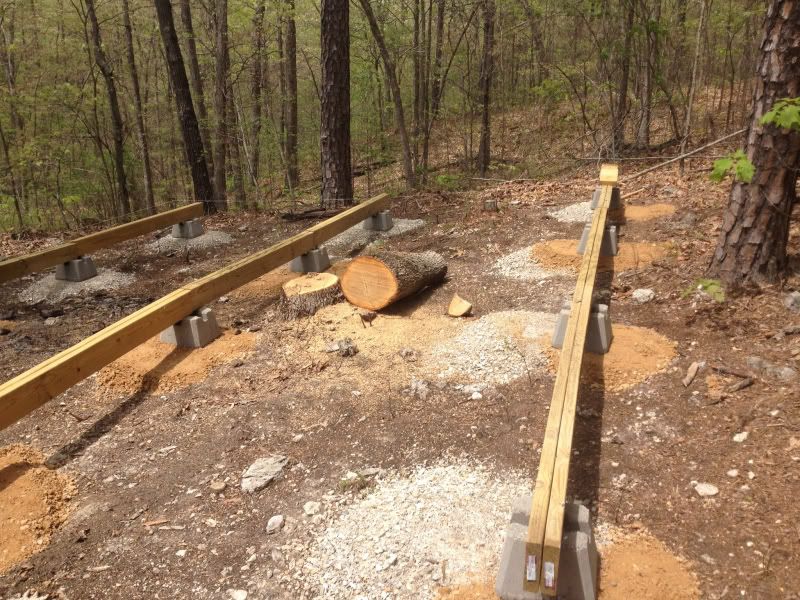
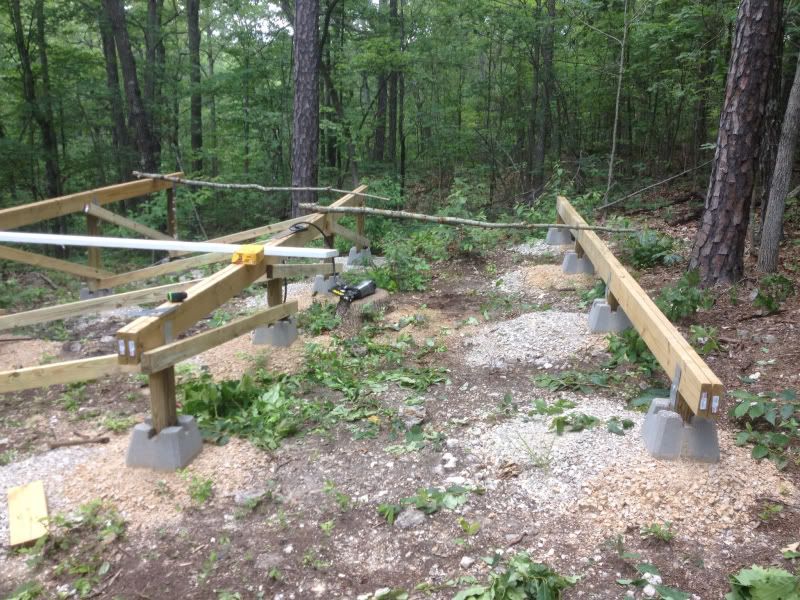
Starting the foundation this weekend. It's going to be deck blocks individually leveled, 4x4 posts cut to a level plane and 2x6 beams sandwiched together. Trying to build this thing on the cheap because it very well could be a meth lab 2 weeks after the roof goes on. So far the foundation including gravel is $275.
3 rows (beams) with 4 posts spaced 6ft apart. A one foot cantilever on either end. So a 7ft section of beam, a 6ft section, and another 7ft.
Got the beams pre assembled before heading out to the farm...

|
|
johng
Member
|
# Posted: 3 Apr 2013 09:50pm
Reply
I'm sticking to the assumption that you facetiously meant trespassers would homestead and build a lab on your property. 
Nice looking land and sound plan. 
|
|
old old buddy
Member
|
# Posted: 7 Apr 2013 11:13am
Reply
mattd
When I was looking at your pictures you took of your property, I couldn't help but think that it looked a lot like our property when we first started going up the hill and clearing trees out before the build. You're off to a great start. Take lots of pictures and you'll treasure them for a lifetime. The last time I went back through our thread from beginning to end (sixteen pages then) it took me about two hours and twenty minutes. I just enjoy reliving the experience and watching my grand-children growing up "at Pap's Cabin."
Keep us updated!
Old Old Buddy
|
|
mattd
Member
|
# Posted: 9 Apr 2013 11:02pm - Edited by: mattd
Reply
That's why i made the thread....to keep a record and to share with family. I look forward to getting to the point where I can go back and re-live it.
Didn't get as much done as I wanted this weekend. Cleared the leaves from the road and confirmed all the little sappling stumps were cleared so they wouldn't pop any tires. finally drove down there for the first time. This was a good feeling.
[img= ]null[/img] ]null[/img]
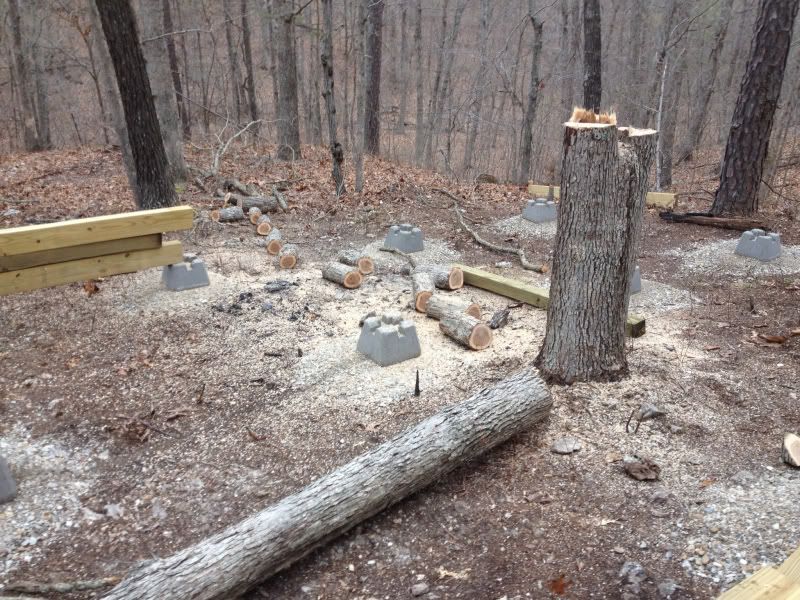
Also limiting productivity - this place is like the Bermuda Triangle. Some piece of equipment always quits working. This time it was the chainsaw. Notice the tree in the middle. Had to get a yard of gravel out of the truck tho so put it down and got it tamped. Need about another yard to fatten up the gravel pads and give me room to square everything up. The beams are just placed to get them off the ground.
[img=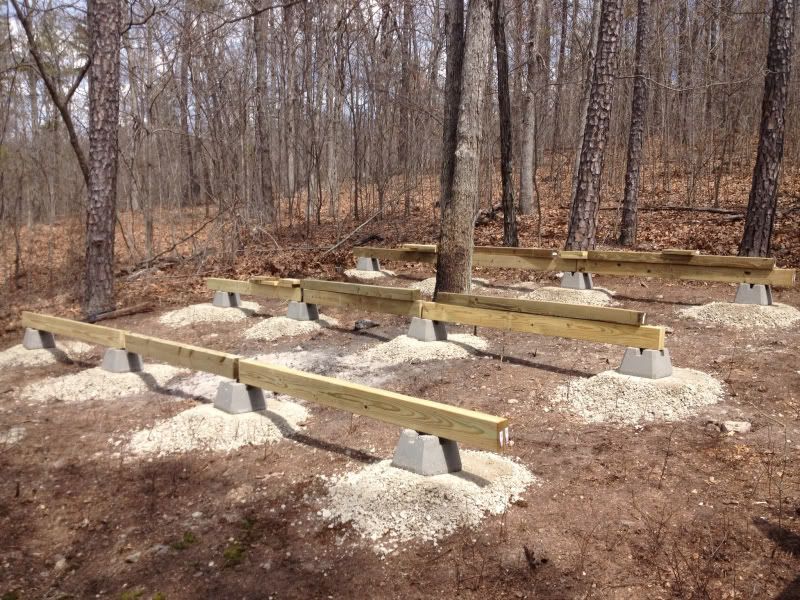 ]null[/img] ]null[/img]
|
|
mattd
Member
|
# Posted: 15 Apr 2013 07:50pm
Reply
Turkey season started today. No luck but got some work done.
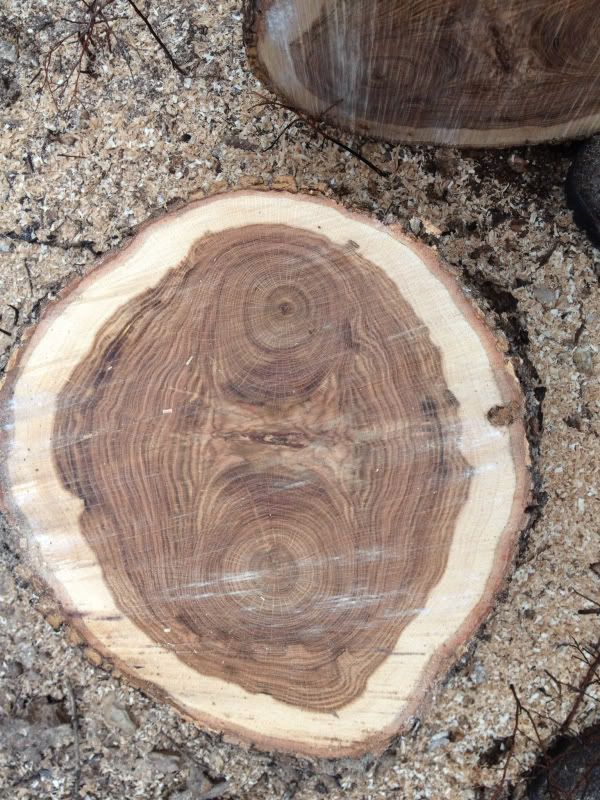
Dropped the tree. Each part fell perfectly. One towards the front and one towards the left of the cabin. Didn't touch any gravel. Cut some, but realized it was nice dense wood, not sure what kind, so left a couple 10 foot+ lengths to use in the cabin maybe.
There was about 4 feet of trunk before the split. This cut is at the bottom close to the ground and you can see the grain of both splits.
|
|
Tobit
Member
|
# Posted: 15 Apr 2013 07:52pm
Reply
Looking good Matt, I love the grain on that wood.
|
|
mattd
Member
|
# Posted: 1 May 2013 09:35pm
Reply
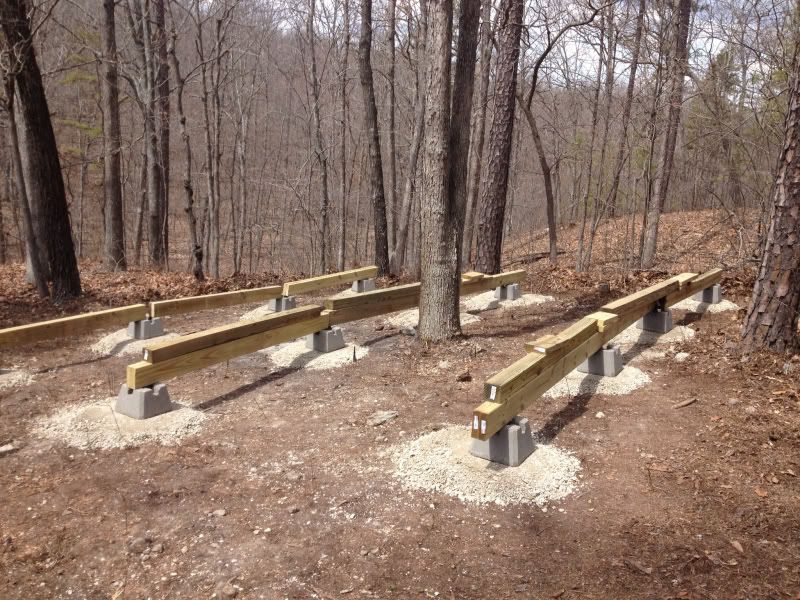
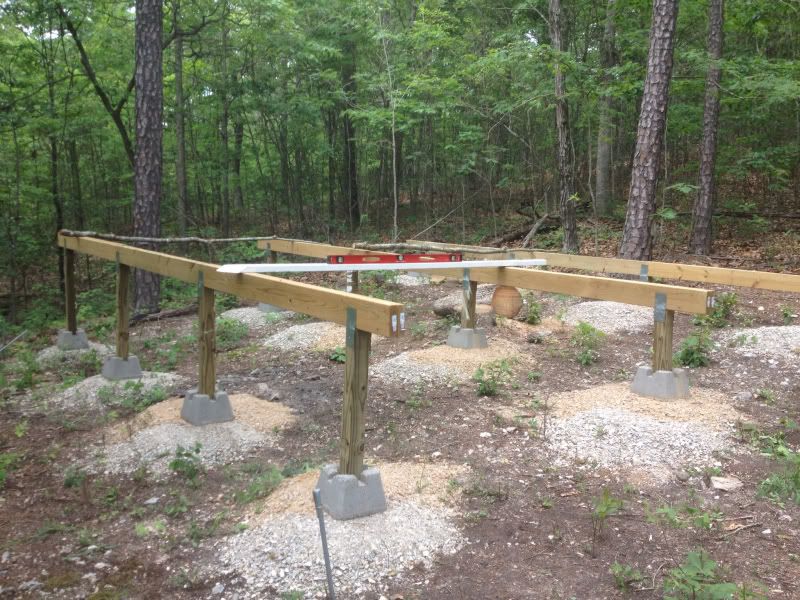
Got some more work done. Doesn't look like much, but got everything all squared up. You can see the extra brown gravel to widen the pads to give me a little more room to move the deck blocks to get them square. Got down there with 1 ton of gravel and realized I forgot the shovel. Used a metal sign to fill up a cardboard box. It actually worked really well. The box held more then a shovel so less back and forth.
Since the generator isn't working, and I can't run the saw down there I set a laser level on the highest block, and then used a 4' level to measure the length of post I'll need at each location. I'll cut them all at home, get the generator repaired and return ready to nail everything together and maybe even get the floor joists in.
|
|
|
leonk
Member
|
# Posted: 3 May 2013 08:30pm
Reply
good looking spot, where is it?
|
|
mattd
Member
|
# Posted: 5 May 2013 11:02pm - Edited by: mattd
Reply
It's in central MO. Anybody know where the setting is so I get an email when there is a reply here?
|
|
leonk
Member
|
# Posted: 6 May 2013 10:29am - Edited by: leonk
Reply
when you post or reply you will note a checkbox under the reply window
"Check to watch this topic and get updates by email" check it 
|
|
mattd
Member
|
# Posted: 18 Jun 2013 04:18pm - Edited by: mattd
Reply
Finally got back out. Been a busy last couple of weeks, and the next few will be the same.
Foundations almost done tho...
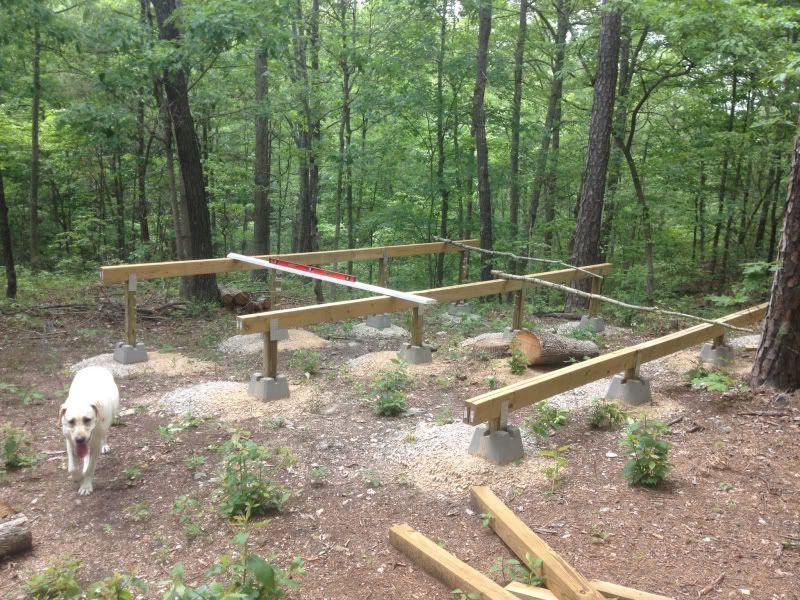
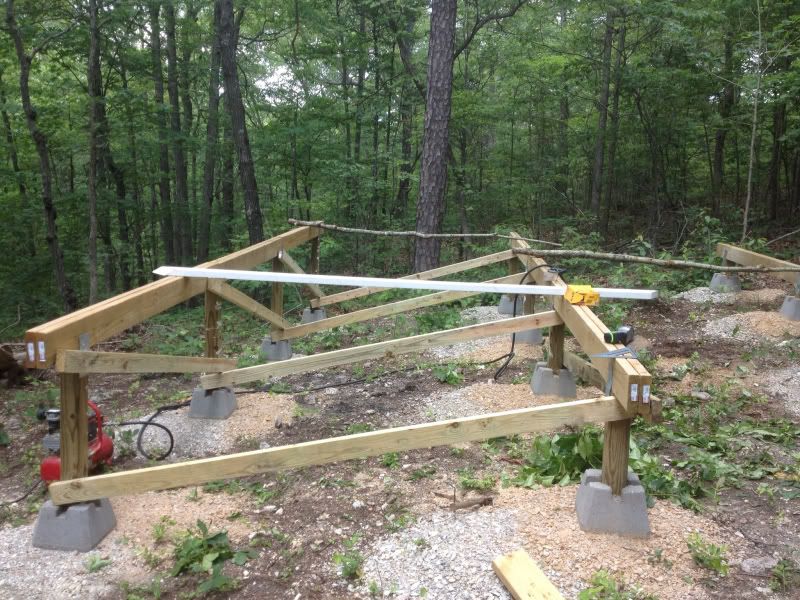
Just need the cross bracing on the posts.
Even tho the generator is toast and I had to cut all the posts at home, with careful measurements and precise cutting I managed to keep everything square and level.
A couple of lessons learned.....
Start with the short posts. They arent as top heavy and likely to fall over when your working by yourself. And once they are in you can tie the other beam to the short post beam for stability.
And bring extra 2x4s for the bracing. I obviously didn't have enough.
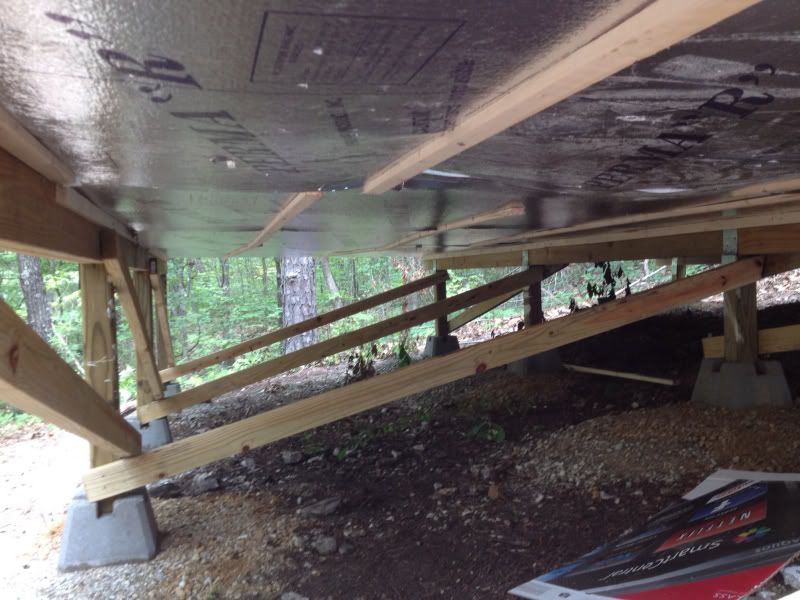
After bracing comes the floor. I have been saving paper and styrofoam trash to use for insulation. My plan is to put some kinda sheeting on the bottom of the joists and then fill in between before I put the floor on. I guess there is two concerns...rodents and ventilation.
Any opinions there?
Def summer in my woods. Was covered in ticks after stepping out of the truck. Deeps woods OFF did the trick tho.
|
|
Taiwin
Member
|
# Posted: 19 Jun 2013 12:38am
Reply
Looking good. Will be watching
|
|
creeky
Member
|
# Posted: 19 Jun 2013 11:25am
Reply
nice.
|
|
cabingal3
Member
|
# Posted: 19 Jun 2013 11:51am
Reply
gosh 80 acres!can not even imagen!good for u.this all looks wonderful.cant wait to see more.
|
|
mattd
Member
|
# Posted: 15 Jul 2013 10:51am
Reply
Foundation is done! Next step will be floor joists. The cross bracing really solidified the beams. They feel strong and sturdy. The posts on the back beam aren't tall enough to get a decent cross brace on, so hopefully the joists tie them in we'll enough.
Got a replacement generator now so hopefully the work will take off.
In the spirit of keeping track of costs, the second load of gravel was $30 and the bracing was $40. So the total on the foundation was $345 not including nails, gas, etc. this is probably going to more expensive then I originally thought.
|
|
Tobit
Member
|
# Posted: 15 Jul 2013 11:54am
Reply
Nice progress Matt. I have land down in Texas County, MO that I plan to visit in October and begin work on.
|
|
knock
Member
|
# Posted: 15 Jul 2013 08:52pm
Reply
I agree, nice progress. Keep the photos coming.
Whats your timeline?
My projects always seem to be more expensive than I first planned.
|
|
mattd
Member
|
# Posted: 15 Jul 2013 09:44pm
Reply
I hope to have a roof up by deer season in Nov. really, even figuring lots of extra time, that should happen. Floor should get done next trip, after that its gotta go quick. But with young kids there's not a timeline for anything.
|
|
mattd
Member
|
# Posted: 4 Aug 2013 10:44pm - Edited by: mattd
Reply
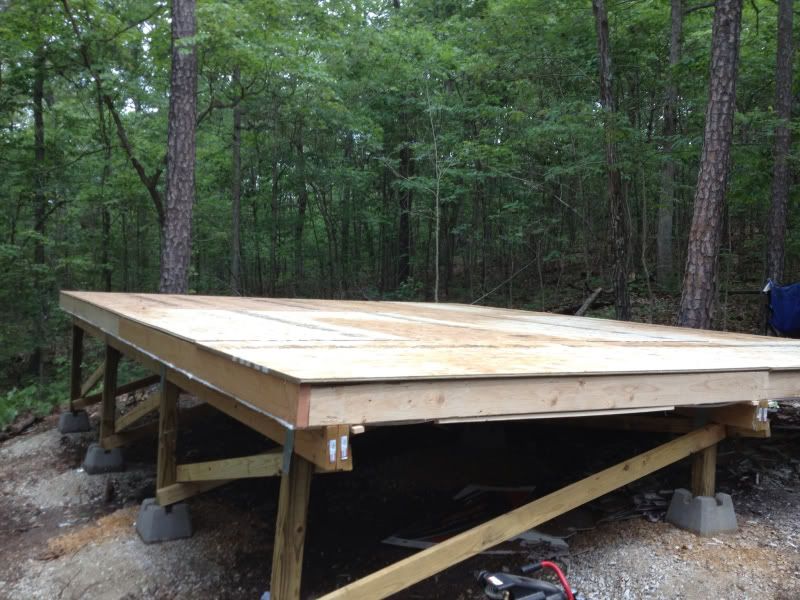
Got back out this weekend with a plan that the floor joists, insulation and sheeting would take saterday afternoon and we would be done before dark, have time to hang out, and till a food plot in the morning. Well, of course the floor took both days and no tilling.
First problem was the joists got out of square. They still are but we made the sheeting square. Took some extra blocking between joists.
The insulation is half inch 4x8 styrofoam sheets, with newspaper and other paper trash on top. I read on a building science site that the foam would be better then wood sheeting. But hanging it was difficult. Any weight and it would start to sag. So right at dark we left to go get some strapping to hold it up. Worked ok, but as I generate more scrap I'll tack it up down there.
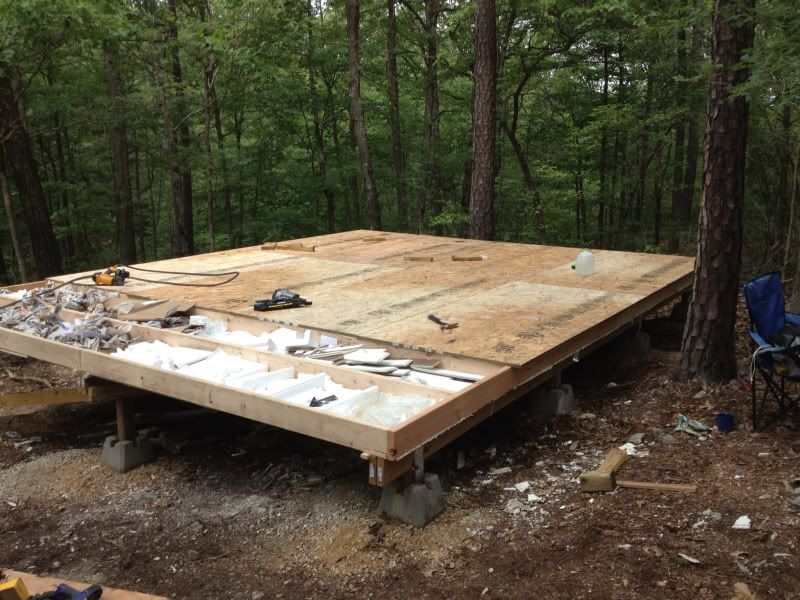
We just threw the floor sheeting up so we could put a tent on it. As we finally took a break around midnight we were talking how it started to feel like a real structure.
The next morning we figured out how to compensate for the out of square joists by adjusting the floor sheeting and got everything nailed down. I made a close to last minute design change and opted for 2x6s at 24" OC. all the tables said it was sufficient, and it feels good.
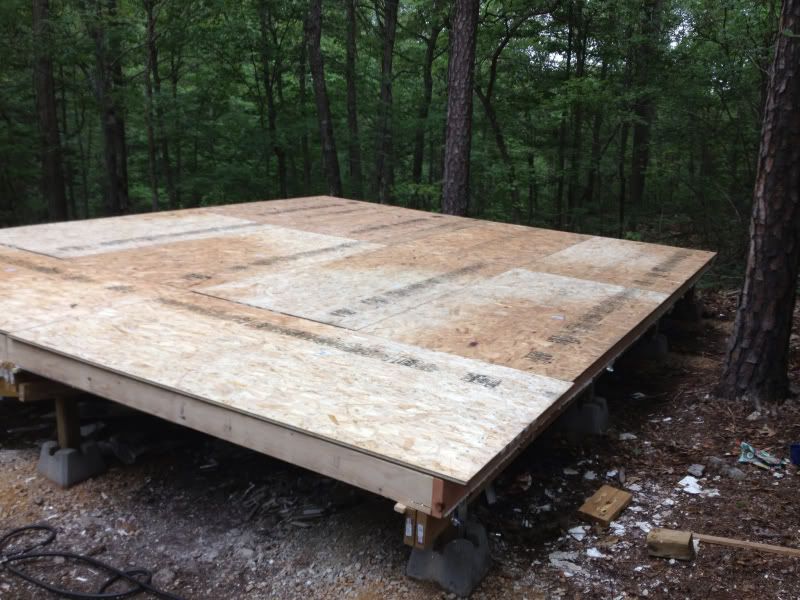
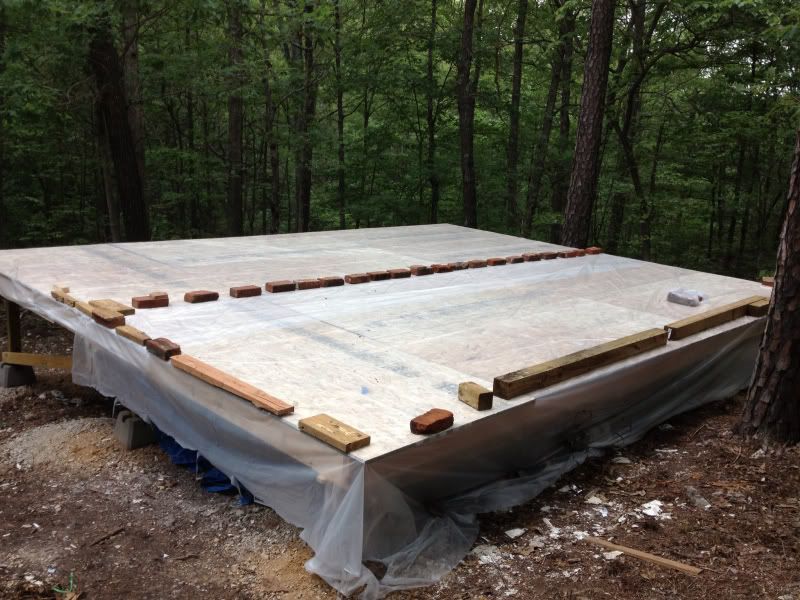
And some plastic over the top till next time.
|
|
mattd
Member
|
# Posted: 8 Sep 2013 08:45pm
Reply
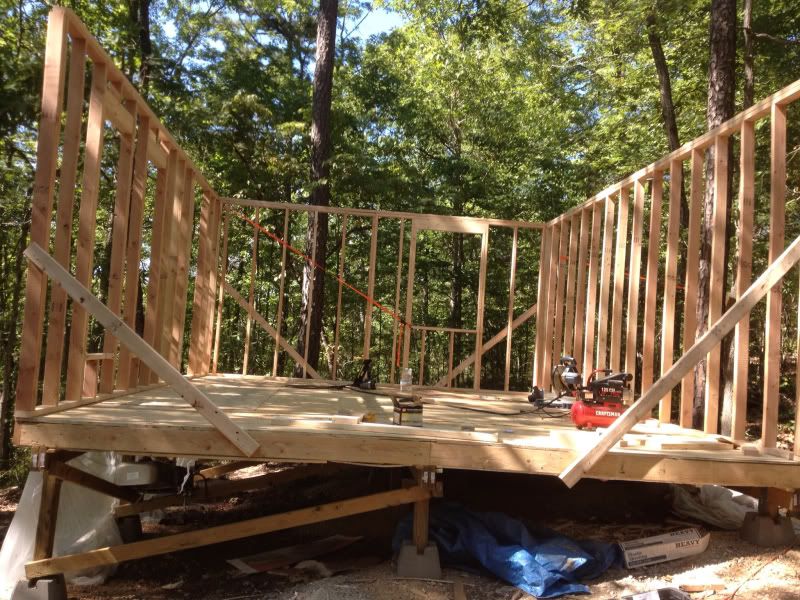
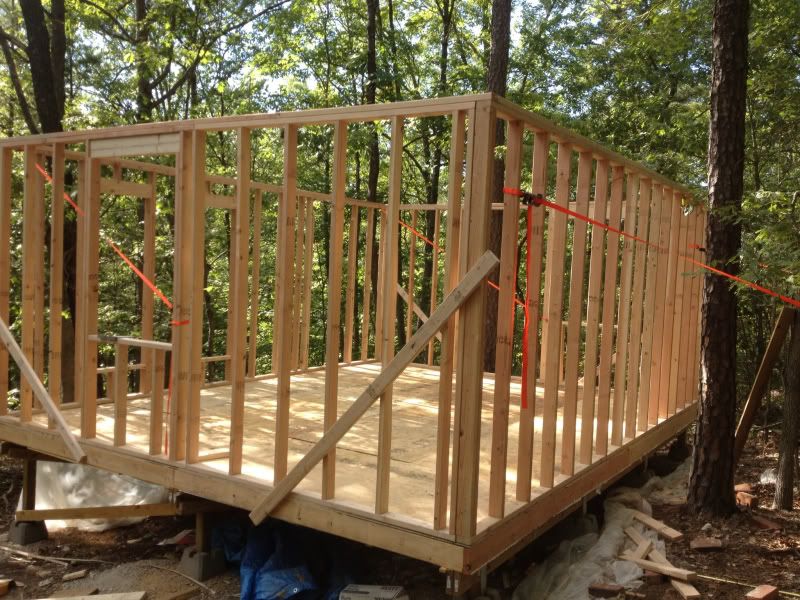
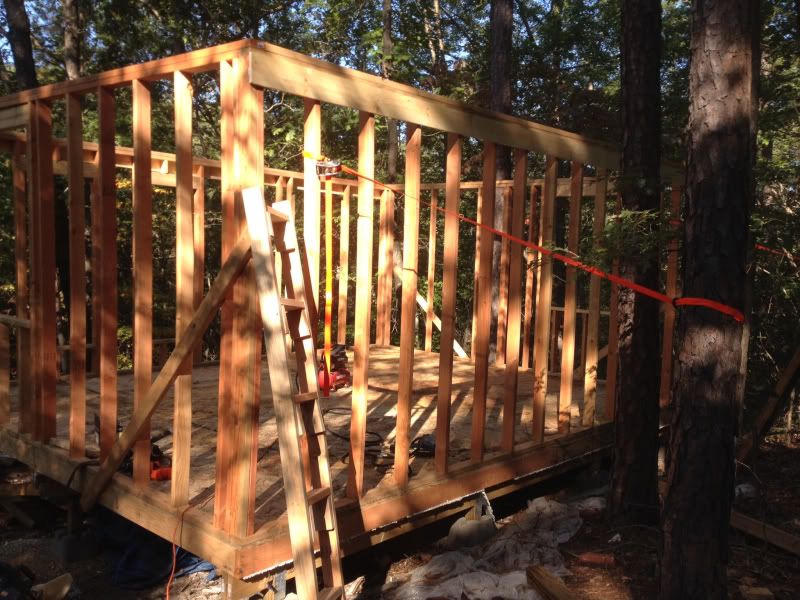
Got all the walls up by myself last Tuesday. From start to finish was about 8 hours. I forgot my tape measure. On a previous trip I cut 42 inches off an old tape by accident. That piece was still out there so I laid everything out with that. Double and triple checked my measurements.
First thing was to take off the plastic. That might not have been the best idea. There were spots that had condensation pooling, and there were thousands of dead bugs under it. No harm to the floor tho and it did probably help keep the floor insulation dry.
First thing was to trim the overhang of the floor then I started with a 20' wall, got in the middle of it and did a clean and jerk motion to get it up. Then reached way out with my leg to hook the nailer and pull it to where I could reach it. Nailed in the first brace and the second was easy.

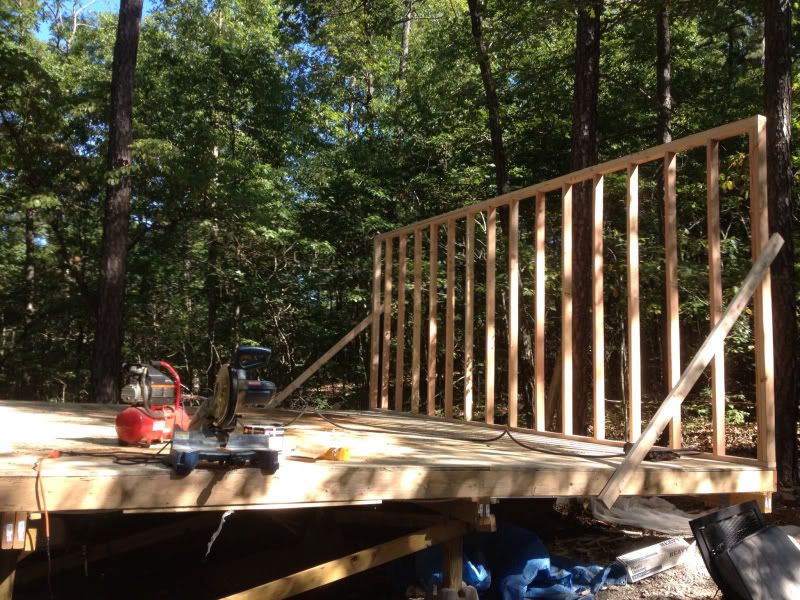
Started framing the second long wall and realized I was framing it up side down - the headers were closest to the outside. Had to tip it up, which put it standing in the middle of the floor, then "walk" it back to the edge. Not too difficult once it was up. I didn't finish the door framing....not sure what kinda door I will have so wanted to have room to adjust.
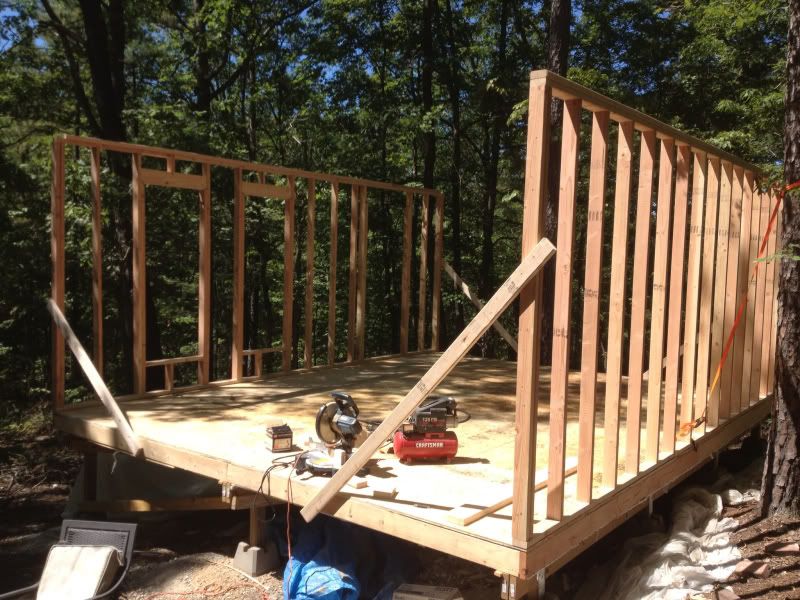
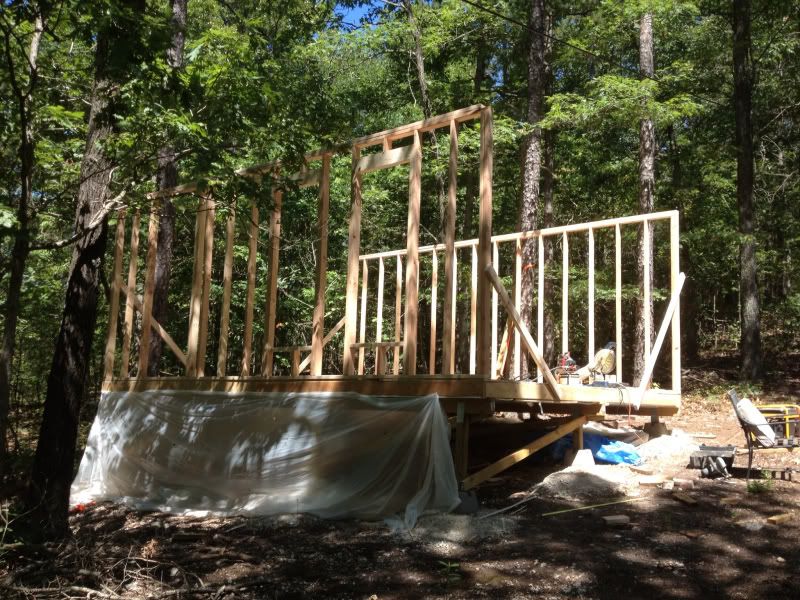
Side walls were pretty uneventful. You can see the orange straps in the pics. Those were my second set of hands. Use them to plumb everything up, whcich worked great. Make one crank, and check plumb, and so on till it was perfect.
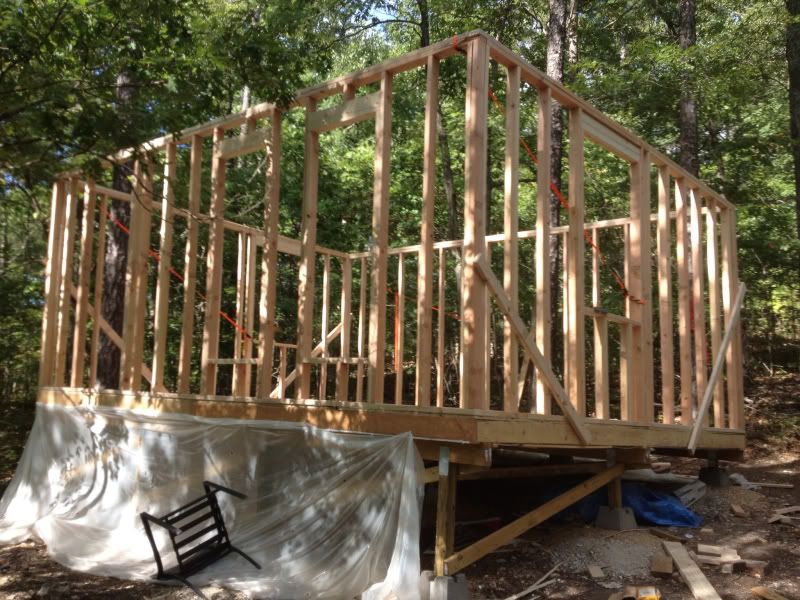
Some of the headers looked like stacked 2x4s. They're not....just the grain of the 2x6.
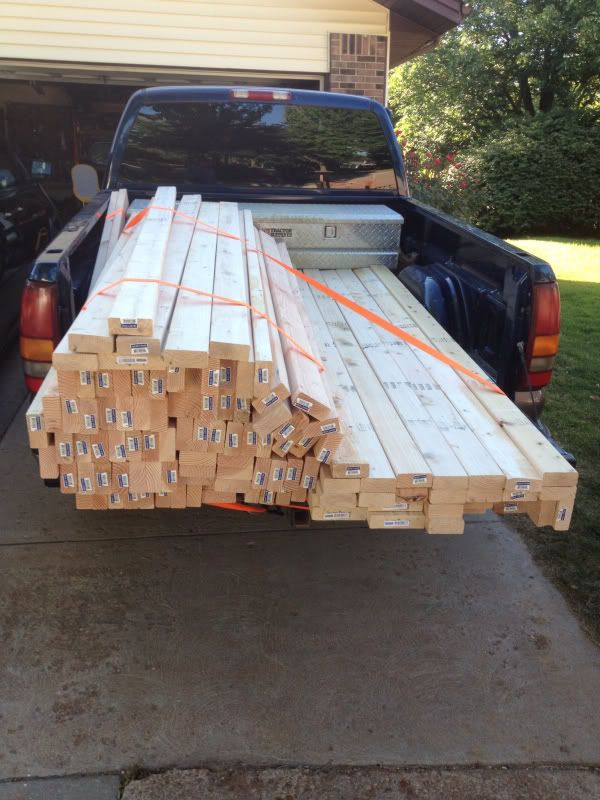
Wall lumber cost $360 with a $30 box of nails. Roof framing is next.
|
|
mattd
Member
|
# Posted: 11 Oct 2013 11:17pm - Edited by: mattd
Reply
I got behind posting so I'll just pretend I'm posting trip by trip....
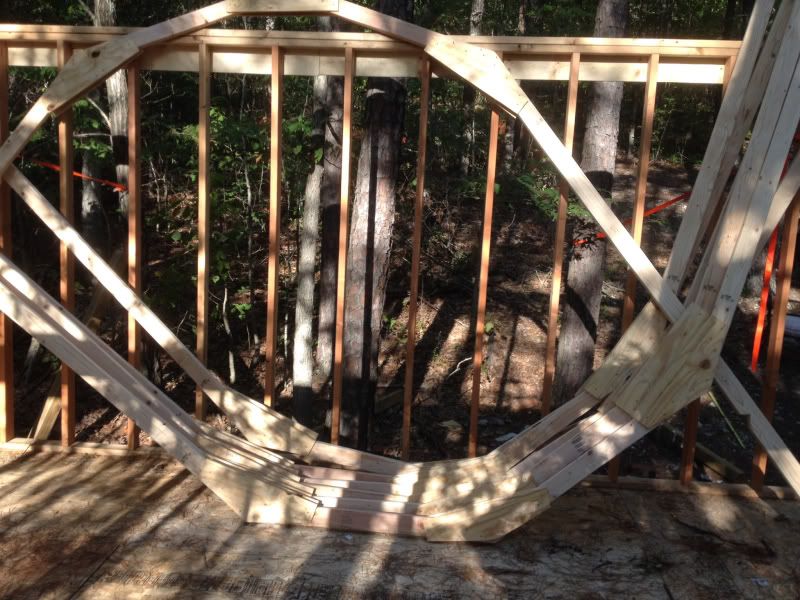
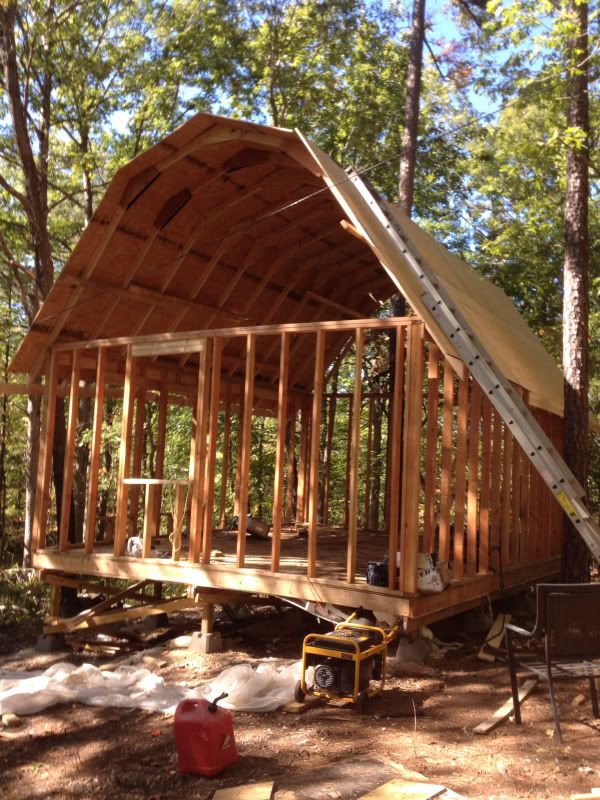
Went down by myself to build and install trusses. Had drawn everything in CAD prior and had my angles and seat cuts figured. Also precut almost all of the gusset plates. All I needed to do was cut all the truss members, build the first, confirm some measurements, layout a template around it and continue building the rest. Following the tradition the important thing I forgot this time was the ladder....no prob, built one. I installed the 1x6s at the top so when I put the 4x8 siding on all I'll have to do is set it against it and will have an inch of overhang below the floor joists.
First truss and template.

Had Thought about using 2x6 trusses, but since I was going by myself I figured I'd have a better chance getting 2x4 trusses up. Not a chance. This was as far as I got.

So I built a bunch more and hoped for help next time.
|
|
mattd
Member
|
# Posted: 11 Oct 2013 11:30pm - Edited by: mattd
Reply
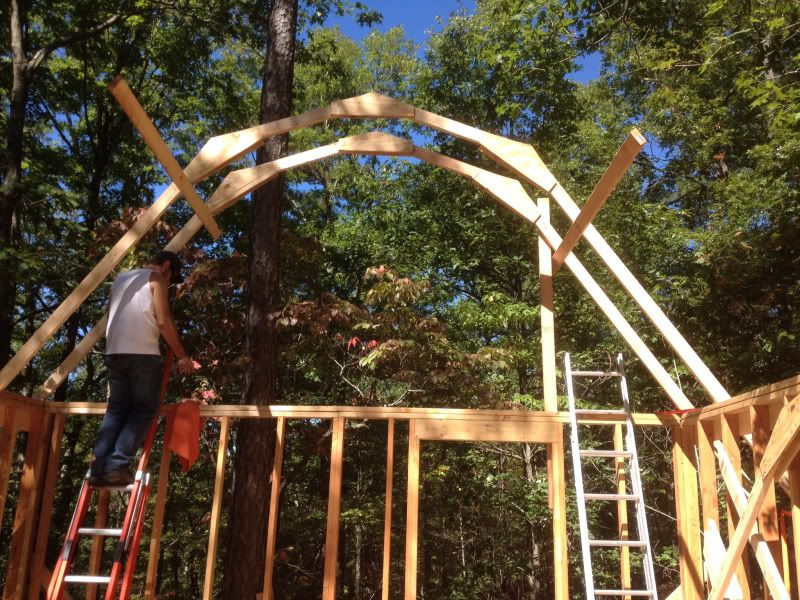
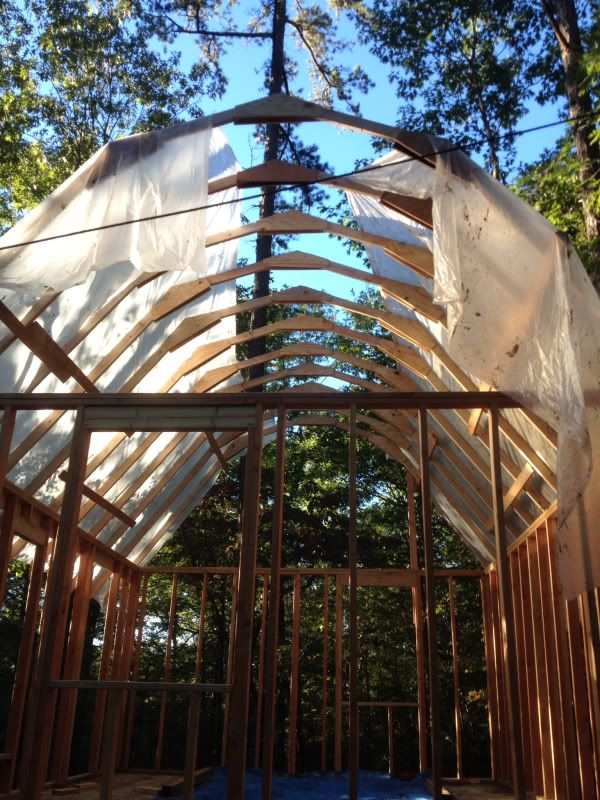
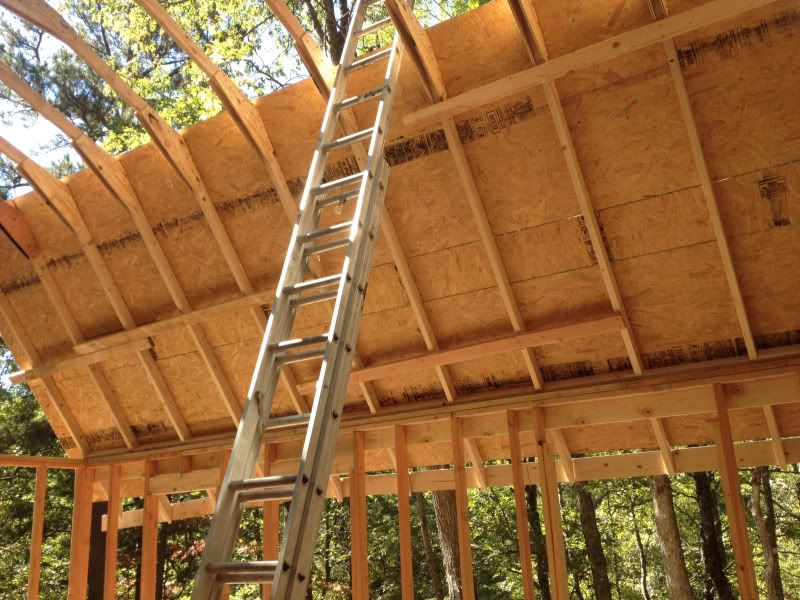
Next trip had some help and two ladders. Things went pretty quick.
One up...
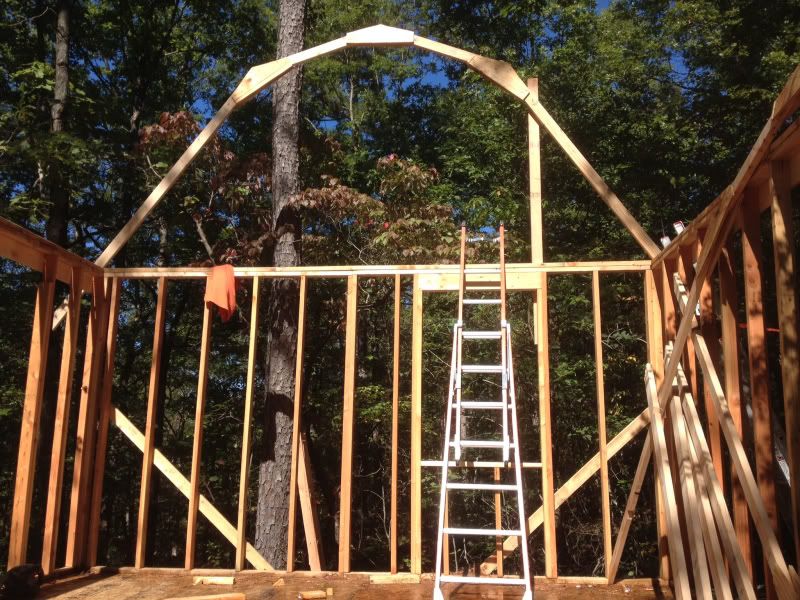
What we did was get on either side of the truss, turn it upside down, raise the bottoms of the truss (which are now at the top) above the walls, turn it to the 16' width and set it hanging upside down on the wall. I would then stand on the wall and my friend used a 10' 2x4 attached to the peak to rotate it from an upside down position to right side up, I'd grab it once it was close to vertical, he'd jump on his ladder and we would move it into place and then we toenailed it in. There's no way I'm doing any justice to that explanation, but it worked well for only being two people.
With the second we got the supports on. They over hang the first truss by a foot so that I can hang an outside truss on them a foot from the wall.
Moving along
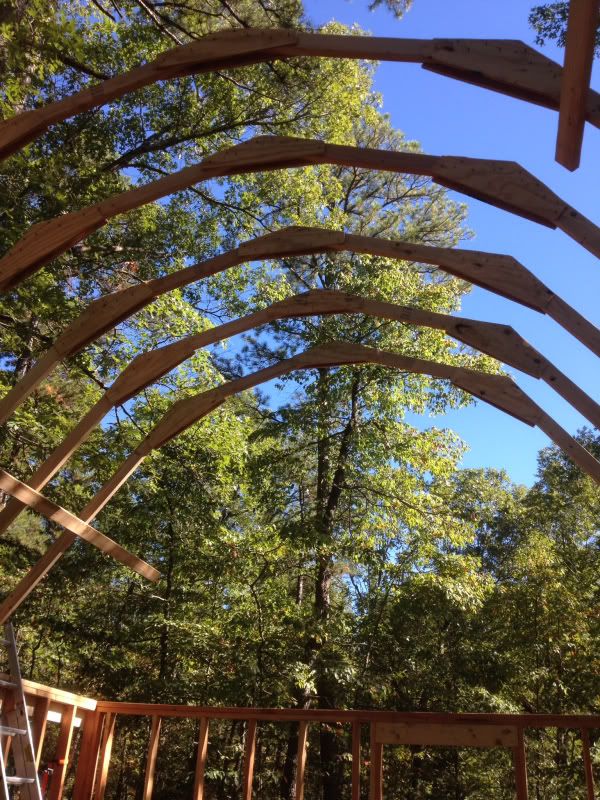
All done with interior trusses. You get an idea of how big it is with my buddy in the pic. Much bigger then I thought, which is awesome. Also, notice how some of the gussets change color towards the end. Had to build the last couple trusses this trip and used a sheet of plywood that was out there already for the last couple gusset plates.
It got late and didnt get to the two exterior trusses.
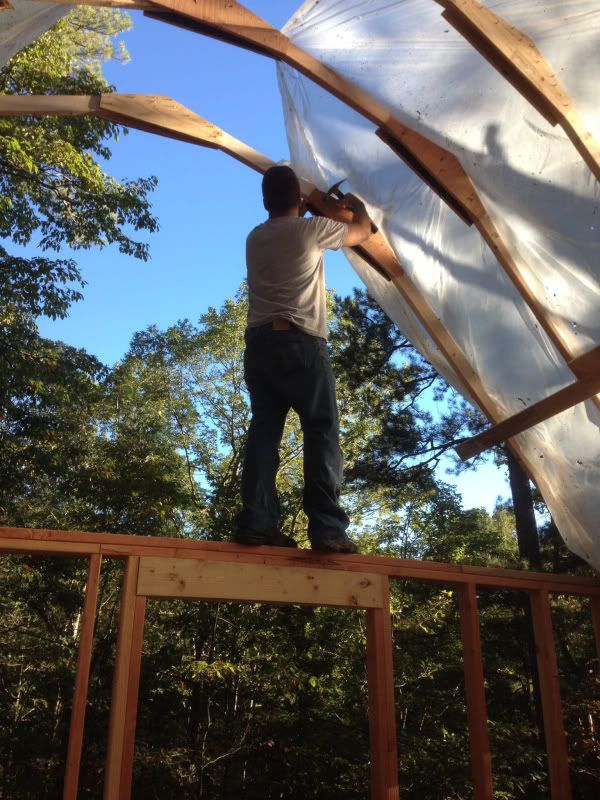
Hang some plastic to cover the floor as much as I could. A little wind will probably take it down, but I'm tired of showing up to pooling water on the floor. On the plus side, now that we are getting some rain the food plot is starting to grow. Also, the angle of the pic is hard to see it, but I am reaching as high over my head as I could and am still not to the peak. Should be some good head space in the loft.
If I remember right roof framing was $160ish. For 2x4s and 2 sheets of 1/2" ply for gusset plates. Also used CAD to layout gussets most efficiently on a 4x8 sheet
|
|
mattd
Member
|
# Posted: 11 Oct 2013 11:59pm - Edited by: mattd
Reply
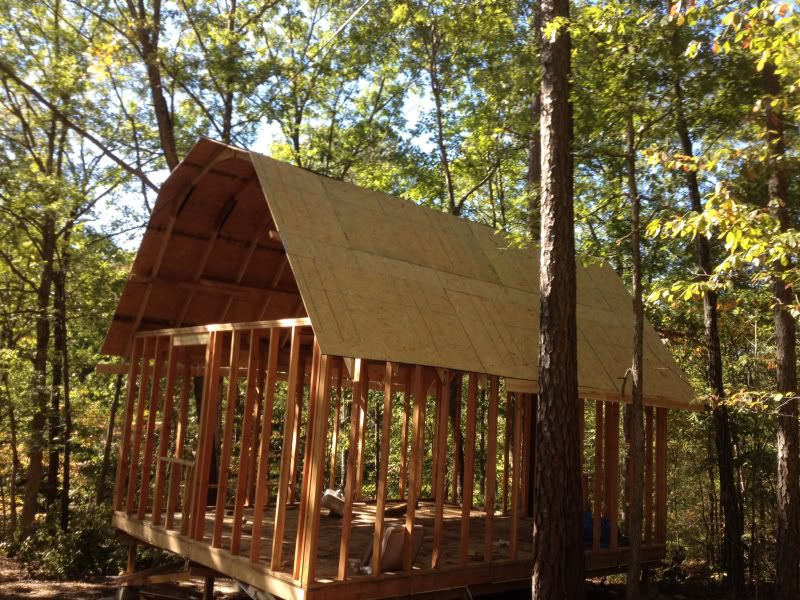
Next trip out planned on getting the two end trusses up and getting the roof sheeted, which desperately needs it because the floor has been exposed for a while now. Some miscommunication and I didn't get a full day in. Lucky i got to go because i had bought all the sheeting and cut it in the morning and it would have been sitting in the truck for a while if i didnt get out there. Got there around 3 and worked till 7.
The plastic on one side actually held up. the other had been blown around but was still cover a good portion of the floor. Even tho it had rained it was fairly dry.
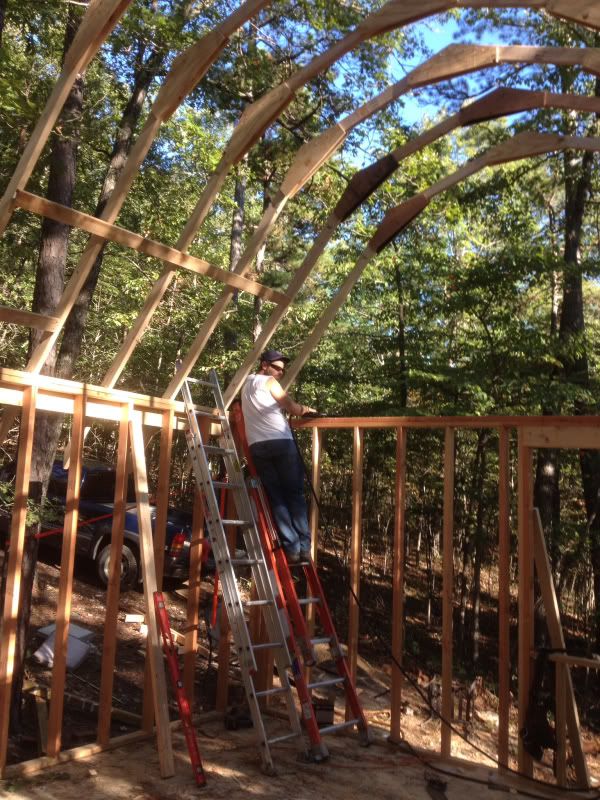
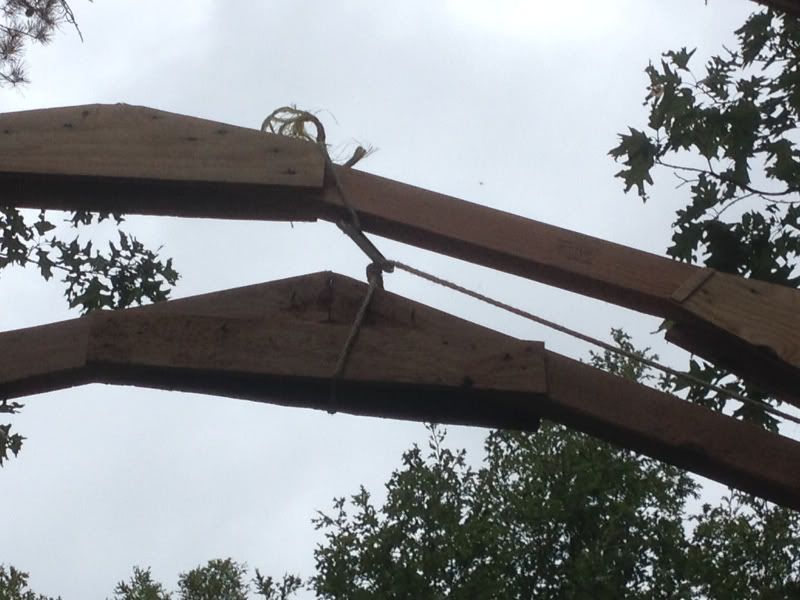
First step was to get the exterior truss up. How would one person accomplish this?....
Rigged a pulley on the end truss and pulled it up, moved it into position and raised it onto the overhanging supports. Done and done....
I did this with the floor joists, but when planning a truss count for a 20 ft long cabin, on 2' center, it's not 20 ft divided by 2' = 10 trusses. You have to count for 0. So it's actually 11, plus the two outside trusses is 13. I only had lumber for 12 so I built the last one, got it up and that was it. One end dosent have one yet.
Next I got all the blocking in between the trusses, on top of the wall. Once the sheeting goes on top these will seal that joint from the outside. They were all precut at home so I just set em and toenailed.
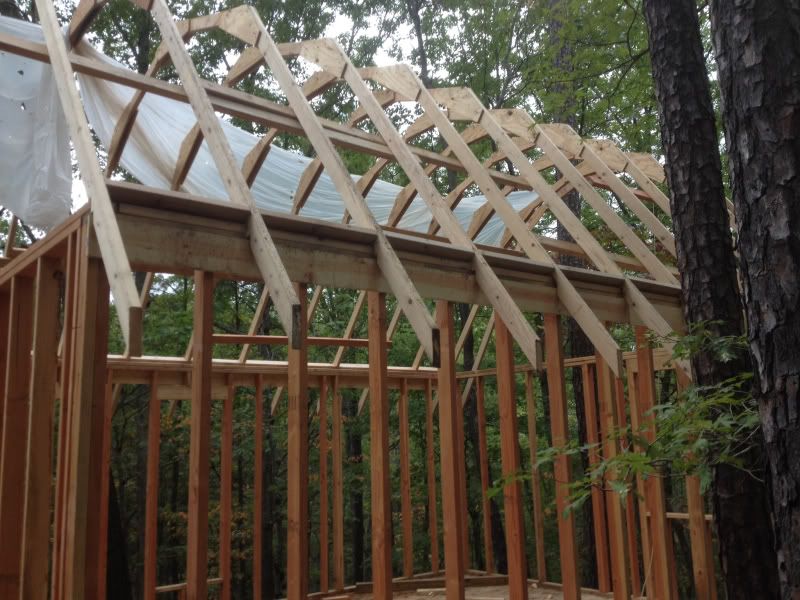
Next I hung a facia plate on the truss ends and raised it an inch above flush with the top of the truss so that once I get the roof sheeting up it will catch on the facia plate and won't slide off. Turns out my truss template wasn't great because my seat cuts aren't positioning my truss ends evenly. The facia plate is not nice and straight. Can't figure out where it went wrong. I guess once the sheeting is up, I'll trim the truss ends even.
Designed the roof so that the top pitch is 4' wide, and to get at least a foot of overhang I made the steep pitch 9' wide. That means a bottom row of full 4' wide sheets, a middle row of 1' wide and another row of 4'. All with offset seams of course.
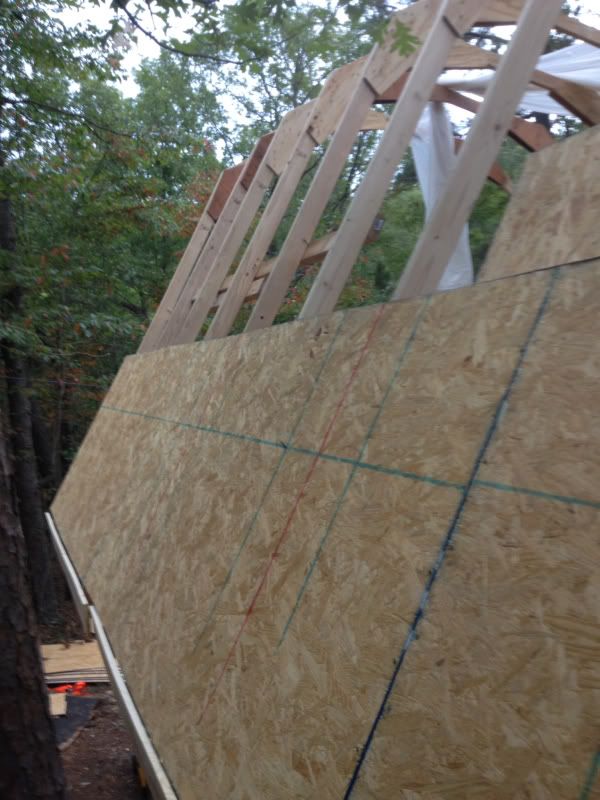
I got the bottom 4' and middle 1' row done on one side, and 2 of the 3 sheets for the bottom row on the other side. Then it got dark and started raining. Time to go home.
Roof sheeting, blocking and facia plates where around $225
|
|
mattd
Member
|
# Posted: 12 Oct 2013 12:26am - Edited by: mattd
Reply
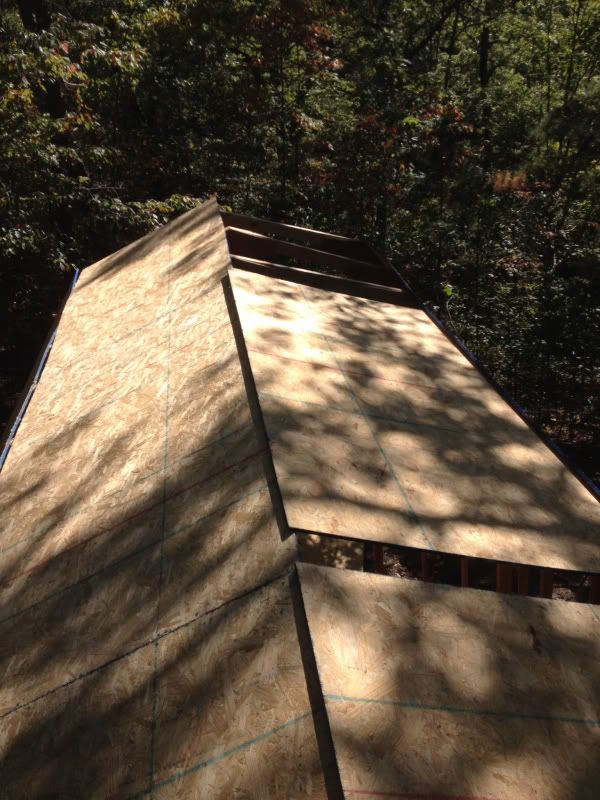
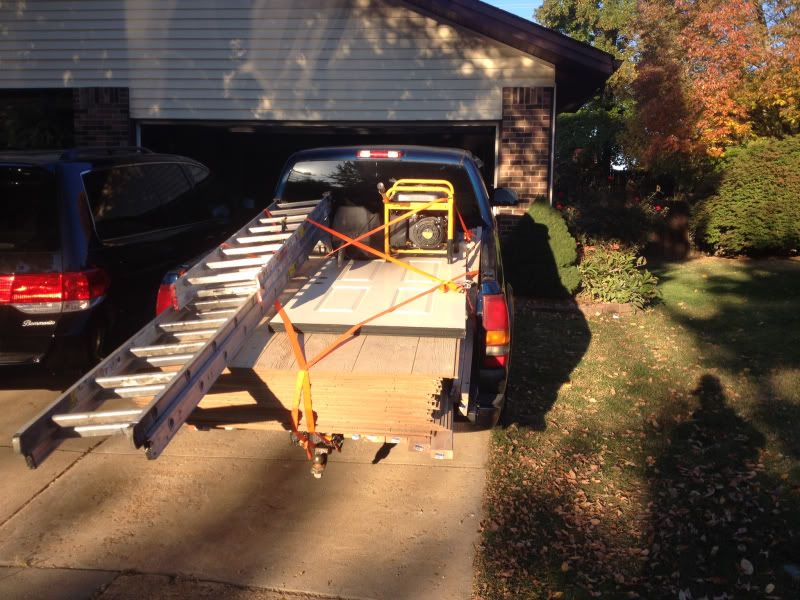
Now I'm all caught up and can report my last trip a few days ago. Need to finish the roof sheeting and get the floor covered. By myself again, but borrowed my moms 24' ladder and had my 16' as well. Things went pretty well. I'd set a sheet on the ladder push it up the ladder as I climbed it, pushed it over the ladder and onto the roof. Not too difficult but some of the close trees made it difficult to set a sheet flat on the ladder until I got it up a good ways.
Got the last piece of the bottom row on first and things really started to tighten up. Got the 1' wide row on the same side and then the top 4' wide row. I started to run out of ladder at the top of these sheets so had to move inside and reach up and over to finish nailing.
Got the top row done on the other side then moved to the very top sheets. After I got one on I could get off the ladder, stand on it and get the next installed. I actually put a couple on at this point and nailed them in one after the other.
A couple of issues. First, one of the seat cuts positions the truss joint between the two angled truss member high on one side of the roof. You can see how it effects the sheeting here. There is about a half inch gap as it pushes the sheet out of plane, and then a wave as it comes back on plane on the next truss. Hopefully the shingles will make up for this problem.
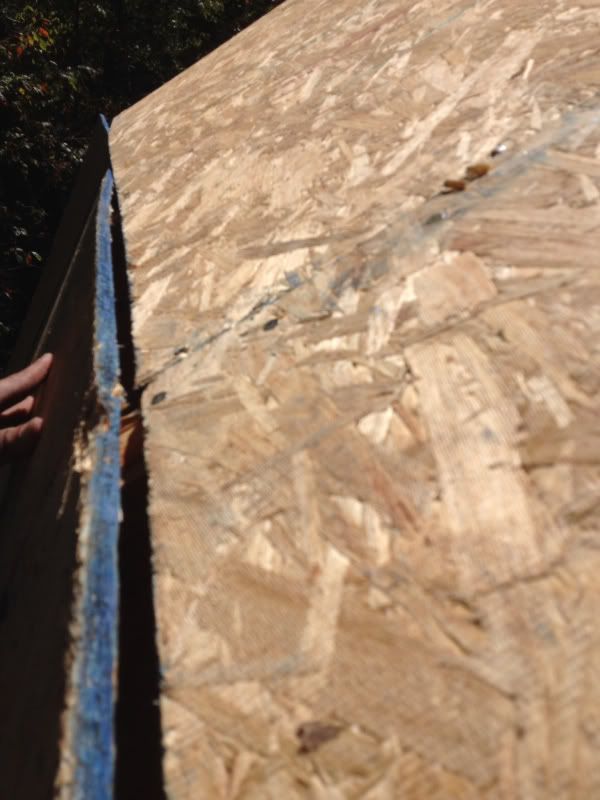
Second, you can see two picks up. The design should have allowed me to just drop the 4' wide sheets on. I'm just slightly narrower then 4' so the one side sits on top of the other and dosent sit flush to the truss. Next trip I'll snap a chalk line and trim off the over hang. Shouldn't be a big deal.
|
|
old old buddy
Member
|
# Posted: 1 Nov 2013 07:45am
Reply
You have made a lot of progress since you started. Looks like you'll be dried in before the real bad weather starts! I'm sure you're very proud!
Are you going to leave all trees up that are so close to your cabin? I wasn't just thinking about lightning or wind but the dampness that comes with trees being so close to a structure. We had to remove about five fairly large ones after ours was up because of fear of lightning and wind blowing them over into the cabin.
Old Old Buddy
|
|
mattd
Member
|
# Posted: 3 Nov 2013 11:43am
Reply
I was planning on leaving them up until they caused a problem. The two closest are more then a foot away from the closest structure.
What kind of moisture problems? What would I look for?
|
|
bldginsp
Member
|
# Posted: 3 Nov 2013 12:06pm
Reply
I really like this design. Maximum room for minimum lumber. A couple questions-
How did you design/engineer the trusses? Do you get snow?
I assume you are putting in a second floor. How will those floor joists tie across the two eave side walls?
I really like the idea of site built trusses that easily assemble on site and then are fairly light and easy to throw up.
Keep the pics coming
|
|
mattd
Member
|
# Posted: 3 Nov 2013 12:08pm - Edited by: mattd
Reply
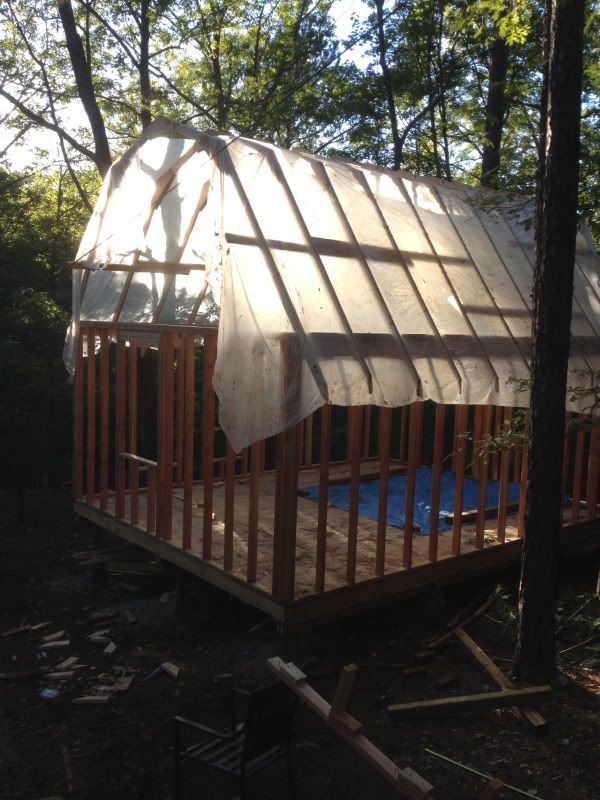
Getting behind again. Two weeks ok my brother and I went out to wrap the cabin and get the siding started.
While I worked on the framing above the wall he got started on the felt paper wrap. I was thinking about tyvek, but it was soooo expensive for a roll that I would only use a quarter of. Then a friend mentioned the felt paper. Great idea.
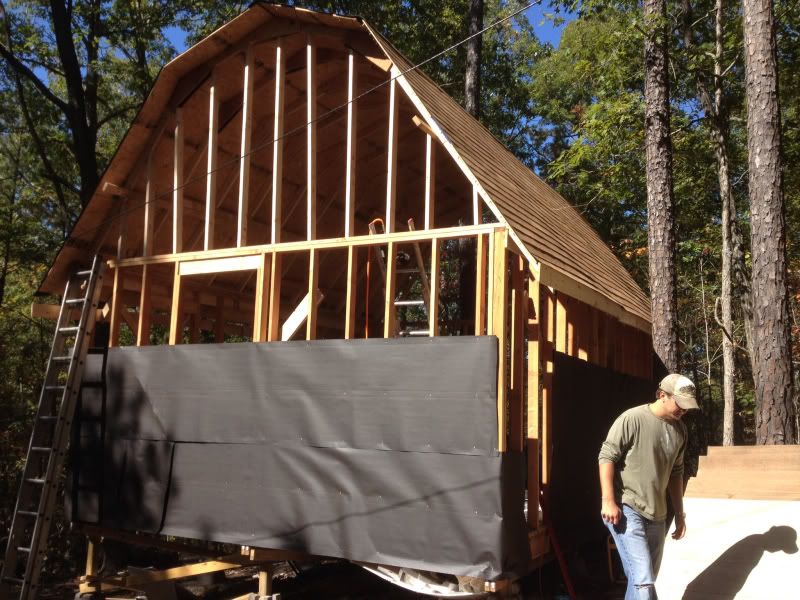
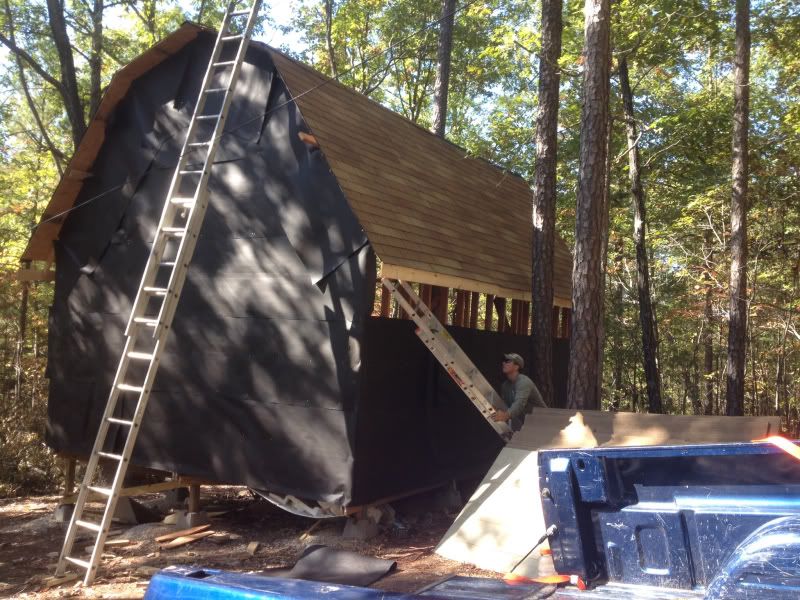
Some siding up
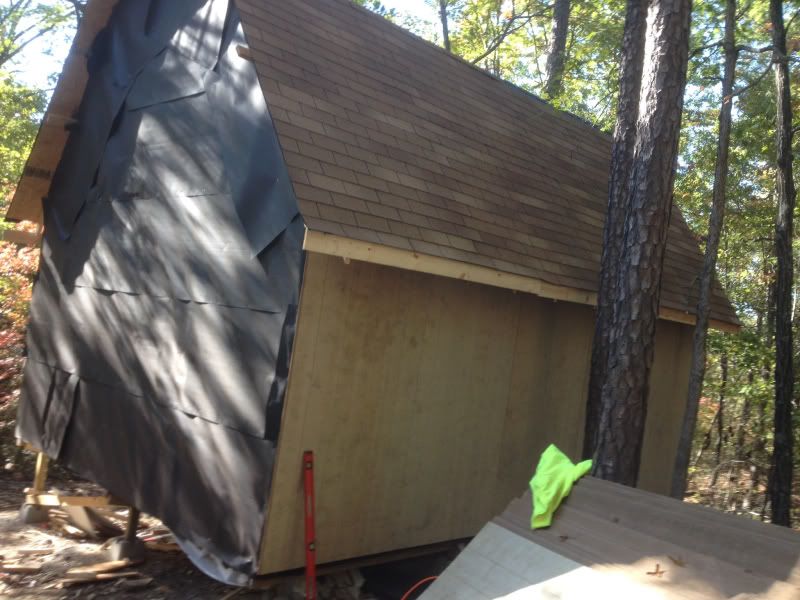
This is as far as we got. One long and one short side wrapped and mostly sided. I had hoped for more, but things always take longer then you think. Deer season is coming up quick and need to get it closed in. Notice the felt on the roof - for the next post - at this point it's been up the for awhile.
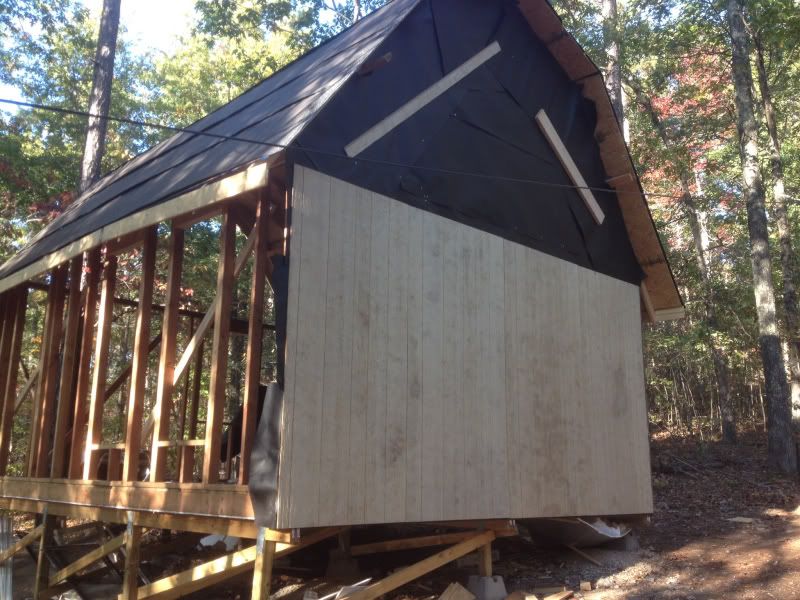
All the siding and extra felt paper came to $525
|
|
mattd
Member
|
# Posted: 3 Nov 2013 12:52pm
Reply
How did you design/engineer the trusses? Do you get snow?
I assume you are putting in a second floor. How will those floor joists tie across the two eave side walls?
I do get snow, but MO snow is pretty light. I researched similar shed and cabin roof structures and determined what the structure could be made of. Then I drew it up in CAD to figure the angles, layout the gussets on a 4x8 sheet, etc. then just cut everything with a miter saw.
I will have two beams connecting the short walls - to prevent the weight of the roof pushing the walls out. I'll hang the loft joists with deck hangers across one beam and an exterior wall.
|
|
| . 1 . 2 . 3 . >> |
