| << . 1 . 2 . 3 . >> |
| Author |
Message |
mattd
Member
|
# Posted: 3 Nov 2013 01:44pm
Reply
Me and a buddy took Friday off and went down for the last time before deer season to get the cabin completely wrapped and closed in. Have to anyway because we're sleeping in it then. Well, got it wrapped and I spent my first night in it! Brought down a futon that will stay and a kerosene space heater and slept great.
We hung our stands first thing Friday. Food plot is doing pretty good and getting hit even tho there's acorns everywhere. There were tracks, but they were pretty washed out because of the rain we had just got. Couple rubs and a good scrape near by.
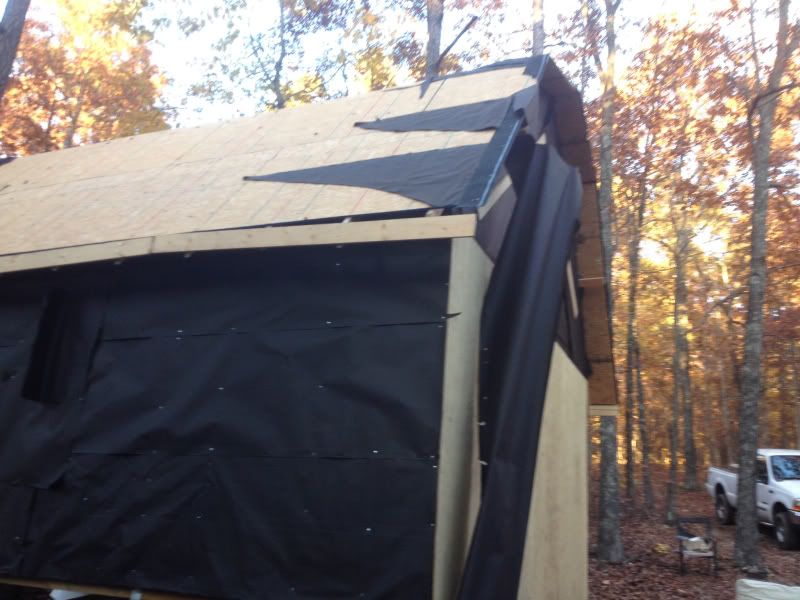
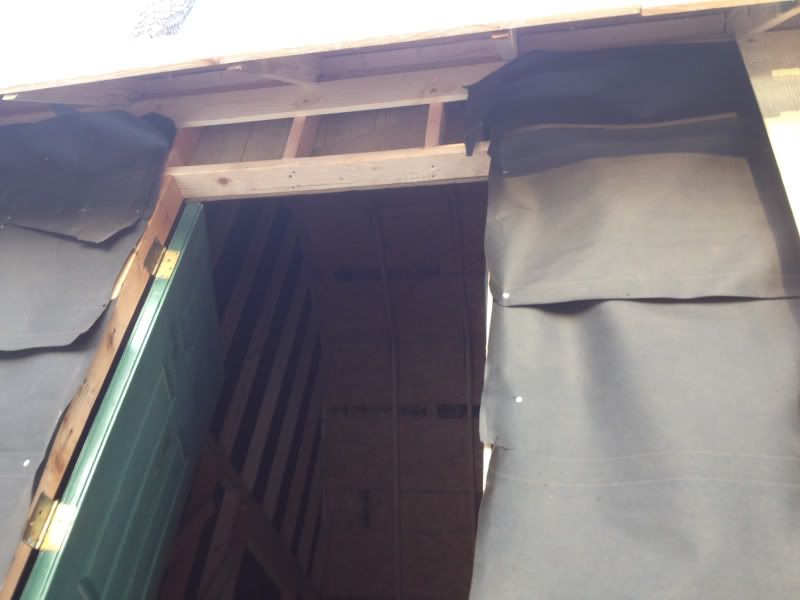
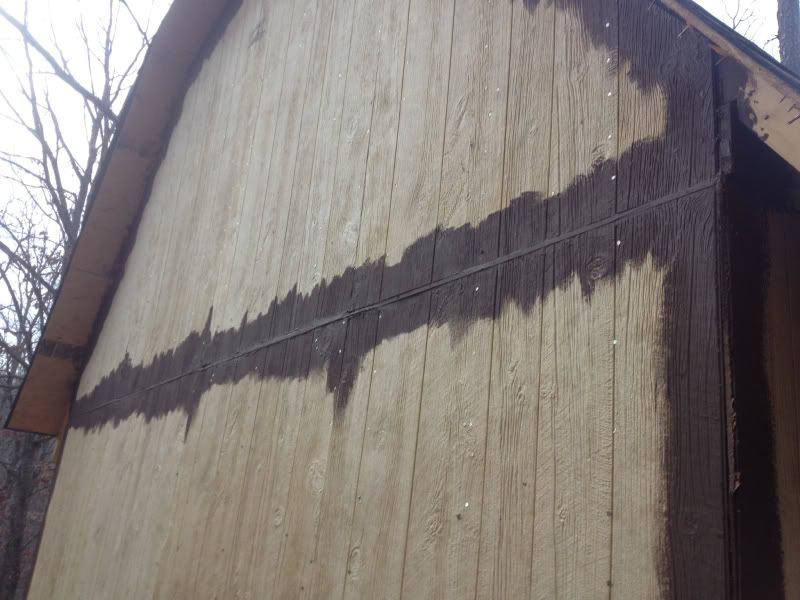
When we got to the cabin the roof felt had been stripped by the wind on the side that hadn't been shingled yet.
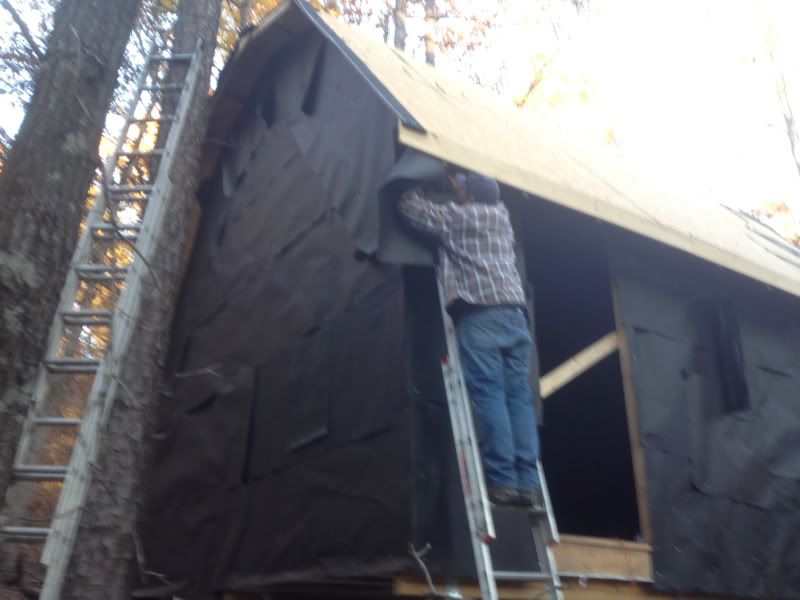
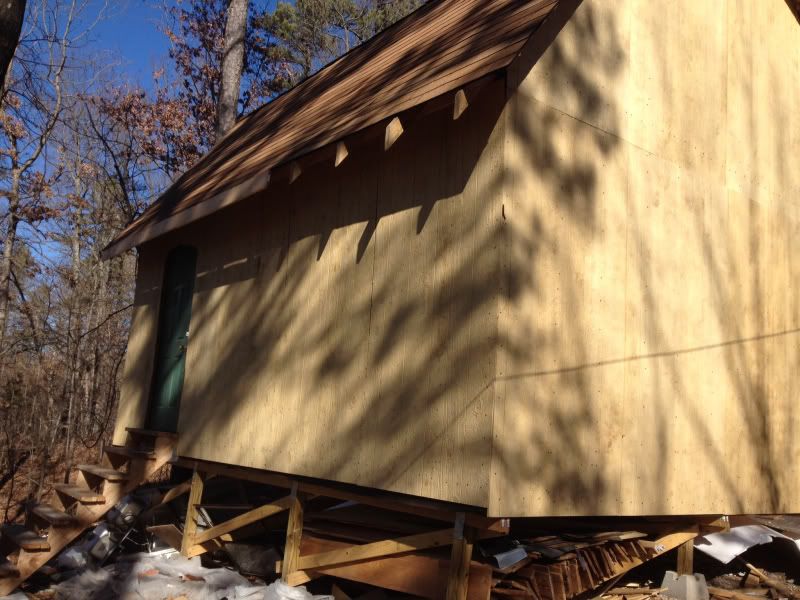
I worked on the framing above the wall while he started wrapping the rest with the felt paper. Got both tasks done and started to hang some siding, but we were whopped and it was difficult. Got three pieces up with just a few nails each. They will probably come back off and be hung more square. But it's closed in.
He went home after dark Fri night. I got the heater going, the inside swept up and propped a piece of siding up against the door opening to close out the cold.
Sat morning woke up before dark and bow hunted the food plot. The fall woods look awesome, but no deer. There were fresh tracks in the plot tho, so I guess all of our working the day before didnt drive them off.
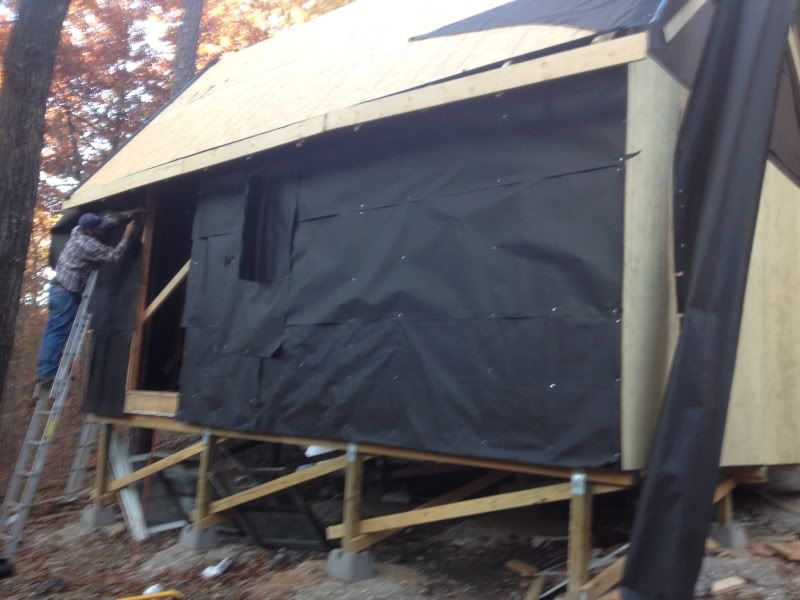
After hunting I first worked on getting the high siding done on the side we hung two weeks ago. Pretty easy. Measured, cut and pushed each up the ladder then just set it on the one below and got them nailed down.

I don't have any pictures of the rest of the day. It was non stop work and no stopping for photos. Got the roof felt repaired and got the majority of the steep roof shingled. That just leaves the top, not so steep, part of the roof to be shingled, but at least the majority of the felt is held down by shingles now.
Also, got the beams installed inside. Brought down a 16 foot 2x10 from my in-laws deck the are replacing. Cut it in half length wise and had the two beams. They will probably need to be placed better, leveled and attached with hangers, but are at least there and holding the walls for now.
|
|
mattd
Member
|
# Posted: 3 Nov 2013 01:51pm - Edited by: mattd
Reply
O man, just realized I missed a day. 3 weeks ago my neighbor, a pro roofer, came down to help me shingle. We got the whole thing felted, all the edge trim done, and the entire side of one of the steep slopes shingled. The problem with the one truss with the bad seat cut showed up here. There is a low spot on the top not-steep part. I'll have to build that up before putting shingles on it. Neighbor gave me some rubber he uses on commercial roofs to go under the shingles in that area. He also showed me how to shingle which help when I did the other side.
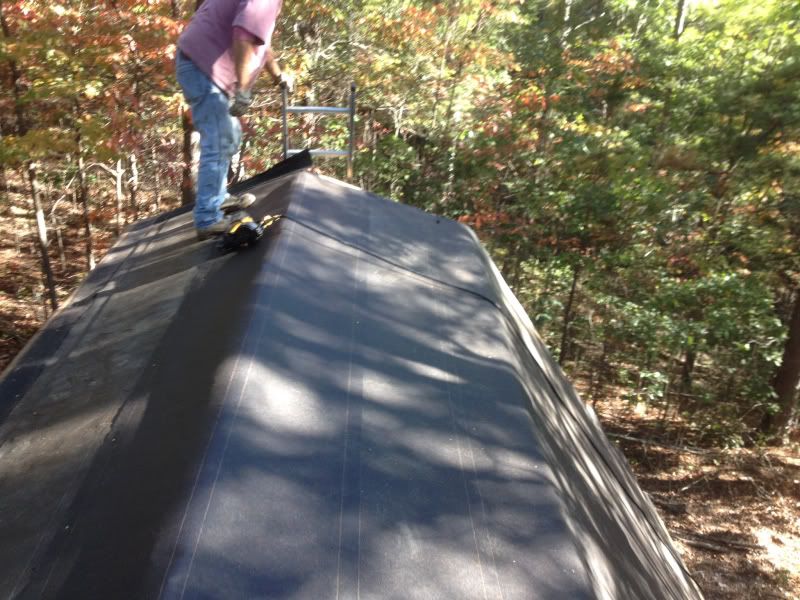
This whole side is shingled.
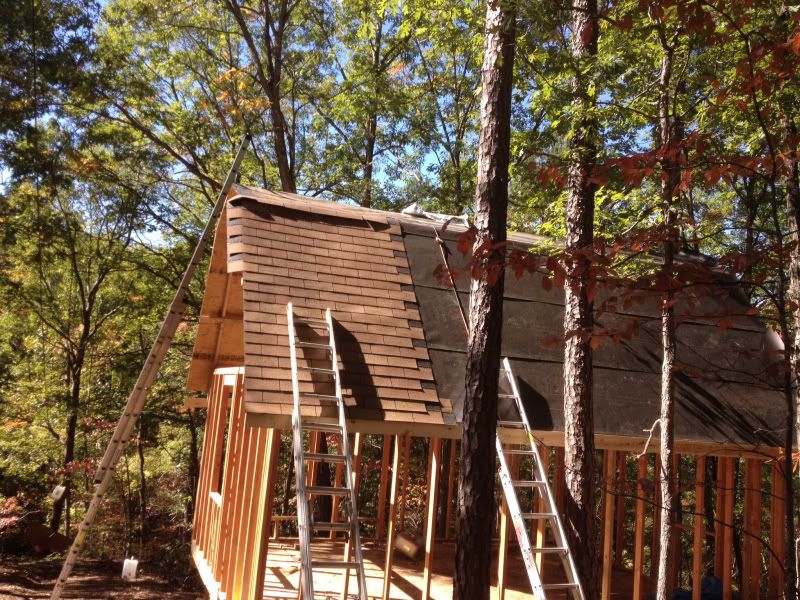
Towards the end we were both on the roof and it was shaky. The roof was locked in with the sheeting. It was the walls that were moving. I jumped down and just threw a couple 2x4s up to cross brace the wall framing. Went back up and it was rock solid.
Shingles and felt we're $310. Still need 2 more bundles so figure $360 for this portion.
|
|
mattd
Member
|
# Posted: 9 Nov 2013 01:04pm
Reply
Not going out this weekend because deer rifle season is next weekend and I want to lay off the noise and commotion. And I'm getting a little burnt out on the work.
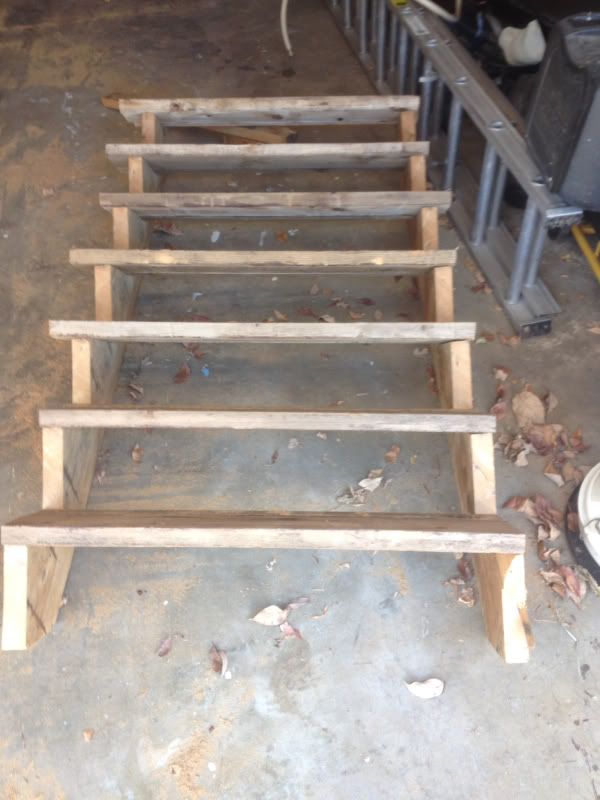
This weekend wasn't a complete blow off tho. Got the stairs done. I forgot to measure everything last time out, so I had to guesstimate my dimensions. I still have my measurements from when I measured the post height, so hopefully I won't be too far off. I planned on putting a gravel pad at the base to level everything, and I can tell now that the pad is going to have to be pretty tall. When i hold up a stringer On my level garage floor the top tread is at the right height. There's a pretty good slope out there tho so we'll see.
|
|
mattd
Member
|
# Posted: 17 Nov 2013 10:32pm
Reply
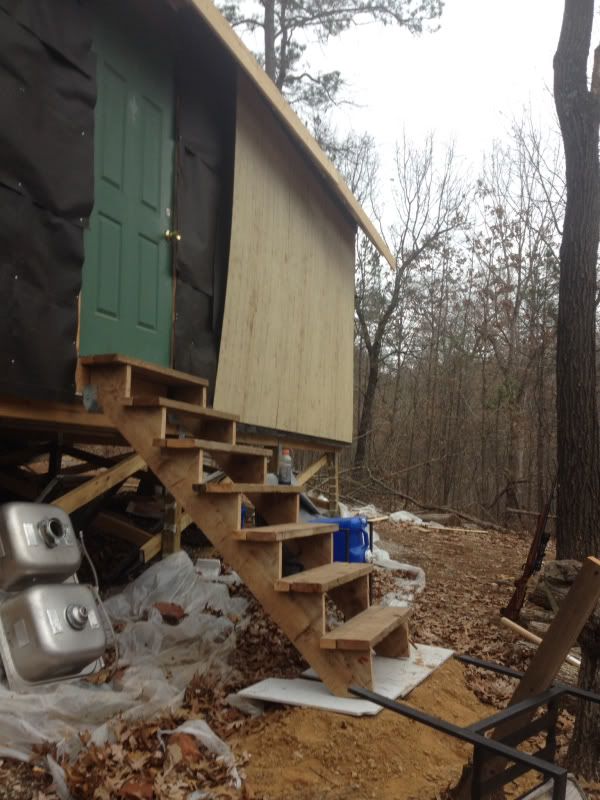
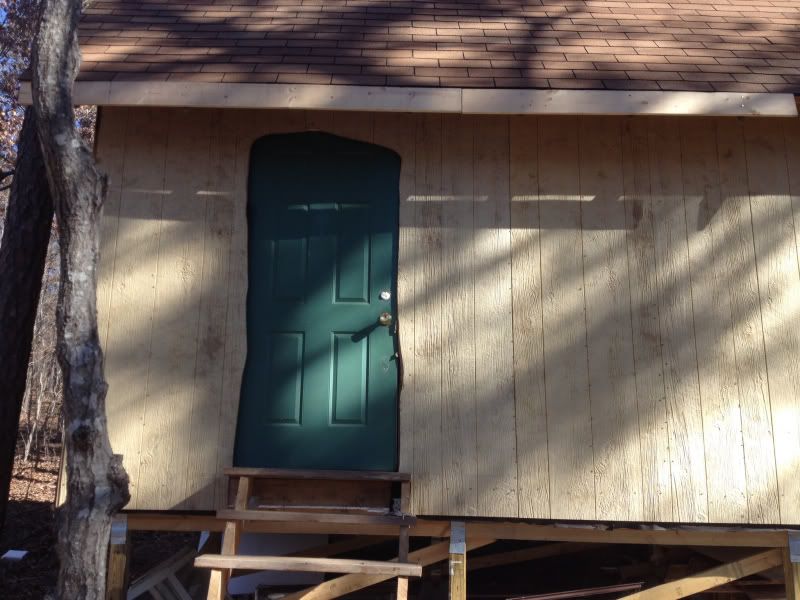
Got down Fri afternoon the day before opening day of gun season. Got stair landing pad tamped down, the stairs attached and the door installed. It's awesome having stairs. It was only the last time down that I had to jump in and out of the cabin, but that was enuf to make the stairs a necessity.
I had planned on having the door swing out. That way I could put some blocking behind the door on the inside and it would make it hard to kick in the door. But the door swinging out hits the roof so not an option. Also, the door frame needs some trim on the inside of the frame to make the door seal tight.

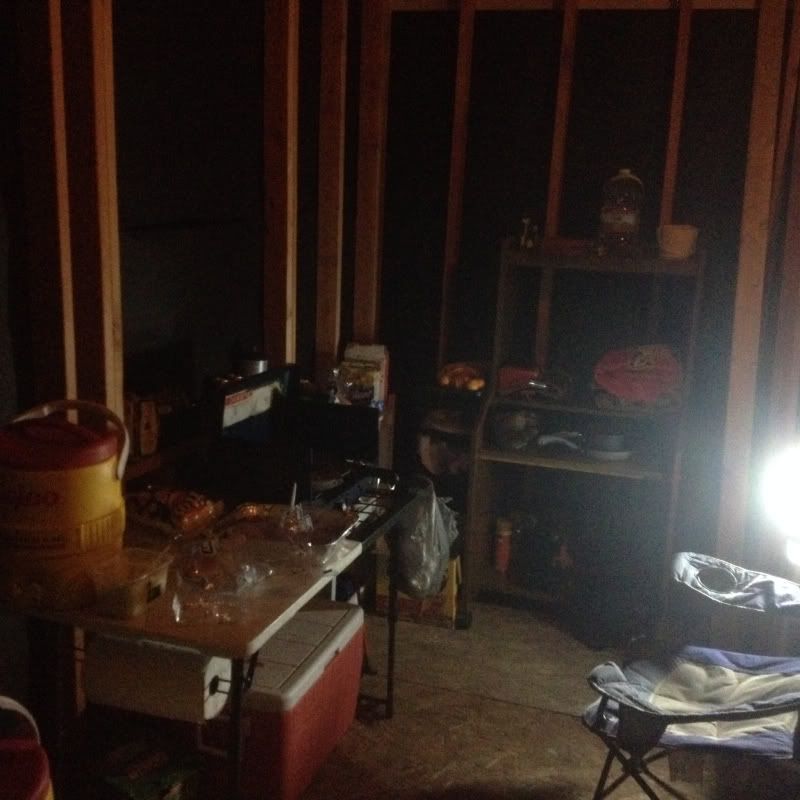
Brought some my furniture from my mom. Made the place more organized and cozy.
Managed to get a little work done Saturday afternoon. Trimmed the shingles I had put on the last trip. Also spray foamed all the gaps and sources of light coming in from outside.
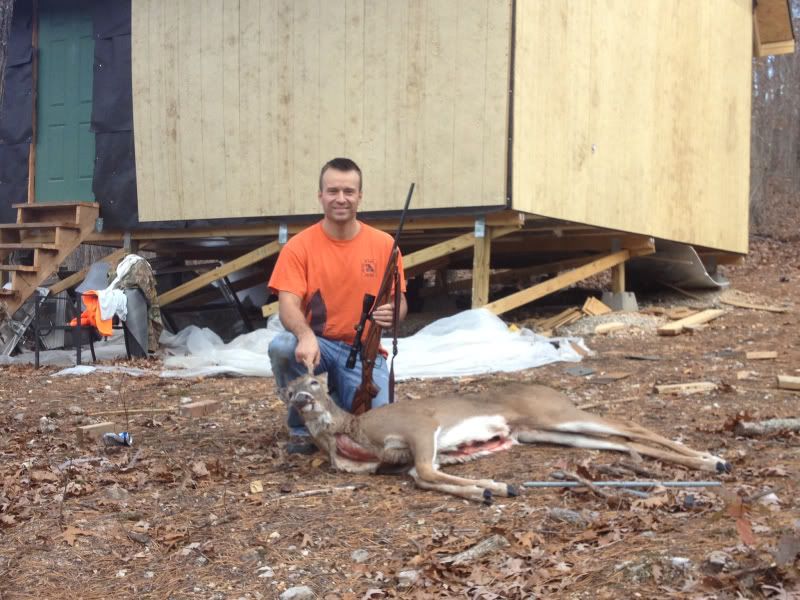
Major wind storm all weekend. Cabin kept us good and warm and was sturdy from the wind even tho all the siding isn't on. And got my first deer on the farm Saturday evening and a second Sunday evening.
|
|
old old buddy
Member
|
# Posted: 30 Nov 2013 07:32am
Reply
You're making some real headway on the cabin! Once you get it completely dried in.....that will take the pressure off. Looks like you faired pretty good for hunting season too. When you get it insulated it will make a world of difference when you fire up your stove. Good luck on your continued efforts.
Old Old Buddy
|
|
gersus
Member
|
# Posted: 30 Nov 2013 11:33am
Reply
It sure was windy opening weekend! My dad and I got lucky and killed a couple but a lot of people haven't killed a thing.
I'm looking forward to watching your cabin progress.
|
|
mattd
Member
|
# Posted: 2 Dec 2013 12:46pm
Reply
The second weekend of our gun season was better hunting weather, and my buddy saw one from one of my stands, but it busted him before he got the shot. So, first full season of owning the property and two deer down and another one at least seen. Not too bad considering my woods need a lot of work.
It got down to 12 degrees at night. We had the kerosene space heater between our beds. We tried to throw some siding sheets on top of, on the sides of,etc, the beams to hold some heat on top of us. It kept the temp around 30. A zero degree mummy bag and I was fine.
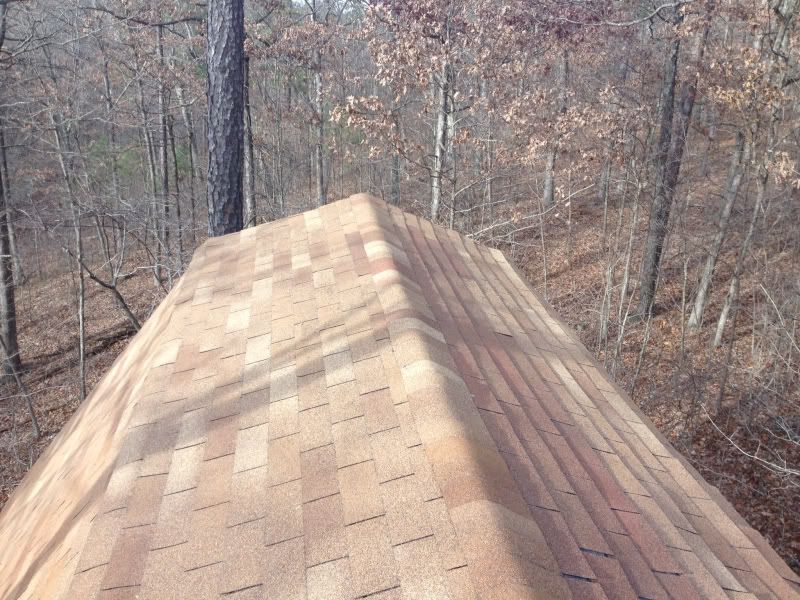
In the morning I got to work and finished up the roof. During the previous weekend it had rained a little and there was one spot that leaked. This time the bucket we put under that spot had a couple inches and there was another small spot on the other side of the floor. That was with just the felt on the top, so finishing up the shingles should take care of that. The ridge shingles aren't split evenly over the sides of the ridge. Hope that's not a big deal. Otherwise everything went pretty smooth.
Took 3 more bundles so $70 more, not the $50 I mentioned before.
Here is the wood stove I asked for for Xmas....
http://www.northerntool.com/shop/tools/product_796_796
|
|
mattd
Member
|
# Posted: 17 Dec 2013 09:07pm - Edited by: mattd
Reply
I posted on another thread asking for ways to install the 4x8 siding by myself since I was having a hard time finding someone to help finish off the siding. http://www.small-cabin.com/forum/2_4146_0.html. Some people pointed out that I didn't have any "z" flashing between my first and second level siding. My plan was/is to caulk the seam and put 1x4 trim over it caulking that top joint as well. Anyone have any opinions on that? Insulation won't be going in immediately so I guess I can keep my eye on it.
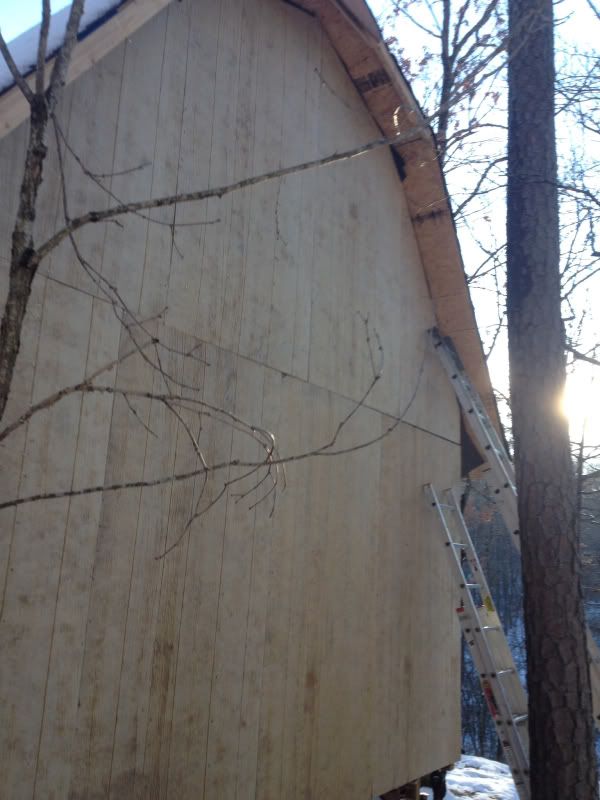
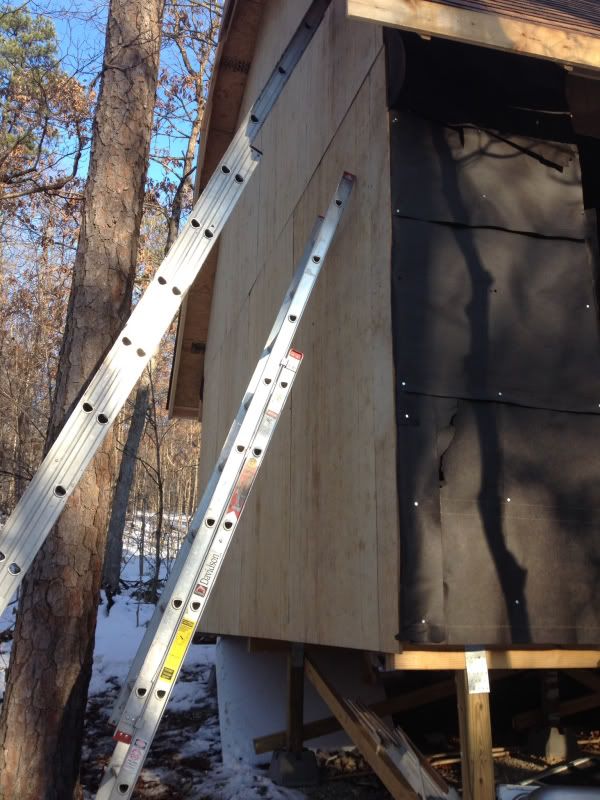
Got some help from a friend tho and we managed to get the remaining tall side done in about 3.5 hours. Also finished framing in the door. First time back after a few weeks. Surprisingly the steep roof slope was holding snow, as well as the rest, but the inside was perfect. Have been leaving extra clothes, bedding, etc down there and all was good.
The deer carcass I left out from a few weeks ago was drug off. We found it picked clean with coyote and hawk tracks around it about 30 yards from the cabin.
Finally got some deer pics off the trail cam I had over the food plot. Just does, and mostly at nite, but also a fox and a fat raccoon.
On the way to check the camera I had the ladders strapped down on top of the bed. Had to back up in a tight spot and ran a ladder right into a tree which threw it into the rear window and blew it out. Cold ride home, but $160 bucks, and a lot of window glue around the dent, later and it's fixed. Guess that counts as a cabin expense.
|
|
|
leonk
Member
|
# Posted: 17 Dec 2013 09:37pm
Reply
By no means I am a Z strip expert, but I can share a general tip  - -
build like there's no such thing as caulk, meaning use construction details to shed water naturally and your creation will last much longer.
|
|
mattd
Member
|
# Posted: 29 Dec 2013 03:32pm - Edited by: mattd
Reply
Got the front siding on this weekend. Forgot to take pics, will get them next trip. Had to take the 3 panels that were tacked up down and get them up more square, but at this point we've done it enuf it was like we knew what we were doing. Also, all the building materials are out of the living space and it got cleaned and looks like the real thing. got the front door rough cut out with the sawzall. The perimeter is kinda wavy and looks like a hobit door. Took a couple hours and we spent the rest of the evening in the woods for our black powder rifle deer season. Pushed two diff groups of deer on the way to a new spot, but that was it.
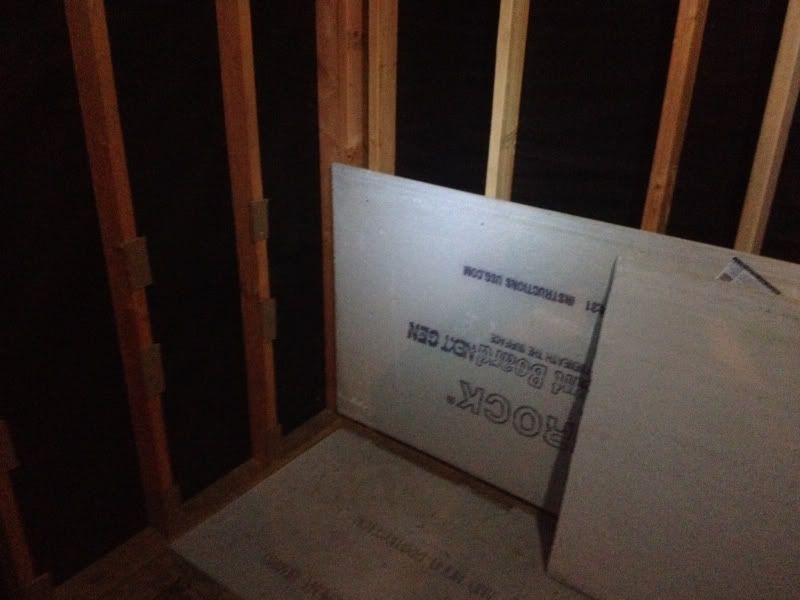
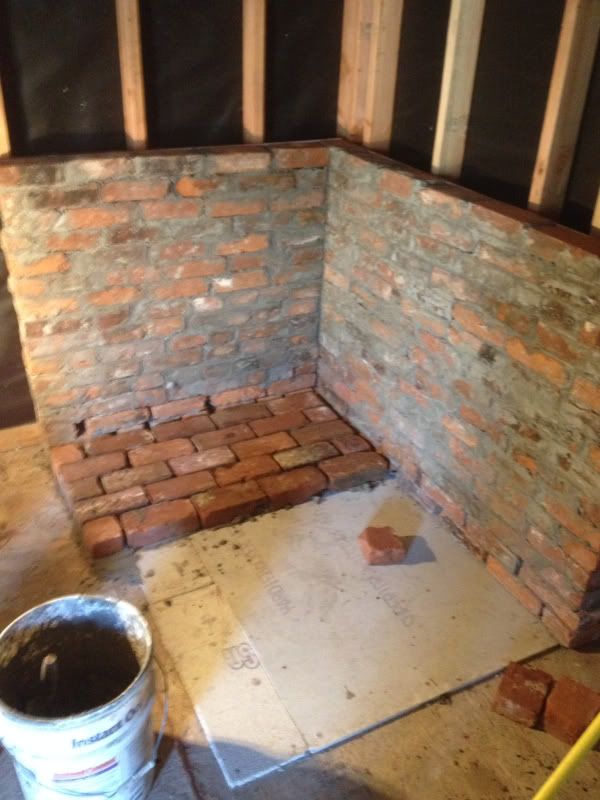
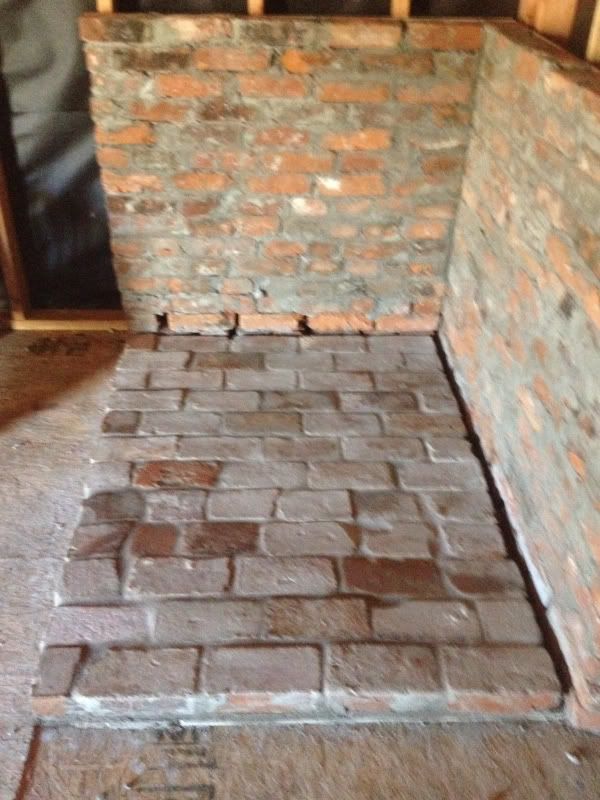
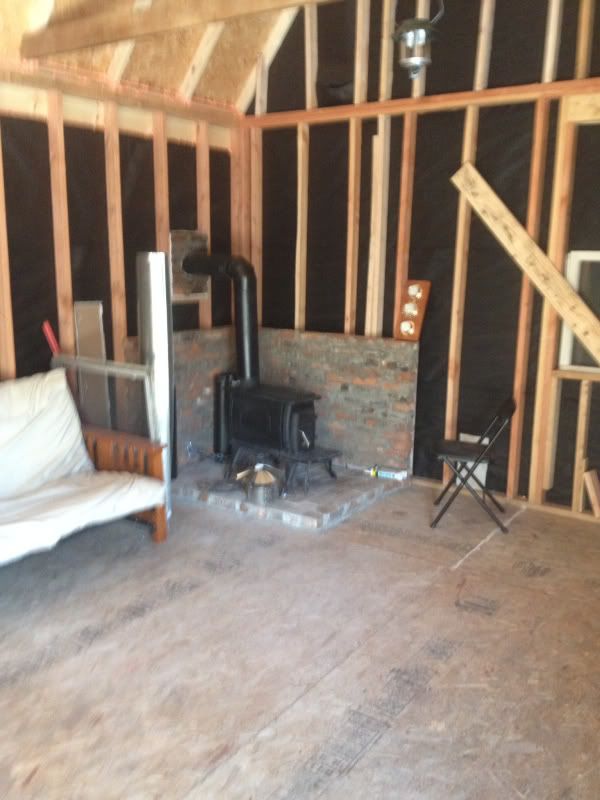
After dark I started working on the hearth for the new wood stove. Being Fully sided adds a lot of R value. Had one burner of a propane heater going, with the front door open wide, low 30s outside and I was fine.
The heat shield is concrete board on the long side, back and bottom, with brick over it. My friend donated the brick from a remodel at his house. The verticle concrete is elevated a couple inches off the ground and there are spacers to get it off the framing.
Bricks at the bottom don't get any mortar so there is airflow up behind the heat shield. On the short wall you can see the anchor that is screwed into the framing and will be mortared into the bricks. I'll be able to put a chain on it and around the legs of the stove to secure it from theft.
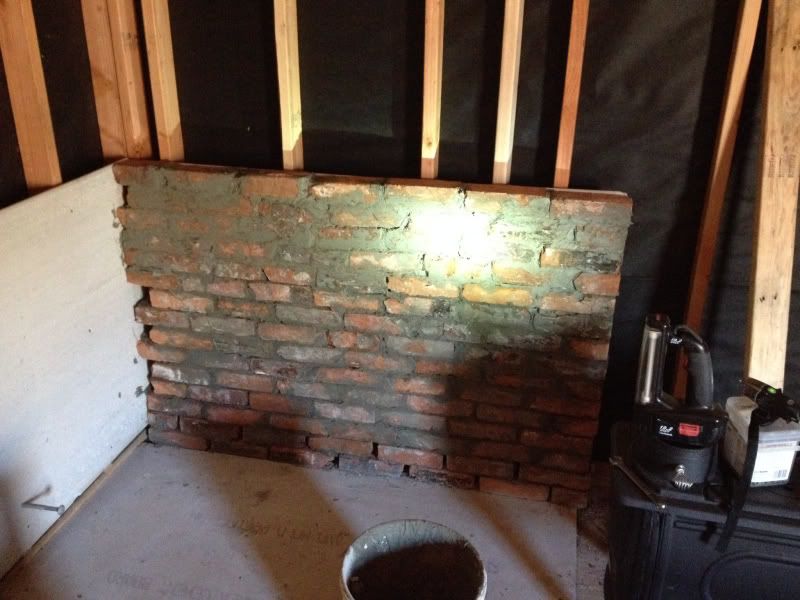
The bottom 3/4s of the long wall is what the dried, finished product looks like. Brick work is much more difficult and tedious then I thought.
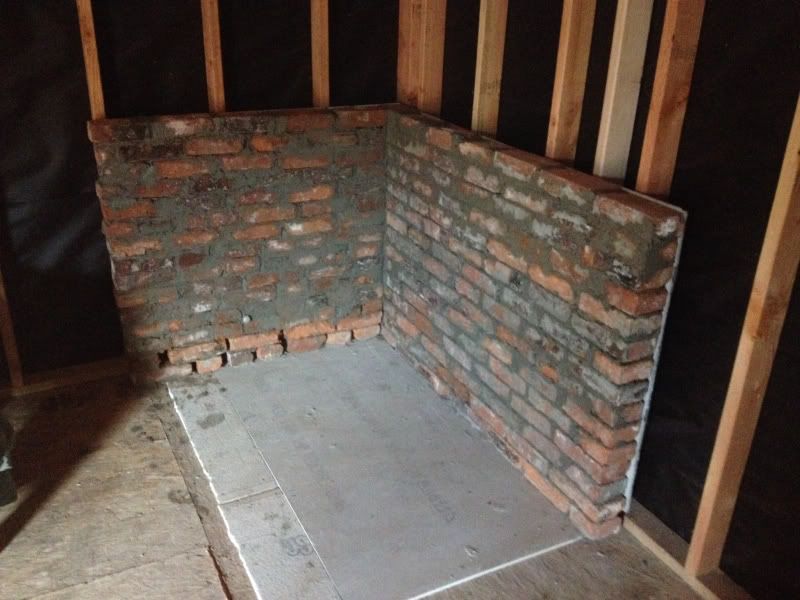
Still need to do the floor, and going to brick the hole in the wall where the stove pipe will pass thru. And am thinking about a third long freestanding wall. That will keep the heat off the futon that sits next to it. Maybe do a few burns first to see what it is like.
While I was working Saturday afternoon I heard a noise behind me and turned around to see my daughter walking thru the door. A surprise vistit from the wife and kids! A little surprised she found it. She hasn't been there since back when we were working on the road, so has never seen any part of the cabin. Showed them around the cabin site and then we went on a hike. They left, I got back to work finishing up the hearth, hunted again and went home.
$175 for hearth materials and about half the stove pipe - enuf to get it outside. Still need to get the vertcle pipe to get it above the ridge, prolly 12 ft.
|
|
OwenChristensen
Member
|
# Posted: 30 Dec 2013 07:25am
Reply
Nice, you are building more than a cabin, it's a big part of your future too,
|
|
tombiosis
Member
|
# Posted: 8 Jan 2014 09:54pm
Reply
hoping to see an update on this thread...are you still here?
|
|
mattd
Member
|
# Posted: 8 Jan 2014 10:43pm
Reply
Haha. Still here. Hoping cabin is. Got 14 inches of snow and consecutive days of sub 0 temps. VERY unusual for MO. My roof has such a steep pitch you'd think snow weight wouldn't be a problem, but a couple weeks ago when we did the tall siding we got a few inches and every bit of it stuck to that steep pitch. Think I might be able to squeeze a day trip out Sunday so we'll see.
|
|
mattd
Member
|
# Posted: 20 Jan 2014 10:57pm
Reply
She's still standing!! Not bad for a dude without any plans. Gotta believe that's the worst it'll ever see...12+ inches of snow, multiple consecutive days of sub 0 temps.
As promised here's pics of all the siding up.
And my hobbit door waiting for a router.
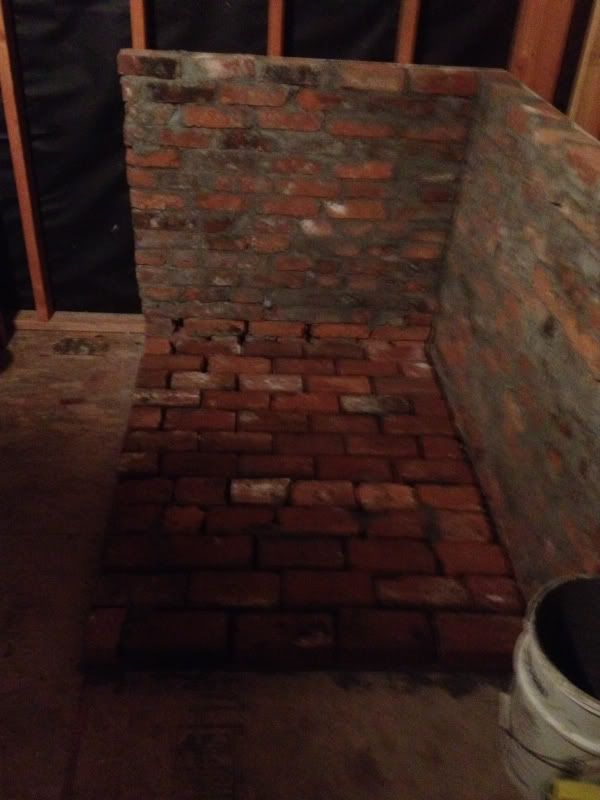
Easy day, didnt bring many power tools or generator. Got the hearth done for now. I' guessing I'm gonna need a third wall as a heat shield from the furniture, but until I get the interior walls in the furniture can be moved. I forgot to take a pic after i grouted the floor bricks. floating grout with a trowel and morter isnt quite the best way, but i think it came out good. Still need to get the brick in on the wall where the pipe will pass thru to the outside.
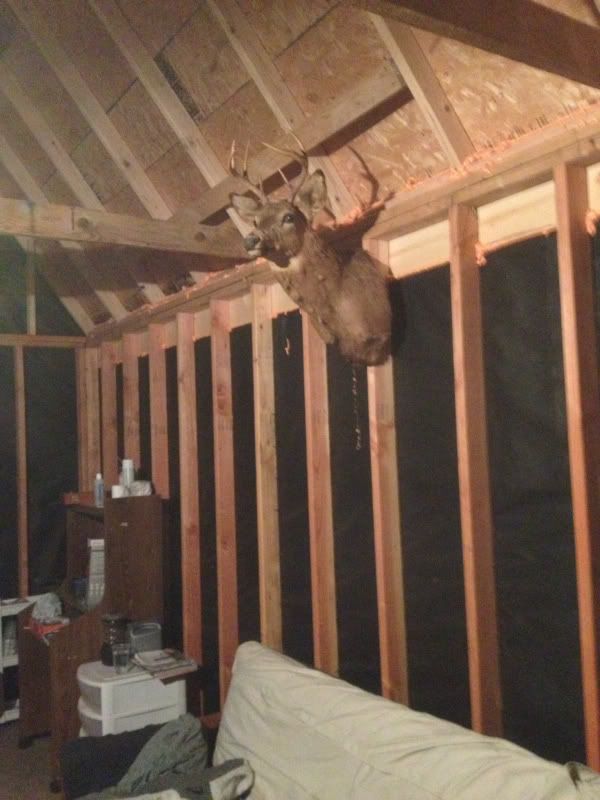
My buddy installs cable and one of his customers husband had died and she was getting rid of his mounts.....first one up. It's bright in there cause my buddy also donated a dual mantel lantern and it is brigh!
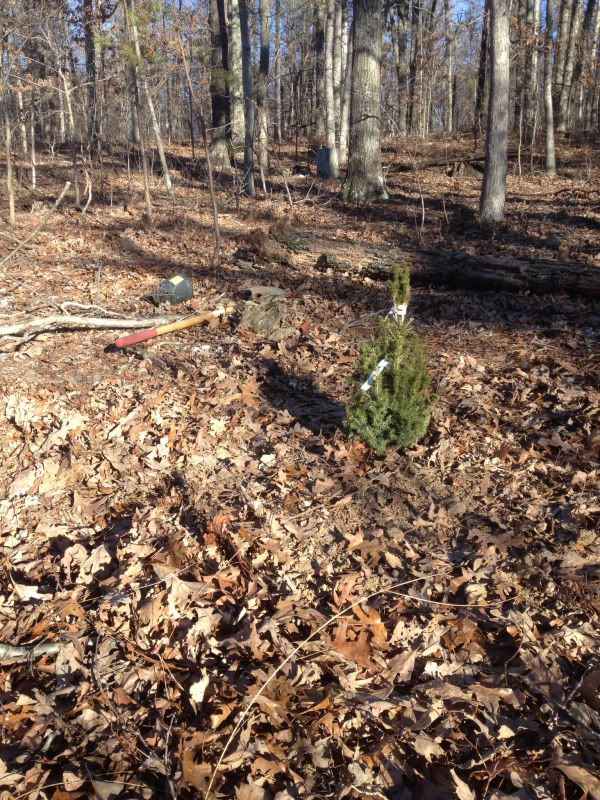
Also, for Xmas the wife and kids got me a small spruce with the idea we'd plant it and it will be our Xmas tree some time in a few years. Got it in.
Next trip will be soon and I gonna start working on the final trim to get it 100% dried in. Lots of little things to do. I'd say 90% dry now.
|
|
mattd
Member
|
# Posted: 26 Jan 2014 09:21pm - Edited by: mattd
Reply
I'm incredibly poor at figuring how long a project will take. The cabin is 90% dried in and hasnet leaked, but still needs the final touches - seams sealed, trim installed, and the siding fully nailed down. I was thinking a couple hours per tall side, at most a day. Well 7 hours later and I didn't even finish one side.
First, here's the hearth grouted. Needs a wet rag run over it to clean off the mortar dust.
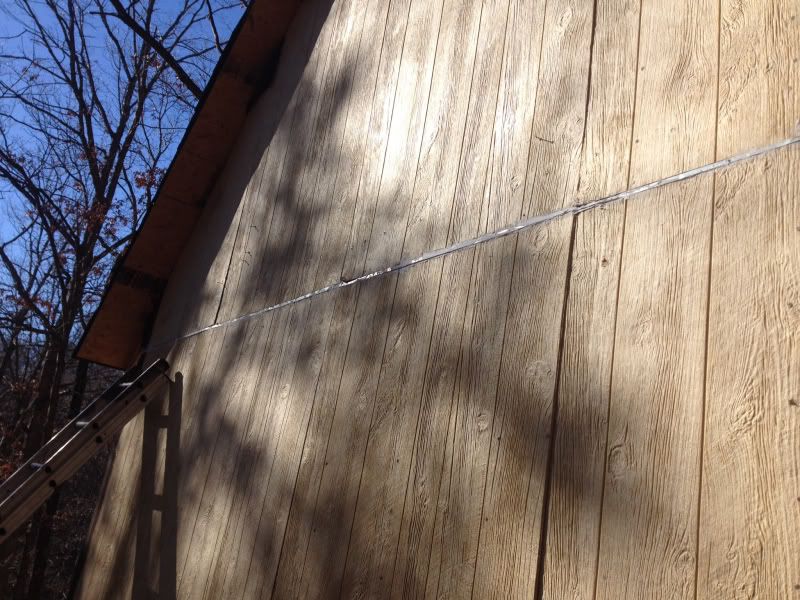
First thing was to trim the overhang off the siding corners. Then paint the corners and the trim that will eventually go over them. Then I managed to get the z flashing up under the siding. Took some time and effort, but its done and I feel better about that seam. Got caulk under it along the whole length.
Next, I had to angle grind the nails coming through the roof that were too close to the siding. When I put the trim under the roof sheeting they would have been in the way. While I was at that I painted along the roof line. While I was painting I would paint some trim at the same time. Also painted the flashing and trim will cover it.
Also had to do a little framing inside. The verticle seams of the siding didnt land on a stud, so I had to add them top and bottom. Got those in and then got the entire side nailed down which really strenghtened the wall and no more gaps.
Just have to hang the trim now. Which will require some angle cutting, so not as easy as just throwing it up, but not too bad. Then on to the other side.
Cut firewood last time and this time. prolly set for the rest of winter.
Trim, flashing and paint was $120.
|
|
gersus
Member
|
# Posted: 26 Jan 2014 11:17pm
Reply
We finally had good weather! Good to see things moving along.
|
|
mattd
Member
|
# Posted: 7 Feb 2014 09:17pm - Edited by: mattd
Reply
Guess who's got heat!
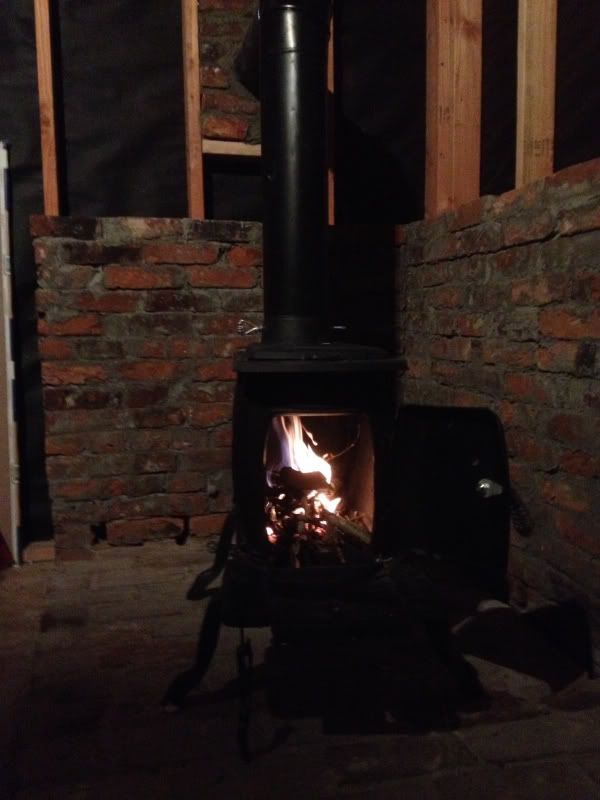
Good thing to cause its cold here. 5 inches of snow and highs in the teens. Cabin still holding up well. First step was cutting a hole in the wall and nailing in a sill.
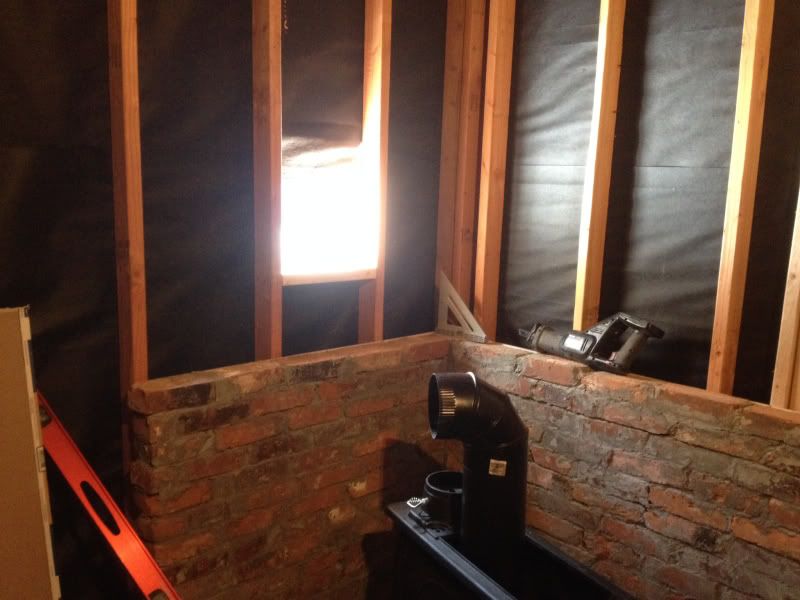
And I was by myself so I had to figure a way to support the pipe as I bricked around it.
Floor plan starting to come together.
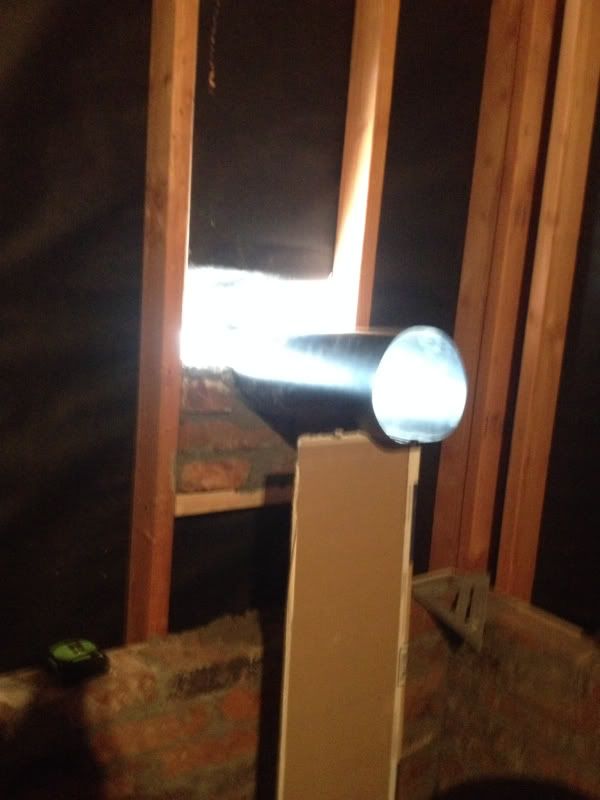
This is ow it looks from the outside.
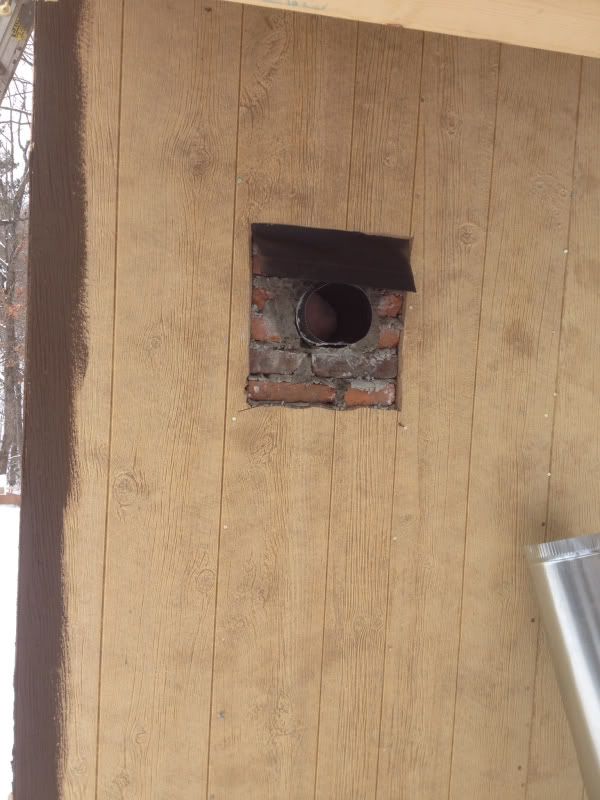
And after the flashing, which includes a z strip here. Red is 650* RTV silicone for engines.
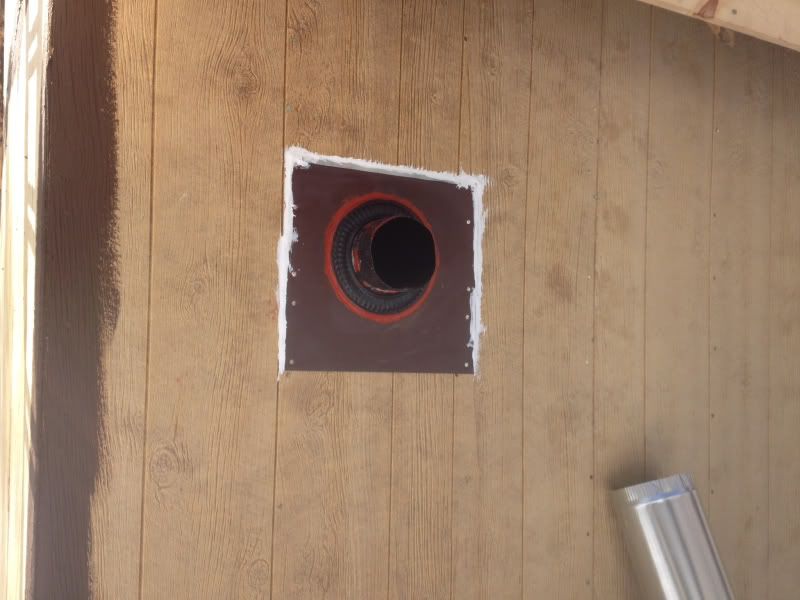
And that's as far as I got. Sealed up the perimeter of the brick on the inside, made sure mortar was tight around pipe and no day light was showing and had 2 quick small fires per the stove instructions to cure the paint. Ready for full fires now, but even the small fires were heating up that corner to 30 degrees while it was 12 outside. Also need to Finnish the plumbing on the outside. I put the T on upside down before I left it will at least keep water out.
I put an anchor in to the brick to lock the stove down. That needs some improvement.
|
|
Mike 870
Member
|
# Posted: 8 Feb 2014 01:06pm
Reply
Anyone else not able to see the pictures?
|
|
mattd
Member
|
# Posted: 8 Feb 2014 01:35pm - Edited by: mattd
Reply
O man. Now i cant see em either. Was cleaning my Photobucket folder cause it was full. Didnt delete those tho.
looks like the links for the images changed. any idea how to fix?
|
|
mattd
Member
|
# Posted: 8 Feb 2014 02:25pm
Reply
well, i compared the links from photobucket to the links here and they match. so maybe since i deleted some misc photos this morning there is a refresh that has to happen. i submitted a support question with PB, so we'll see. hope this dosent suck.
|
|
mattd
Member
|
# Posted: 8 Feb 2014 05:40pm
Reply
Just testing.....
|
|
razmichael
Member
|
# Posted: 8 Feb 2014 06:27pm
Reply
Photos are not lost (assuming you did not delete them). As the message states, you have exceeded the bandwidth allocated.
Link to Photobucket support
Keep in mind you have had over 4000 views on this thread and each time anyone views it all the photos are downloaded from your photobucket site. Basically they want you to pay more for a PLUS account. Don't forget you can embed them directly from your own computer into the thread rather than a url link to an external site. others may be able to suggest photo sharing sites that do not have such a limit.
|
|
CabinBuilder
Admin
|
# Posted: 9 Feb 2014 02:55pm - Edited by: CabinBuilder
Reply
I think razmichael is correct - your Photobucket's monthly bandwidth was exceeded.
You can either wait for the next period to begin (so the bandwidth count will be reset), and/or upload (new) pictures to the Forum.
|
|
mattd
Member
|
# Posted: 9 Feb 2014 04:10pm
Reply
Thanks guys. Feel better now that all is not lost. Looks like it is going to reset on the 12th so hold tight.
Thanks again!
|
|
mattd
Member
|
# Posted: 12 Feb 2014 08:18pm
Reply
Pics are back!
|
|
andrewcmsu
Member
|
# Posted: 4 Mar 2014 03:12pm
Reply
not much progress going on here.....hurry up
|
|
mattd
Member
|
# Posted: 4 Mar 2014 09:31pm - Edited by: mattd
Reply
Hey buddy! Been traveling like crazy the last few weeks. Took the kids and my mom out this weekend and planted clover in the food plot, filled the corn feeder and checked the cam. Had some doe pics.
Then back to the cabin for a wood stove fire and playing out side. Kids made the fire ring outa rocks, while I cleaned up the construction zone.
|
|
mattd
Member
|
# Posted: 22 Apr 2014 10:34pm - Edited by: mattd
Reply
Guess I'm starting to run out of steam. Been traveling a lot for work and spring house projects make it hard to get down there. Went the other day and dug a trench around the back side to divert water and cut out about 55 yards of shooting range. Already had the short range.
Turkey season started yesterday and I spent the nite on Sunday and hunted Monday. Had one come in to the food plot after I had gotten up and was checking out the plot. Then chased another for awhile who was answering my calls, but not coming in. Got on the back side of the property and the woods there look so much better. Need to get a trail cut out to get back there so it can be hunted.
Didnt work on the cabin, but slept great in it. Next things to work on are gutters and caulking up all the remaining seams on the inside. Couple holes let a ton of wasps in.
|
|
Gary O
Member
|
# Posted: 22 Apr 2014 11:38pm
Reply
THIS is one of the best pictorials of a build I've ever seen.
I'm usually too beat to pick up the camera by the time I'm done for the day.
Wonderful job
|
|
cabingal3
Member
|
# Posted: 22 Apr 2014 11:51pm
Reply
what a great place u go there mattd.
thanks for sharing all the great pics.
|
|
| << . 1 . 2 . 3 . >> |
