| . 1 . 2 . >> |
| Author |
Message |
jjr
Member
|
# Posted: 5 May 2016 09:50pm
Reply
Long time lurker here. We have been admiring everyone projects for quite some time and thought it was time to share our cabin/cottage experience so far.
We have been camping for many years now and have my wife, kids and I have thoroughly enjoyed it up to this point but were wanting some place to settle down and enjoy our time off instead of traveling all of the time.
After quite a bit of searching we stumbled accross the perfect lot on a 450 acre lake about 45 minutes form our home. It was perfect. Needed a little work but we were up for it. It even had a shed to fix up.
Here are a few pics taken the day purchased it. More to follow soon.
IMG_1553.JPG
| 
IMG_1584.JPG
| 
IMG_1575.JPG
| 
IMG_1583.JPG
|
|
|
bigriver
Member
|
# Posted: 5 May 2016 10:42pm
Reply
looks great!
|
|
jjr
Member
|
# Posted: 5 May 2016 11:35pm
Reply
Hmmm... Not sure what the deal is with the pictures not turning up side right. I will post more once I figure that out
|
|
jjr
Member
|
# Posted: 5 May 2016 11:56pm - Edited by: jjr
Reply
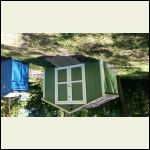
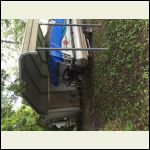
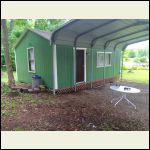
So with a little elbow grease, trimming, scrubbing, and painting we ended up with this with in a few weeks.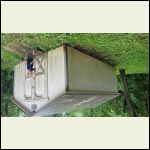
20150617_115933.jpg
| 
20150825_132529.jpg
| 
IMG_1575.JPG
| 
IMG_1792.jpg
|
|
|
creeky
Member
|
# Posted: 6 May 2016 10:48am
Reply
amazing what you can do with a coat of paint. nice looking set up.
|
|
tichalet
Member
|
# Posted: 6 May 2016 06:09pm
Reply
Wonderful! Every kid should have a lake like this to call their own while growing up.
|
|
jjr
Member
|
# Posted: 6 May 2016 11:29pm - Edited by: jjr
Reply
Ok, Can anyone help me figure out why my pictures are loading every which way except up side right??? I have a bunch more to share if I could just figure this out.
|
|
jjr
Member
|
# Posted: 7 May 2016 08:30am
Reply
After enjoying our cabin all summer and fall it was time to figure out what exactly our plans were. We really were not all that enthused about staying in camper any more and we weren't sure if we wanted to invest our hard earned money into fixing up a shed that was sitting on a shaky cinder block foundation.
So after much thought, we decided that we were going to build our own. We spent most of the winter coming up with a budget and materials list.
One rainy day this spring when the weather was keeping up from starting our foundation plans, my wife and I happened across a local "shed" dealer and I could not believe my eyes. They had almost the mirror image of my building sitting on their lot. Once inside I could not believe my ears when she told me the price. I could not even build this thing for the price they were selling it for. So we bit the bullet and bought it. We spent the next couple months planning and building the foundation for our new "shed". Pics to Follow
|
|
|
jjr
Member
|
# Posted: 11 May 2016 05:52pm
Reply
So most of my pics of the prep work involved with getting ready for the new cabin are too large to post on here so I am going to by pass those and get to the nitty gritty. Trust me, we spent a lot of time measuring and remeasuring to make sure that all of my piers were in the correct spot and the pre-built framing underneath the cabin would line up with the skids on the "shed" being brought in.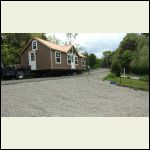
Arrival
| 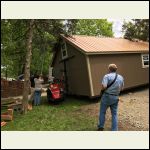
Mule bringing the cabin in
| 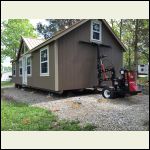
Now time to level the cabin
| 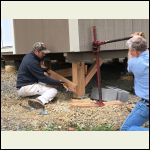
Placing the pre-built framing
|
|
|
jjr
Member
|
# Posted: 11 May 2016 06:09pm
Reply
So the lake is not all about working so hard, so here are a few pictures of the less stressful times!
Family Fun in Mud Dog.
| 
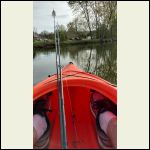
What a Great Evening on the water
| 
How I like to end the work day
| 
First Keeper for my son!!!
|
|
|
jjr
Member
|
# Posted: 11 May 2016 06:26pm
Reply
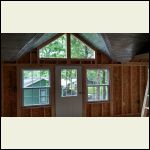
So all of my measuring paid off. Everything lined up great. I am so glad I took the time to get it right the first time. The delivery guys from 5 Star Buildings were so professional and experts with their equipment. They hung out to help me make sure everything was perfectly level.
The pictures do not show all of the x bracing that I added to ensure the cabin had enough lateral support and was not going to tip over.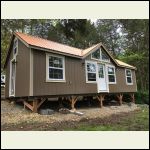
She's In
| 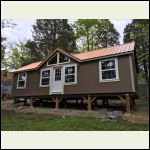
Another angle
| 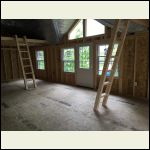
Interior
| 
Dormer
|
|
|
jjr
Member
|
# Posted: 11 May 2016 06:28pm
Reply
Sitting in my son's loft.
|
|
Julie2Oregon
Member
|
# Posted: 13 May 2016 07:56pm
Reply
That's a good-looking building!  What size is it? What size is it?
|
|
jjr
Member
|
# Posted: 13 May 2016 10:30pm
Reply
The cabin is 16x32 and with an 8' loft at each end. We have the AC and light fixtures installed now and are working on framing out a few interior wall this weekend. Plumbing is next week.
|
|
jjr
Member
|
# Posted: 17 May 2016 10:59pm
Reply
Things are really moving at our place. Last week I was able to finish framing the interior walls for our storage room, master bedroom, and bathroom. We finished wiring some additional outlets and light fixtures as well as installing our A/C unit and ceiling fan.
I have a little vacation time from work coming now and plan on putting some gutters up as well as starting the plumbing.
We do not have a well, septic system or underground holding tank and really cannot afford this right now. Instead we are going to plumb the cabin just like a travel trailer with a 275 gallon fresh water holding tanks and a 250 gallon grey/black water holding tank. I have two tanks for fresh water and plan on using one to haul water from the community well to fill the other fresh water tank. For the waste water I am going to buy a second waste water tank and use it to haul the grey/black water to the community RV dump station.
As I get these projects underway I will be sure to take pics of the water system to keep every one updated. Hope it all works the way I plan. Venting the plumbing is my only major concern as I am not looking forward to making holes in my new roof.
|
|
redtoy86
Member
|
# Posted: 20 May 2016 11:54pm
Reply
That is sure beautiful! I am in the process of building a 16x32 shed/cabin like yours with a loft. This will sure give me ideas. I am currently looking for plans. Did you draw up your own plans?
I wish I could a afford for it to look like yours. Great Job!
|
|
hattie
Member
|
# Posted: 21 May 2016 12:05pm
Reply
Absolutely BEAUTIFUL!!!!! Congratulations! 
|
|
jjr
Member
|
# Posted: 24 May 2016 07:04pm
Reply
redtoy86,
We originally did draw up our own plans when we were going to build it ourselves but with the shed builder we were working with, we just chose the options we wanted and they built it. We used google sketch up to figure out the floor plan we wanted to go with. This helped us visualize what the finished product was going to look like and we were able to figure out where we wanted to put our doors, windows, bedroom, AC unit, kitchen etc.
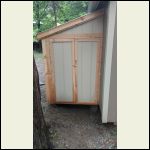
Thanks for all the compliments. I finished up adding a lean to shed, outdoor shower, and all of the fresh water side of the water system. I will get pics this week end and post them. I will be working on all of the drains and vent pipes for the plumbing starting Thursday and should have that completed soon.
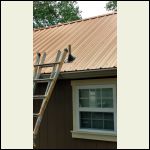
I am still undecided if I am going to run my plumbing stack up through the metal roof for out through the side wall. It would be so much easier to take it out the side but would look better through the roof. If anyone has any experience running a stack either way, any info is appreciated.
James
|
|
jjr
Member
|
# Posted: 28 May 2016 12:15pm
Reply
Just a little up date with pictures.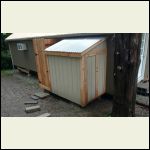
Lean to and Outdoor shower
| 
IMG_20160527_1110460.jpg
| 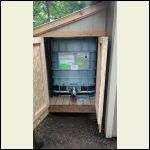
Water Tank
| 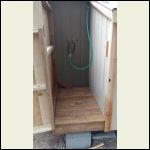
Outdoor shower
|
|
|
jjr
Member
|
# Posted: 28 May 2016 12:21pm
Reply
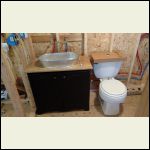
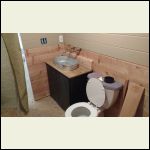
I found an old cabinet at my parents house the other day. It was pretty dingy and an ugly yellow but had potential. I spent a few hours refinishing it with rustoleum cabinet transformations and adding a wash tub to the top and now I have a new bathroom vanity. fun stuff.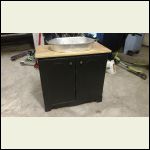
IMG_20160526_0802308.jpg
| 
IMG_20160527_1109011.jpg
|  |  |
|
|
jjr
Member
|
# Posted: 28 May 2016 12:25pm - Edited by: jjr
Reply
We also re-purposed a bench and turned it into a swing for my wife's birthday present. Every one loves to swing in it and it looks directly at the lake. THe kids and I spent quite a bit of time try ing to find a porch swing like this but no one carries them in the store any more. We found a bench and with some cutting and adding eye bolts, we had the perfect swing.
|
|
jjr
Member
|
# Posted: 28 May 2016 12:32pm
Reply
Picture of my water pump set up. So far it works good and no leaks.
|
|
hattie
Member
|
# Posted: 28 May 2016 01:31pm
Reply
Love, love LOVE the swing! That is a clever idea repurposing a bench. Your place is amazing! 
|
|
jjr
Member
|
# Posted: 28 May 2016 02:27pm
Reply
Thank you Hattie. We are having so much fun with this.
|
|
abby
Member
|
# Posted: 31 May 2016 07:09am
Reply
love, love, love it! 
|
|
Asher
Member
|
# Posted: 31 May 2016 10:10pm - Edited by: Asher
Reply
jjr,
Can you tell me what options you added and what were standard?? Our original cabin plans went completely south last week and we are meeting with these builders in Cuba on Thursday, we are looking at the 16x40 or 16x36.. How many windows where standard? Where the lofts standard? I know you added an extra door and we plan on doing the same... Did you upgrade the window sizes or are they also the standards?
Your cabin looks great, as soon as we got a quote for the foundation with our existing plans we realized that we where going to be WAY over our planned budget... The wife started tearing up (this was her dream weekend place for us), I felt horrible and pulled up your place to show her... her eyes dried up and a smile came to her face when she saw your pictures and she called and made an appointment to meet the builder this Thursday...
If we can get what we want, I will have a very limited time trying to make a rotted out 14x70 trailer disappear so we can use it's pad area... I guess I am going to see how many roll off dumpsters one of these will fit into... Anyone need some 70' long I-beam frame rails, axles, and tires??? come down to flippin AR to help and they are yours... 
|
|
redtoy86
Member
|
# Posted: 3 Jun 2016 06:08pm
Reply
JJR,
Thank you for the response and pictures. There's light at the end of the tunnel for me. LOL
You have sure inspired me. We are supposed to start the cement pads tomorrow. Lets see how that goes.
|
|
Cowracer
Member
|
# Posted: 5 Jun 2016 07:48pm - Edited by: Cowracer
Reply
I have seen JJR's cabin and I gotta say that I have major envy issues.
Its every bit as sweet as it looks in the pictures.
Tim
|
|
jjr
Member
|
# Posted: 9 Jun 2016 09:21pm - Edited by: jjr
Reply
Asher,
Sorry for the delay in responding. I have been busy working on our property trying to get it ready for my wife's 40th B-day party.
As far as the options go, we added quite a bit to the standard model. I am not really sure what came standard on the shed bud we added several windows and a door as well as the dormer above the front door. The lofts were not standard and we paid to have both of them. The lofts are also raised a bit to allow for a full sized door on the side. The front door is a short door to allow for the gable. One of the major selling points for us was the insulated floor that the manufacturer offered. Its done really well and they did a great job at sealing the under side. The shed(cabin/cottage) was built in Cuba, MO also.
Sorry to hear about you plans not working out for you as well as you had wished. I am sure all will work out for you. If I could give you one piece of advice about putting the shed on a pad. I would probably try to figure out a way to make it so you could still access the under side of the structure so if you do any plumbing you can get to it.
redtoy and Cowracer,
Thanks for the kind words. I am finding that all of this work is becoming a labor of love.
As I said before, I have spent quite few hours getting the property ready for my wife's birthday party. I wish I would have take more pictures of the place other than just the cabin. Here are a few more pics of the bathroom progress. I finished all of the plumbing including the vent stack, and all of the drains for the cabin.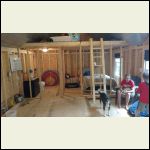
IMG_20160527_1113211.jpg
| 
IMG_20160602_1737293.jpg
| 
IMG_20160531_1427107.jpg
|  |
|
|
jjr
Member
|
# Posted: 9 Jun 2016 09:24pm - Edited by: jjr
Reply
So in addition to all of the work you have to squeeze in family time also. The best part of building a cabin right?
Campfire Cones with the kids
| 
Sunset veiw from Mud Dog
| 
Muddin in Mud Dog
| 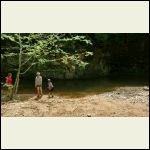
The Grotto
|
|
|
| . 1 . 2 . >> |

