| << . 1 . 2 . 3 . 4 . >> |
| Author |
Message |
Jabberwocky
Member
|
# Posted: 25 May 2017 10:16am
Reply
toyota_mdt_tech
Thanks! I'm fortunate that I married a LMC "Low-maintenance chick" as well 
We've been through every idea in the book, and although this apartment in someone else's shop wasn't our first choice, it makes the most sense for our lifestyle at the moment. We have two acres right next door that we can build a house on someday if we feel the need, but honestly we can already tell that this apartment will be so perfect for our needs, I don't know that we will ever feel a pressing desire to upgrade - we are pretty simple people 
|
|
Jabberwocky
Member
|
# Posted: 1 Jun 2017 09:59am
Reply
There has been great progress on the build, I just haven't had the opportunity to take good photos.
In the meantime, I wanted to share something you don't see every day. Last weekend there were huge storms to our south. Nothing threatened our place, but the anvil of the supercell enveloped our sky. It was beautiful in an eerie sort of way.
20170527_203904.jpg
| 
20170527_203829.jpg
|  |  |
|
|
Jabberwocky
Member
|
# Posted: 21 Jun 2017 08:48am - Edited by: Jabberwocky
Reply
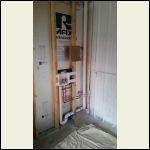
Been busy advancing the project. The rough plumbing is done. In the last picture you can see the current project - painting the metal siding which forms the rear interior wall. We are spraying it with a bonding primer first, then eventually a nice light warm gray color.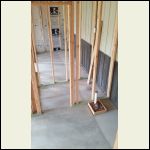
20170603_173610.jpg
| 
20170620_203319.jpg
| 
20170620_203333.jpg
|  |
|
|
creeky
Member
|
# Posted: 21 Jun 2017 09:21am
Reply
Great build. Quite hilarious to see how we've all run into the same sorts of problems. As witnessed by the number of scars on my pate.
My gf even gave me a, what are those things called?, goofy hard plastic thing I'm supposed to wear on my head. Anyway. I can never find it.
|
|
Jabberwocky
Member
|
# Posted: 21 Jun 2017 10:02am - Edited by: Jabberwocky
Reply
Thanks Creeky 
Yeah, I think they are called "hard hats" although I always thought my head was hard enough... at least until the concussion... now my wife insists I wear one of those goofy things as well 
I just realized I haven't shown the outside in its current state... almost have it weathered in:
|
|
Jabberwocky
Member
|
# Posted: 21 Jun 2017 10:10am
Reply
You can see the craigslist doors and free window - woot!
We wrapped the exterior in Grace Ice & Water because I plan to install exterior foam before the final siding layer. One problem... I didn't realize that I can't ALSO install interior insulation when going this route... the Grace creates a wrong-side vapor barrier. Fortunately it doesn't seem that it will be a problem given our climate - the 1" foam on the outside will keep the sheathing from ever reaching dewpoint and creating moisture issues.
As you can see, the overhang of the shop was so short, I can't install any foam more than 1" thick, otherwise, once the siding is on, the wall system will stick out too far. I will therefore have to supplement the exterior foam with some interior insulation to bring the R-value up sufficiently.
As for the remainder of the walls that are well underneath the roof, I will be installing 3" thick foam panels, thus keeping all of the insulation on the exterior where it belongs. I plan to leave the stud bays, wires, etc all exposed inside that particular room (my office) because I like the raw look anyway.
|
|
Jabberwocky
Member
|
# Posted: 21 Jun 2017 10:13am
Reply
You can also see from that picture that the door sills stick out past the concrete floor. Does anyone have any ideas on the best way to do something about that?
I was thinking of either pouring a good sized porch across the front, but that's a lot of do-it-yourself work and I have very little experience with concrete.
Another idea was to build a porch using old pallets (with proper footings and decking boards)... but I just don't know what to do with those door sills..
|
|
NorthRick
Member
|
# Posted: 21 Jun 2017 12:37pm
Reply
Quoting: Jabberwocky I was thinking of either pouring a good sized porch across the front, but that's a lot of do-it-yourself work and I have very little experience with concrete.
You could set up the forms, wire mesh and rebar and then have a concrete truck come in. Either hire out the finish work or watch a bunch of Youtube videos and convince some friends to help when the truck shows up.
|
|
|
creeky
Member
|
# Posted: 22 Jun 2017 08:19am
Reply
I might excavate a bit and then put a layer of cloth down. Some stone. And then a wooden deck. That way the water can flow through and away from the building.
That would raise your sills and keep em drier?
I have very soft soil. So cloth is a must before anything porous goes down or it just disappears into the gumbo.
Lookin' good.
|
|
Jabberwocky
Member
|
# Posted: 22 Jun 2017 08:45am - Edited by: Jabberwocky
Reply
Thanks for the suggestions. Right now I'm leaning toward pouring a small footing, or curb, in front of the existing slab that will come up to the bottom of the door sill, then building out from there with a wooden deck of sorts. I figured that might be a better option than pouring a whole porch because A) Our budget is quickly diminishing, and B) I already own or can get most of the necessary wood for free, and C) I could pour the footing in front of the doors without having to rent equipment.
I'm wondering how deep and how wide I need to pour that footing though to keep it from settling or shifting later on? I can easily picture it settling and dropping away from the existing slab edge if it is poured too narrow. Any thoughts?
Oh, and Creeky, just to make sure I understand your suggestion, were you saying I should build the wood deck to go under the part of the sill that's sticking out? I suppose I could do that if it would work..
|
|
NorthRick
Member
|
# Posted: 22 Jun 2017 02:40pm
Reply
Quoting: Jabberwocky I'm wondering how deep and how wide I need to pour that footing though to keep it from settling or shifting later on? I can easily picture it settling and dropping away from the existing slab edge if it is poured too narrow. Any thoughts?
Any idea how the existing slab is constructed? If so, match that and I would think you'd be fine.
|
|
Jabberwocky
Member
|
# Posted: 23 Jun 2017 09:17am - Edited by: Jabberwocky
Reply
NorthRick
Since it's a post-frame building, the 4" slab was poured after the walls were constructed. It has no footings.
Anything I pour will obviously not be connected to the existing concrete. If I pour just enough to provide a ledge for the part of the door sill sticking out (about 2-3"), I feel like such a skinny ribbon of concrete is not going to fair well in the long run. So what I'm wondering is how deep and how wide I need to make a new section of concrete underneath those door sills that won't heave or sag, or fall away like the leaning tower of Pisa. - Hopefully that makes sense.
The next thing I'm worried about is water getting into the crack between the old concrete slab and the new concrete step. Maybe I'm overthinking it?
|
|
ColdFlame
Member
|
# Posted: 23 Jun 2017 10:29am
Reply
Could you tie it into the existing slab with some epoxy and rebar (after drilling a few holes of course)? That would prevent your "tipping" issue, and there are some damn good caulks that are very flexible that could take up the gap between the two slabs to prevent water getting in.
In my mind at least, I think of it like attaching a set of stairs to a house foundation, albeit on a smaller scale. Water can still get between the stairs/house, but you want to minimize that if at all possible, or at least allow it to drain properly to prevent heaving if it were to freeze.
|
|
Jabberwocky
Member
|
# Posted: 23 Jun 2017 11:36am
Reply
ColdFlame
Good point about tying into the other slab by drilling holes and epoxy'ing in some rebar. That could work.
The only concern I have with caulking in between the joints is that the joint will run underneath the existing door sill - I won't have access. Obviously caulking the sill itself will be part of any method, but I'd hate to rely on that alone.
|
|
ColdFlame
Member
|
# Posted: 23 Jun 2017 11:55am
Reply
Valid point - I'm not sure what other choices you have? I would jam some backer rod down the crack first. Sika makes some good products which are long lasting and intended for this type of situation. I can't speak to how long, but...
http://usa.sika.com/en/solutions_products/Construction-Products-Services/residential- home/products/02a024/02a024sa008.html
Specifically the "Sikaflex Self Leveling Sealant" and the "Sikaflex Crack Sealant". There are a couple of other options on that page which may suit as well.
|
|
Jabberwocky
Member
|
# Posted: 23 Jun 2017 12:01pm
Reply
Maybe this idea is bonkers... I'm just spit-balling here so go easy on me...
What about using one or two (depending on thickness) concrete boards (like Hardiboard) cut to the exact length of the door sill, and after digging out access, fastening the board(s) directly to the side of the slab? They wouldn't rot, and being connected to the slab itself, wouldn't move independently of it. The sill itself is well protected and sealed already, so wouldn't matter if water got in-between the Hardiboards and the slab... at least not in my lifetime probably.
Huh, how 'bout it?  
|
|
ColdFlame
Member
|
# Posted: 23 Jun 2017 12:14pm
Reply
If you're thinking that route, why not attach a pressure treated ledger board that's the exact width of your door opening(s) (think attaching a deck to a house) that's lagged in with concrete anchors/lags and have a foam gasket behind the PT so it's not in contact with the concrete to prevent premature failure? I don't think the Hardiboard would provide much strength and would fail rather quickly. I'm no expert, mind you!  I'm spit-balling with you! I'm spit-balling with you!
|
|
Jabberwocky
Member
|
# Posted: 23 Jun 2017 12:45pm
Reply
True, that's a lot more straightforward. I just wasn't picturing having to remove that much dirt and build a full-on deck immediately. The porch is going to come much later in the project and so I was planning to backfill the dirt under and against the cement board. I had pictured building a floating platform rather than a deck with piers etc attached to the house.
I checked with the local lumber supply yard - They have cement board planks that are 5/8" thick, 7 1/4" wide, and 12' long. I could cut them to length of the sills... would probably have to laminate two of them together to get thick enough... but I dunno, like you said... I wonder if they would hold up to footsteps treading across the sill.
|
|
NorthRick
Member
|
# Posted: 23 Jun 2017 02:24pm
Reply
Dig out in front of the doors, lay down a gravel bed, then sand, then lay pavers. They can move up and down with any freezing/thawing and, done right, it doesn't bother them. If things get too cattywampus, pull them up, relevel the sand and lay em back down.
|
|
Jabberwocky
Member
|
# Posted: 26 Jun 2017 10:36am
Reply
NorthRick
But the pavers potentially moving up and down is what I'm concerned with, because I can see them heaving separately from the slab, thus stressing my door sills and potentially compromising my waterproofing details. That's the kicker.... I want to ensure that whatever is installed either A) doesn't move any more than the slab, and B) doesn't move in an opposite direction from the slab.
I appreciate the suggestions though... all of it is food for thought... when I started asking, I hadn't thought of the possibility of attaching material to the side of the slab that won't rot away at some point. But that's the direction I'm leaning - Buy cement planks that are typically used in siding applications, drill holes into the side of the slab, and insert Redhead concrete anchors. I use those to bolt the concrete boards to the side of the slab. That way they will only move in conjunction with the slab and won't rot like a pressure treated board will. (I would guess it's our soil content in my area, but pressure treated boards with ground contact do not last around here).
This will reinforce the door sill that is hanging off the ledge and allow me time to decide on future porch options.
|
|
Jabberwocky
Member
|
# Posted: 26 Jun 2017 10:42am - Edited by: Jabberwocky
Reply
In other news, we nearly have all of our appliances and plumbing fixtures purchased... Craigslist has been invaluable to our budget. We just purchased a barely used dishwasher for $80.
So far our doors have been the most expensive purchases.
French door $40
French door $40
Pella all wood sliding door $400
5 burner, double oven stove $Free
Dishwasher $80
Bathroom sink vanity $50
Bathroom sink $30
Shower head & controls $40
6' Whirlpool tub $90
Kitchen sink $40
Some fancy, extra special range hood my wife just had to have $225 
|
|
NorthRick
Member
|
# Posted: 26 Jun 2017 12:02pm
Reply
Quoting: Jabberwocky But that's the direction I'm leaning - Buy cement planks that are typically used in siding applications, drill holes into the side of the slab, and insert Redhead concrete anchors. I use those to bolt the concrete boards to the side of the slab.
If you are thinking of fiber cement siding, like Hardieplank, that's not a good plan. The stuff is made of wood fibers and cement and will eventually disintegrate if in contact with the ground.
Maybe a masonry veneer product (think thin bricks). Screw a strip of metal lath to the edge of the slap. Stick the bricks, or rocks, or whatever you choose on using mortar. It's a small area so even though some of those fake rocks can be expensive on a square foot basis, this job should be too bad.
|
|
Jabberwocky
Member
|
# Posted: 26 Jun 2017 01:27pm
Reply
NorthRick
Yes I was thinking of Hardieplank. Thanks for the heads up. I might go with the veneer option.
|
|
1tentman
Member
|
# Posted: 26 Jun 2017 02:09pm
Reply
Jabberwocky
I have been following your post and all the suggestions you have received will work for a short time, but you are going to have problems with frost heave later on. What ever is under the door sill needs to be below frost level,the same as the buildings poles.
Here is my suggestion, it doesn't look like you have the inside done or the siding on so remove the doors. Mark on your slab where the inside of the door sets. If the door sets on the slab more than a 1" take a concrete saw and score on that mark and break that small piece of concrete off.Dig a trench 3 ft deep and 8"to 10" wide form up outside and pour full of concrete. Level the concrete the width of the door and taper the outside off at least a 1/2". Reset the doors and seal good under the sill and the door will last forever. I could see some of the other fixes heaving on a wet cold winter and your door may not even open if the frost pushes up hard enough,or possibly cracking the glass in the door. Fix it right now or those doors that you got for 40.00 might end up costing you 400.00 to replace later. It wont be hard to do just alot of labor, as the old saying goes you got the cart ahead of the horse on the doors ,it would of been easier to do before the doors were installed but we all make mistakes, that's how we learn. Good luck!
|
|
Jabberwocky
Member
|
# Posted: 26 Jun 2017 03:52pm
Reply
1tentman
Yikes! Thanks for the advice. I'm going to think about it. What you said makes sense though... When I put on my "common sense" cap, I keep thinking that frost heave (that's the term I was looking for previously but couldn't remember) would adversely affect the sill resting on two different materials/construction methods.
But you suggest 3' deep?.... that seems a little extreme... our frost depth here is 18".
|
|
1tentman
Member
|
# Posted: 26 Jun 2017 04:41pm - Edited by: 1tentman
Reply
You could probably get by with less depth ,I always liked to error the wrong way. I think you said you were in Oklahoma is that correct. I live in Illinois and have seen frost 30" deep, so deeper is better. Go at least 24"and you will be ok. The slab will probably not move if the building is heated all the time. Take the time to fix it right ,you might get by for a winter or two with some other fix but it will get you sooner or later if you skimp on the fix now. I have a concrete pad outside of one of my sheds and have seen it heave over 1" on some winters so it will move if not below frost level, although good drainage does help. Your build looks really nice, it will be worth all the time when your done.
Pour the concrete the same depth that the poles are in the ground.
|
|
Jabberwocky
Member
|
# Posted: 3 Jul 2017 10:04am
Reply
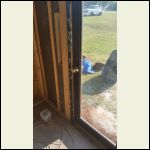
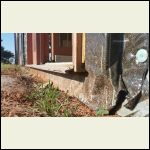
Okay, lots of photos to share after the weekend, but let me start with the door dilemma once again. After much contemplation, I've decided that the simplest and most effective fix would be to move the doors back into the building a few inches and place them on the slab the way they should have been to begin with.
Why were they not already, you ask? Well, as I previously mentioned, I work full time, and so the rough framing was done by a hired carpenter. He's good, but I don't think he understood exactly what I plan to do with the exterior foam and siding on the outside. He built out the doors to the outside, and thus inadvertently made every subsequent project surrounding them harder. I didn't say anything at the time because I thought I could work around it, and he had already dealt with several change requests.
After realizing the trouble this is going to cause, not only with my exterior finishing, but also with the slab, I've decided to move the doors back in where I want them. I'll do this tomorrow on my day off.
I've attached photos showing the current position...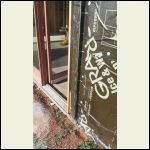
20170701_182539.jpg
| 
20170701_182528.jpg
| 
20170701_182548.jpg
|  |
|
|
Jabberwocky
Member
|
# Posted: 3 Jul 2017 10:44am
Reply
On the subject of doors, THIS is the north door, which is on the side of the barn that already has finish siding. We are not going to be moving this door inward because of that. I still have the same issue however.... any ideas on the best way to pour a step for this sill? What if I drill holes into the existing slab and epoxy in some rebar that will stick out and join the existing slab with a newly poured step? Dig down 18-24" for the new step... Overkill? Underkill?
|
|
Jabberwocky
Member
|
# Posted: 3 Jul 2017 10:48am
Reply
Here's an overview of the project looking from the northwest corner. Riley is trying to look dignified for the photo lol
|
|
Jabberwocky
Member
|
# Posted: 3 Jul 2017 10:51am
Reply
We have completed painting the back wall, which will remain as the existing sheet metal from the shop building. (Those are shadows and reflections on the wall, not missing paint  ) )
|
|
| << . 1 . 2 . 3 . 4 . >> |

