| << . 1 . 2 . 3 . 4 . >> |
| Author |
Message |
Jabberwocky
Member
|
# Posted: 3 Jul 2017 10:53am - Edited by: Jabberwocky
Reply
Here's a Sketchup rendering of how that space will look in the future. You will notice a furr down in the rendering that accommodates the exhaust vent for the range hood. I built that over the weekend but don't have photos. We have designed everything so that no extra holes go through the roof whatsoever.
|
|
Jabberwocky
Member
|
# Posted: 3 Jul 2017 11:01am
Reply
Another miscellaneous project I took care of over the weekend: Securing the gas pipe that feeds the stove. The plumbers did fine, however I didn't like how wobbly the end of the pipe was going to be. Since it was already ran, I had to rip a 2x4 block in half and splice the two pieces together around the pipe. I secured them with Liquid Nails. I didn't have a large enough diameter drill bit for the pipe itself, so I had to wallow out the hole with a sawzall... got a little too big, hence the wedging scrap wood pieces in there and caulking around it with Liquid Nails... The important thing is, it's solid now!
|
|
Jabberwocky
Member
|
# Posted: 3 Jul 2017 11:13am
Reply
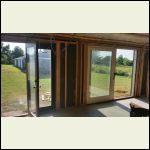
Also 95% completed is the interior insulation across the west and north walls. We had a lot of rigid poly-iso left over from our ceiling insulation project, so we are using it in the walls. My buddy the electrician didn't have a problem with us putting in the insulation before the wiring goes in since it will be much easier to do now than after. We oversized the cut-outs for installing the outlet and switch boxes, then will spray foam around them.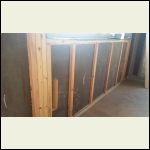
20170701_182342.jpg
| 
20170701_182327.jpg
|  |  |
|
|
Jabberwocky
Member
|
# Posted: 3 Jul 2017 11:18am
Reply
In this picture you can see the wall system for the north wall, which was already covered in siding. We have 1" poly-iso ran continuous with taped seams. Then the 2x4 walls behind that with 2.5" poly-iso cut-and-cobbled in-between. Should be pretty airtight and efficient.
(You probably notice the carpentry mistake with the door opening... it got framed way too big and had to be re-sized... lol.. no harm done)
|
|
Jabberwocky
Member
|
# Posted: 3 Jul 2017 11:39am
Reply
Here you can see the junction under the roof overhang on the south end. It's quite a hodge-podge of converging materials. You can see the radiant barrier hanging out over the rafter edge. There's 5.5" of rigid foam in-between the rafters, and Intello Plus smart vapor retarder underneath. The ceiling straps extend past the outer wall out of necessity. I have trimmed them off as flush as possible with a sawzall, and the plan is to continue the Grace up the side and over them. There will be rigid foam, strapping, and siding on the exterior, so it'll all work out in the end. Some of the challenges of a retrofit!
|
|
Jabberwocky
Member
|
# Posted: 3 Jul 2017 11:43am - Edited by: Jabberwocky
Reply
One of my upcoming projects is to build a frame around the tub. You can see we didn't paint the wall behind it because it'll be covered by cement board and tile anyway.
|
|
Jabberwocky
Member
|
# Posted: 3 Jul 2017 12:02pm
Reply
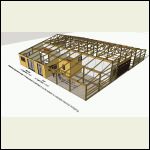
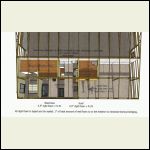
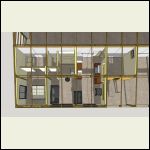
Been talking with an HVAC contractor I was already acquainted with before the project started. Here's the Sketchup pictures I sent him to give him an idea of how to size the system.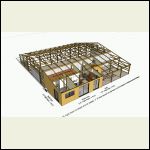
The_Outlaw_1.png
| 
The_Outlaw_2.png
| 
The_Outlaw_3.png
| 
The_Outlaw_4.png
|
|
|
Jabberwocky
Member
|
# Posted: 3 Jul 2017 12:16pm
Reply
Last but not least, another sunset picture... This was the backside of another storm to the south of us. Picture was taken looking out the north door in our future bedroom.
|
|
|
Jabberwocky
Member
|
# Posted: 6 Jul 2017 10:48am - Edited by: Jabberwocky
Reply
Had the 4th off work so spent all day on the Outlaw.
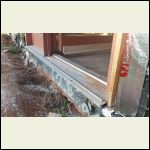
Moved the two west-facing doors inward so the sills are not hanging so far off the concrete. I still allowed a little bit of a drip edge though. Tore up the Grace a little bit in the process - hence the window flashing around the door. The sliding door shuts way better now that the sill is more firmly planted - I hadn't realize that was causing a problem until we moved it inward!
Am I correct in assuming the front of the sill should not be caulked to allow for drainage?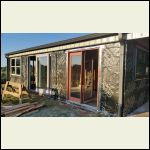
20170704_194251.jpg
| 
20170704_194307.jpg
|  |  |
|
|
Jabberwocky
Member
|
# Posted: 16 Aug 2017 10:04am - Edited by: Jabberwocky
Reply
Updates...
After successfully moving the west-facing doors, we discovered that the vinyl window we received for free (visible in the previous entry's picture) was not sealing well. I've never been a big fan of vinyl to begin with, and since it's pretty much now or never, we decided to remove it and purchase a new aluminum window instead.
While I was at it, I decided to make a back-dam using some scrap OSB.
|
|
Jabberwocky
Member
|
# Posted: 16 Aug 2017 10:05am
Reply
By the way, "Protecto Wrap" should be renamed "Protecto Crap." That is all.
|
|
Jabberwocky
Member
|
# Posted: 16 Aug 2017 10:20am
Reply
Another thing I was able to check off the to-do list is fix the poor details at the top of the west wall. There was a gap between the top of the new wall top plate and the header of the original pole building that was only being covered by the Grace wrap.
I cut some 2x4s to the proper dimensions (to work out correctly with the final siding) to close up the gap more solidly.
|
|
NorthRick
Member
|
# Posted: 16 Aug 2017 01:21pm
Reply
Quoting: Jabberwocky By the way, "Protecto Wrap" should be renamed "Protecto Crap." That is all.
Care to elaborate? Is that the silver stuff around the windows and doors in your photos?
|
|
Jabberwocky
Member
|
# Posted: 16 Aug 2017 05:04pm
Reply
NorthRick
Very poor adhesion after a day. It fools you into thinking it's great, then a day later you are smashing it back down again and cursing it's existence. I was told at the hardware store that it is as good as Huber Zip tape but half the price. They were wrong.
I ended up using it to flash the window under the nailing flanges, as you can see, but there was no way I was going to trust it over the top of the nailing flanges. The aluminum tape you see around the doors in that last photo is different stuff - I can't remember the name for the life of me - but it's waaay better, and less money to boot.
|
|
Jabberwocky
Member
|
# Posted: 16 Aug 2017 05:09pm
Reply
Here's another niggle partially out of the way.... I had to build some angled boxes for the kitchen light fixtures, as the ceiling is a 3/12 pitch and the lights we chose have rigid downrods. The first box took forever (because I'm not a carpenter), but the second one was done in less than half the time.
In the lower right corner of the picture you can see the furr-down I built for the range hood, which I don't think I've shown before.
|
|
Jabberwocky
Member
|
# Posted: 16 Aug 2017 05:17pm
Reply
Electrical is almost roughed in. A friend of mine is doing a bang-up job (and getting paid to do so  ). Decided to go armored cable throughout to match the existing wiring in the building. ). Decided to go armored cable throughout to match the existing wiring in the building.
We are using what's left of our rigid foam to insulate in-between the studs on the exterior walls. We put the foam in first, and wired in front of it, as you can see. Not sure if this would get by code, but it IS recessed at least an inch.
The rest of the interior walls will get fiberglass batts once we run out of rigid foam.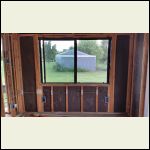
20170813_192304.jpg
| 
20170813_192401.jpg
|  |  |
|
|
Jabberwocky
Member
|
# Posted: 16 Aug 2017 05:24pm
Reply
Left the project on Sunday for a few hours and came back in the afternoon to find that this little sparrow had managed to sneak in while we weren't looking. She was panicked and exhausted from seeking a way out, and she ran into the glass door so hard I was surprised she was still alive.
I was able to pick her up and hold her for several minutes while she calmed down and caught her breath. This project has been surprisingly rough on the neighborhood birds!
|
|
Jabberwocky
Member
|
# Posted: 16 Aug 2017 05:29pm
Reply
New toy!
New/old toy that is.
Check out my new miter box! LOL
This is what I will be using when it comes time to do finish trim. This was used back when men were men 
|
|
Jabberwocky
Member
|
# Posted: 6 Sep 2017 03:56pm
Reply
Septic is done!
This was a challenge for the installer. The system had to be placed on the opposite side of the building from the apartment due to topography, existing structures, and property lines.
The drain line exits the north side of the building, turns east, and travels to the northeast corner where the septic tank is buried. A line runs from the tank back toward the south which is actually downhill due to the mound the building sits on. From there the lateral lines start and trail out to the northeast following the slope.
The guys did a good job and for a reasonable amount.
|
|
Jabberwocky
Member
|
# Posted: 6 Sep 2017 04:08pm
Reply
My next biggest project was to get the exterior insulation and siding on. The Grace wrap has been exposed since May and I was starting to get nervous about it.
Since I am installing exterior rigid foam and limited by the overhang of the pole barn, I had to do a lot of pondering over the design details.
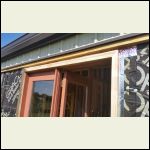
The first thing I did is build some custom window bucks using some cheap 1x4s cut to size. We painted them our final trim color before installing for efficiency's sake; that and longevity's sake.
I attached them using corner brackets spaced appropriately to ensure they are solid.
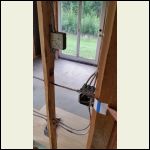
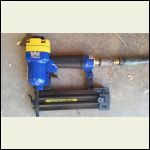
The second picture shows the best $25 investment I've made. I wasn't expecting much for the price, but this little 2" brad nailer does the trick with no fuss. I mean, a carpenter would need something better, but for a weekend warrior like myself, this can't be beat. It worked great on building the window frames.
The same concept applied to the doors, however the Front door opening was large enough that I needed some brick molding first, then the 1-by set on end. The last picture shows this.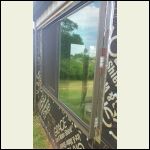
20170902_131024.jpg
| 
20170819_171232.jpg
| 
20170819_171112.jpg
|  |
|
|
Jabberwocky
Member
|
# Posted: 6 Sep 2017 04:15pm - Edited by: Jabberwocky
Reply
I won't be caulking in-between the aluminum window frame and the custom wooden buck. Keep in mind that the waterproofed drainage plane is the Grace. The windows are appropriately flashed, so it doesn't matter if water gets in-between. That's why pre-painting made sense. A lot less sloppy than if we were trying to caulk and then paint!
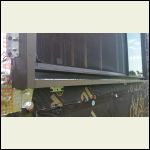
I intentionally oversized the window buck at the bottom. The idea is to install a nice window sill that sticks out past the finish trim after it's all said and done. I've already made the sills, but they will be installed at the very last - sliding into that gap.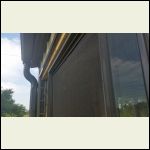
20170902_131034.jpg
| 
20170902_131045.jpg
|  |  |
|
|
Jabberwocky
Member
|
# Posted: 6 Sep 2017 04:22pm
Reply
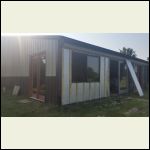
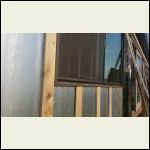
This weekend I was finally able to start installing the exterior foam and furring strips. Good grief the 1x4 pine lumber was terrible, but it was cheap and didn't need to win any beauty contests ;)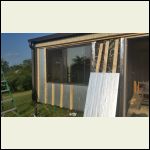
20170902_182109.jpg
| 
20170903_094730.jpg
| 
20170902_182135.jpg
|  |
|
|
Jabberwocky
Member
|
# Posted: 6 Sep 2017 04:28pm
Reply
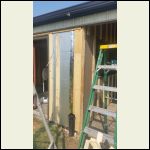
When I got to the other corner I had a minor design dilemma to figure out. You see, I was limited to 1" foam board on the west (front) elevation, but on the south side I wanted to use the thicker 3" foam we had left over from insulating the ceiling. On the south wall, ALL of the insulation is on the outside, building a true PERSIST wall.
You can see in picture #1 how the corners come together. I had to rob a couple of 1x8s from the scrap pile to use as furring strips; anything else wasn't wide enough to reach the wall corner where I could fasten them to.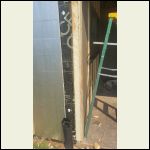
20170904_155638.jpg
| 
20170904_162725.jpg
|  |  |
|
|
Jabberwocky
Member
|
# Posted: 6 Sep 2017 04:34pm
Reply
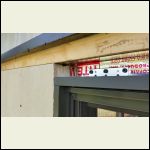
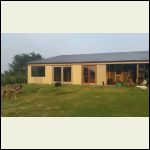
Once the foam was up on the majority of the exposed walls, I came back and installed the siding. The second picture shows how the details all come together.
The siding comes out flush with the window bucks and the top weatherproofing board. I will eventually install some nice 1x4 finish trim around all the windows and doors and across the top.
That's what I got done over the weekend... hopefully more progress to come soon!  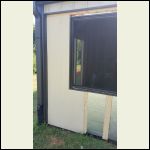
20170903_110851.jpg
| 
20170903_110905.jpg
| 
20170905_183947.jpg
|  |
|
|
ColdFlame
Member
|
# Posted: 6 Sep 2017 06:18pm
Reply
Looks awesome - great work!
|
|
Jabberwocky
Member
|
# Posted: 7 Sep 2017 09:58am
Reply
^^^ Thank you  . It has been a long time in the making but I've been enjoying the experience. . It has been a long time in the making but I've been enjoying the experience.
|
|
Jabberwocky
Member
|
# Posted: 5 Oct 2017 08:36am
Reply
Pressing on...
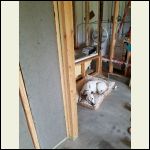
We are insulating some of the interior walls using our leftover rigid foam board. Riley was feeling clingy and wouldn't stay out from under our feet, and if there's something on the ground, he assumes it is there to be laid on LOL .... problem solved - we brought his bed down from the house so he could stay off to the side.
25727734220157.jpeg
| 
Riley.jpg
|  |  |
|
|
Jabberwocky
Member
|
# Posted: 5 Oct 2017 08:45am
Reply
We originally intended to go with shiplap board and install it ourselves, but we got bids for drywall just to make sure we weren't shooting ourselves in the foot. As it turns out, the cost of a complete drywall installation was the same as buying shiplap and doing it ourselves, so we opted for the method that didn't require us to spend weeks of additional labor.
The drywall guys were scheduled, so we had to work really hard the last couple of weekends trying to get everything ready for them.
Here Mrs. Jabberwocky is admiring the test fit of her new kitchen lighting. It was tough trying to get them positioned in such a way to make the base of the lights level with each other. Required buying short adapters from the UK to get the lengths of the downrods juuust right. Edison bulbs will complete the look.
|
|
Jabberwocky
Member
|
# Posted: 5 Oct 2017 09:00am
Reply
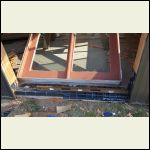
Another project that needed doing was to move the bedroom French door in a couple inches. As with every door we've used on this project, I'm still not sure why the carpenter put them where he did. The sill, as I have shown in other pics, was hanging off of the concrete slab about three inches. This was affecting the squareness of the door, and when it rains, the door is nearly impossible to open. Something had to be done before the drywall goes up.
Another challenge is that the concrete slopes toward the exterior (it was originally designed to be a stall for parking a car in, not an apartment). This made it really tough to get the door level. I ended up laying down some stepped levels of Grace and even added a row of shims to finally get it right.
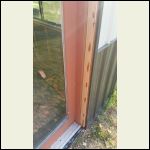
Moving the door in of course created a gap between the jamb and the exterior siding. I filled it with some cedar appearance trim.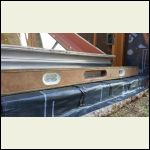
20170909_170439.jpg
| 
20170909_170427.jpg
| 
20170910_181940.jpg
|  |
|
|
Steve_S
Member
|
# Posted: 5 Oct 2017 09:04am
Reply
@Jabber, good going and BTW: I just bought some Edison Styled LED Bulbs from Ikea (not expensive) and Very Nice ! Some versions can even be dimmed with a little remote... Seen others on the market which also allow for colour change too.
|
|
| << . 1 . 2 . 3 . 4 . >> |

