| . 1 . 2 . >> |
| Author |
Message |
SteveF
Member
|
# Posted: 17 May 2014 07:30
Reply
In August of 2013 I started planning for the cabin and went out and did some googling for reasonable builders. I found a few local to Ottawa but then I happened upon leisurecabins.com . Arie Daadler is the dutch builder and together we discussed modifications to his standard models and by late September we came up with a custom design for a 16x26 cabin with a 16x12 deck. The cabin itself would have 2 bedrooms on the main floor of which one I would actually re-purpose as my bathroom and then also a main room of 16x16 for a kitchen and living area. Above I decided to also put a 16x16 loft for more sleeping and living space.
After lots of reading an researching I learned some truths but in the end the call to the township office was all I should have done from the start. There I was provided with the name of Peter McIntosh who is the local septic engineer. In Quebec they are adamant about the environment so before you can turn a shovel you must get a septic engineering plan which outlines how you will dispense of your grey water and waste. Peter's son has taken over from his father so in late September I walked my property with his son Greg as we discussed where the building would go and potentially where the septic would be place. 10 days later Greg emailed me my engineering report and also faxed it to local contractors on my behalf to get quotes for a full septic system. Now I was a bit worried about the cost but the quote I ended up going with was just above $7k and that gave me an 850gal septic tank and a 20x24 septic field. Not bad when in the rural city it can be as much as $30k.
Now that I had my septic report I contacted the township and provided them the engineering plans and my building plan which I developed using openoffice. After a bit of back and forth on types of building material I had both my building permit and septic permit. Now I had the green light to do some clearing of trees for the building.
I started clearing the lot for my cabin in Sept/Oct 2013. Working with a local cement contractor in Thorne township we also worked out a deal where he would take care of removing my large trees and also removing brush and the large trunks. He also took care of installing 18 big foot cement piers for me and backfilling the site with a dump load of sand. Given that this was completed by mid-November and we still had access to the site Arie was able to get in and lay the PT foundation frame so we could get an early start to building in the spring. That was what we thought anyway.
Fast forward to the late spring and here I am now in mid-May and we started the build only two weeks ago. Mind you we are quite a ways along but I kept myself busy during the winter with lining up the electrician (Hodgins Electric) and Septic Contractor (Blue Heron). I also researched how to build my own custom kitchen cabinets which I have successfully completed thanks to the DIY site anawhite.com.
|
|
SteveF
Member
|
# Posted: 17 May 2014 07:47
Reply
Here are some pictures from the fall of 2013 and spring of 2014.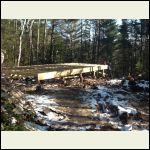
PT Foundation Frame
| 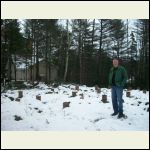
The cement piers
| 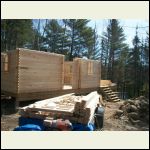
Day 2 of build
| 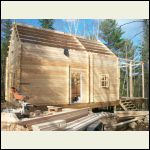
Day 4 of build
|
|
|
SteveF
Member
|
# Posted: 17 May 2014 08:05 - Edited by: SteveF
Reply
On the subject of plumbing I did research this topic to death.  I was originally looking at using a submersible because I am 100 feet from the water and my elevation is at about 40' from the lake. After talking with the guys at The Pump House in Ottawa I was able to see that a deep well jet pump could be used for 1/3 of the price. Now a submersible would have been the Cadillac but with all the safe guards to avoid the pump shorting out in the lake I decided that a deep well jet pump with the jet kit would do the trick. Because the deep well jet pump relies on two pipes to #1 create the suction for the jet kit and #2 to suck the water from the lake and back up the hill I went looking for the best price as I needed about 130' of 1" red line CSA and 130' of 1.25" red line CSA water line. After two weeks of price comparing I went with HomeDepot as they had the best price. For the pump I paid a bit more than I probably needed to but the guys at the PumpHouse set me up with a .5 HP jet pump, jet kit, pressure tank, fittings, check/foot valve, and tubing between the pump and pressure tank for just over $1K. I was originally looking at using a submersible because I am 100 feet from the water and my elevation is at about 40' from the lake. After talking with the guys at The Pump House in Ottawa I was able to see that a deep well jet pump could be used for 1/3 of the price. Now a submersible would have been the Cadillac but with all the safe guards to avoid the pump shorting out in the lake I decided that a deep well jet pump with the jet kit would do the trick. Because the deep well jet pump relies on two pipes to #1 create the suction for the jet kit and #2 to suck the water from the lake and back up the hill I went looking for the best price as I needed about 130' of 1" red line CSA and 130' of 1.25" red line CSA water line. After two weeks of price comparing I went with HomeDepot as they had the best price. For the pump I paid a bit more than I probably needed to but the guys at the PumpHouse set me up with a .5 HP jet pump, jet kit, pressure tank, fittings, check/foot valve, and tubing between the pump and pressure tank for just over $1K.
I have decided to use PEX for the plumbing. I thought of using copper but then talking with the locals theft of the copper piping is a real concern these days and also frozen pipes have little forgiveness when it comes to copper.
For the pump house that will contain my water pump I looked across the net for designs. Then it dawned on me that I had build a rough base cabinet to see how easy it would be to build my kitchen cabinets. I had used builder 3/4 plywood and it was a perfect box and it would fit pump and pressure tank. I bought myself some Thomson Water Seal, hinges, a good lock, and a drain for the floor and there you have it. All for under $60.
For the purification system I have not yet decided on what to get. The water will simply be for dishes and showers. I brought a water sample into Boone Plumbing in Ottawa (they will supply the water bottle) and they did a water test for $10. I have yet to talk to them about a system but based on the result they can match me to the system I need. I know for sure I will need two filters for sediment and micron filtration but I am not sold on the UV. Seems like a bit of overkill considering I don't plan on drinking the water and I can safely swim in the lake without getting sick. I want to make sure though before I consider any system that the replacement filters are easy to find and don't cost a mint.
|
|
razmichael
Member
|
# Posted: 17 May 2014 08:11
Reply
Great start Steve! Where in Quebec? It was fun reading your progress due to many similarities. We too looked at Leisurecabins and went to the manufacturing site. They do some really nice work but in the end I built myself. We needed the septic inspection despite not planning to put one in (using outhouse and greywater pit which we already built). I would think you are doing well at the cost for yours! As you mentioned, environmentally things are very strict - especially dealing with waterfront.
Finding good local guys to help out was great for us as well. This is how I got my driveway cleared and built up and the foundation put in.
Finally - I'm just finishing up my kitchen cabinets based on Ana Whites plans.
Despite some delays with the land survey and registration, in our location in Quebec (near Maniwaki), the actually process for permits etc was easy. The building permit was $50 and took 20 minutes to get when everything was lined up.
Enjoy the build process (can be frustrating at times but very rewarding as well).
|
|
SteveF
Member
|
# Posted: 17 May 2014 08:19
Reply
Thanks Michael. The property is near Shawville... leaving shortly to go do some more work. Enjoy your long weekend!
|
|
razmichael
Member
|
# Posted: 17 May 2014 08:21
Reply
You too.
|
|
SteveF
Member
|
# Posted: 25 May 2014 22:37 - Edited by: SteveF
Reply
Some updates from the build this past week.
Some updates on the plumbing ... I spoke to Boone and they reported back that the water is low iron, soft, and well water like. They did provide more specifics than that but essentially since I am not drinking it they recommended the "Big Blue" and a 5 micron filter. They first quoted me a reasonable price but I wanted to do some price comparing so looked at the big box stores and then decided that Boone is by far the best price. All in I got the Big Blue, Filter, and brass fittings to connect to my PEX for just a few dollars over $120. The UV would have been overkill for me... I have since been looking on Kijiji for water coolers which are abundant and available for under $75 compared to $3-400 for a UV system.
Plumber started this past weekend and was able to get most of the ABS installed and grey/sewage pipe positioned for the guys from Blue Heron that are installing Septic this week. There is not much plumbing to do except for install of jet pump and prime, two outside faucets, kitchen sink, bathroom sink, toilet, and a full tub shower. I opted for the tub as I thought that when my kids have theirs someday they will need a spot to wash the babes. Plus when I renovated my bathroom myself at home a few years ago a tub I concluded is much less likely to leak/crack than a shower base.
|
|
razmichael
Member
|
# Posted: 26 May 2014 06:55
Reply
Looks really nice! Are you planning to screen in the porch? We use our porch (not as large as your porch) as a main living space but only because it is screened in - especially this time of year. I had temporary stuff up last year but just finished doing a better and neater job for this season.
|
|
|
Wilbour
Member
|
# Posted: 26 May 2014 09:40
Reply
leisurecabins.com built a 10 x 10 two doors down from my place on Wolfe island. Infact the gallery shows his cabin beeing built. It looks like a perfect blend of price and quality.
|
|
SteveF
Member
|
# Posted: 26 May 2014 18:15
Reply
I built the deck large as that is exactly my plan... to screen it in next year. My friend who has a cottage on the same lake seems to think I will do it this summer but I have other work cut out for me!  The bugs last weekend were pretty nasty but I have no problem with showering in Deep Woods. ;) The bugs last weekend were pretty nasty but I have no problem with showering in Deep Woods. ;)
|
|
SteveF
Member
|
# Posted: 26 May 2014 18:20
Reply
It is a perfect blend - Arie does nice work and my experience with him since last year is it is all about pleasing the customer.
|
|
SteveF
Member
|
# Posted: 27 Jun 2014 09:34 - Edited by: SteveF
Reply
Ok I have made a lot of progress in the last month on the cabin as I wait for the plumbing to complete so that I can power wash the building and start the staining process.
The floors have all been sanded with the help of the kids. I put three coats of Sure Shine that I purchased from Canadian log home supply.
My kitchen cabinets have been installed and now I am at the point of the fine detail work. I got the IKEA butcher block counter top installed 2 weeks ago and it looks great. I have done some research on finishing the top and mineral oil seems to be the easiest way to go so that will be this weekend. Picked up two bottles for $6 at Loblaws and according to what I have read I will simply put it on at night with a rag and wipe the excess up in the morning. I'll do this for a few nights and apparently keep doing a day or two each month afterwards to keep it from drying and cracking. Because I custom made my cabinets it has not been so easy to find cabinet doors so I made the decision to use the Purebond birch plywood. I'll be using the miniwax pickling stain to give it a white washed look but also bring out the grain. For the drawers that I put in this past weekend too I used Metabox with half inch russian birch for the bottom and backs. The instructions were for in mm and I would like to say it was easy but I found it quite time consuming to do. Worth it in the end though as they will last forever.
For the loft and bedroom I built some Hailey bed frames that I found off of the anawhite.com site. For the double it cost all of $58 and honestly it blends well with the pine.
The electrical work is pretty much done and Hodgins did an amazing job. They did not just install the wires but they took the time to finish it so all the wires are hidden behind 2x1 inch pine which has been channelled out to hide the wire. They also used true 2x10 barn board which they had planed to secure the ceiling fan and hide the box and then for pot lights they also put in pine between the ceiling joists and installed my pot lights. There are NO wires to be seen throughout and the plugs and switches are all based on older style which really gives the place a great look!
The plumber has pretty much finished up too with the exception of the tub and surround. Last weekend I finished my bathroom vanity which again plans came from anawhite.com. I used standard $8 drawer sliders and IKEA hinges for the doors. I was at HD this week and picked up the door and drawer knobs.
After this weekend the dreaded staining begins. It is not a job I am looking forward too and figure it will take me at least a few weekends. I am getting there though!
|
|
Wilbour
Member
|
# Posted: 27 Jun 2014 10:08
Reply
Quoting: SteveF I built some Hailey bed frames that I found off of the anawhite.com site.
Thanks for the tip. I never saw this site before. Great DIY cabin furniture plans.
|
|
SteveF
Member
|
# Posted: 15 Jul 2014 17:21
Reply
I can now report that the plumbing is complete and this weekend I had a fully operational bathroom with hot water! I have now exited most of the work inside the cottage and am now taking on the staining which is a bigger job than I had thought. Twenty-fours hours in total labour so far and I have only finished the front and the overhang over the deck. I had been told by the suppliers of the stain that a 5 gal pail would cover the sq/footage for the exterior but I am already down to half a pail and have not even started the other three sides. I will definitely need another pail.
Inside the building this past weekend I put the vapour barrier up in the bathroom ceiling as I will be covering it with T&G pine. After doing some research I discovered that pine on the ceiling MUST be finished on both sides. Obvious to some I guess but news to me so... I started looking around at finishes that I could use and good deals for pine. And then I happened upon this stuff called EasyPine which is pre-finished and comes in the 8' lengths that I need. I did what I have been doing and sent off an email and got a price quote back for 80 sq/ft delivered at $4.50. Best deal I found around so I will have the pine delivered and by the end of the month I will install it myself.
Anyway I am back up there this weekend to tackle the side of the building. Here are a few pictures of my progress.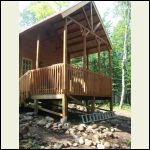
Cabin front
| 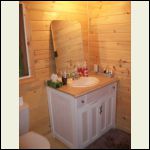
My bathroom vanity
| 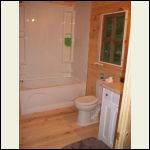
Bathroom
|  |
|
|
Wilbour
Member
|
# Posted: 15 Jul 2014 18:53
Reply
What do you use for T n G pine? Anything I have seen is 4" or less. I was at Lowes and they sold bundles of 4" x 8' x 5 boards for $6 It said it would cover 10 sqft.
|
|
Shadyacres
Member
|
# Posted: 15 Jul 2014 21:11
Reply
Your place is looking mighty fine. Keep the pics coming !
|
|
SteveF
Member
|
# Posted: 16 Jul 2014 07:05
Reply
Here is the company I used where I got the $4.50/sq ft. Some could say a bit expensive but when you factor in the your time to sand and finish I think it is worth it.
http://www.easy-pine-paneling.com/
The boards are 5" width by 5/8" thickness - take a look at the website too as the boards come in two patterns and different stains. I chose the clear although I was tempted to go with the pickled.
|
|
razmichael
Member
|
# Posted: 16 Jul 2014 07:42
Reply
Hi Steve - Looking really great! I've got most of my kitchen cabinets finished based on Ana White's plans. That is expensive T&G pine you are using but it all depends on how much you consider your time worth (and it is for a relatively small area). If you need more or are looking for alternatives sources in the future I got all my pine (both the outside siding and the inside T&G) from a mill/manufacturer "Les Bois Héritage near Kazabazua - which is not too far from your area. I used 1x6 Grade A (so very little waste). Lengths varied but many were 16' long so that I required no end to end joins (going horizontal). Although I will admit that getting one 16' piece in place high up on a wall by yourself is not for the weak of heart! Price for this Grade A was just over $1 sq ft. It's about half that for Grade B.
|
|
SteveF
Member
|
# Posted: 16 Jul 2014 08:13
Reply
I know I paid probably a bit more than I should have - in my case I was looking for pre-finished but I appreciate you sending me the link. I took a quick look at the site and I can see myself making use of them in the future. Thanks for sharing!
|
|
woodswoman
Member
|
# Posted: 18 Jul 2014 08:03
Reply
Wow, what a spectacular cabin! We are in New Brunswick and have decided to abandon the old, falling down cabin on our land and build something brand new. This post is inspirational! Although ours will be much more modest, I love the idea of having extra sleeping space.
|
|
SteveF
Member
|
# Posted: 22 Jul 2014 07:51
Reply
Thanks for the compliment! It has been a great experience and a bit of work. 
So new progress to date...
I decided to install fiberglass drywall (Dense Armor) above the shower/bath as opposed to bringing the pine ceiling all the way over. Even though the pine board will be finished I can foresee issues down the road. I put it up on the weekend, taped and mudded it and then two coats of kitchen & bath paint. I am headed back in a few days and will run a bead of silicone around the perimeter and once I have my pine I will complete the ceiling flush to the drywall. My daughter will be happy as now she can have her shower!
I was able to finish staining the front peak which was a bit unnerving! A friend of mine lent me his safety harness so I did strap myself in the event of a fall but then I also had my partner holding the ladder for me below which she did well!  Next I moved to finish staining another outside wall this past Saturday but then Sunday we got rain. To compensate I slid around under the cabin with my caulking gun and sealed the holes were the electrical and plumbing enter the sub-floor. Since I have an over abundance of boulders and small rocks I also piled some more up around the perimeter of the building in line with where the water drips off the roof edge to avoid erosion. My pile of rocks never seems to end! Next I moved to finish staining another outside wall this past Saturday but then Sunday we got rain. To compensate I slid around under the cabin with my caulking gun and sealed the holes were the electrical and plumbing enter the sub-floor. Since I have an over abundance of boulders and small rocks I also piled some more up around the perimeter of the building in line with where the water drips off the roof edge to avoid erosion. My pile of rocks never seems to end!
I will take some more pictures this coming weekend and post.
|
|
dpoisson
Member
|
# Posted: 7 Aug 2014 12:40
Reply
Hi SteveF,
I was wondering if you ever go to your cabin in the winter months? I guessing it isn't insulated in anyway, right?
Cheers,
David
|
|
CaptCanuck
Member
|
# Posted: 7 Aug 2014 16:55
Reply
Looks great Steve. I'm in the Ottawa area too.
Do you think Arie would be interested in building one of his cabins on a water access only property? I'd be looking for something 12x8 or so (to stay under the "no permit" rules, and materials would all have to come in by boat.
|
|
SteveF
Member
|
# Posted: 9 Aug 2014 07:42
Reply
Best advice would be to give him a call and ask - 613-930-1963. He transports all material within 200km of Ottawa which is included in your price.
|
|
SteveF
Member
|
# Posted: 9 Aug 2014 08:45 - Edited by: SteveF
Reply
I are nearing the end of the finishing with the last coat of stain going on yesterday and now only my clear topcoat left for the ceiling rafters over the deck and one outside side wall. I have some minor interior finishing work to complete with my kitchen cabinets but I am 85% done and it feels good. I had my sister and her kids up this past week and a friend and his kids up the previous weekend. My partner bought herself a kayak so I got to be a little creative and built a storage rack for that which took me away from the brushes and caulking for awhile. I actually did spend a few days doing almost nothing although when I am there I am awake and out by 5:30-6am and doing something for a few hours before others stir.
I am posting a few pictures today of the finished bathroom with the pre-finished T&G pine. I borrowed a friends air nailer to install and it was so easy. I used by mitre saw for the length cuts and my jig saw for cuts around the shower ceiling and exhaust vent. I am very happy with the end result. Under the finished ceiling is a 6mil vapour barrier that I applied. I tried using vapour caulking around the perimeter but it was a mess to work with so resorted to red tuck tape and my staple gun.
I spent hours surfing the net looking at ideas for a pump house and how to configure the pump, pressure tank, and 5 micron water filter and have posted a picture that hopefully will help others. As I said in a previous post I used the 36" Base cabinet plan from the ana-white.com site with 3/4 inch ply and some Thompson water seal all in at about $40.... equipment extra of course.
For the stain I purchased this from Canadian Log Home Supply in Eganville and went with an almond tint (in Ottawa there is a distributor so if you want the name let me know). I decided to pre-treat the wood with their Shell Guard product which when diluted with water was like liquid honey. I tried to spray on which was recommended but it just clogged up the sprayer. If I did it again I would skip this as it was a pain to apply and it set me back 10 days as I had to wait for what was applied to dry. For the stain I used the Ultra-7 and Lifeline Advance clear coat and a good $9 stain brush from HD. I did try using cheaper brushes but it made a huge difference in both time and appearance paying a little but more for a quality brush. Prior to applying the stain coat I caulked the seams at all the log ends with DAP Window/Door caulking - Arie did supply me with three boxes but I had to buy three more. A day before staining I pressure washed the wall using the soap nozzle to apply their Log Wash product. To rinse I just used the hose with a spray nozzle on the end and not the pressure washer to avoid interior leaks. I did use the pressure washer once for the front and the water was even being pushed in through the knots in the wood and we had to lay out towels to catch all the leaks. I would recommend a rinse using a simple spray from the hose.
For the bathroom walls to protect and seal against water stains from the shower steam and potential mold issues I applied three coats of their Acrylic Satin clear coat diluted with their stay clean product which was recommended by CLHS. Prior to applying I diluted log wash in a bucket of water and using towels soaked in the liquid I washed and rinsed the walls. I have to admit that it made a huge difference in taking the sheen off the wood and cleaning them. The same principle really as using TSP prior to painting.
As I near the 100% mark I will of course post more pictures and information. If you have questions or comments feel free to ask or leave your email address and I would be happy to help out and share what I can. I can also share costs for the project with you but don't really feel comfortable posting on the site.
Steve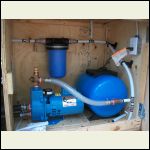
Simple pump house
| 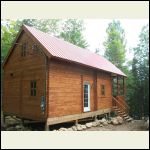
Stained cabin
| 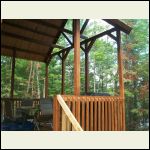
Deck overhang
| 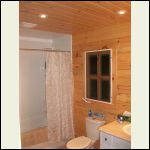
Finished bathroom with T&G ceiling
|
|
|
frank
Member
|
# Posted: 28 Nov 2014 03:11
Reply
hy, from Québec too, did you get some problem when asking the construction permit for a 16' wide construction? here at Gore they ask for a minimun of 20'..
|
|
neb
Member
|
# Posted: 28 Nov 2014 19:52
Reply
Looks good!
|
|
SteveF
Member
|
# Posted: 21 Dec 2014 18:02
Reply
Some pics as we wend out 2014
|
|
SteveF
Member
|
# Posted: 21 Dec 2014 18:04
Reply
Pics
|
|
Jigger
Member
|
# Posted: 5 Aug 2015 18:41
Reply
Great build.
|
|
| . 1 . 2 . >> |

