| << . 1 . 2 . 3 . 4 . >> |
| Author |
Message |
gcrank1
Member
|
# Posted: 24 Feb 2021 12:59pm
Reply
Might be an option for me short of putting in a whole house septic for a 2 person 'weekender' cabin. Even if I did it sans permit it would be sanitary and show my good intensions should I ever get questioned about how we handle 'it'.
Thanx for the tip!
|
|
Grizzlyman
Member
|
# Posted: 25 Feb 2021 02:32pm
Reply
Yep. It’s just a “weekender†for us.
|
|
Grizzlyman
Member
|
# Posted: 16 Apr 2021 05:13am - Edited by: Grizzlyman
Reply
We finally have ice out here in Minnesota. I’m heading up to the cabin this morning for my first go round of weekend construction this year. It’s still 20s at night here so this first weekend I’m going to stay at a lodge nearby every night instead of tenting below freezing. I have 3 primary goals this weekend.
1. Install boat ramp
2. Build shed
3. Move materials
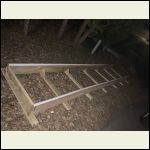
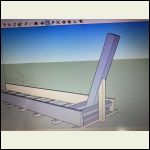
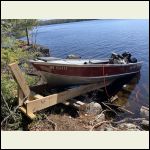
Installation of our dock won’t happen until August- so I built a shoreline boat ramp that I will use in the meantime to dock and crank my boat on shore. This is more or less like a boat trailer made out of wood that sits on shore. There a capstan (for lack of a better word) with winch on the front of the ramp-just like
A trailer. The boat is winched on to two big 20’ long 2 x10 runners. I’ve already assembled and I’m transporting my shore ramp in the boat itself as I bring it up today.
Long story short-The terrain of our cabin makes dock installation challenging - as roll in and/or floating docks can’t be used. My shoreline is too deep for a roll in dock and I don’t have anywhere to pull a floating dock on shore in the winter. The solution is either a “lift†dock that is kind of like a drawbridge or a permanent dock- both are used primarily on the lakes around our area. I’m not going to tackle this myself and after much deliberation will pay someone to get a good dock setup that I never have to worry about.
This weekend I’ll transport and install the ramp first. This will be challenging with the cold water but once it’s in I shouldn’t have to ever touch water again. I’ll put it on the shoreline and anchor it around a tree with a chain to keep it in place.
After that the next step will be to level and build my 8x10 shed. First I need to clear a site for the shed. I’ve taken down most of the large trees already- so I shouldn’t need to do any *major clearing. The foundation for the shed is just two 6x6 treated skids. This may be quick or slow- depending on whether I can find level ground for the skids. If not I have some concrete and may have to mix up a batch and pour a pad or two to level a corner or a few corners first. I may also entertain leveling the skids with logs underneath for now. I can always go back and re-level/ repour under the skids at a later date. Waiting on concrete will kill my productivity for the weekend... I want to accomplish this shed build first so I have a place to stay during construction. That will be my living quarters until the cabin is complete/ livable. It’ll be nice to not have to pitch a tent every weekend. I’ll be able to have a bed in the shed as well as keep food / supplies. For water I’ll haul in 5 gallon buckets with gamma seal lids. I already have a gatorade water cooler with spout that I can set up in the shed to use to dispense. I’ll keep a Coleman stove in the shed as well.
As far as materials- we have everything about 100-150 ft from the build site now. I’d like to get a start at organizing materials in order of when I’ll need them in the build as well as moving some to the site. I think I will just pick them and move most of them as i need them during the build but if I get done with the shed early this weekend I might spend half a day just moving some piles.
If I can get the shed finished I will consider the weekend a success!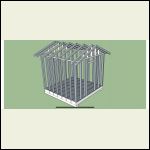
6B64CBCA0EEF485CA.png
| 
6F11C1226BE14DA2A.jpeg
| 
43AA4F4991BE47948.jpeg
|  |
|
|
Grizzlyman
Member
|
# Posted: 19 Apr 2021 07:49am - Edited by: Grizzlyman
Reply
Weekend was an overwhelming success.
Boat ramp installed and works perfect. Better than I thought. I budgeted a few hours for installation but it only took an hour.
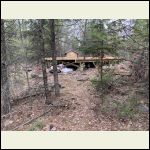
Shed went up easily as well. I forgot staples however so I couldn’t wrap the shed or put tarpaper on the roof. Instead I just covered the roof with two layers of tarp- I fastened quitewell so it should do the job!I will definitely wrap it when I get back but may just leave roof like this until/ if it leaks.
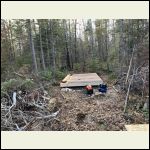
I also did a lot of clearing. I had to clear out a pocket for the shed and also cleared for the outhouse.
[img=null]null[/img]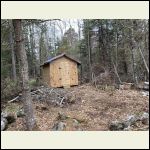
37CD6A590D154E7BA.jpeg
| 
A17623C6293449C99.jpeg
| 
7CA51DB8688D4B99A.jpeg
| 
70515D29091F4DBCA.jpeg
|
|
|
gcrank1
Member
|
# Posted: 19 Apr 2021 02:10pm
Reply
Yer an animal, I need you at my place!

|
|
Simonfredette
Member
|
# Posted: 21 Apr 2021 05:50pm
Reply
I think I'm going to end up with similar footings , I'm building on top of a ridge in central frontenac ontario. Did you go through permit and inspections etc, I have to on this build and it's not exactly clear what the build inspector wants. It sounds like he will allow what you did, I was planning the same but I want to pour both the 20 and the 16 or a 9 sonotube if I go that route, just so the 20 forms to the rock perfectly . Yours look mint
|
|
Grizzlyman
Member
|
# Posted: 21 Apr 2021 06:44pm - Edited by: Grizzlyman
Reply
I didn’t. Mn doesn’t require it for off grid properties. Mine are really 2 parts. A pad and a 16x16 concrete block on top of the pad filled with concrete.
I think you’re on the right track though. The large the pads are the more shape you’re going to have to the rock below. Drilling into the rock for vertical rebar attachment is good as well. I also put rebar netting inside the concrete on the pad.
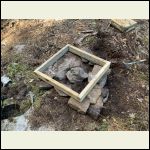
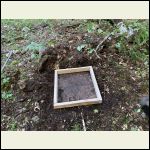
Here s a photo of a few of the forms.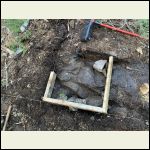
ED468316CA3C45AAA.jpeg
| 
303C5BCBF26B45EB8.jpeg
| 
AEF3D9BFCEA04967A.jpeg
|  |
|
|
Grizzlyman
Member
|
# Posted: 10 May 2021 07:41am - Edited by: Grizzlyman
Reply
Been working the last two weekends.
Was able to put a permanent roof on the shed. I used rolls of shingling. I’ll eventually put steel on but not for a while. The shed has been awesome. 1 to keep tools but 2 just to have a place for my personal stuff while there. Also foam sealed gaps between roof and rafter blocks to keep critters out.
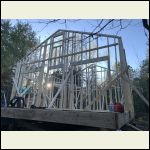
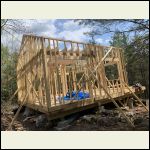
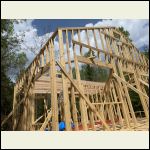
Was able to frame and raise my exterior walls. The 10x20 rectangle walls were heavy but I could do it somewhat easily
The22 x15 rake walls were another story. These were just two heavy- especially when that 15’ gets over your head and behind you! Losing leverage battle! I did one by myself. Lifting a little at a time with swingin 2x4 braces- then repositioning braces. Lifting. Repositioning. Etc
The second rake wall I got some help! No problem with two people.
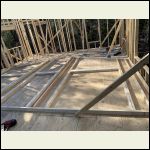
Framed my interior bedroom walls- one of which is load bearing for the loft.
Braced the s)&@ out of it.
Carried my 2x10 joists up to the site so I can do the loft next time.
Chainsawed and Cleared new trail down to finalized dock location.
Also chainsawed an cleared outhouse location.
Next trip I’ll do the loft and build outhouse.
It’s funny to see my lumber piles shrinking!😉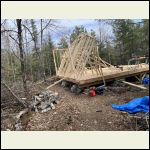
C09DF5F802314E76B.jpeg
| 
E6AF1AD0D2584E60B.jpeg
| 
31D56D32B41644B1B.jpeg
|  |
|
|
|
WILL1E
Moderator
|
# Posted: 10 May 2021 08:27am
Reply
Great progress!
|
|
Aklogcabin
Member
|
# Posted: 10 May 2021 10:22am
Reply
Looking good man
|
|
WILL1E
Moderator
|
# Posted: 10 May 2021 01:17pm
Reply
Grizzlyman what did you for insulation in your floor?
|
|
Grizzlyman
Member
|
# Posted: 10 May 2021 02:07pm - Edited by: Grizzlyman
Reply
Quoting: WILL1E Grizzlyman what did you for insulation in your floor?
Nothing. I wanted to avoid anything that would give mice chipmunks and and squirrels a place to nest.
At some point I will likely crawl under and try to spray foam underneath between joists.
|
|
Grizzlyman
Member
|
# Posted: 17 May 2021 06:30am - Edited by: Grizzlyman
Reply
Another work weekend. I put in the outhouse and my loft.
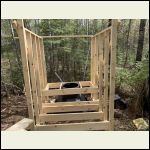
As mentioned previous my outhouse has to have a tank. I built it back from my cabin about 50 ft. The landscape starts to flatten there and there’s actually some soil.I was able to dig down about 2 1/2-3 ft till I hit the granite bedrock.
Outhouse is 5x6. I built it on skids. I used corrrugated fiberglass for the roof and left the triangle between the roof and wall open but screened to vent and hopefully keep cool.the back of the outhouse where the tank is is open since I basically built the structure around the tank and closing it in serves no purpose. Vent runs from the tank out back-which is nice it doesn’t need to be inside. This will be sided with the same shake siding as the cabin and finished with pained pine boards inside. - Not t&g -just flat boards.
I also installed the loft this weekend. This was very easy. After much deliberation I put a ledger board against the exterior wall. I rested the joists on the ledger for support and fasted them right to the studs. The purpose of this is for them to act like rafter ties resisting rafter thrust. I was able to put them all in and block everything in just a few hours. Next up is OSB sheeting the outside!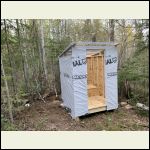
05EF9898810A45DD8.jpeg
| 
0ED13D0CEC5C4F0EA.jpeg
| 
E27E74DAC0C6406D8.jpeg
| 
516903AB8953437B8.jpeg
|
|
|
Grizzlyman
Member
|
# Posted: 9 Jun 2021 01:04pm - Edited by: Grizzlyman
Reply
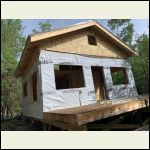
I spent 9 days going at it like a madman over Memorial Day week. I am tired!I have a finished shell! Some thoughts/observations/advice in short form below to keep post short
OSB on walls took 2x longer than I thought:3 days
On tall parts lift osb from inside and over wall- rest on previous row. Use a scab nailed to other row to make a “pocketâ€
Use scabs whenever possible to help- be inventive with them. They can hold lots!
Steel roof easier than I thought
Just push steel roof Up the ladder and over a scab/lip on edge of roof=easy
Cut steel roof with backwards saw blade= easy
Rafters easy when you learn how to measure correct
Birdsmouth hard at first, then easy
Finish birdsmouth with regular common handsaw
Lifting rafters by self not easy but doable- birdsmouth on wall, then Walk high part up ladder and attach to ridge
Fly rafters by self very hard. Use jig fastened to lookout to hold far end and do same as rafter.
Lookouts every 4 feet=sturdy but not overkill
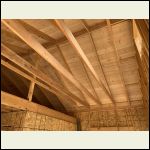
Sheeting roof with pine boards looks great and easy vs OSB
Safety harness on roof is a must
Roof plan of boards/tarpaper/XPs pink insulation/purlins /steel was good call
Chipper for brush is a must
Spax are awesome
Carpal tunnel is bad
Hurricane ties on all rafters
Simpson rafter ties at ridge
Ring shank nails for sheeting
Steel let-in bracing is great- easier to instal on ground
Braced all the big window walls best I could with steel
Loft is very sturdy
Used last rafter tie by loft as a handrail for loft
22’ 2x8s for rafter ties
Spaxed rafters to ballon frame wall in loft
Rafters on top of rake wall not sit perfect as rake wall plate is invariably slightly bumpy
18 inch overhang looks great(glad I didn’t do 24)
Whole place is surprisingly Square and plumb
Roof also surprisingly flat with only few dips from rafters being off
Too tired to finish tyvek
Survived a few thunderstorms already 
Bigger than I thought while also being smaller than I thought- go figure
Had to OSB sheet loft bearing wall for strength/ sway purposes.
95* heat + June sun killed productivity. Had to take 4 hr afternoon break with no clouds in sky.
Bugs: gnats/horseflies/ skeets all or any of the above
Functional outhouse is much better than 2x4 between trees 
6/12 with steel roof is scary but possible in sun
Need to block osb seams yet.
I’m happy with it!!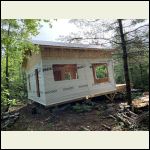
376730C1534E46259.jpeg
| 
BFB8A68B1A3947FFA.jpeg
| 
5EE3582BA2594CD3A.jpeg
| 
5AD7CC7985A948DCB.jpeg
|
|
|
WILL1E
Moderator
|
# Posted: 9 Jun 2021 01:26pm
Reply
Looks great!! Good job!
Are you keeping that column in the loft going up to the ridge board? If so, y? Just curious, not critiquing.
|
|
Grizzlyman
Member
|
# Posted: 9 Jun 2021 02:10pm - Edited by: Grizzlyman
Reply
Quoting: WILL1E e you keeping that column in the loft going up to the ridge board? If so, y? Just curious, not critiquing.
I am. It’s going to be the cornerstone for a handrail system. Well fasten something between it and the rafters on the side. I did put the rafter tie on the last rafter slightly higher so that it can act as a handrail already. I fastened that post with brackets but made sure to keep space between it and the ridgeboard to avoid taking on any load
|
|
Grizzlyman
Member
|
# Posted: 30 Jun 2021 07:02pm - Edited by: Grizzlyman
Reply
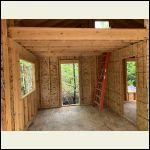
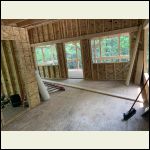
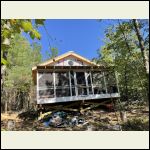
I am now officially done with the construction. I have yet to put on the siding, but aside from siding and trim it is finished. Windows are on site and need to be installed yet, but there is nothing lower to build at r th is point.
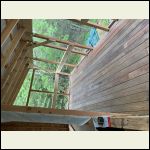
T th is last weekend I buttoned up the roof and the trim. Finished framing my patio. Put the roof on the patio. Finished the tyvek, put the deck boards on the patio, inside of the outhouse, and built my stairs. Very happy with the finished product at this point. I’ll head up in 2 weeks to do windows and doors and put the screen on the patio but then at that point have a livable shell!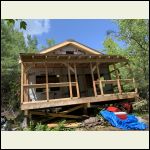
6C26A7658FA642C18.jpeg
| 
C755E4867C944EF09.jpeg
| 
8A37540FA50943AFA.jpeg
| 
68460690640A4A8D8.jpeg
|
|
|
Aklogcabin
Member
|
# Posted: 1 Jul 2021 11:48am
Reply
Looking better every day man.
|
|
Grizzlyman
Member
|
# Posted: 14 Jul 2021 12:23pm
Reply
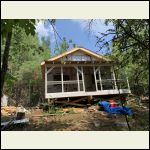
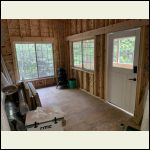
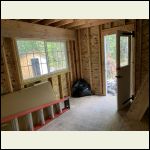
Painted patio this weekend and installed windows/doors. Made doors myself. as of now I have a completed finalized livable shell.
Was going to put screen on porch but didn’t have time. Next week.
Furniture is on site as well. We bought mostly all ikea furniture as it’s a heck of a lot easier to haul boxes up my bluff trail than completed furniture!
Wife is going up with friend this weekend to put together all the ikea furniture. Should be ready for weekend enjoyment after this weekend.
Only major project left is siding.
Flooring has been ordered but will be august project. Interior finish will be board and batton but that will be next year!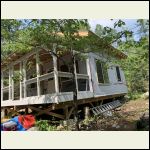
AE3C74796FEE48BB8.jpeg
| 
F962CFAA2D6842C8A.jpeg
| 
CCAAFD475ABE408E8.jpeg
| 
5B58B63D0CDC45689.jpeg
|
|
|
Grizzlyman
Member
|
# Posted: 2 Aug 2021 07:45am - Edited by: Grizzlyman
Reply
Had a great weekend- whole family (wife +3 kids) came up for a full weekend for the first time.
I did some work while we enjoyed our time. Was great to not have to be working alone
As far as work-
I installed the solar panels on the roof. Did this by simply mounting 2 treated 2x4s to the purlins under the steel- then screwing the panels to that.
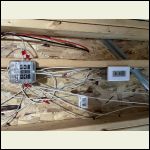
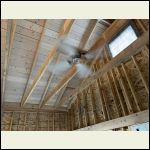
I hooked up all the electricity as well. We have 4 sconces (2 in bedroom, 2 in living room on opposite sides of my dividing wall). A led light strip in the loft. Small chandelier above the table. 12v rv fan with controller above the main living area, string lights on porch.
The sconces are actually normal sconces with 12v led edison bulbs. I did this because I couldn’t find any 12v sconces that we liked.
I ran 4 circuits to keep amperage down. As you may know 12v amperage adds up quickly as your wires get longer. I also used 10 gauge wire. None of the circuits are above 5 amps.
I bought a fuse panel that is mounted inside the cabin. So solar panels go to a controller, which goes to a battery, which goes to the fuse panel, which goes to the lights.
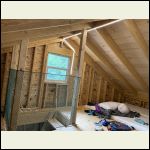
Built a post system around the loft hole in the floor as well - but the railing panels were out of stock so just put some plastic netting up to keep the kids safe for now.
Also finished some gable trim on the patio roof and put the screen on the porch too.
Did a lot of chainsawing and mulching as well.
Going back this weekend with the family for another round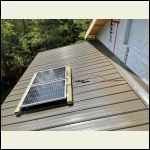
AE704C0B524644EC9.jpeg
| 
DD1445FD07B64F519.jpeg
| 
B7E5228E93794353B.jpeg
| 
A588A27A6DDC4C3BA.jpeg
|
|
|
BRADISH
Member
|
# Posted: 18 Aug 2021 12:40pm
Reply
Grizzlyman
Place is looking great! I am jealous that you're done with construction..
A few questions - Which you may have addressed, but I couldn't find them in my search...
With your mounting of the solar panels, are you not worried about snow covering them / potential snow load on them?
Also, Which program are you using to sketch out your framing (Seen in some of your first posts)? I need to find an easy to use program to do the same thing. Not wanting to spend weeks to learn something complicated, but my brain and the back of a napkin are no longer cutting it.
Thanks!
|
|
Grizzlyman
Member
|
# Posted: 18 Aug 2021 02:36pm - Edited by: Grizzlyman
Reply
BRADISH:
I’m not sure about the panels. I wasn’t worried about it at all. But I don’t know what I don’t know! …As far as snow load I wouldn’t think that’s be a problem as the are quite strong and they’re not that big-maybe 3’x4’? I also had read that they will likely melt snow even in sub zero temps- but we’ll see about that fact. They are supposedly typically 30* warmer than ambient temps even in lower light… but again we’ll see. I have them on a southern facing roof. They’re waterproof of course so I cant imagine the snow will cause any electrical issues. Biggest worry I had is that they won’t produce in the winter- but I’ll cross that bridge then… I don’t expect too many winter trips anyways.
As far the framing. I used google sketch up. I TRIED to find another good free framing program that was easy to learn but couldn’t. In sketch up you have to build each board but there’s shortcuts to make it easy and I know that program VERY well so it was pretty quick. Frankly I was hoping there’d be a program where you drew a wall more less and it did the framing for you. Maybe it exists but I couldn’t find it- at least not one that was EASY to use…
|
|
WILL1E
Moderator
|
# Posted: 19 Aug 2021 08:27am
Reply
@ BRADISH I would recommend Fusion360 for a good free CAD program. Lots of videos on YouTube in case you get stuck.
|
|
Grizzlyman
Member
|
# Posted: 19 Aug 2021 12:09pm - Edited by: Grizzlyman
Reply
An update on the progress:
2 weekends ago I installed all the window, door, and edge trim. That was very easy. Lp smart trim. It’s ready now for siding.
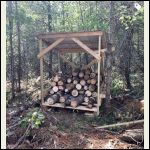
Last weekend I built a woodshed from leftover scraps of 2x4 as well as leftover roof tin. I had a bunch of 2x8s that I accidentally ordered extra so I used those for the floor of the woodshed. I laid flat and spaced out 5 of them over 6’ on the floor and nailed.
I cut and cleared a lot of the logs too from clearing land.
I also installed the last of my lights- some hanging lights over the kitchen table.
I cleaned up the electrical as well installing boxes at all junctions and put the switches in.
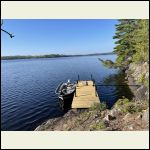
Our dock was delivered and installed last weekend as well. This will make life so much easier on the build site. The shore ramp worked fine- but I got a newer and bigger boat a month ago and that was difficult to get on the ramp. That and unloading supplies out of the boat on the ramp sucked. Also, the ramp is on the edge of my property so I had to carry everything much further than from where my dock is now.
Flooring also came- natural hickory engineered floor.
I’m going up this weekend again to install the floor and make nice the area around the dock.
I will also install our last window. A special octagon window that I made to go in the gable above the porch- right now it’s just tyvek’d Over the opening.
Also install things like swim ladder, dock bench, cleats, etc…
Lastly One of the things we worked on together as a family a trail to the back of the property: We’ve walked it every day to wear a path and continue to clean up. Hopefully we’ll have a good trail by fall for hunting!  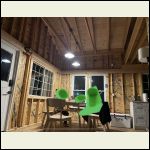
6D05C6C24C974CE88.jpeg
| 
1797EC60DA304362A.jpeg
|  |  |
|
|
Grizzlyman
Member
|
# Posted: 22 Aug 2021 11:29pm
Reply
Flooring in this weekend.
Hickory engineered flooring. Was able to finish in one day but it was a lot of work!!!
Also put in my octagon window in the gable peak and prepared the dock site after dock installed- the one thing I didn’t do myself 
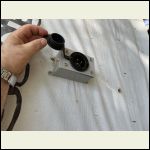
Installed propane stove as well as built a stand for 20lb propane bottle outside. Just fed through wall. Also installed male plug receptacle to put generator ac power into cabin when wanted and wired two outlets for it.
Next trip I’ll build small generator box and start siding.
Things to do yet this year.
Siding
Insulation
Wood Stove piping and surround
Interior walls (maybe)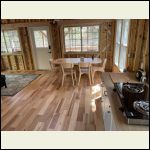
56C34960BDDF4E2F8.jpeg
| 
077E922380C347978.jpeg
| 
7201B287D1274386B.jpeg
| 
A78EF8944EC14A23A.jpeg
|
|
|
BRADISH
Member
|
# Posted: 23 Aug 2021 02:44am
Reply
Looks like a lot of great work - flooring looks great in there.
Very jealous you're on/near the water - if I could find that I may never leave!
|
|
Steve_S
Member
|
# Posted: 23 Aug 2021 06:39am
Reply
Hey that Flooring REALLY POPS I love it with so many colours mixed in. Now it's really "feeling" like something isn't it ? Flooring is one of those Milestones or "Watershed moments" in a project.
|
|
Grizzlyman
Member
|
# Posted: 23 Aug 2021 08:29am
Reply
Quoting: Steve_S Now it's really "feeling" like something isn't it ? Flooring is one of those Milestones or "Watershed moments" in a project.
Amen. It’s amazing how different it feels now. I was sitting there eating dinner on saturday night and all I could think was how “homey†it suddenly felt.
|
|
Steve_S
Member
|
# Posted: 23 Aug 2021 09:00am
Reply
Quoting: Grizzlyman It’s amazing how different it feels now.
|
|
Grizzlyman
Member
|
# Posted: 6 Sep 2021 03:53pm
Reply
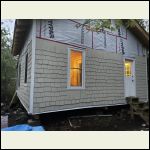
Went up for a days work on Saturday. I worked all day from sunup to sundown and was able to get about 1/2 the siding on.
Siding was not enjoyable for me. I was dreading it and it wasnt fun. It went up relatively quick and easy, but took a lot of work.
Also- I bought a cheap piece of chinese coil nailer. No depth adjustment other than PSI which made things more difficult than they had to be also the thing
Jammed nonstop and the magazine broke. Had to jimmy rig it together.
Up and down LOTS on the ladders. What made it
Worse was rain- lots of it on and off all day- was slogging through a mudpit by the end of the day
Very happy with progress. A few spots where the pattern was unfortunately repetitive but on the whole i think it looks good! Will be back up in 2 weeks to finish siding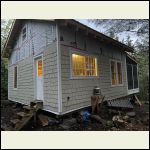
932C1DA147B7446BA.jpeg
| 
C46902050D8F4AE0B.jpeg
|  |  |
|
|
| << . 1 . 2 . 3 . 4 . >> |

