| << . 1 . 2 . 3 . 4 . >> |
| Author |
Message |
foxdud
Member
|
# Posted: 15 Nov 2013 02:07pm
Reply
Valve at the bottom of the tank opens to a water filter. Off the filter is a small section of garden hose to that I attach a small pump and from the pump I use another hose and put that in my clamper style fill hole on the side of the cabin and plug into power. When the inside water tank is full u unplug the pump take the hose out and shut my fill door. I usually only go through one tank of water in a weekend. (35) gal indoor tank that I salvaged from my old camper trailer.
|
|
WyattEarp
Member
|
# Posted: 23 May 2014 10:22pm - Edited by: WyattEarp
Reply
Back to cabin prep now that it's warm outside....I have been accumulating more logs and am getting ready for the next phase: the floor and walls. I have some friends coming to help me next weekend, so hopefully the weather holds out.
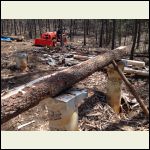
Peelin' logs with my logging buddy
I apologize for the sideways pictures....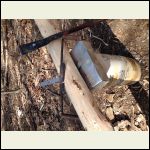
Log spud an draw knife used
| 
You can't have this
| 
Start
| 
Finish
|
|
|
WyattEarp
Member
|
# Posted: 23 May 2014 10:28pm
Reply
I unfortunately realized since I measured and marked for my footers and a friend used a skid steer to dig them, the back right footer (if you are facing the soon to be cabin) was dug about 20" back too far...still in line but too far back for my 18' sill logs. I'm not really sure how it happened, but nothing a little more concrete can't fix.
|
|
WyattEarp
Member
|
# Posted: 23 May 2014 10:34pm
Reply
I started digging for the new footer with a digging bar and manual post hole digger and about an hour in I realized I was on bedrock. I called it quits for the day and spent another 30 min or so digging through shale the next day to make sure it was solid and not a floating seam. About 20" down and I decided to just pour the footer on top of the shale seam. The Frost line is 36" here, but I figured I should be ok.
|
|
WyattEarp
Member
|
# Posted: 23 May 2014 10:39pm
Reply
I'll post some pics after next weekend and hopefully I'll finally be able to show some progress!
|
|
WyattEarp
Member
|
# Posted: 28 May 2014 08:24pm - Edited by: WyattEarp
Reply
I picked up 50 lbs of 12" hot dipped galvanized spiral spikes...
I ended up buying them for $90 shipped from a seller on eBay...much cheaper than a local hardware store who was selling smooth shank nails for around $2.75 each
|
|
stickbowcrafter
Member
|
# Posted: 28 May 2014 09:43pm
Reply
That is some serious work there, I commend you for taking it all on. Best of luck and I look forward to following your progress.
-Brian
|
|
WyattEarp
Member
|
# Posted: 28 May 2014 09:55pm
Reply
Thanks Brian. I'm really excited to get things going this weekend. Looks like the weather is going to be beautiful, so it's game on!
I ended up selling my polaris ranger and buying a kubota b3200 with some pallet forks, which will really help lifting logs into place...
|
|
|
stickbowcrafter
Member
|
# Posted: 28 May 2014 10:43pm
Reply
Yeah that Kubota will come in handy for sure. I just picked up a tractor myself.

-Brian
My property tour
|
|
WyattEarp
Member
|
# Posted: 28 May 2014 11:16pm
Reply
Nice! Where in PA are you?
|
|
stickbowcrafter
Member
|
# Posted: 29 May 2014 12:44am
Reply
I live in western PA between Pittsburgh and the Ohio line. My farm is in north eastern Ohio.
-Brian
|
|
Nirky
Member
|
# Posted: 29 May 2014 12:56am - Edited by: Nirky
Reply
I don't think those pins are long enough, unless you are using 8" or smaller logs. You need the pin to go through the top log of course and then half way through the log underneath.
I'm going to be constructing a 14x14 butt & pass cabin with logs abt the same diameter as yours, and will be pinning them with 1/2" rebar.
|
|
Jim in NB
Member
|
# Posted: 29 May 2014 06:23am
Reply
Good to see you found a draw knife -much better way to peel logs! Did you ever think of going vertical rather than horizontal with your logs? Different idea and the first time I saw it I though it looked ridiculous but after being around it and then doing one of my own (1983) saw it was the only way to build with logs. Removes so many issues and particularly in those in the long term - log sag, mositure issues and can provide better insulation although being so far south that is probably not a big issue. Looking forward to seeing more pictures!
|
|
WyattEarp
Member
|
# Posted: 29 May 2014 09:55am
Reply
Hi Nirky,
I would say 70-80% of my logs are 8" or slightly smaller. For the select logs that are above 8", I plan on countersinking the pins and capping the holes with wood or wood putty to prevent water from sitting in the holes.
Keep me posted on your project. When do you plan on starting?
|
|
WyattEarp
Member
|
# Posted: 29 May 2014 10:00am
Reply
Hey Jim,
Working with the draw knife was a nice change for sure!
I have thought about vertical logs, but never in depth.... It really does make sense to keep them in their natural position.
Thanks for the recommendation. I do some research tonight....
I should have some progress to show after the weekend.
|
|
Nirky
Member
|
# Posted: 29 May 2014 12:33pm
Reply
How many feet between pins?
If you have to worry abt water entering the holes, you have a bigger problem, because it means your chinking has failed. What are you going to be putting in the log gaps before you chink?
|
|
WyattEarp
Member
|
# Posted: 29 May 2014 01:38pm
Reply
It wont hurt to cap the holes though. I'm a firm believer in overbuilding 
I haven't figured out spacing yet for the pins. Do you know what's recommended as far as spacing for logs of this size?
As far as filler material behind the chinking, I honestly haven't figured that out yet. I've seen many different materials used, but I need to do some more reading.
|
|
Nirky
Member
|
# Posted: 29 May 2014 02:40pm - Edited by: Nirky
Reply
At the class ( buildloghomes.org ) they teach pinning w/rebar every 2 feet. I don't know how effective those pins will be vs. rebar so I can't really say for sure. You are building with smaller diameter logs so I'm guessing those pins will be okay every 2 feet. If you find there is any movement after pinning you might want to switch to rebar.
For the gap fill, I will be using spray foam, the $3.98 in the can kind. Will shave it after drying, then using mortar chinking.
|
|
WyattEarp
Member
|
# Posted: 29 May 2014 02:59pm
Reply
Cool. I'll stick to every 2 ft. They have a 3/8" shank diameter, which is a pretty standard shank size for log spikes from what I've found online. I think they'll be good with logs of this size...
Really Great Stuff is awesome stuff!
|
|
WyattEarp
Member
|
# Posted: 30 May 2014 07:32pm
Reply
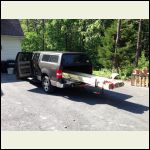
Picked up the materials for the floor joists today. I don't plan on putting plywood down and finishing the floor until I have a roof on the cabin.
Getting anxious for tomorrow... I bought some tasty beer and good food to make sure my friends have a good time tomorrow. That's what friends are for, right?  I happily help them any time they need it. I happily help them any time they need it.
Again I'm sorry for all the sideways pics. I'm uploading straight from my phone and any pics taken in portrait upload funny like that. I'll try to correct that from now on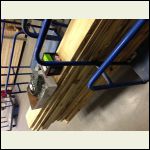
Checking out at lowes
| 
Back at home
|  |  |
|
|
WyattEarp
Member
|
# Posted: 30 May 2014 07:34pm
Reply
I'm going to hang the joists on the inside of the sill logs, like in this photo.
|
|
Nirky
Member
|
# Posted: 30 May 2014 10:15pm
Reply
2x6's for the floor?
|
|
WyattEarp
Member
|
# Posted: 30 May 2014 10:19pm
Reply
2x8s
|
|
Nirky
Member
|
# Posted: 30 May 2014 10:25pm - Edited by: Nirky
Reply
At 12x12 that will make for one stiff floor, only spanned 6ft across. Or can you span the entire 12 ft? Will you insulate floor?
|
|
WyattEarp
Member
|
# Posted: 30 May 2014 11:09pm
Reply
Yes i do plan on insulating the floor, but it's another thing I need to read up on. I just got done insulating my garage and have plenty of left over insulation laying around.
|
|
WyattEarp
Member
|
# Posted: 30 May 2014 11:14pm - Edited by: WyattEarp
Reply
My friend who is a contractor said 2x8 would be up to code, 16" on center. I think they're only going to span about 10'. I was going to go with 2x10s originally. I'm wondering if I should have. Maybe I should retract my earlier comment of "overbuilding." 
|
|
WyattEarp
Member
|
# Posted: 13 Jun 2014 08:21pm
Reply
We had a pretty productive day 2 weeks ago during the 1st day of construction. It was a task getting the materials and tools back to the cabin site, but was to be expected. We ran into some issues with the footers and since 5/31, construction has been halted until an issue is addressed. Details to follow...
|
|
WyattEarp
Member
|
# Posted: 13 Jun 2014 08:34pm
Reply
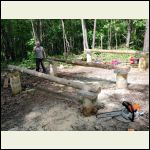
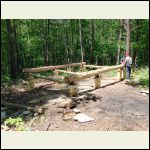
We spent about half a day correcting issues with the footer placement so we could square up the sub-floor. We ended up spanning 3 logs perpendicular to the sill logs, so the sill logs could be squared up and correct the misplacement of the footers...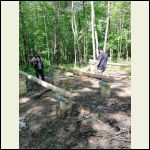
IMG_2594.JPG
| 
IMG_2595.JPG
| 
IMG_2596.JPG
| 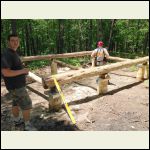
IMG_2597.JPG
|
|
|
WyattEarp
Member
|
# Posted: 13 Jun 2014 08:43pm
Reply
The 3/8 inch log spikes worked nicely. We only had a normal length drill bit to start the hole for the 12" spikes, so I recently purchased a 12" 3/8" bit for the rest of the spikes in future construction. I'd image ill be buying a few more of these before the job is over.
|
|
WyattEarp
Member
|
# Posted: 13 Jun 2014 08:46pm
Reply
My neighbor's boys heard the racket and came tromping through the woods on a mission. They came to help and they did! They nailed in a good portion of the joist hanger nails. I think they might have convinced my friend to have kids haha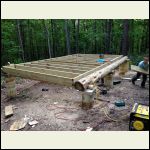
IMG_2602.JPG
| 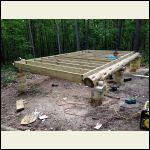
IMG_2603.JPG
| 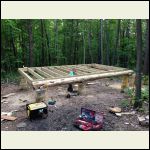
IMG_2605.JPG
|  |
|
|
| << . 1 . 2 . 3 . 4 . >> |

