| << . 1 . 2 . 3 . 4 . >> |
| Author |
Message |
Hangblague
Member
|
# Posted: 8 Mar 2020 08:21am
Reply
Thanks for the input!
Here is the 1st floor layout idea we came up with. There would be a few chairs added too. They and the table could be moved around. Futon and bunk beds, along with bed in loft means we could sleep up to six, I think.
|
|
Hangblague
Member
|
# Posted: 10 Mar 2020 12:30am
Reply
The proposed front door has a bit of a story. It sat for years at my father-in-law's place in Thunder Bay. Somehow he got it from the general store in Elphinstone, Manitoba where it once belonged to the fur trading post run by his grandfather.
He gave up finding a new purpose for it and so then it wound up in my basement where it has sat for several years. It will be much closer to its old home if it gets hung at the cabin. That's the plan.
The latch set for the thumbed handles to fit was missing and has proved very hard to replace. I found finally a specialized antique dealer in Ontario who is shipping one shortly.
I think the door will be a nice feature, but it will also be an odd contrast with the brand new cheapo vinyl windows I plan to buy. Hopefully this antique is up to mouse exclusion standards. It's going to take a lot of figuring and work.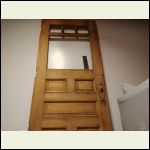
Front door
| 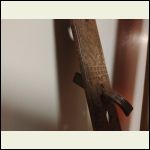
Thumb latch
| 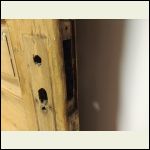
Empty mortise
|  |
|
|
Hangblague
Member
|
# Posted: 14 Mar 2020 06:03pm
Reply
Worked some more on the door today with my father-in-law. As mentioned above, door belonged to his grandfather. I said "let's get this door fixed up and ready. What do we work on first?" He says "maybe a plaque." 
Our dilemma was that we knew it would be outswinging and that the hinge and latched sides could not be switched. This meant that either one would have to go off to the side up on the porch to open it, or else the feature side would have to face the interior. The first option seemed slightly better. Then we got the idea to try removing the fancy face moulding instead and fasten it to the other side. It worked! And came off easier than we thought.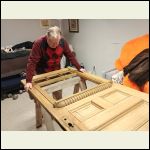
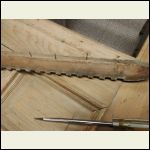
Lots of trim to lift off
| 
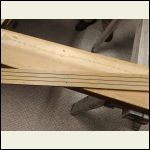
Just finishing nails, hardly any glue
| 
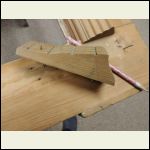
More off...
| 
More off
|
|
|
Hangblague
Member
|
# Posted: 14 Mar 2020 06:15pm
Reply
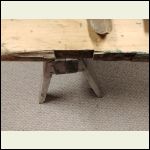
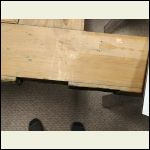
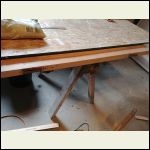
Next we decided to deal with the ragged hinge side. At some point in its long sorry life it appears it got rehung with new hinge slots, cut in beside and deeper than earlier ones. I ended up shaving a little more than 1/4" to regain an even edge. I took great care to get my line perfect with gyprock square, several measurements, and a jigged skillsaw fence to keep it perfect and parallel. Made me nervous to cut into a supercentennarian door.
Next, I have to cut new hinge recesses with chisel. I don't have a router. I was interested to observe that hinge mortice faces are slightly angled.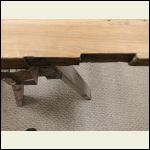
Before...
| 
Before - chewed up
| 
Line drawn
| 
After
|
|
|
Hangblague
Member
|
# Posted: 15 Mar 2020 08:26pm
Reply
Hinge edge got cleaned up today to get rid of the circular saw marks. Fun to break out the old dust-gathering Stanley plane. His baby brother softened the sharp edges just a smidge. So much more satisfying than sanding.
Next is new hinge cutouts. No router, so I'll have to sharpen a chisel.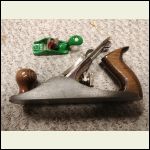
Fun tools
| 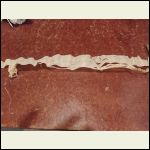
Satisfying ribbon
| 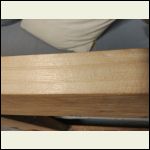
Satisfying edge
|  |
|
|
fiftyfifty
Member
|
# Posted: 15 Mar 2020 08:39pm
Reply
"odd contrast with the brand new cheapo vinyl windows I plan to buy"
Is there any particular reason you are planning that type of window besides the price? I was planning on using cheapo vinyl windows myself, but eventually bought high quality windows off Craigslist and at auction from a scratch and dent building supply warehouse. I got some very nice windows very cheap. But it did take some time hunting online.
|
|
Hangblague
Member
|
# Posted: 16 Mar 2020 12:56am
Reply
That's good advice. It really is just a price issue as you say. I'm not too skilled at bargain hunting. I'll have to make an effort and see if I can find a similar deal.
|
|
Brettny
Member
|
# Posted: 16 Mar 2020 07:48am
Reply
How cheap of a window are we talking? Like Lowes project source or like American craftsman. The project source should never go in anything but a shed. The American craftsman is what I put in my house last year and 7yrs ago. There good windows. I think they where $200 for double hung 27inx57in. New construction.
Never buy a cheap door. My front door is a home depot jeldwen fiberglass. It's bowed out from the lock about 1/4in. The door is 8yrs old. Masonite makes good doors.
|
|
|
Hangblague
Member
|
# Posted: 16 Mar 2020 09:49am
Reply
The brand I have a bead on is Gentek I think. Hard to compare US apples to Cdn oranges maybe.
I got an American Craftsman for my loft window because of very particularized reasons for wanting double hung up there at a particular dimension. It was under $200, but a replacement variety only. So I'll have to install it without nailing flange.
I had to drive to Montana to get it - nothing comparable in Canada for less than nearly 3 times the price.
|
|
Hangblague
Member
|
# Posted: 30 Mar 2020 03:20pm
Reply
Still chipping away at the door. The hinge slots have been chiseled in to a nice fit for their heavy duty hinges.
Making a "new" used latch set fit in with the old door mortise and handle hardware, keyhole etc. I've also gotten glass to fit into the 4 frames of the door. I'm to learn glazing next I guess.
In the meantime, here are some photos of the plans I've developed.
|
|
jsahara24
Member
|
# Posted: 31 Mar 2020 08:11am
Reply
Did you forget the picture?
|
|
Hangblague
Member
|
# Posted: 31 Mar 2020 08:13am
Reply
Trying again...
|
|
Hangblague
Member
|
# Posted: 6 Apr 2020 08:01am
Reply
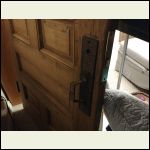
The door is coming along nicely. The latch hardware has been retrofitted in. The hinges installed and the new glass and glass moulding glazed in. This has been a good project to chip away at before I can get started at the land.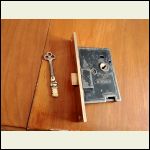
"New" latch set
| 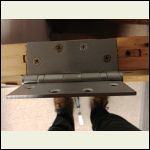
Non antique hinges
| 
Hardware in
| 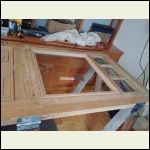
Glass in
|
|
|
Hangblague
Member
|
# Posted: 6 Apr 2020 08:16am
Reply
I'm considering next building and fitting the jambs etc. around the door and thus bring a "pre-hung" door to fit in the build. Might make things easier?
|
|
gwindhurst
Member
|
# Posted: 6 Apr 2020 12:12pm - Edited by: gwindhurst
Reply
Beautiful door! Can’t wait to follow your build. I too used a repurposed door although not with as much of a colorful past history. My oldest brother replaced the doors on his Cedar Log Cabin only because he wanted more light/glass. They’ve stood the weather since 1979 and still they’re in good condition. Best wishes on your build! I’ll be waiting...
|
|
Gary O
Member
|
# Posted: 7 Apr 2020 12:14am - Edited by: Gary O
Reply
Quoting: Hangblague I wish I understood how not to post photos upside down
Quoting: Hangblague Well and woodshed most recent projects.
Quoting: Hangblague I thought I would document the adventure here.
Fixed the older ones for ya since yer documenting
(I use imgur)


|
|
Hangblague
Member
|
# Posted: 7 Apr 2020 10:12am
Reply
Thanks Gary.
|
|
Gary O
Member
|
# Posted: 7 Apr 2020 07:05pm
Reply
Quoting: Hangblague Thanks Gary.
You got it
and welcome to SCF

|
|
Hangblague
Member
|
# Posted: 3 May 2020 12:30am
Reply
I finally got to spend a day on the land, but had only 8 hours to spend on site. Most of the time was used replacing the woodshed roof. But I also took the first baby onsite cabin-build steps.
Unloading concrete blocks from the truck alone was the toughest part of the day.
I now have my exact site staked out, doing the hypotenuse thing. I also determined I have a slope of approximately 15" to deal with along the length.
|
|
Hangblague
Member
|
# Posted: 3 May 2020 12:34am
Reply
Photos of the day
|
|
Hangblague
Member
|
# Posted: 3 May 2020 12:34am - Edited by: Hangblague
Reply
My other photos exceed 8MB by a bit and so cannot be posted. I don't know how to avoid this problem.
|
|
CabinBuilder
Admin
|
# Posted: 4 May 2020 03:03pm
Reply
Quoting: Hangblague My other photos exceed 8MB by a bit and so cannot be posted. I don't know how to avoid this problem.
You can resize /scale down photos using any photo editing software. Microsoft Paint first comes to mind.
|
|
Hangblague
Member
|
# Posted: 15 May 2020 07:08am
Reply
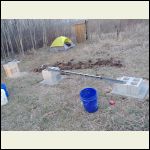
Yesterday was day 1 of what I hope will be several productive days. Spent the day loading the truck, driving to site, visiting lumber yard, setting up camp, organizing tools, receiving lumber delivery, and beginning on my pier foundation.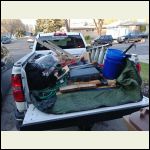
Truck nearly loaded for trip
| 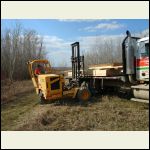
Lumber arrives
| 
One side straight and level
| 
Hard at work from the hammock
|
|
|
Hangblague
Member
|
# Posted: 15 May 2020 11:25pm
Reply
Day 2 done. Not much accomplished as I had to wait for the wife to bring more crushed limestone. Then there were visiting duties with the relatives who came. Still I managed to finish leveling my 6 piers and dial in my corners with more hypotenuse measurements etc.
Other than that, cut a little lumber, went for a hike, cut and split some firewood, made a fire, napped in the hammock.
|
|
Hangblague
Member
|
# Posted: 16 May 2020 11:30pm
Reply
Day 3 was a good one. I worked very slow but also very steady. I had help from my son-in-law for most of the morning. We laminated 18' 2x8's into 2 beams (4 layers for each beam). We used screws and construction adhesive. It took a lot of clamp work. The afternoon was mainly measuring and cutting lumber.
The wife, father-in-law, daughter and son-in-law came back at supper time and cooked steaks and potatoes on an open fire. The wife painted the treated skid beams with some kind of rubbery coating. I got the rim joists going and managed to dial in my diagonals to near perfect. So far so good. I don't mind being slow.
My photos of the day are all slightly more than 8MB, I'll try again tomorrow. My goal tomorrow is to finish the floor joists and subfloor. If successful, I may move the tent onto it for the night.
|
|
jsahara24
Member
|
# Posted: 18 May 2020 09:51am
Reply
Sounds good, looking forward to seeing pics of the progress!
|
|
Hangblague
Member
|
# Posted: 18 May 2020 12:43pm
Reply
Day 4 saw me spend the best part of the morning fixing a mistake from the day before. Other than that, I was able to finish nailing my floor joist frame together (19 2x10s). My cousin and his wife came by to see and he helped me get started on the subfloor. That's a LOT of screws. Very windy conditions last night. My wife is looking forward to saying goodbye to the tent.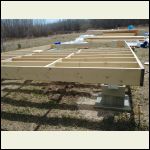
Floor framing
| 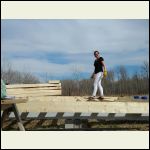
My smokin hot wife on the catwalk
| 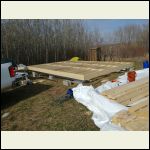
Ready for subfloor.
|  |
|
|
Hangblague
Member
|
# Posted: 18 May 2020 08:12pm
Reply
Day 5. My wife went back home so I'm on my own now. I'm even slower now that I have to look after myself. Once again the day started by fixing the mistakes of the day before.
Very windy conditions but still dry. I finished the floor at last. So many screws. My generator was chugging for much of the day to keep me in Dewalt batteries. Tomorrow starts the walls I guess. Anyone ever raise walls alone?
Thanks for your interest. Feel free to ask questions about any of the details.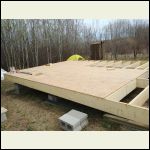
Subfloor underway
| 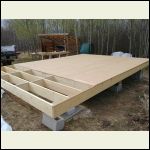
Subfloor done
| 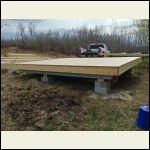
Backside of construction site
|  |
|
|
gwindhurst
Member
|
# Posted: 18 May 2020 11:38pm
Reply
Before raising walls by yourself, be sure to tack cleats tacked on the forward edge of the wall to keep it from slipping off the deck and have braces hinged and ready to plumb the wall on the outside.
|
|
Hangblague
Member
|
# Posted: 19 May 2020 05:33am
Reply
Thanks. That's exactly the advice I need.
|
|
| << . 1 . 2 . 3 . 4 . >> |

